What are issues?
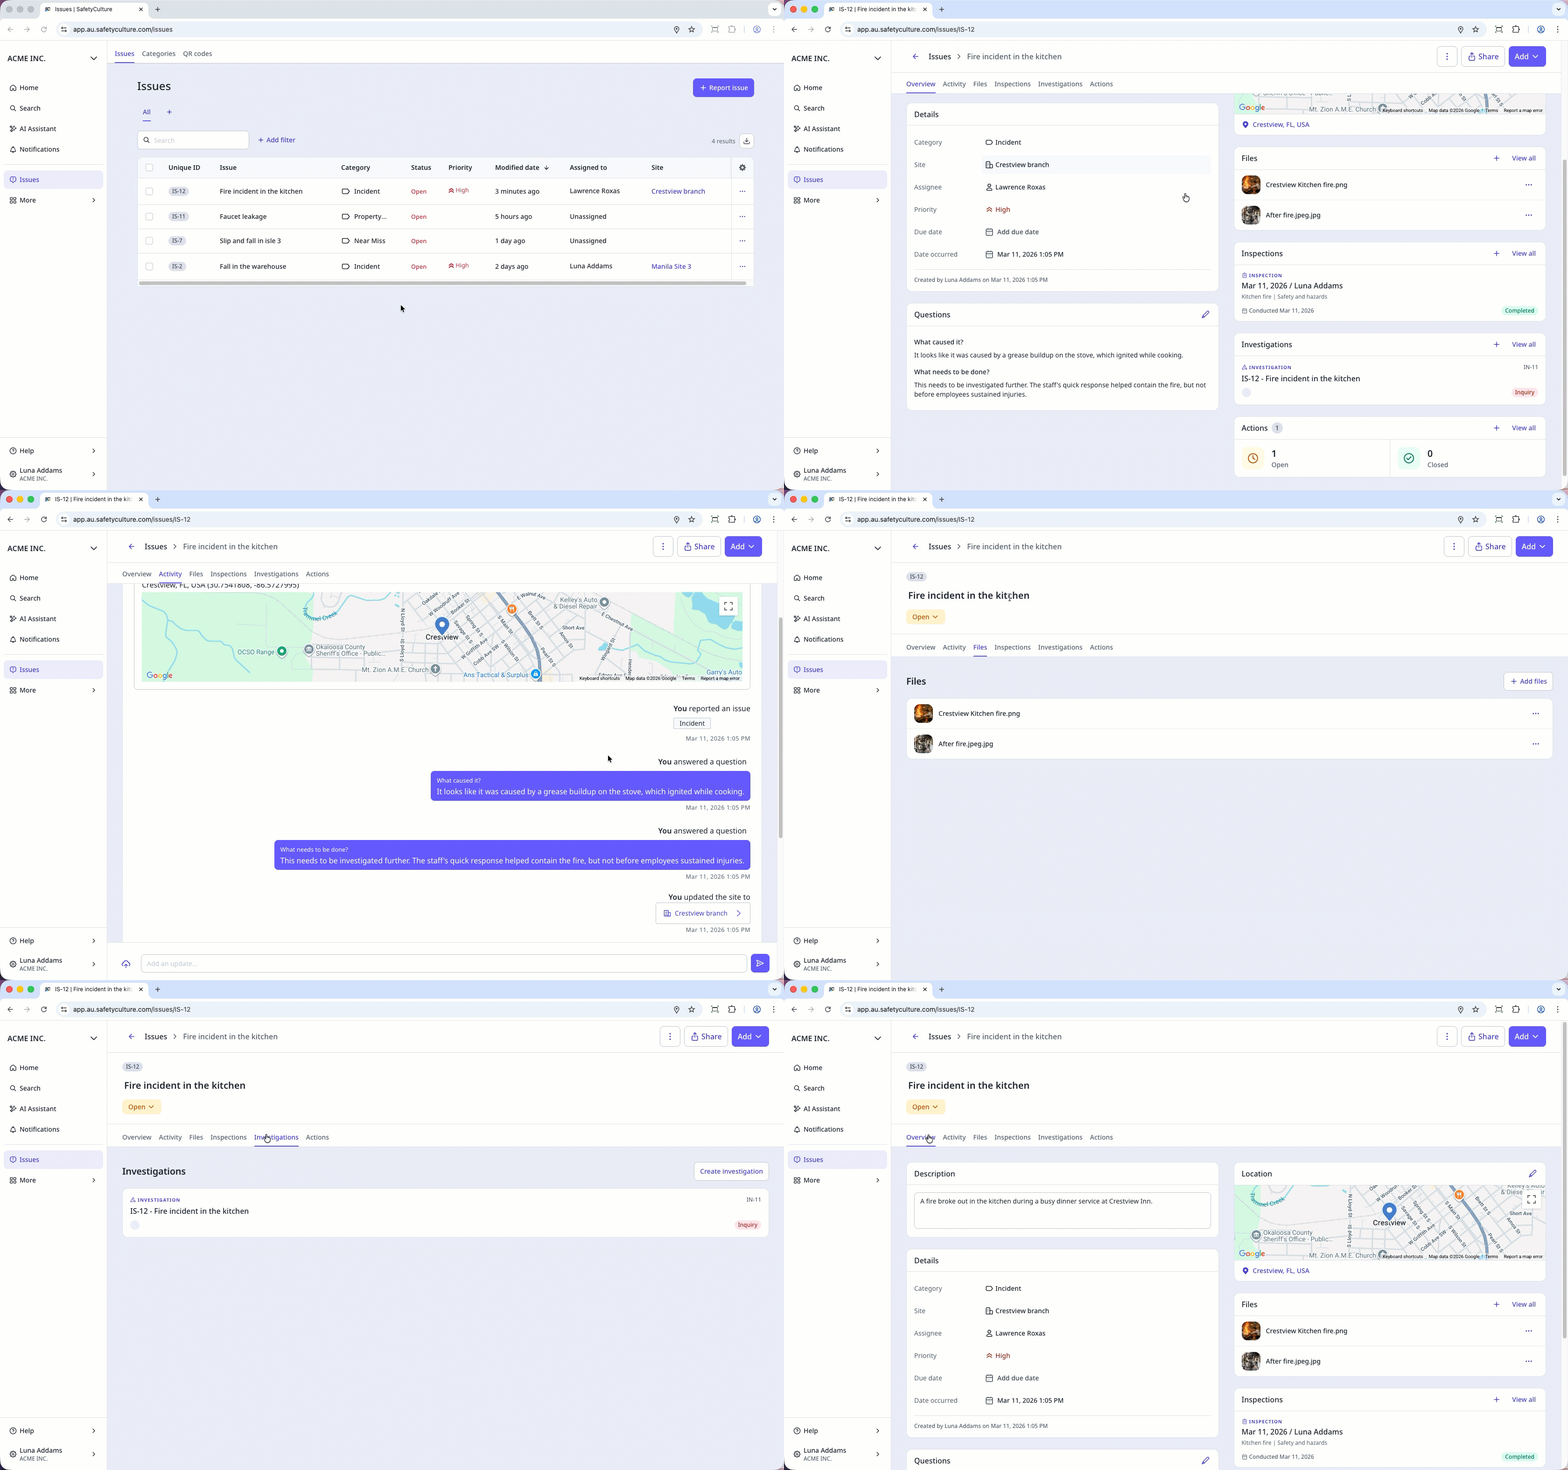
The Issues feature in SafetyCulture lets you capture and track problems in your organization that don’t look right and need to be resolved, such as near-misses, broken equipment, or safety hazards. When you report issues, you can manage them in one place and organize them by category, with fields and custom questions to capture the right context.
From an issue, you can start inspections, create actions to support resolution, link assets and investigations for deeper analysis, notify team members responsible for resolving them, and control access so the right people have visibility. This helps your team maintain a clear, shared record to collaborate on and resolve issues faster.
Location access is required to capture the location when reporting issues.
When you report an issue while your device is offline, the issue will display the location coordinates instead of the full address.
Report an issue
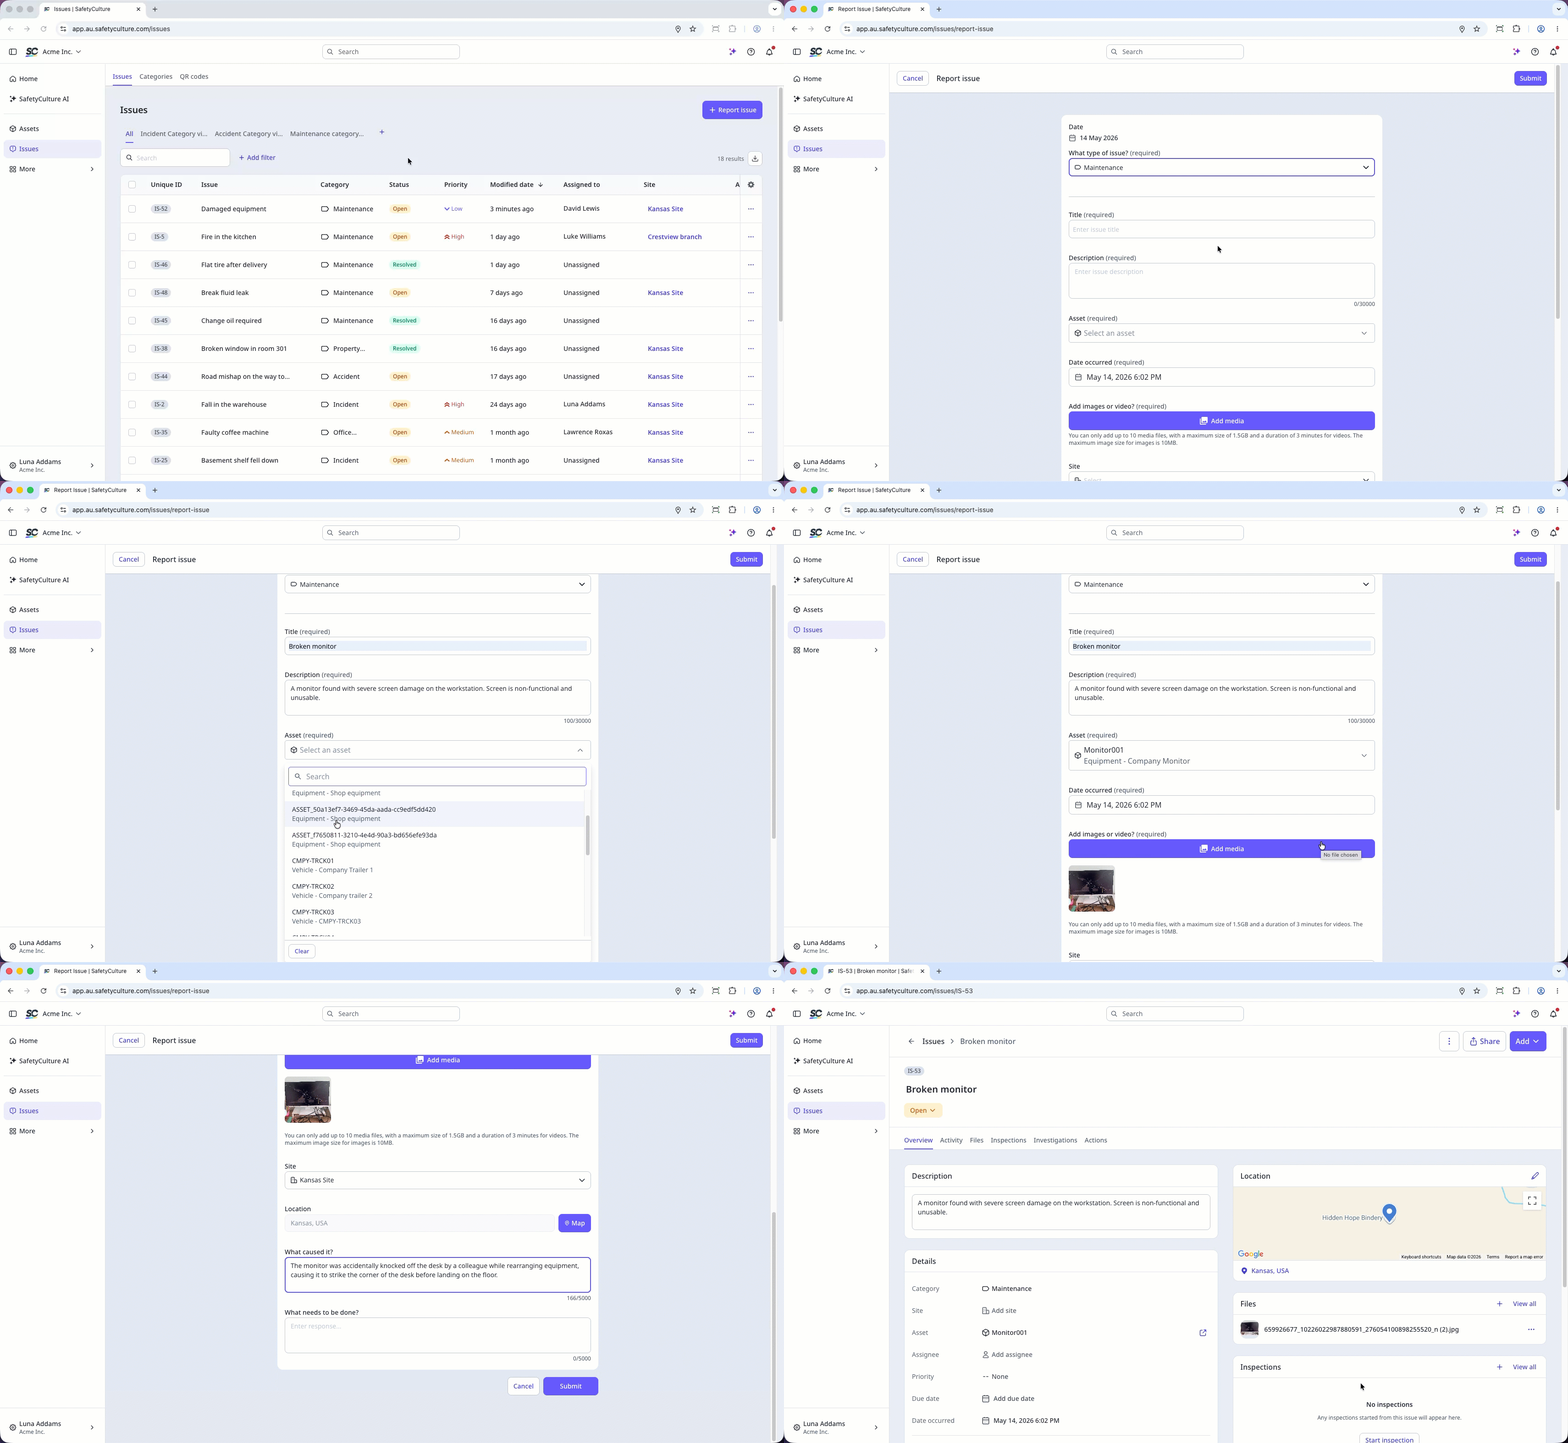
Select Issues in the sidebar or select it in More.
Click Report issue on the upper-right of the page.
On this page, select the issue category.
Enter an issue title and answer any required fields. Depending on the selected issue category, you can also configure the following details:
Click Submit.
In the issue profile, you can find details about an issue in the following tabs:
Overview: You can view and update key issue details, check responses to any custom questions, see the location of the issue, view any media attachments, and see if the issue is linked to an inspection or action.
Activity: You can keep track of the changes made to an issue and see any comments your team members added.
Files: You can view photos, videos, and PDF files attached to an issue.
Inspections: You can view linked inspections and templates related to an issue.
Investigations: You can view investigations linked to an issue.
Actions: You can create and keep track of actions created for an issue.
Issue fields
You can use the following fields for each issue to provide as much detail as possible for your team:
Field | Description |
|---|---|
Title (required) | The issue title. This automatically populates with the issue category appended by the date and time the issue is reported. Allows up to 255 characters. |
Description | The issue description. Allows up to 500 characters. |
Status | The issue status. New issues by default, start with the "Open" status. |
Category | The issue category. Please note that updating the category of an issue does not trigger new alerts for the relevant groups. |
Site | The issue site. |
Assignee | The issue assignee. You can assign issues to anyone in your organization, which the assignees would by default receive email and app push notifications unless configured otherwise. Please note that assigning issues to yourself does not trigger notifications. |
Priority | The issue priority. |
Due date | The issue due date and time. |
Date occurred | The date and time the issue occurred. |
View report | The link to view the issue web report, including all details and its timeline. |
Unique ID | The auto-generated unique ID of an issue. All issues get assigned with a unique ID, so you can easily locate and reference the issue you're looking for. |
Timeline | The issue timeline logs every change in the issue, including updates to issue title, description, status, and details. You can add comments, photos, and videos, as well as answer custom questions to work with your team in resolving the issue. |
Limitations
When you report an issue whilst offline, the issue will display the location coordinates instead of the full address.
Comments and attachments in each issue's timeline cannot be edited or deleted.
Date and location of an issue cannot be edited, this information will be pulled from the device's settings.
You can only upload one video at a time when reporting an issue via the mobile app, but you can upload more videos later on.
The following file size limitations apply to your attachments to issues:
PDF files: Up to 20MB per file
Photos: Up to 10MB per photo
Videos: Up to three minutes or 1.5GB in size per video
Why create Heads Ups?
For many organizations, the lines of communication to frontline workers tend to be fragmented, confusing, and sometimes non-existent. This can create problems such as workers not being aware of regulation changes or managers not knowing who hasn't seen updated training materials. With Heads Up, we've created a one-to-many communication solution that guarantees simple knowledge sharing and acknowledgments.
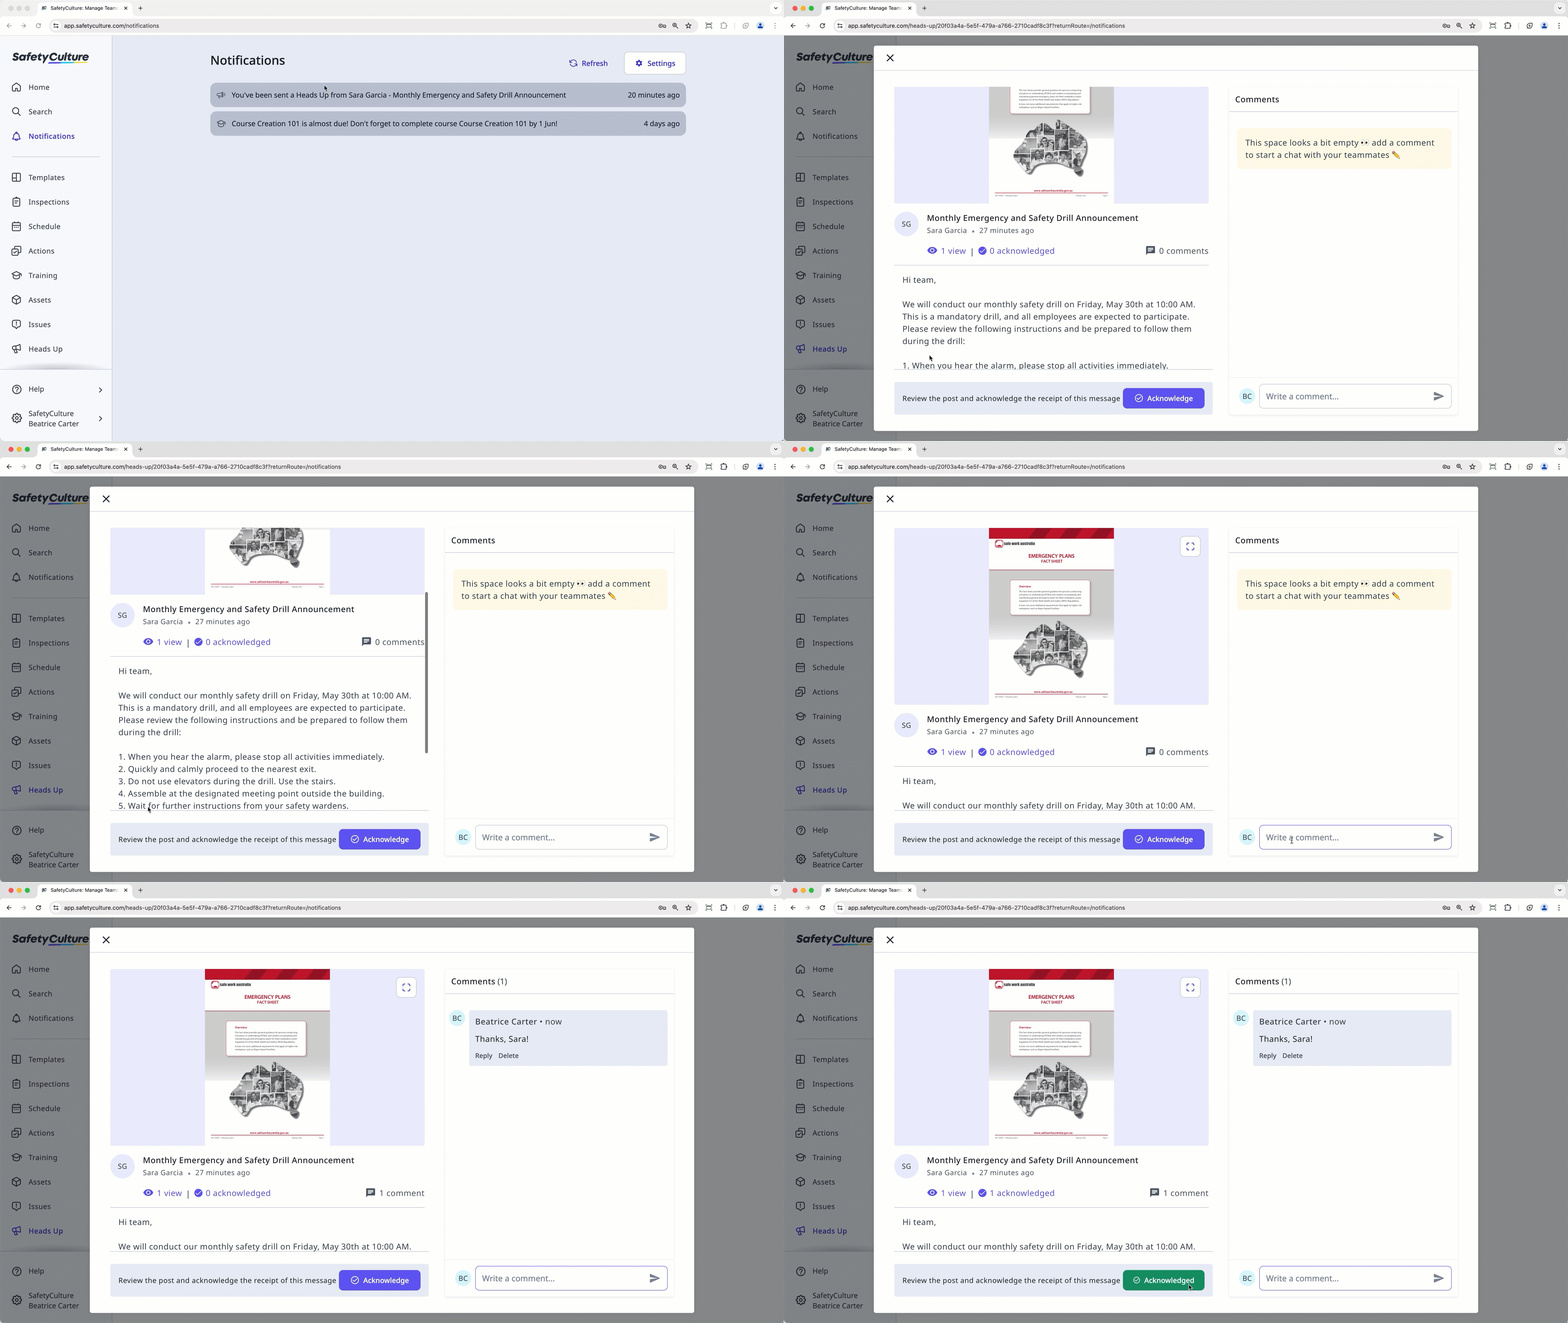
You can only create Heads Ups drafts and schedule them for publishing later on via the web app. A title, description, and at least one user assigned is required before publishing.
If you've created a Heads Up, but need to add more details or update the assignees, you can edit it via the web app.
Create a Heads Up
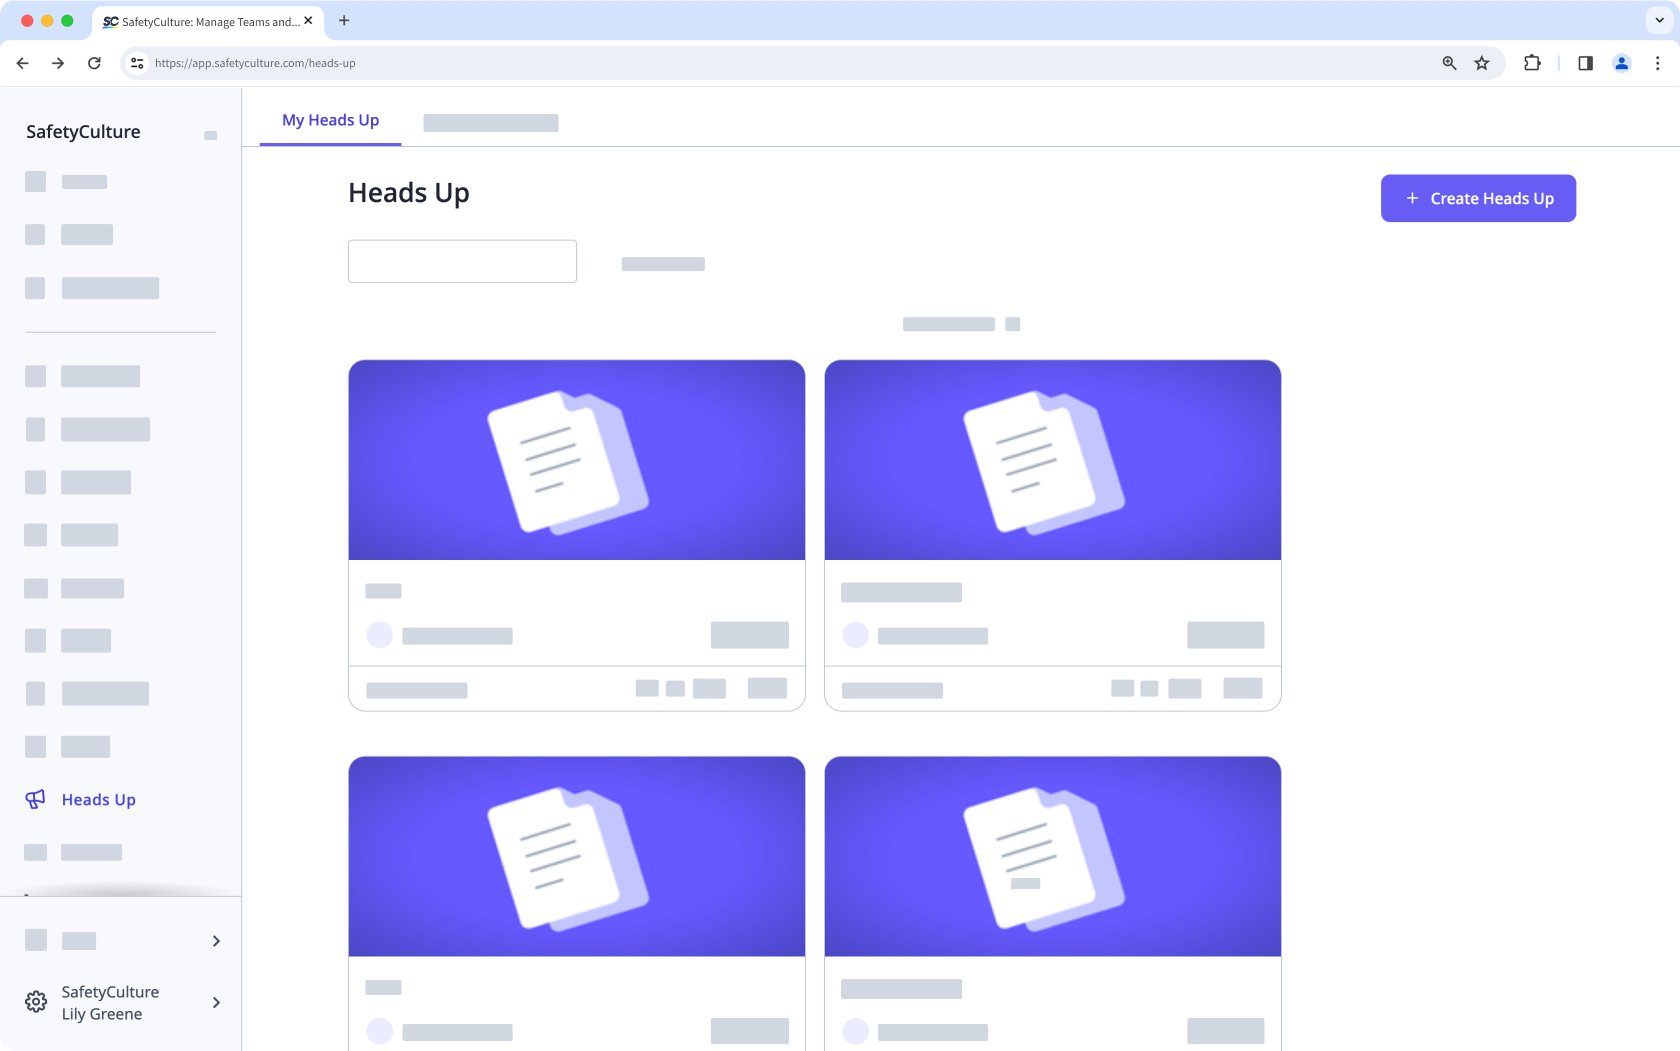
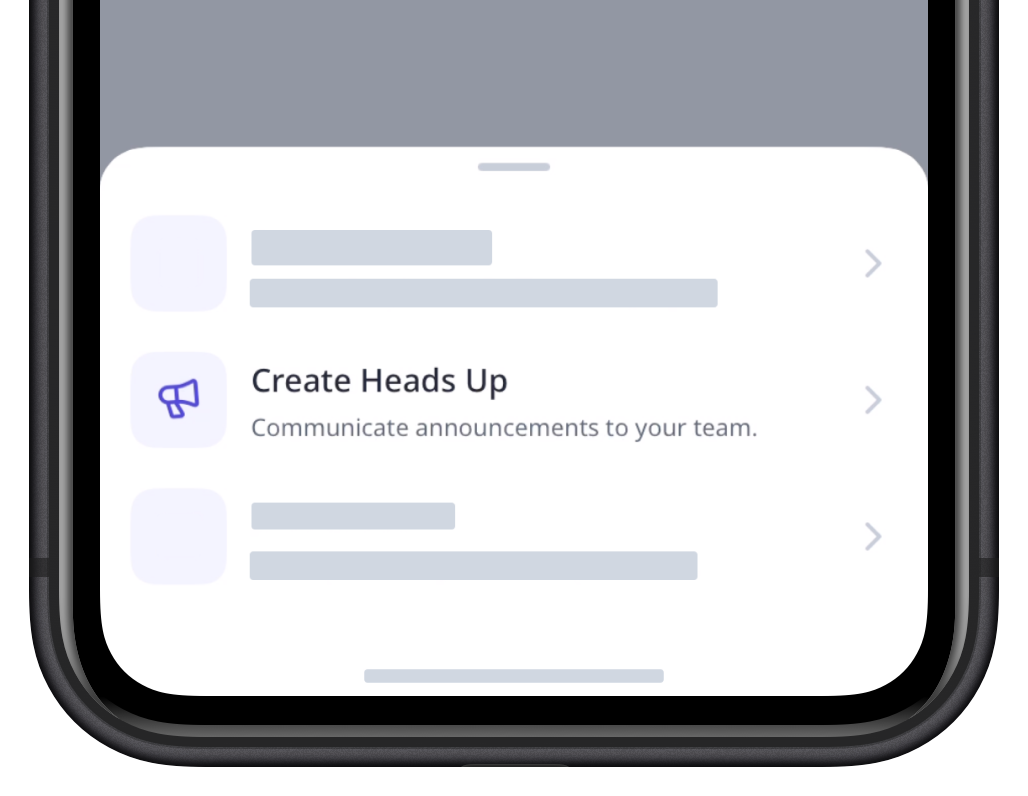
Select Heads Up in the sidebar or select it in More.
Click Create Heads Up on the upper-right of the page.
Configure the Heads Up accordingly. As you add details to your Heads Up, the preview shown on the right-hand side of the page will automatically update.
Click Publish on the lower-left of the page.
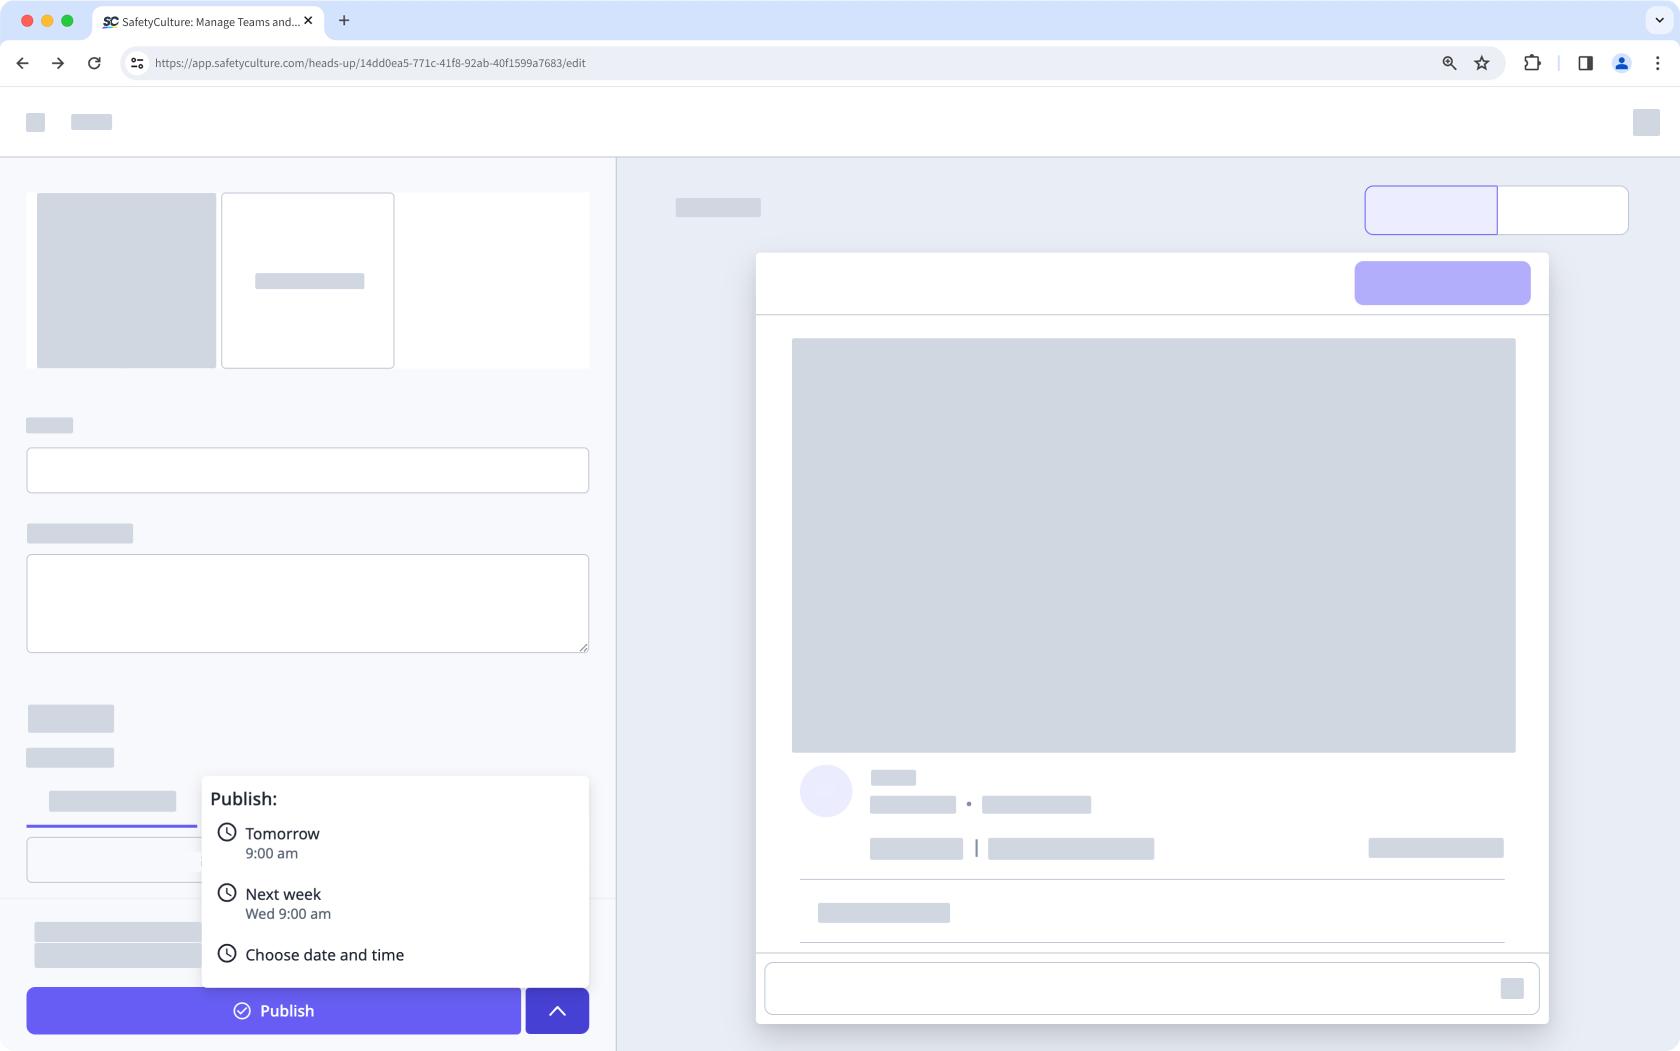
In the pop-up window, click Publish. If you want to save your Heads Up as a draft and come back to it later, click Back on the upper-left of the page and select Save Draft. You can also schedule your Heads Up to be published later by clicking on the right-hand side of the Publish button and selecting a date and time.
 at the upper-right of your screen.
Heads Up fields
You can upload and configure the following fields for each Heads Up:
Field | Description |
|---|---|
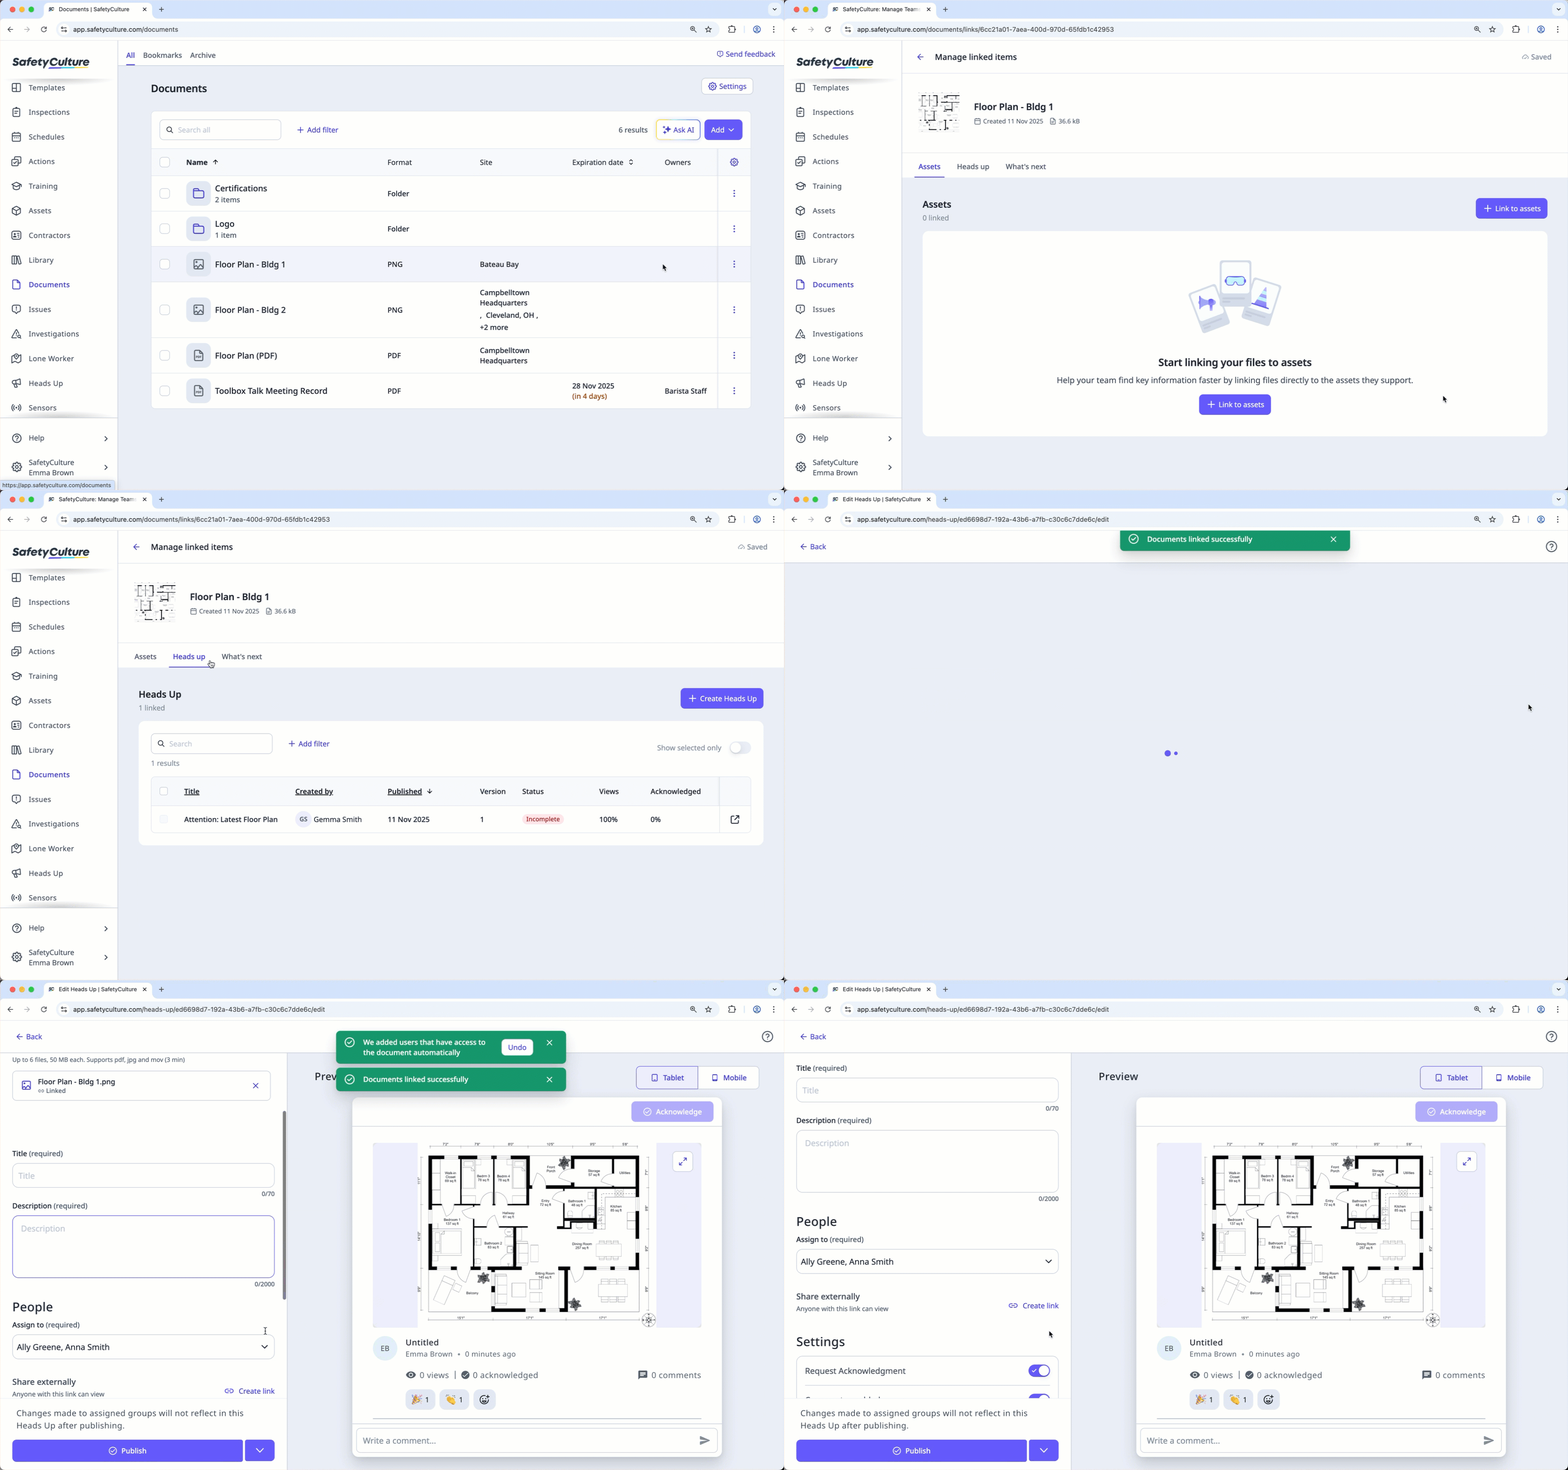
Media | The media attachments for a Heads Up. You can add or link up to 6 files, including videos (up to three minutes or 1.5GB), images (up to 50MB in total), PDF files (up to 50MB). For video files, MP4, MOV, AVI, WMV, and WEBM formats are supported. |
Title | The title of a Heads Up. Allows up to 70 characters. |
Description | The description of a Heads Up. Allows up to 5,000 characters. |
The shareable link and QR code of a Heads Up. | |
Assigned to | The assignees of a Heads Up. You can assign Heads Ups to users, groups, and site members. |
Request Acknowledgment | The toggle to select whether acknowledgments are required for a Heads Up. |
Comments enabled | The toggle to allow commenting for a Heads Up. |
Reactions enabled | The toggle to allow adding emoji reactions for a Heads Up. |
← Previous article: Optimize your processes (Part 1) | Next article: Optimize your processes (Part 3) →