How can I make my processes more efficient?
At this point, you’ve successfully set up your SafetyCulture organization and rolled it out to your pilot users. You have also gathered your team's feedback and finalized how you want the experience to look. Now is the perfect time to start thinking about closing the improvement loop.
Imagine your users conducting inspections in SafetyCulture and identifying several non-compliance areas. Similarly, imagine users reporting something wrong in the middle of their shift, and as an administrator, you would want to announce the issue to your area managers so these are acted upon.
In such cases, consider using the following features to complement your processes so you can focus on other goals you have set for your business.
1. Actions
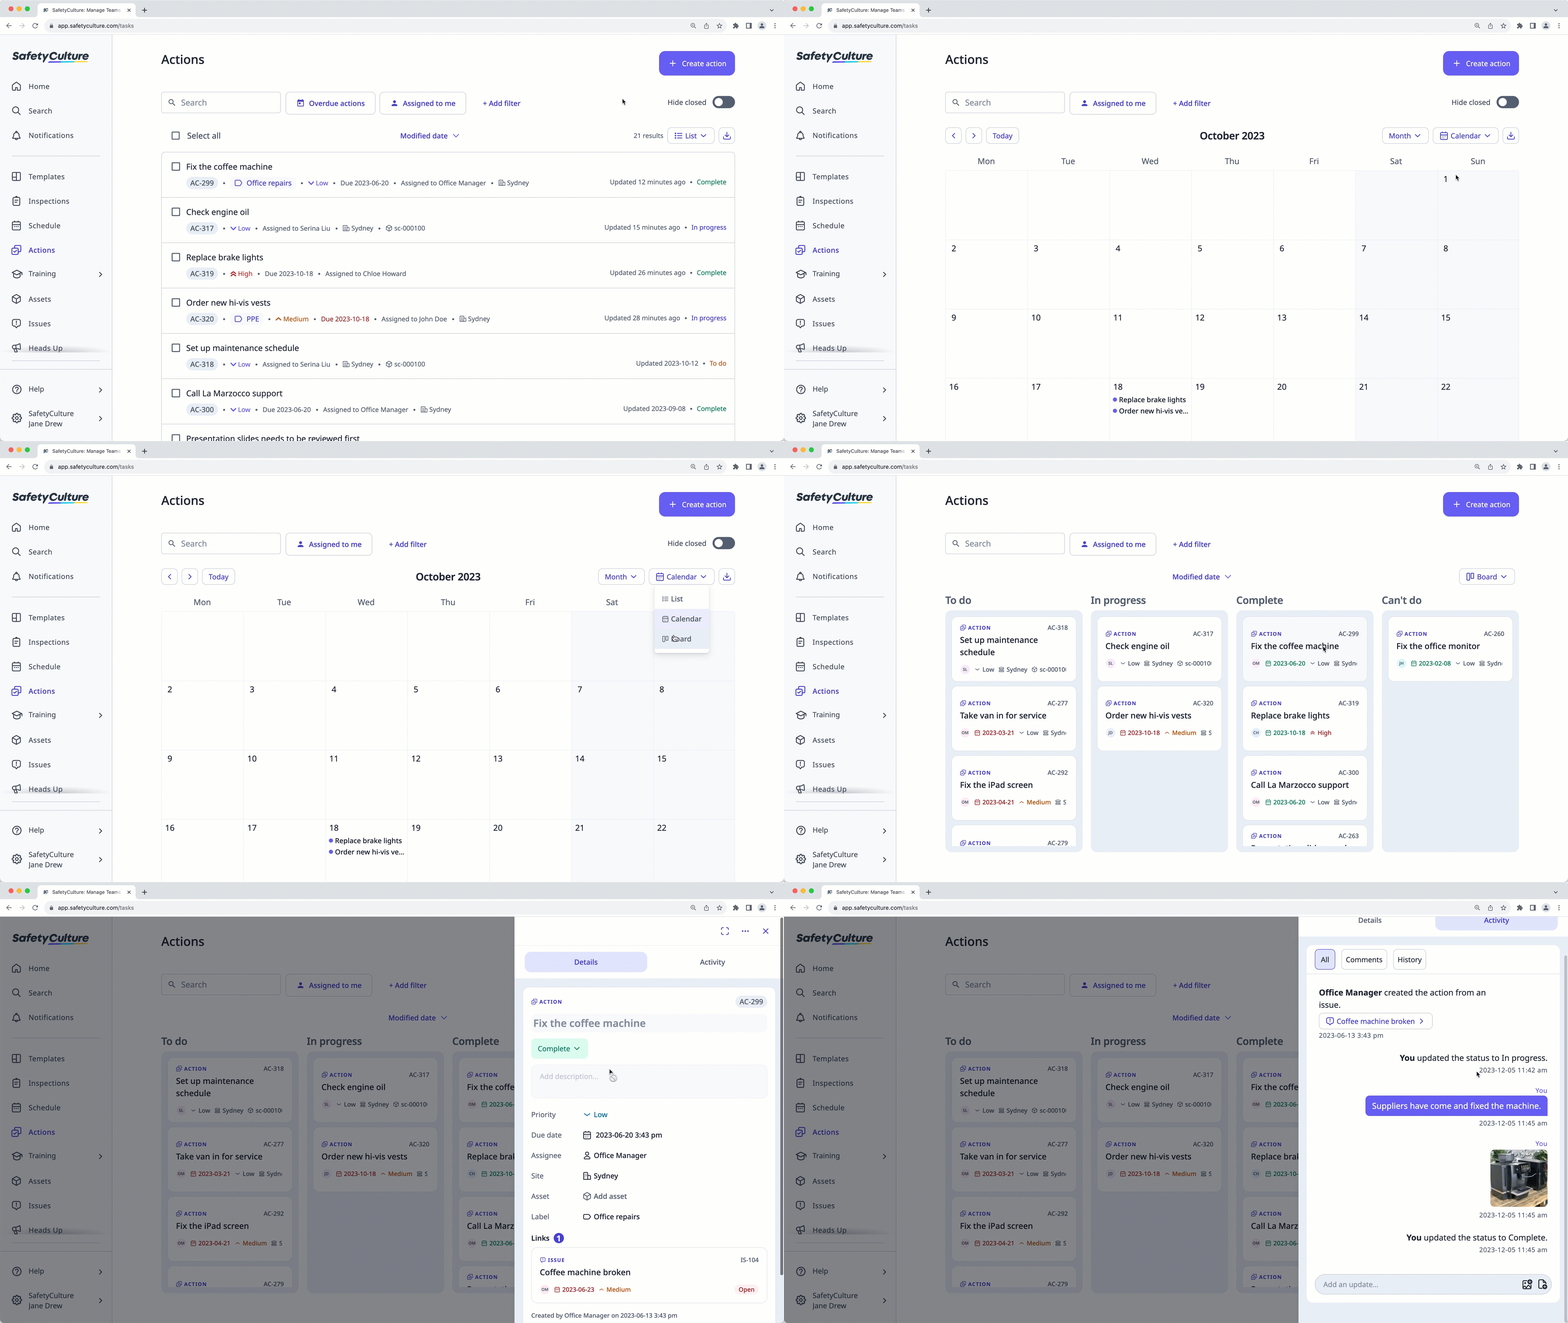
Use this feature to instantly address issues your users found while conducting inspections or create standalone actions anytime. You can also create recurring actions if you have scheduled workflows like maintenance tasks.
2. Issues
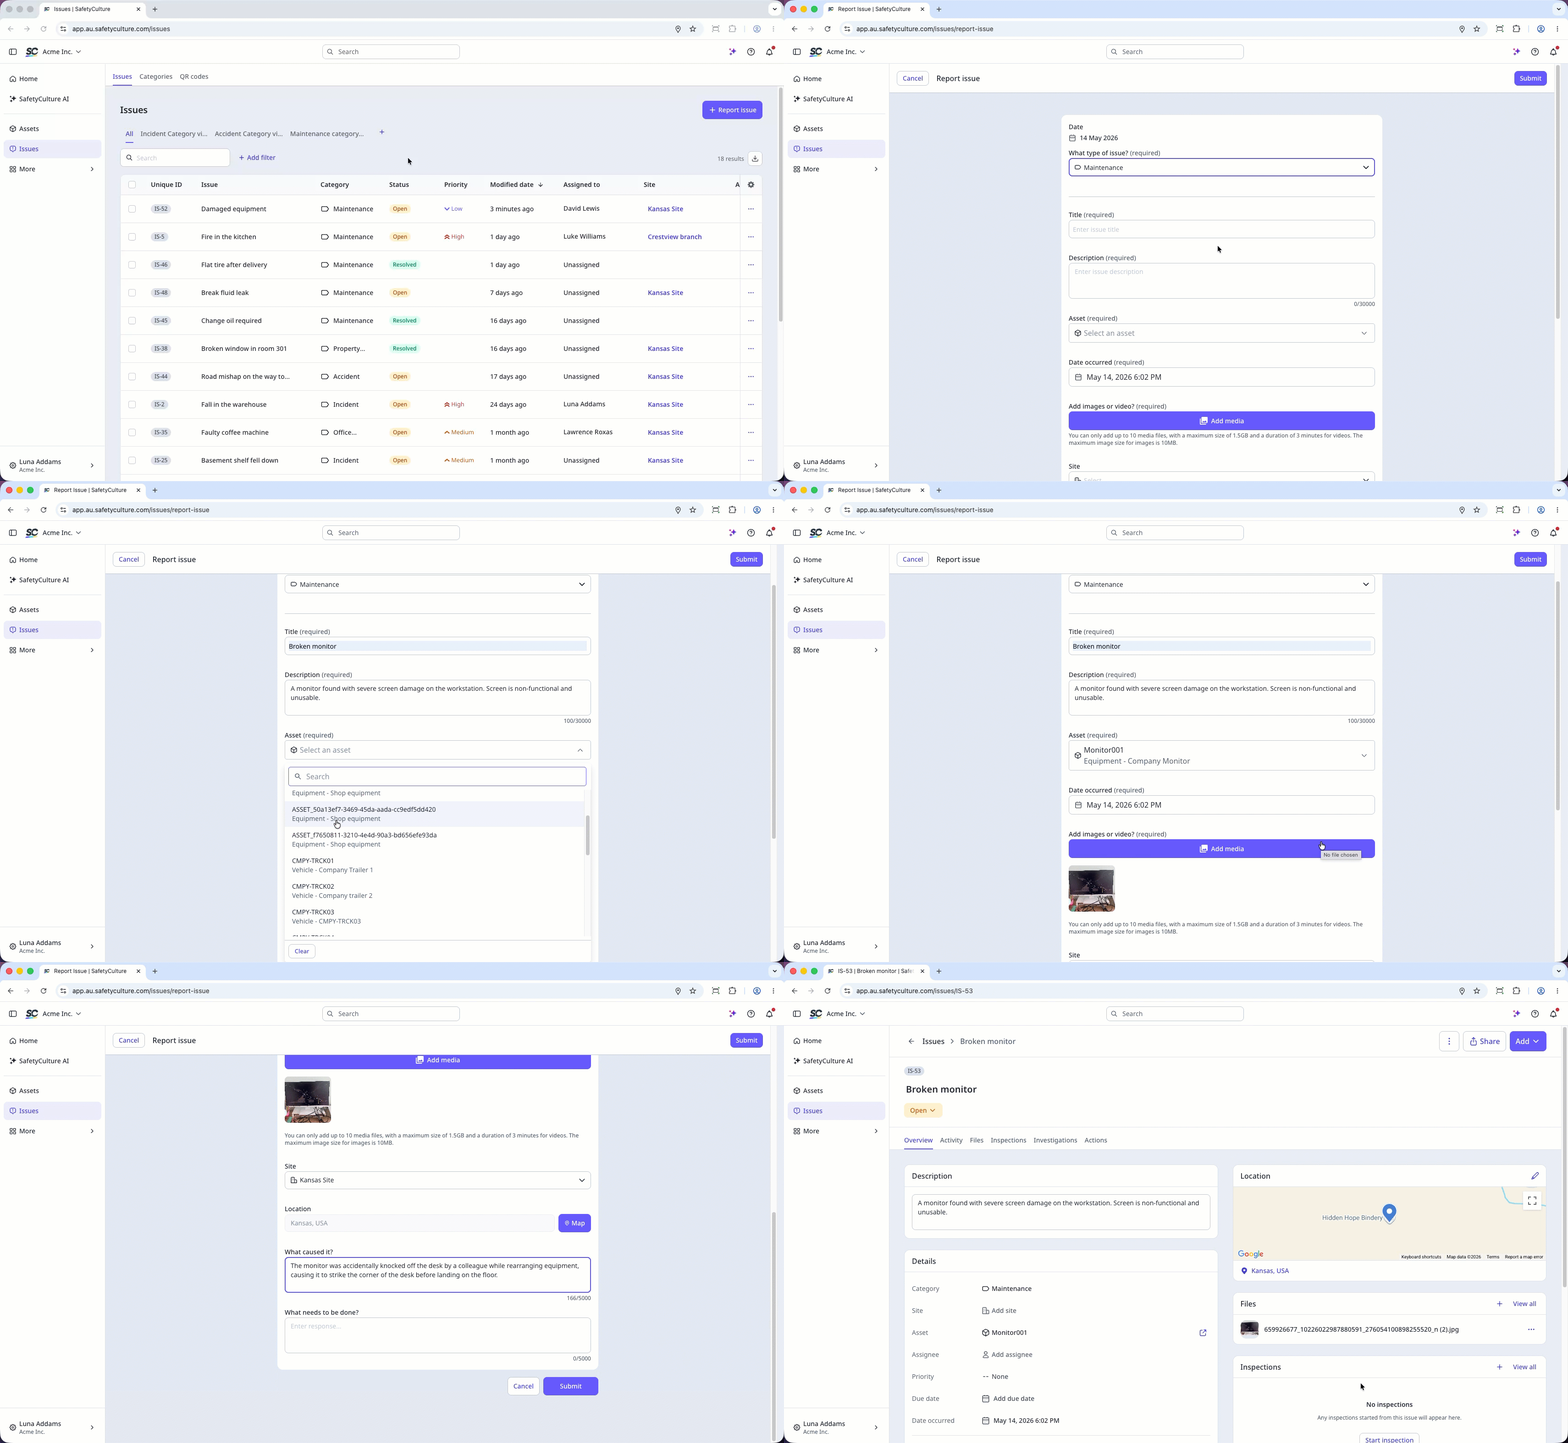
Use this feature to empower your users to report observations, incidents, or hazards as soon as they occur.
3. Heads Up
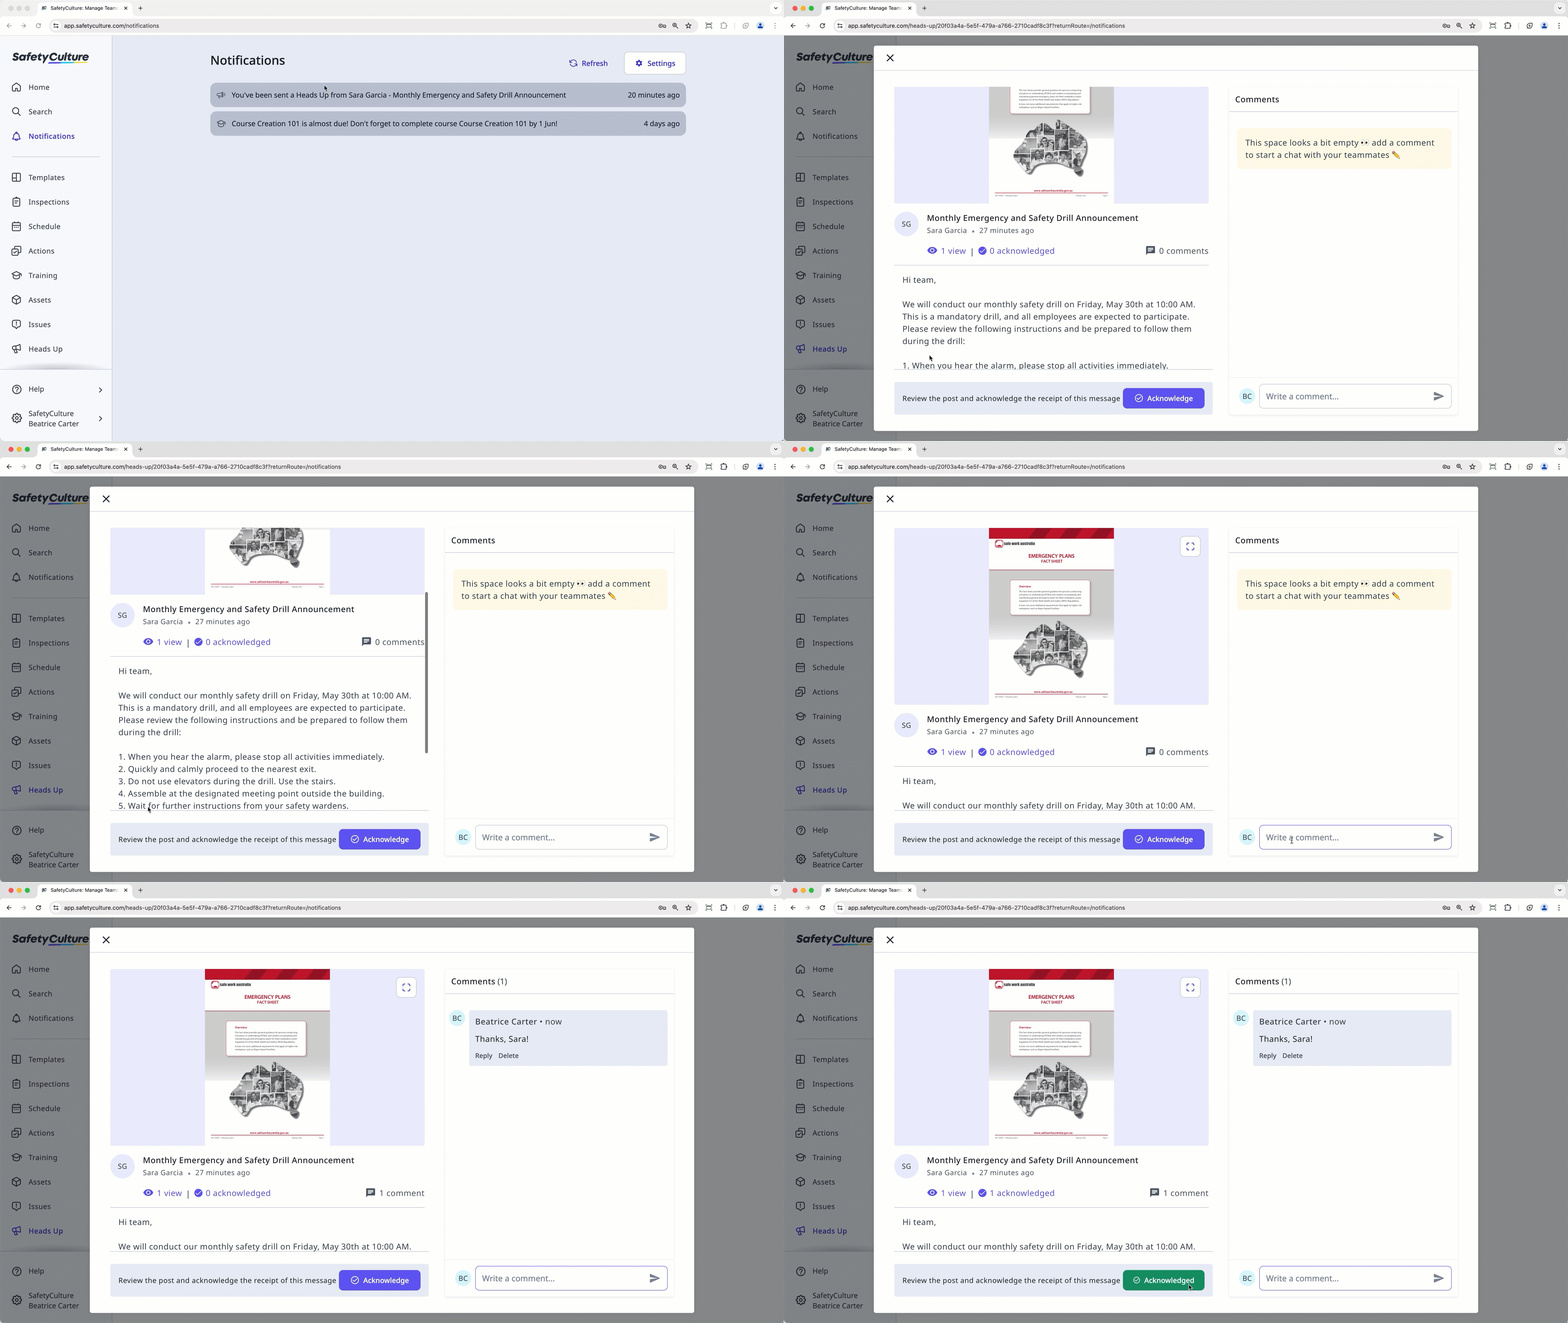
Use this feature to send messages to your team through SafetyCulture. With Heads Up, you can now broadcast messages, discuss announcements as a group, conduct inspections, create actions, and report issues all from one place.
4. Assets
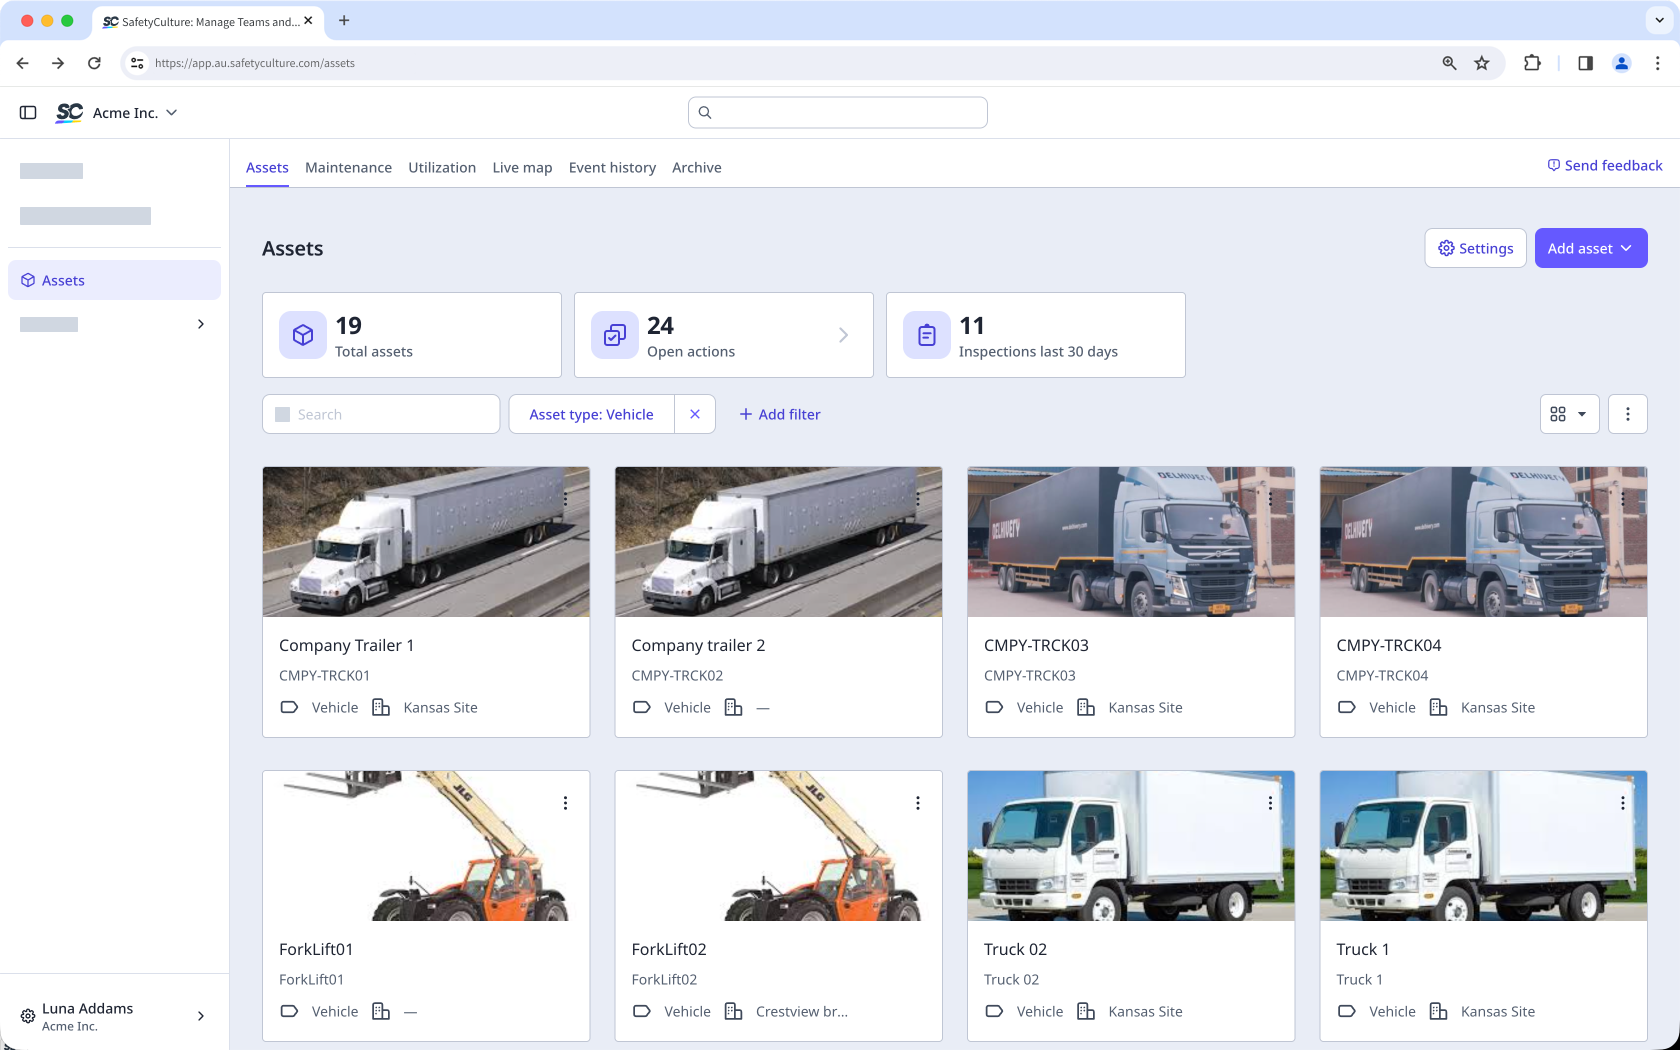
Use this feature to perform scheduled inspections and create actionsaround your assets. Through integrations, you can also connect SafetyCulture with your existing asset management system to create a centralized repository for your asset information.
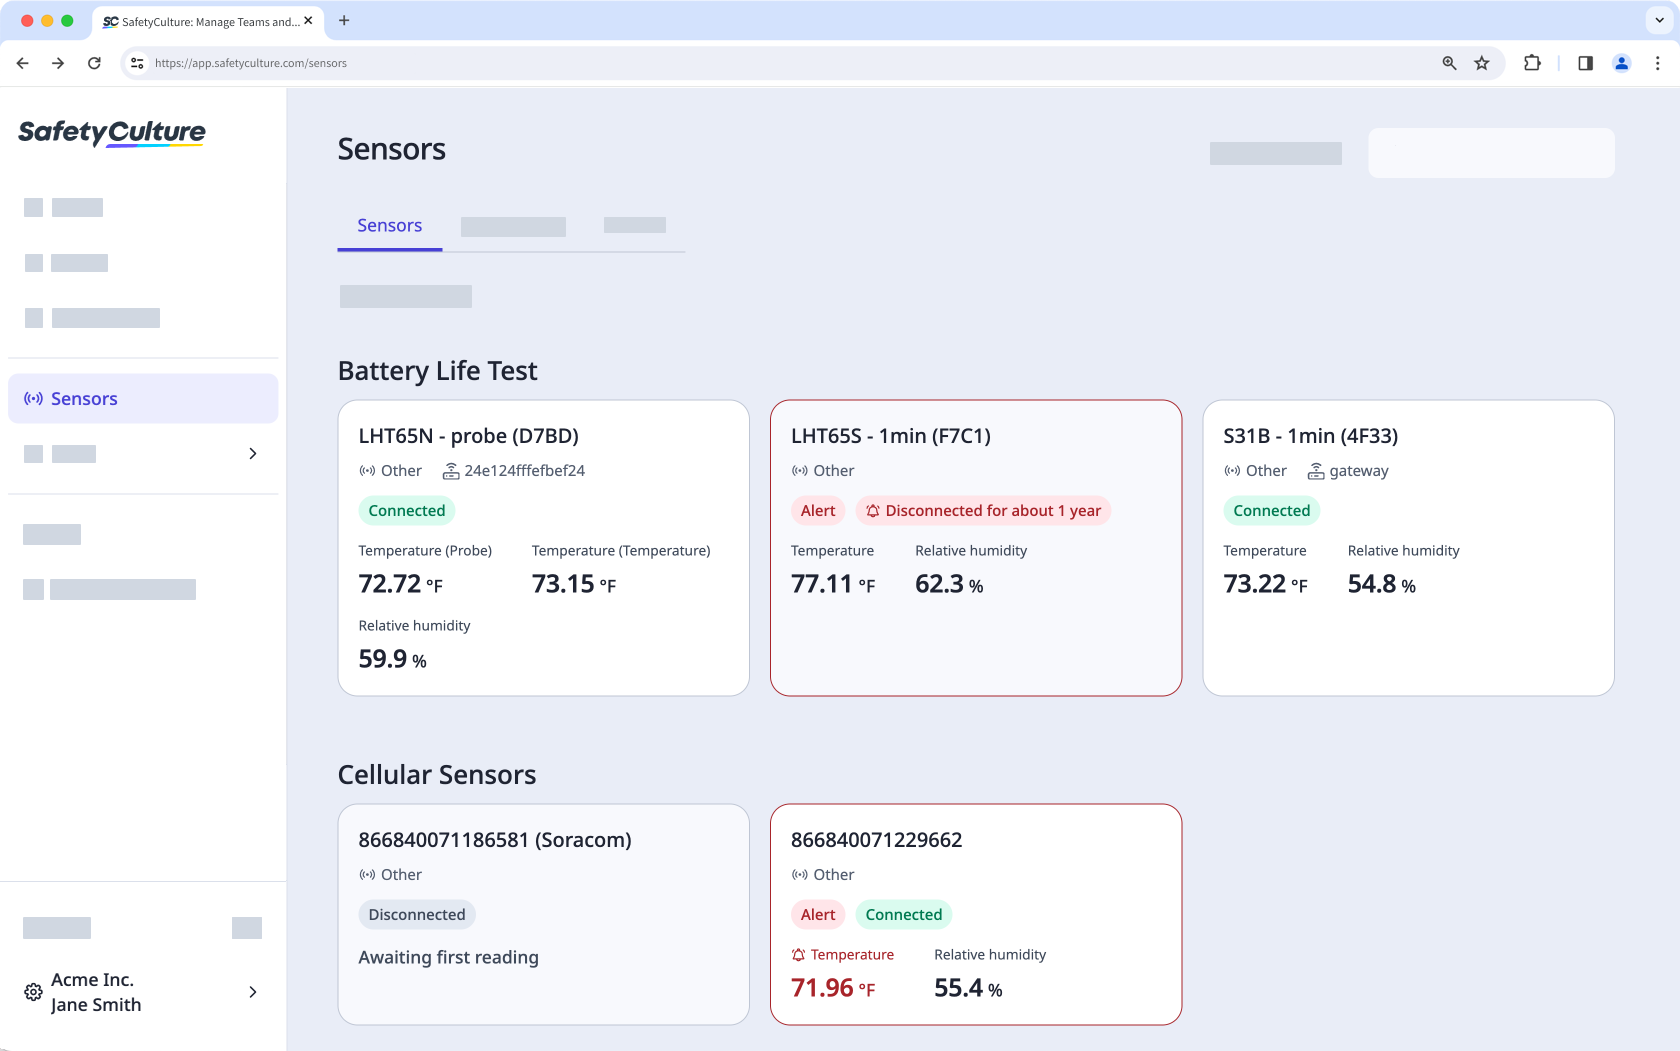
5. Sensors
Use this feature to receive alerts when your assets go out of critical range and record business-critical data automatically. We support a variety of sensors, and if you already have some on hand, you can still set them up in SafetyCulture.
6. Training
If you have not converted any materials into training content, it's time to enhance your team's training experience with interactive courses and lessons.
What are actions?
The Actions feature allows you to identify, track, and complete tasks as a team. You can create actions to highlight a problem that needs fixing as you walk through an inspection or create standalone actions on the go without having to start an inspection. For routine tasks such as maintenance, you can also create recurring actions to ensure regular checks are never missed.
Moreover, you can change the layout view of your actions to manage and complete your tasks more effectively. Each action includes a built-in chat space to collaborate with team members and timestamps to stay updated on everyone's interactions.
What you'll need
If you have sensor monitoring set up, check out how to create actions from sensor alerts to keep track and resolve sensor-related problems.
Create an action in an inspection
Click Create action below the question response. If there are actions created for the question in another inspection, the "Open actions" button will appear to view and link open actions.
In the side panel, select the type from the dropdown on the upper-left corner and enter the action's title and description. You can also configure action fields such as site, label, asset, and more.
Click Create on the lower-right corner of the page.
If you want to add more information, you can click the action to provide details, comments, and media files in the side panel.
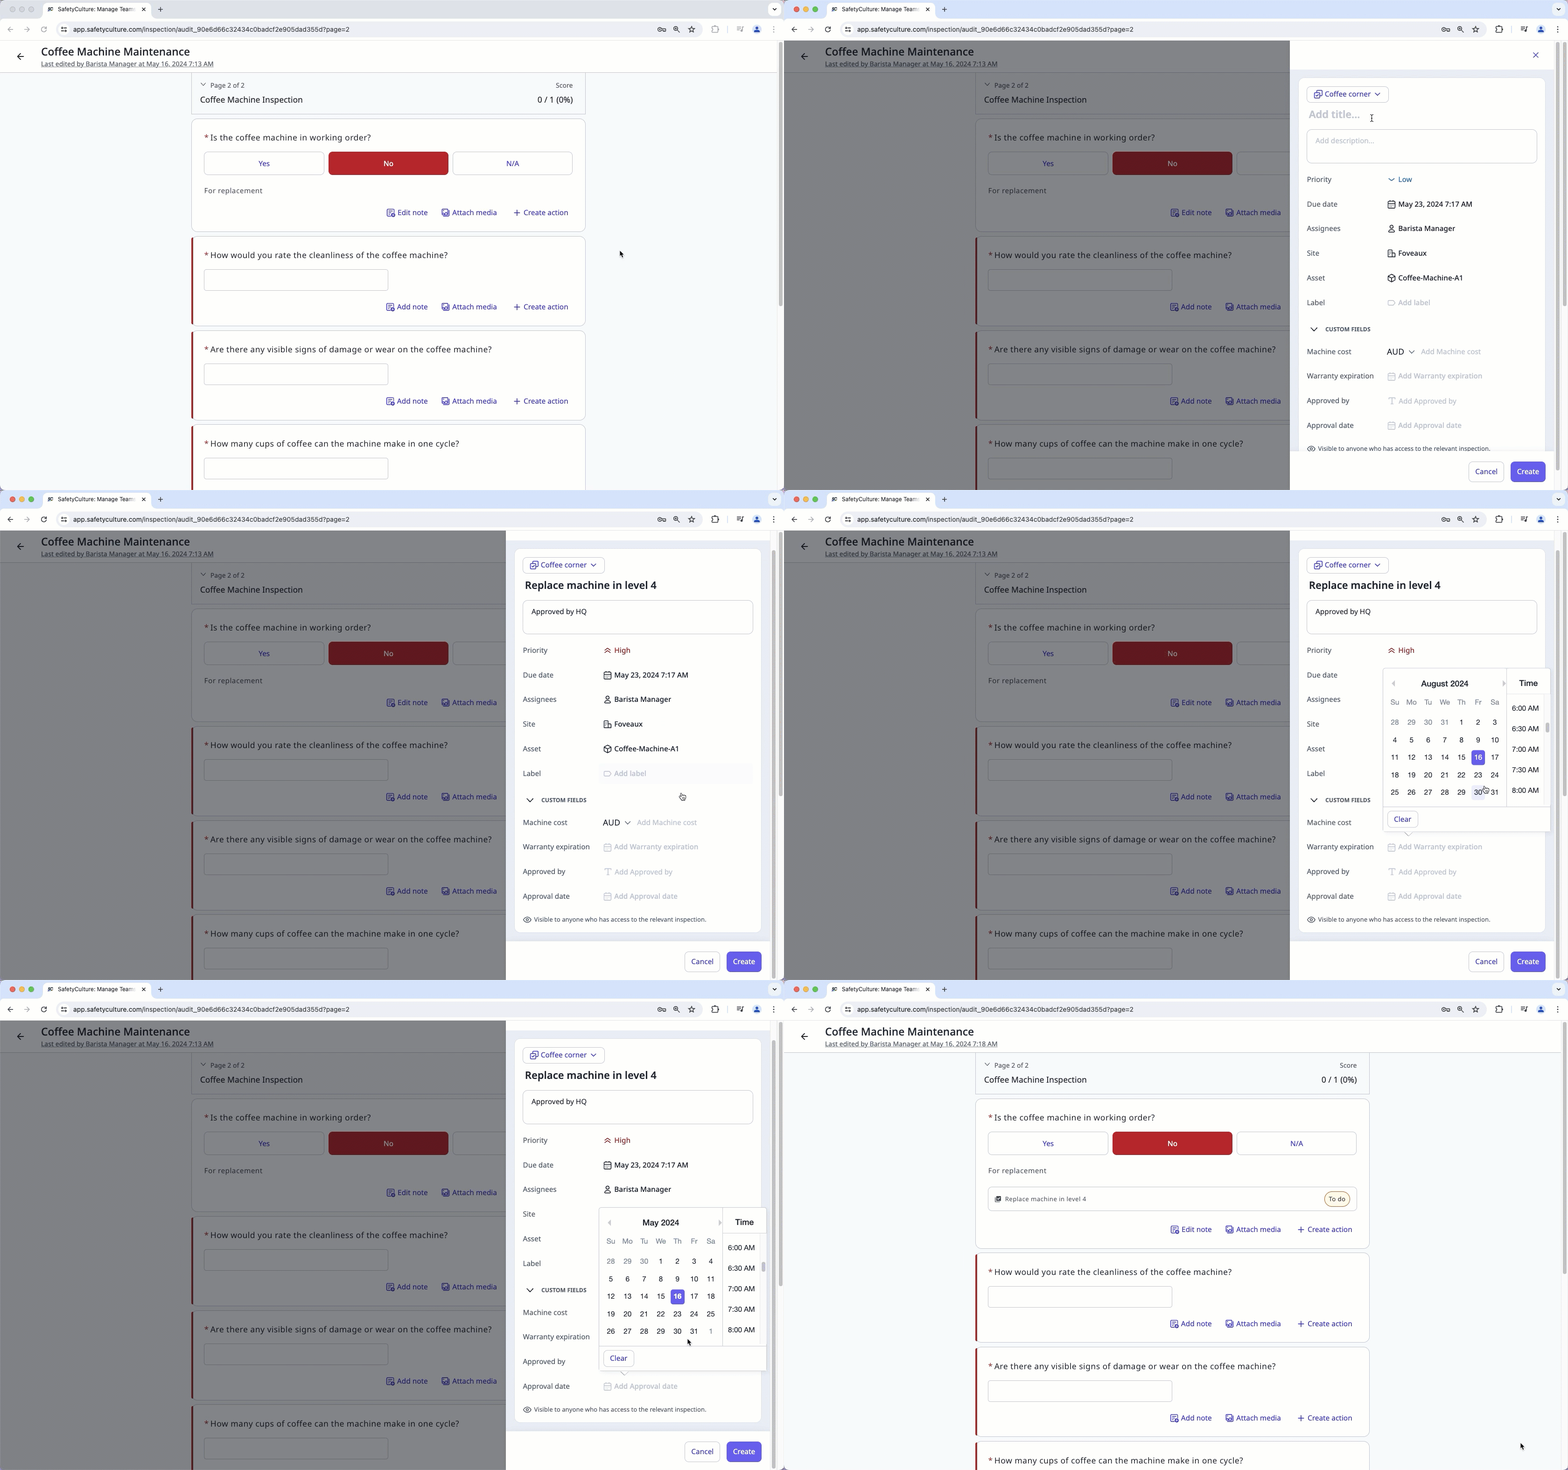
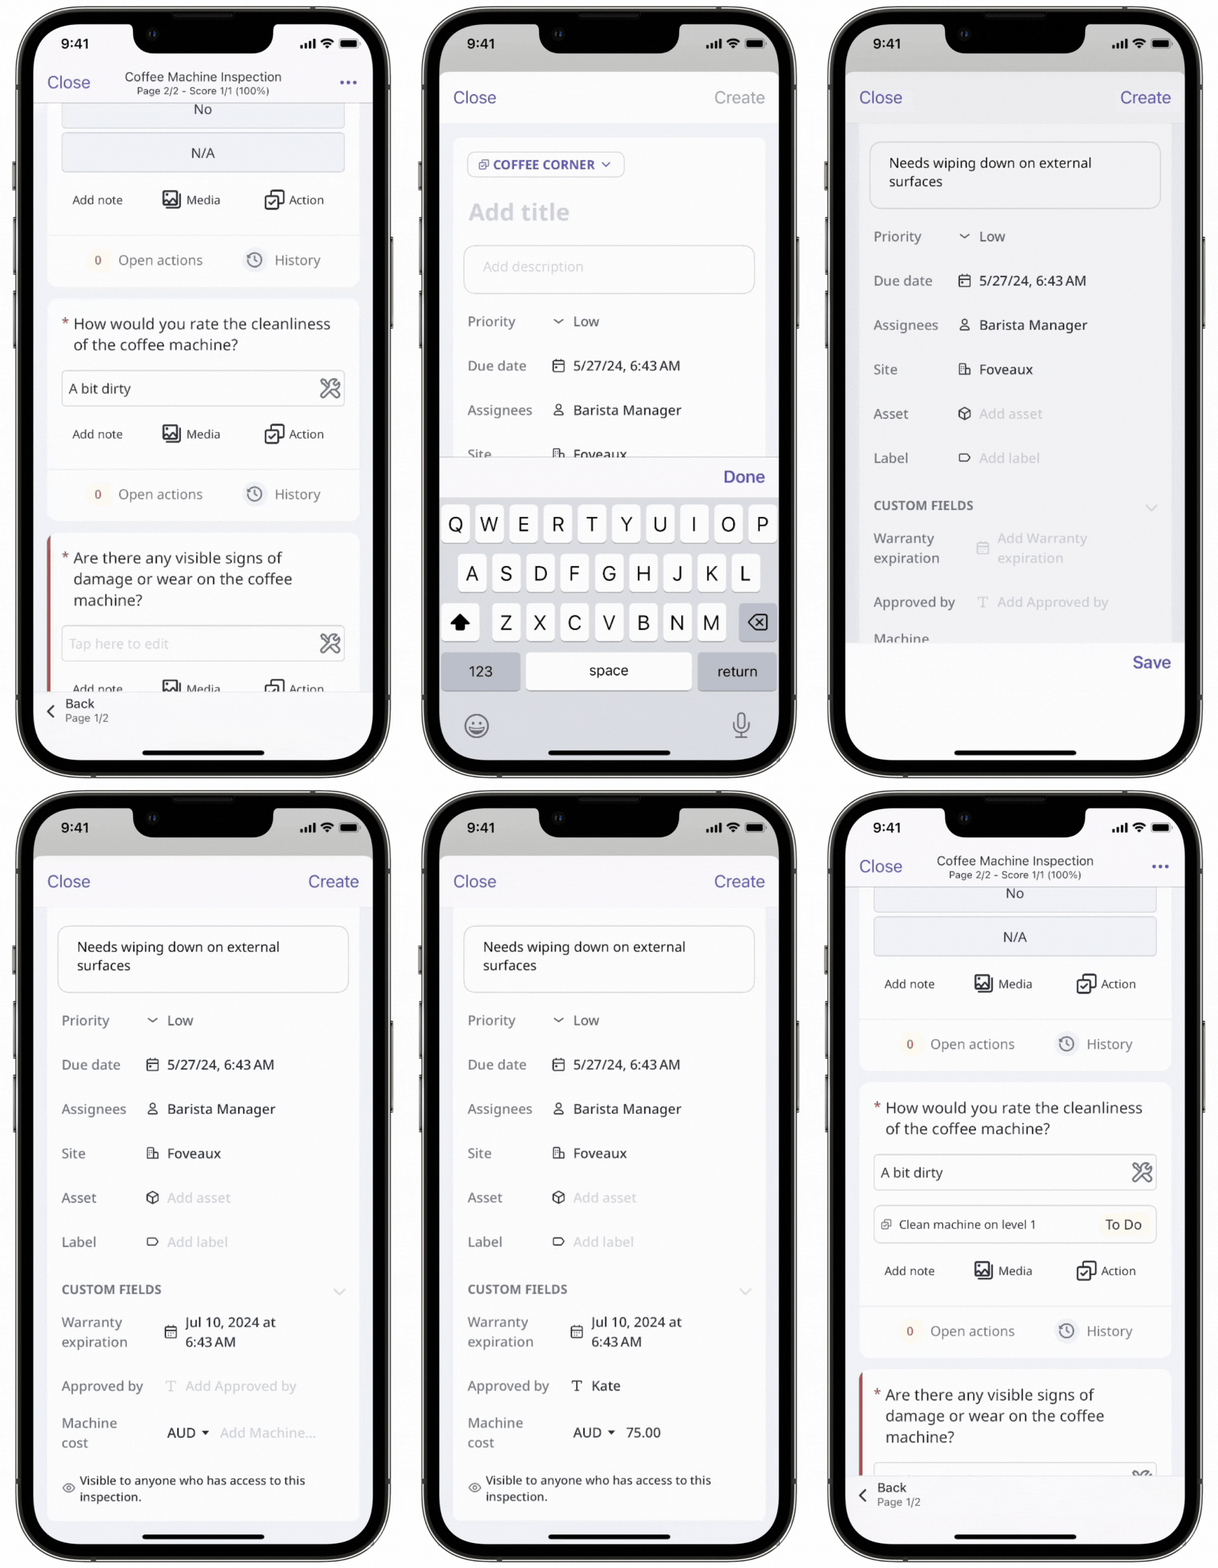
Actions created from inspections are only visible to assignees and users with access to the relevant inspections. Any photos and notes added to the inspection question will also be included.
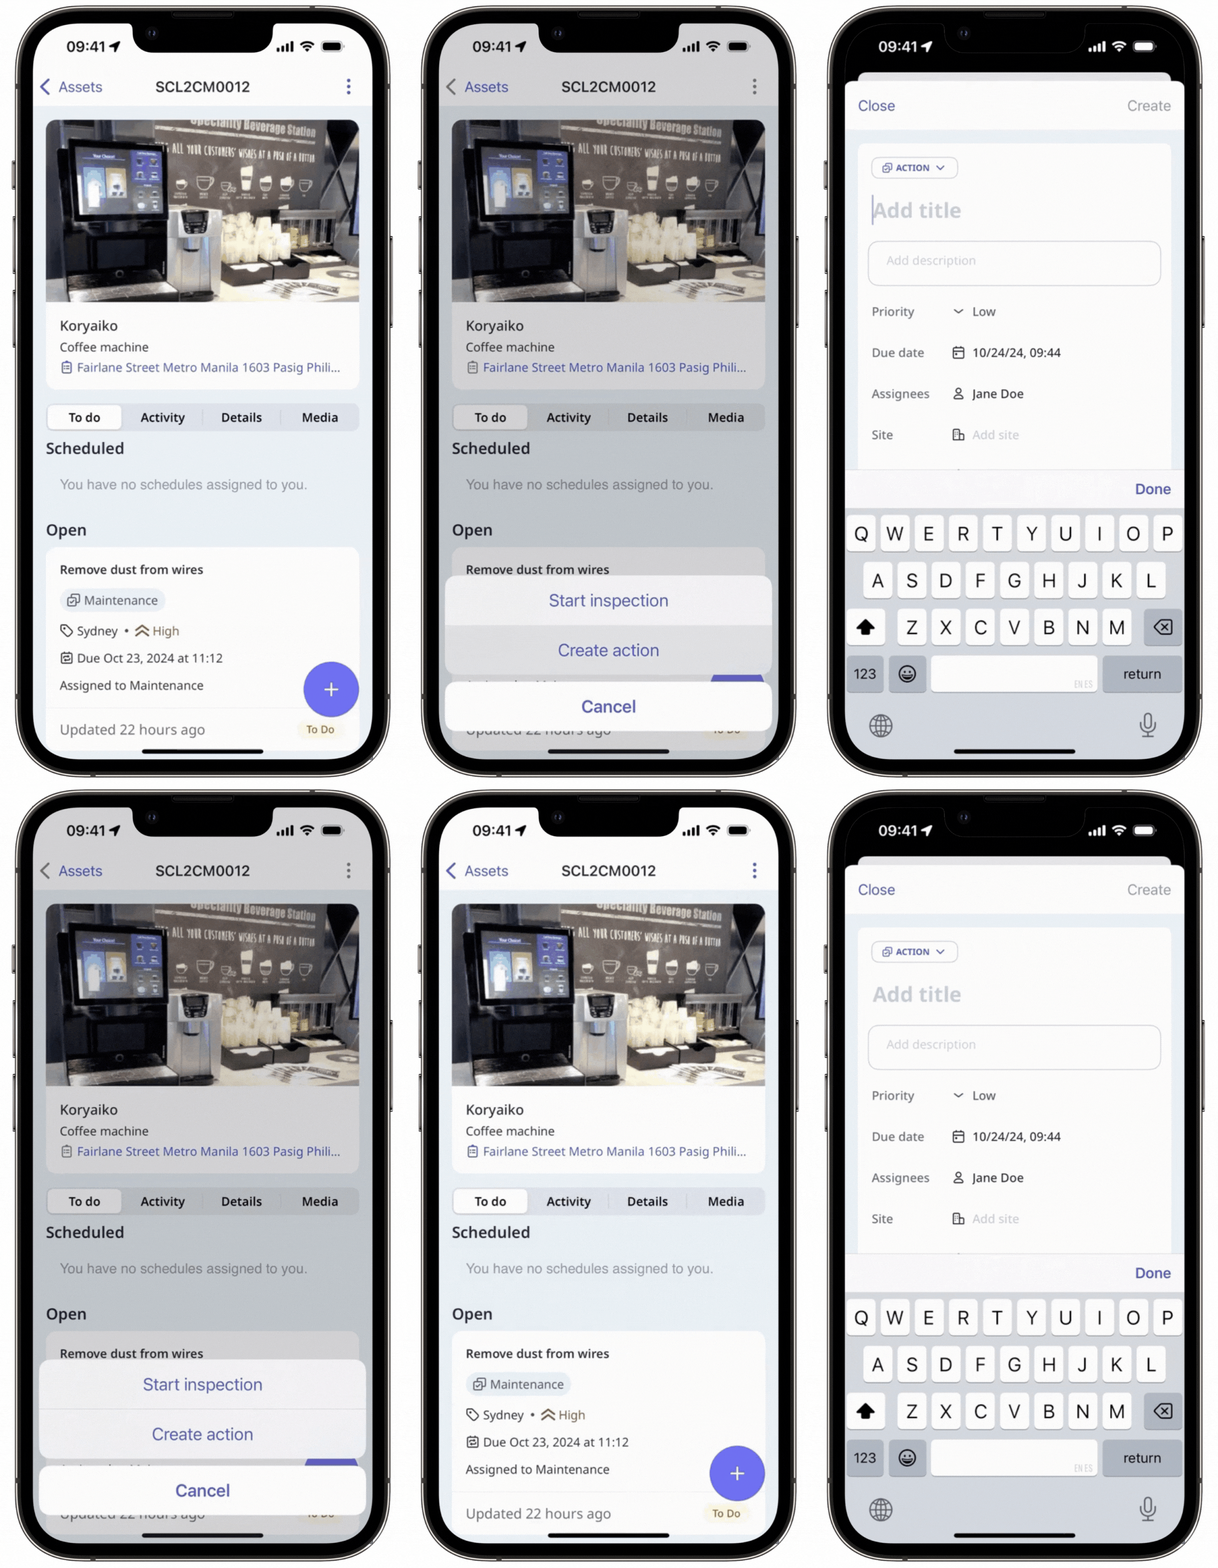
Create an action from an asset
Select Assets in the sidebar or select it in More.
Click on the asset's right-hand side and select Create action.
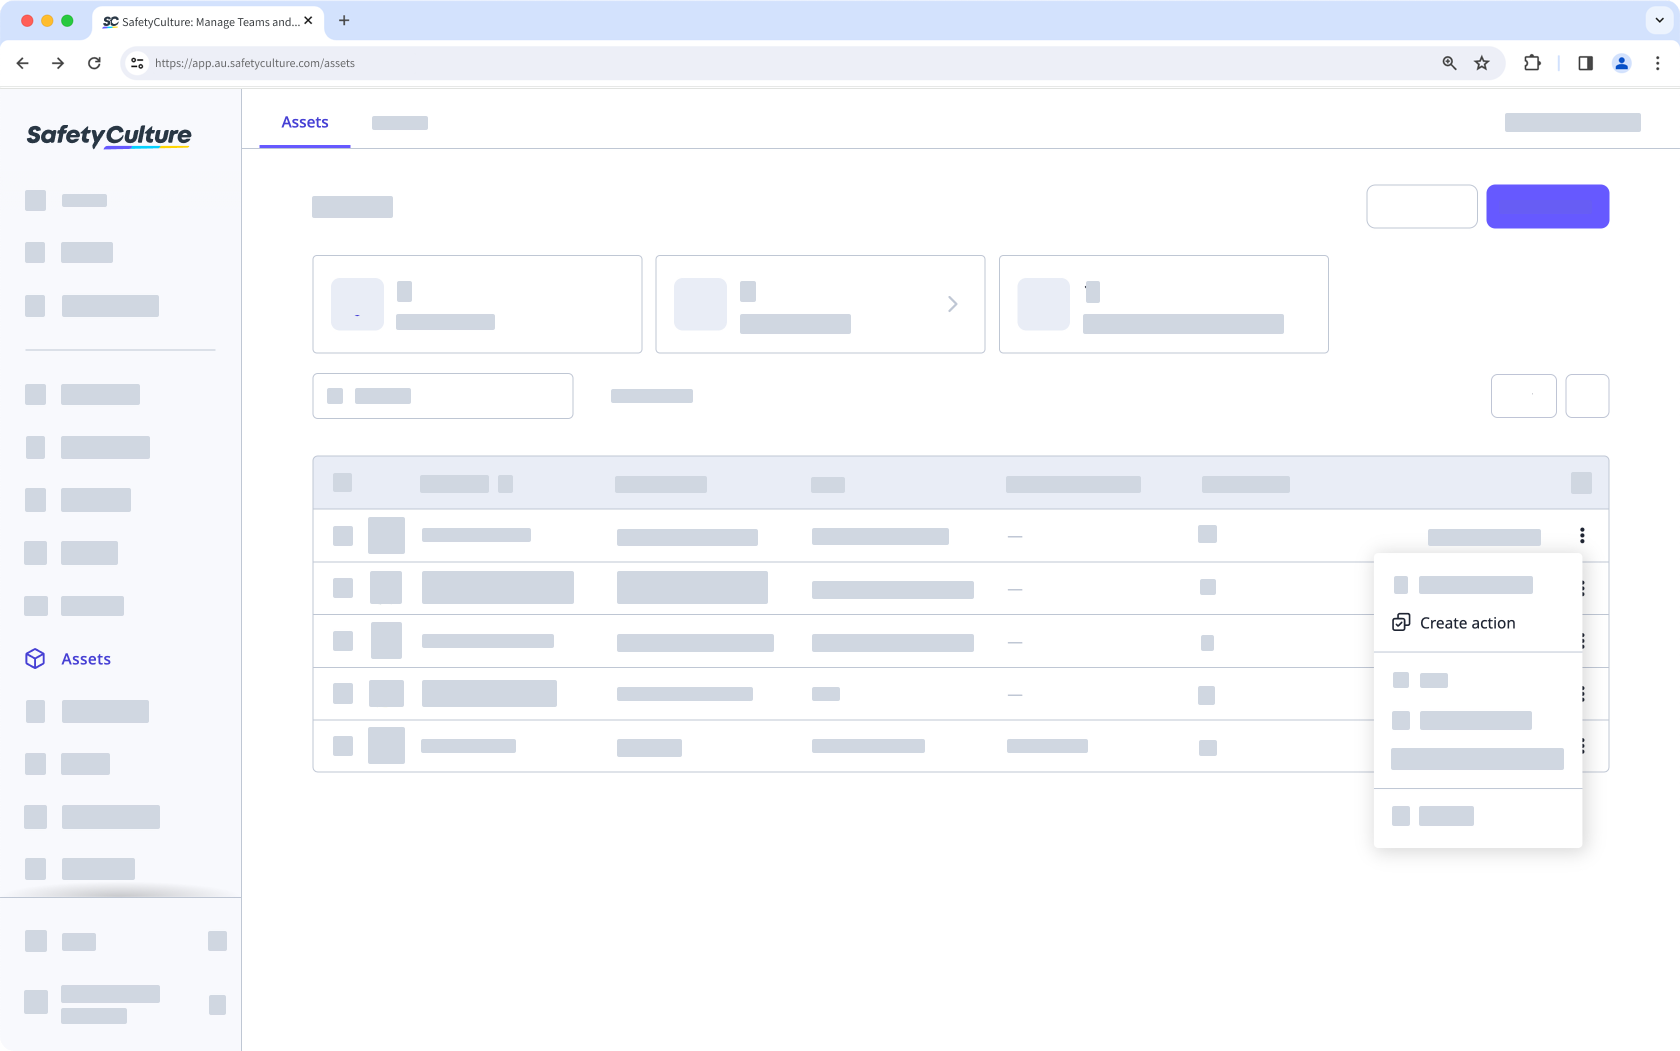
In the side panel, select the type from the dropdown on the upper-left corner and enter the action's title and description. You can also configure action fields such as site, label, and more.
Click Create on the lower-right corner of the page.
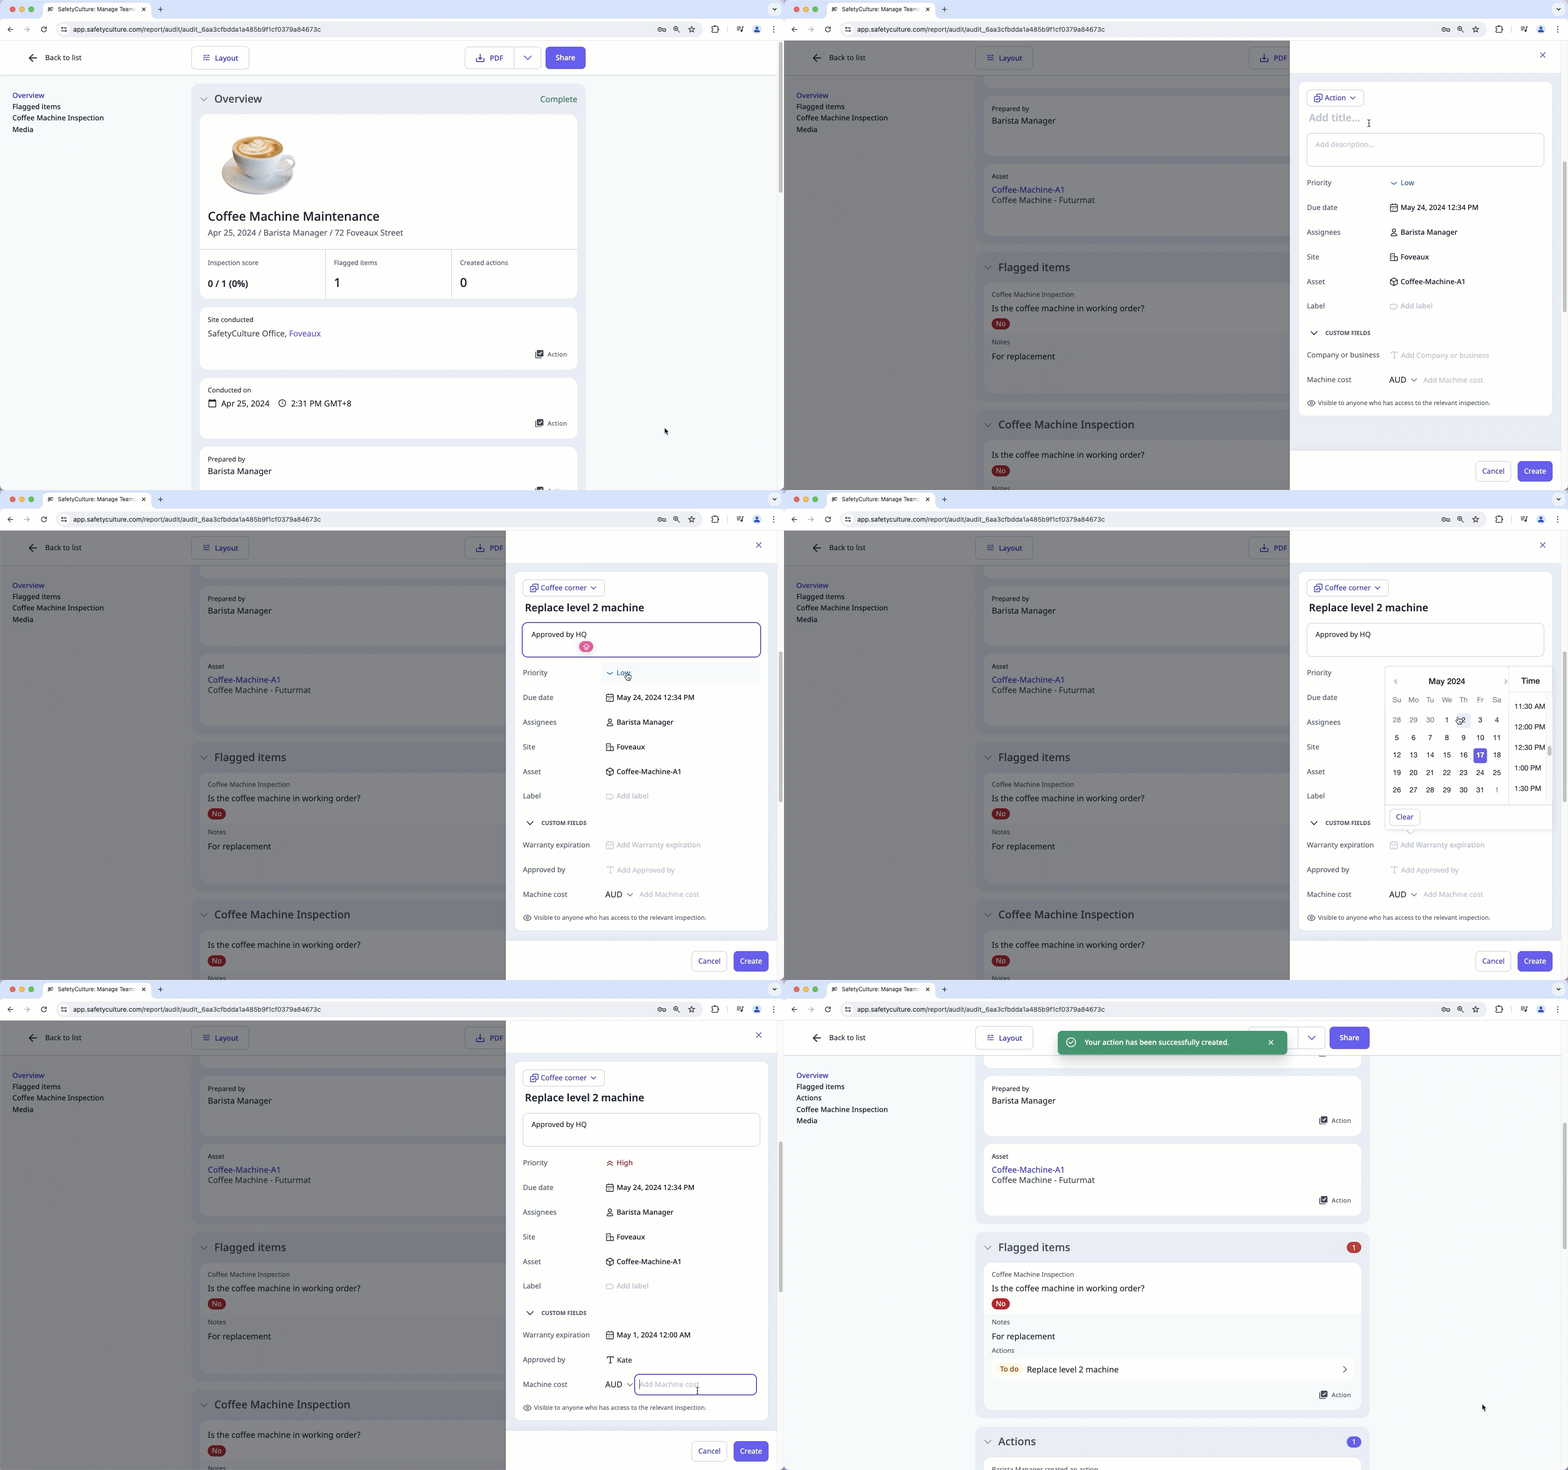
Create an action in an inspection report
Select Inspections in the sidebar or select it in More.
Click More on the right-hand side of the inspection and select View report.
In the report, click
 Action on the question's lower-right.
In the side panel, select the type from the dropdown on the upper-left corner and enter the action's title and description. You can also configure action fields such as site, label, asset, and more.
Click Create on the lower-right corner of the page.
If you want to add more information, you can click the action to provide details, comments, and media files in the side panel.
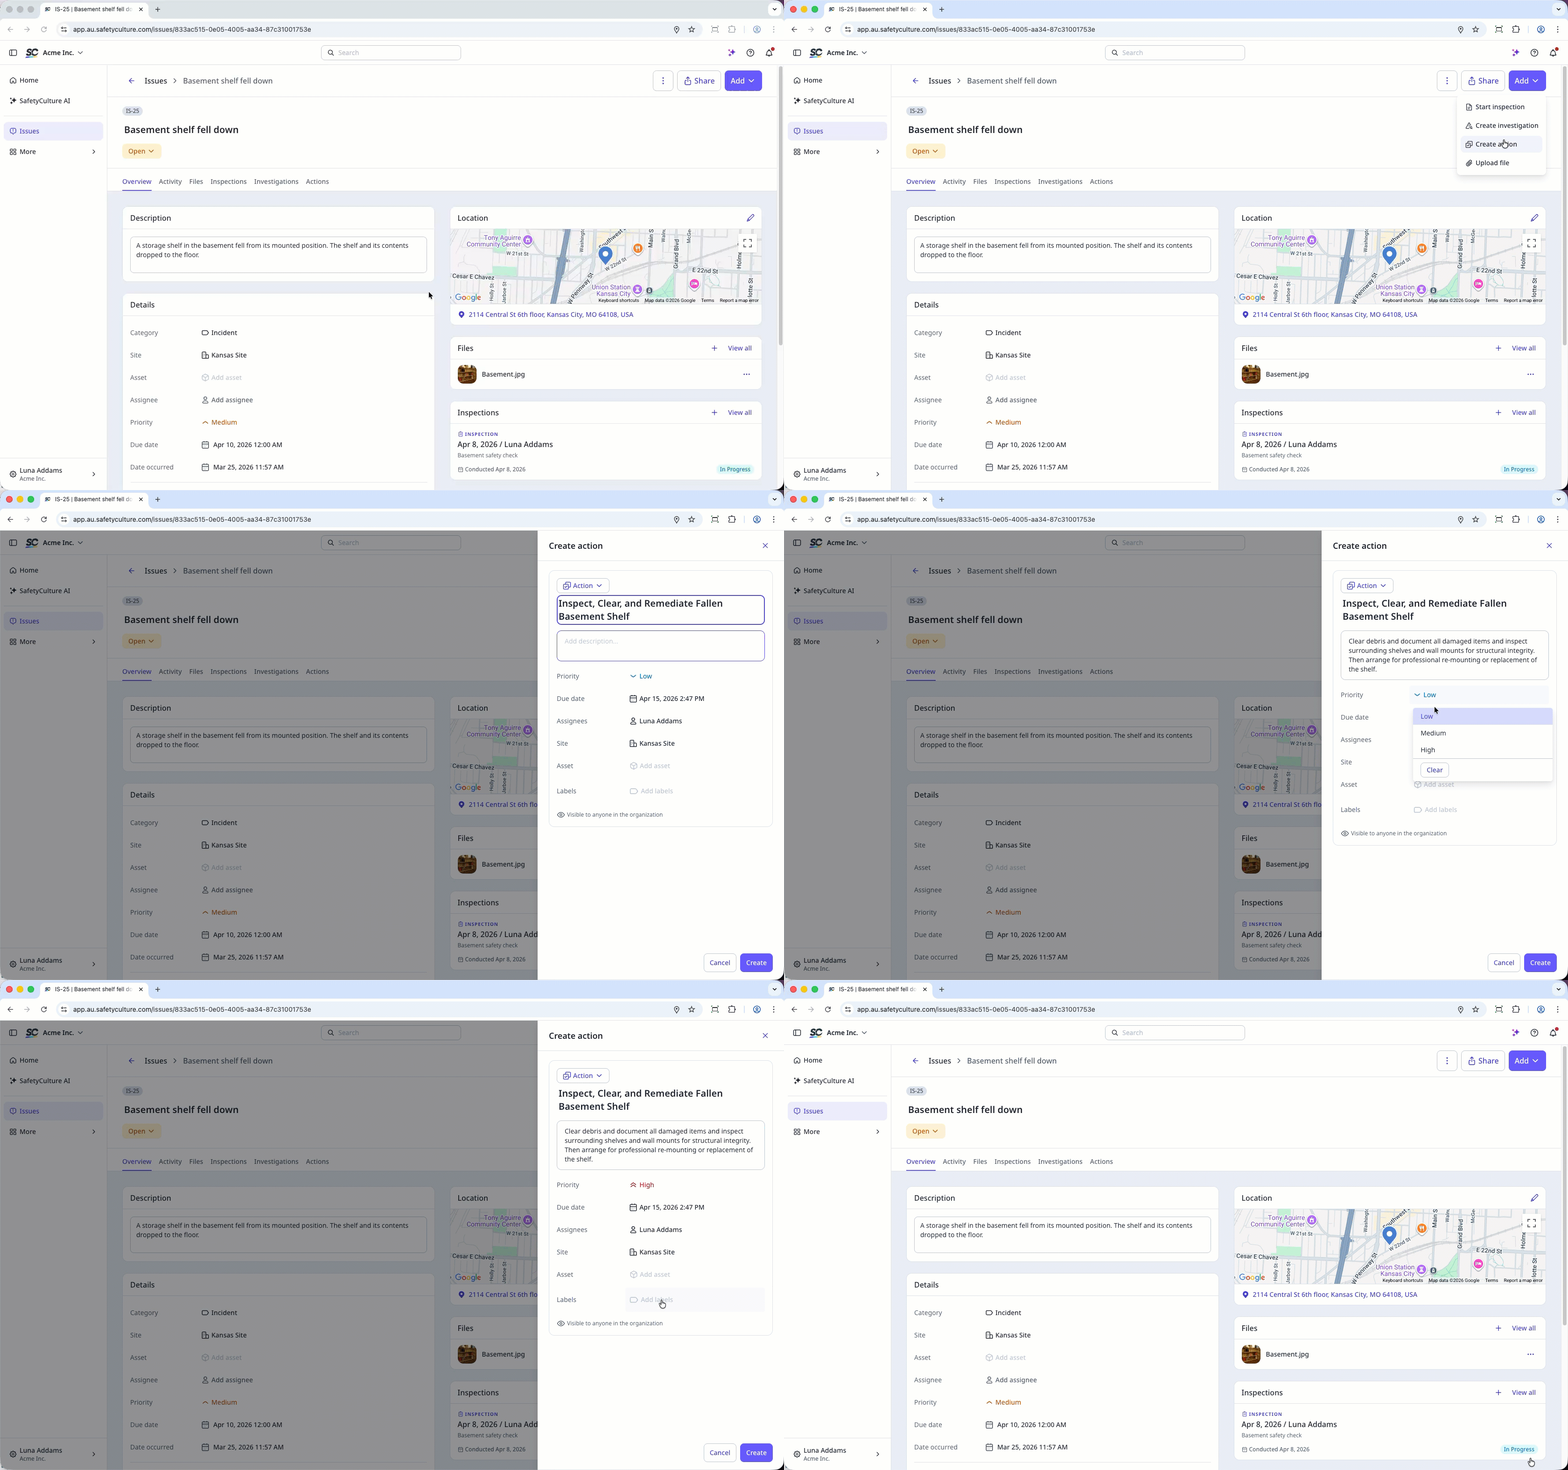
Create an action in an issue
Select Issues in the sidebar or select it in More.
Report an issue or select an existing issue.
Create an action in one of the following ways:
Click Add on the upper-right of the page, and select Create action.
In Overview tab, scroll down to Actions and click on the upper-right.
In Actions tab, click Create action.
In the side panel, select the relevant type and enter the action's title and description. You can also configure action fields such as site, label, and more.
Click Create.
View created actions on the Actions tab.
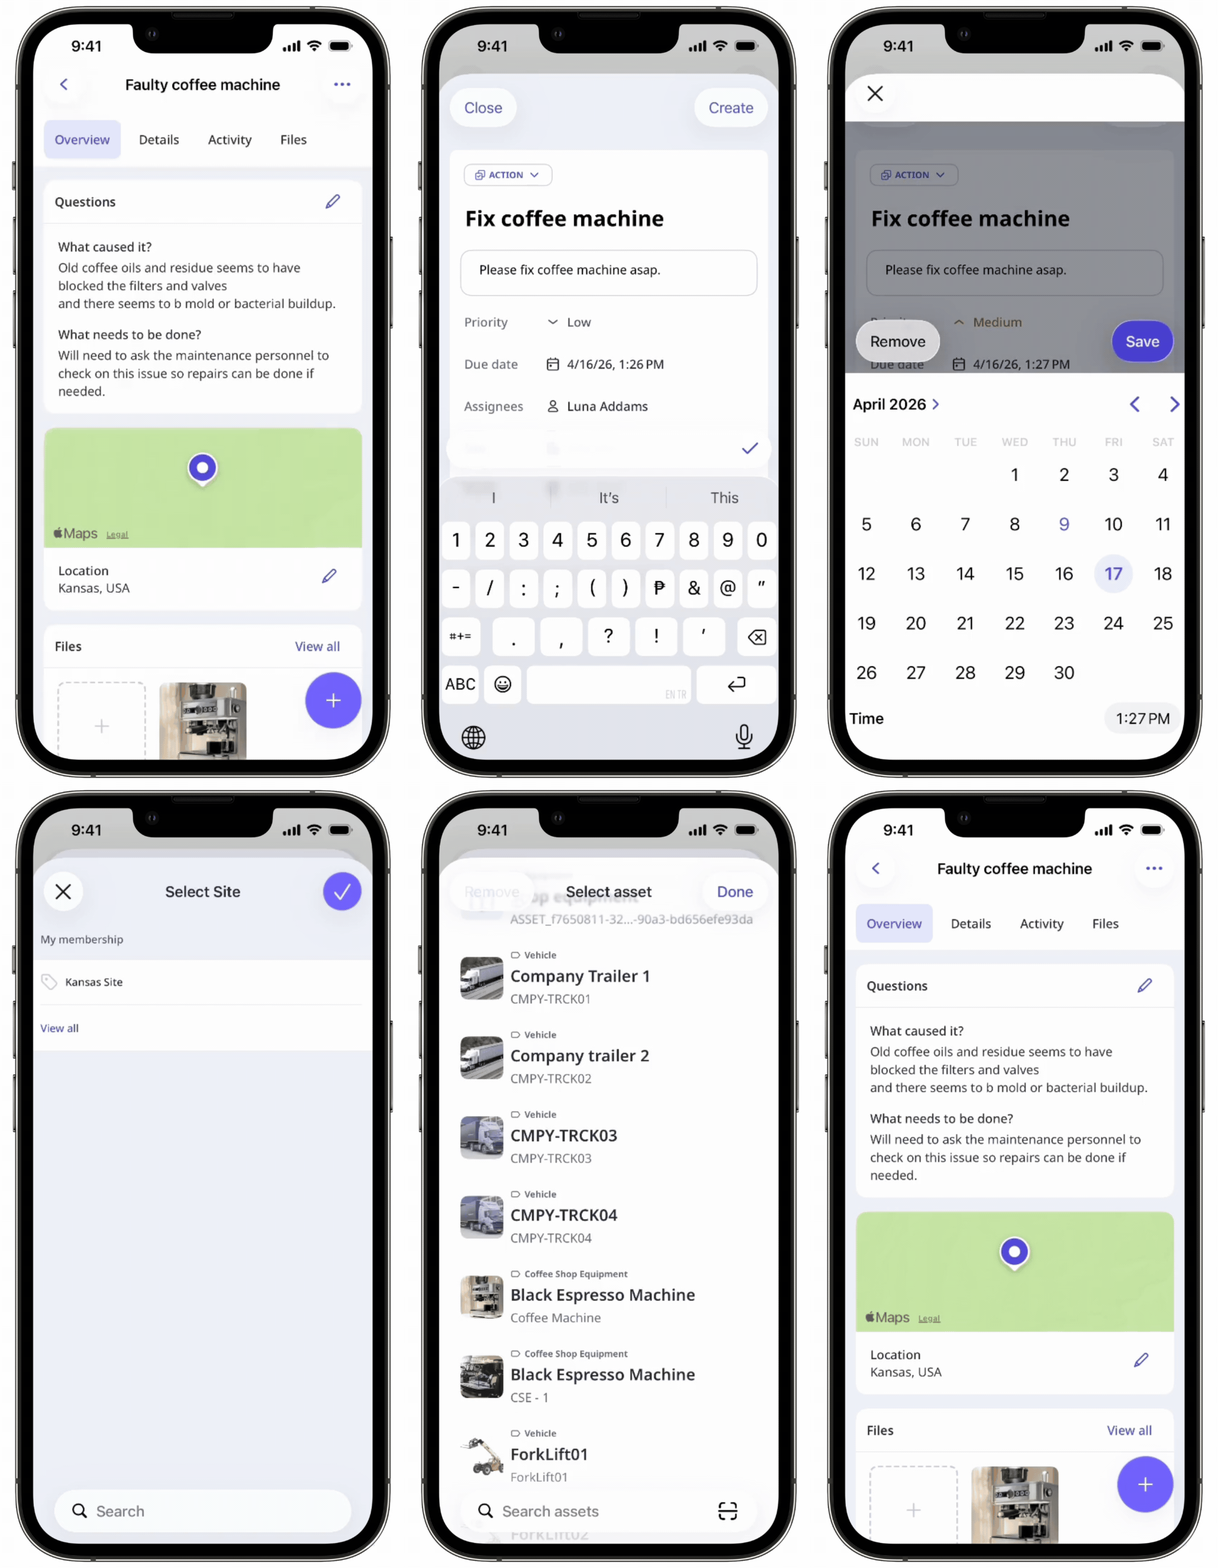
Create a standalone action
Select Actions in the sidebar or select it in More.
Click Create action on the upper-right of the page.
In the side panel, select the type from the dropdown on the upper-left corner and enter the action's title and description. You can also configure action fields such as a site, label, asset, recurrence, and more.
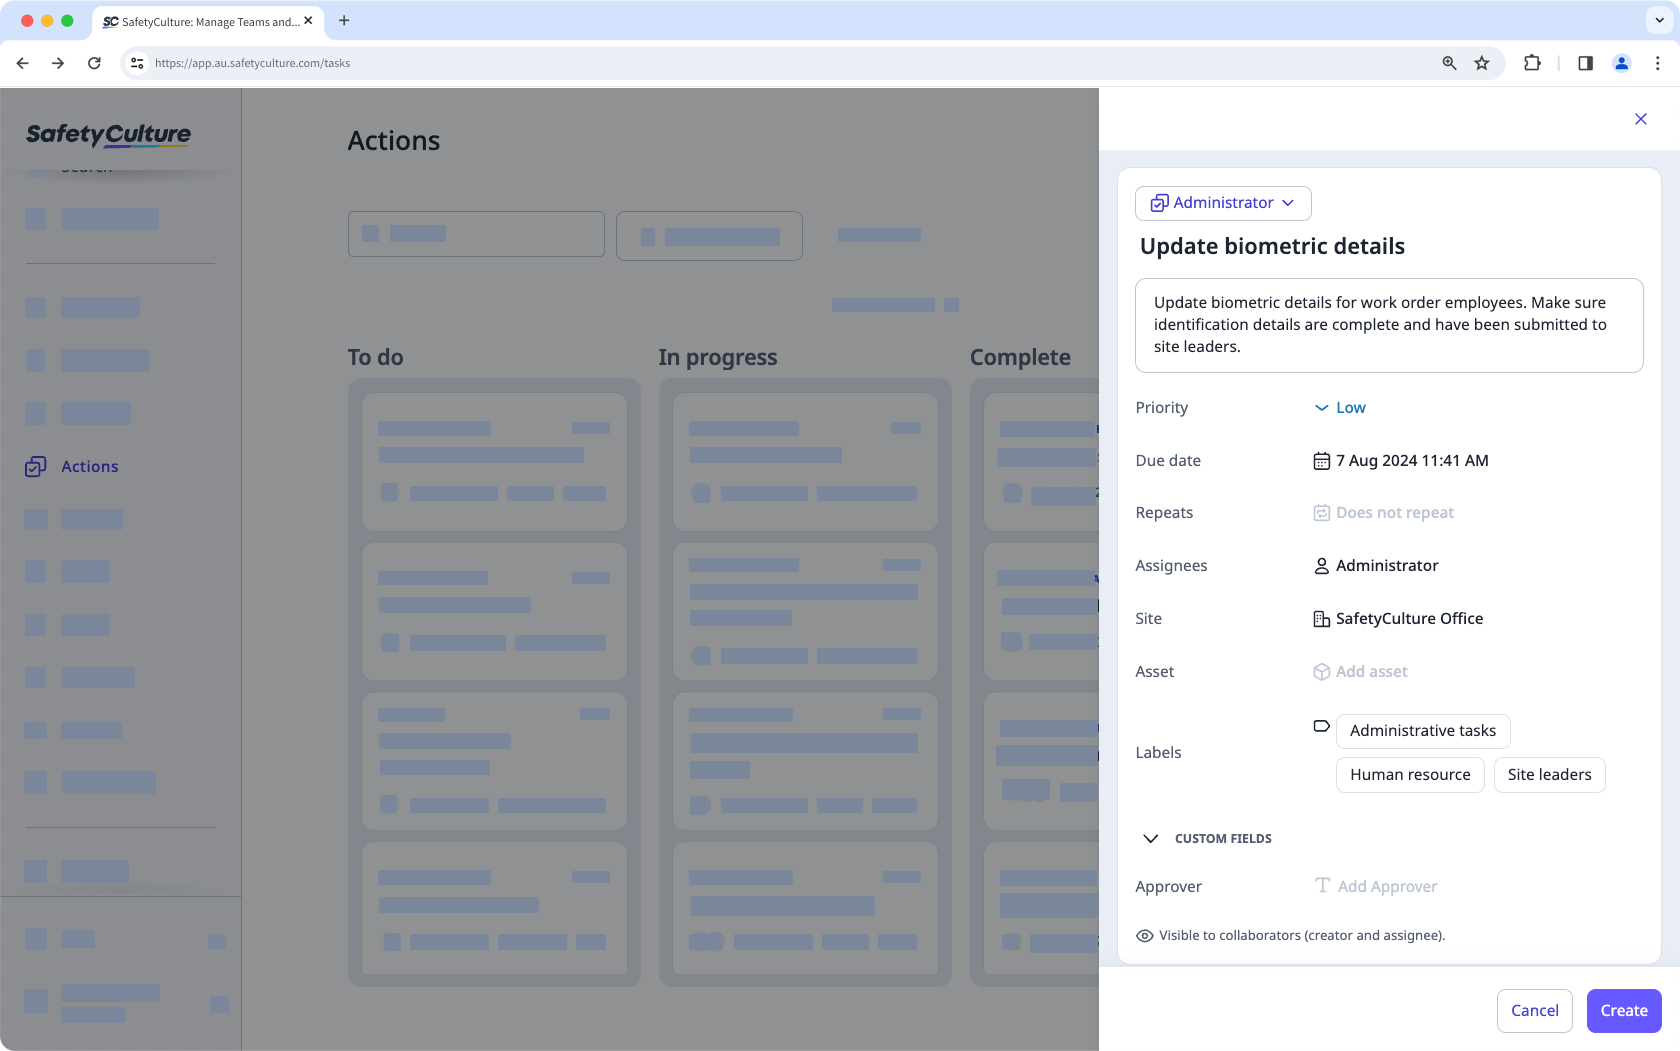
Click Create on the lower-right corner of the page.
In the Activity, you can provide details, comments, and media files for the action.
Click Back on the upper-left corner of the page to return to the action list.
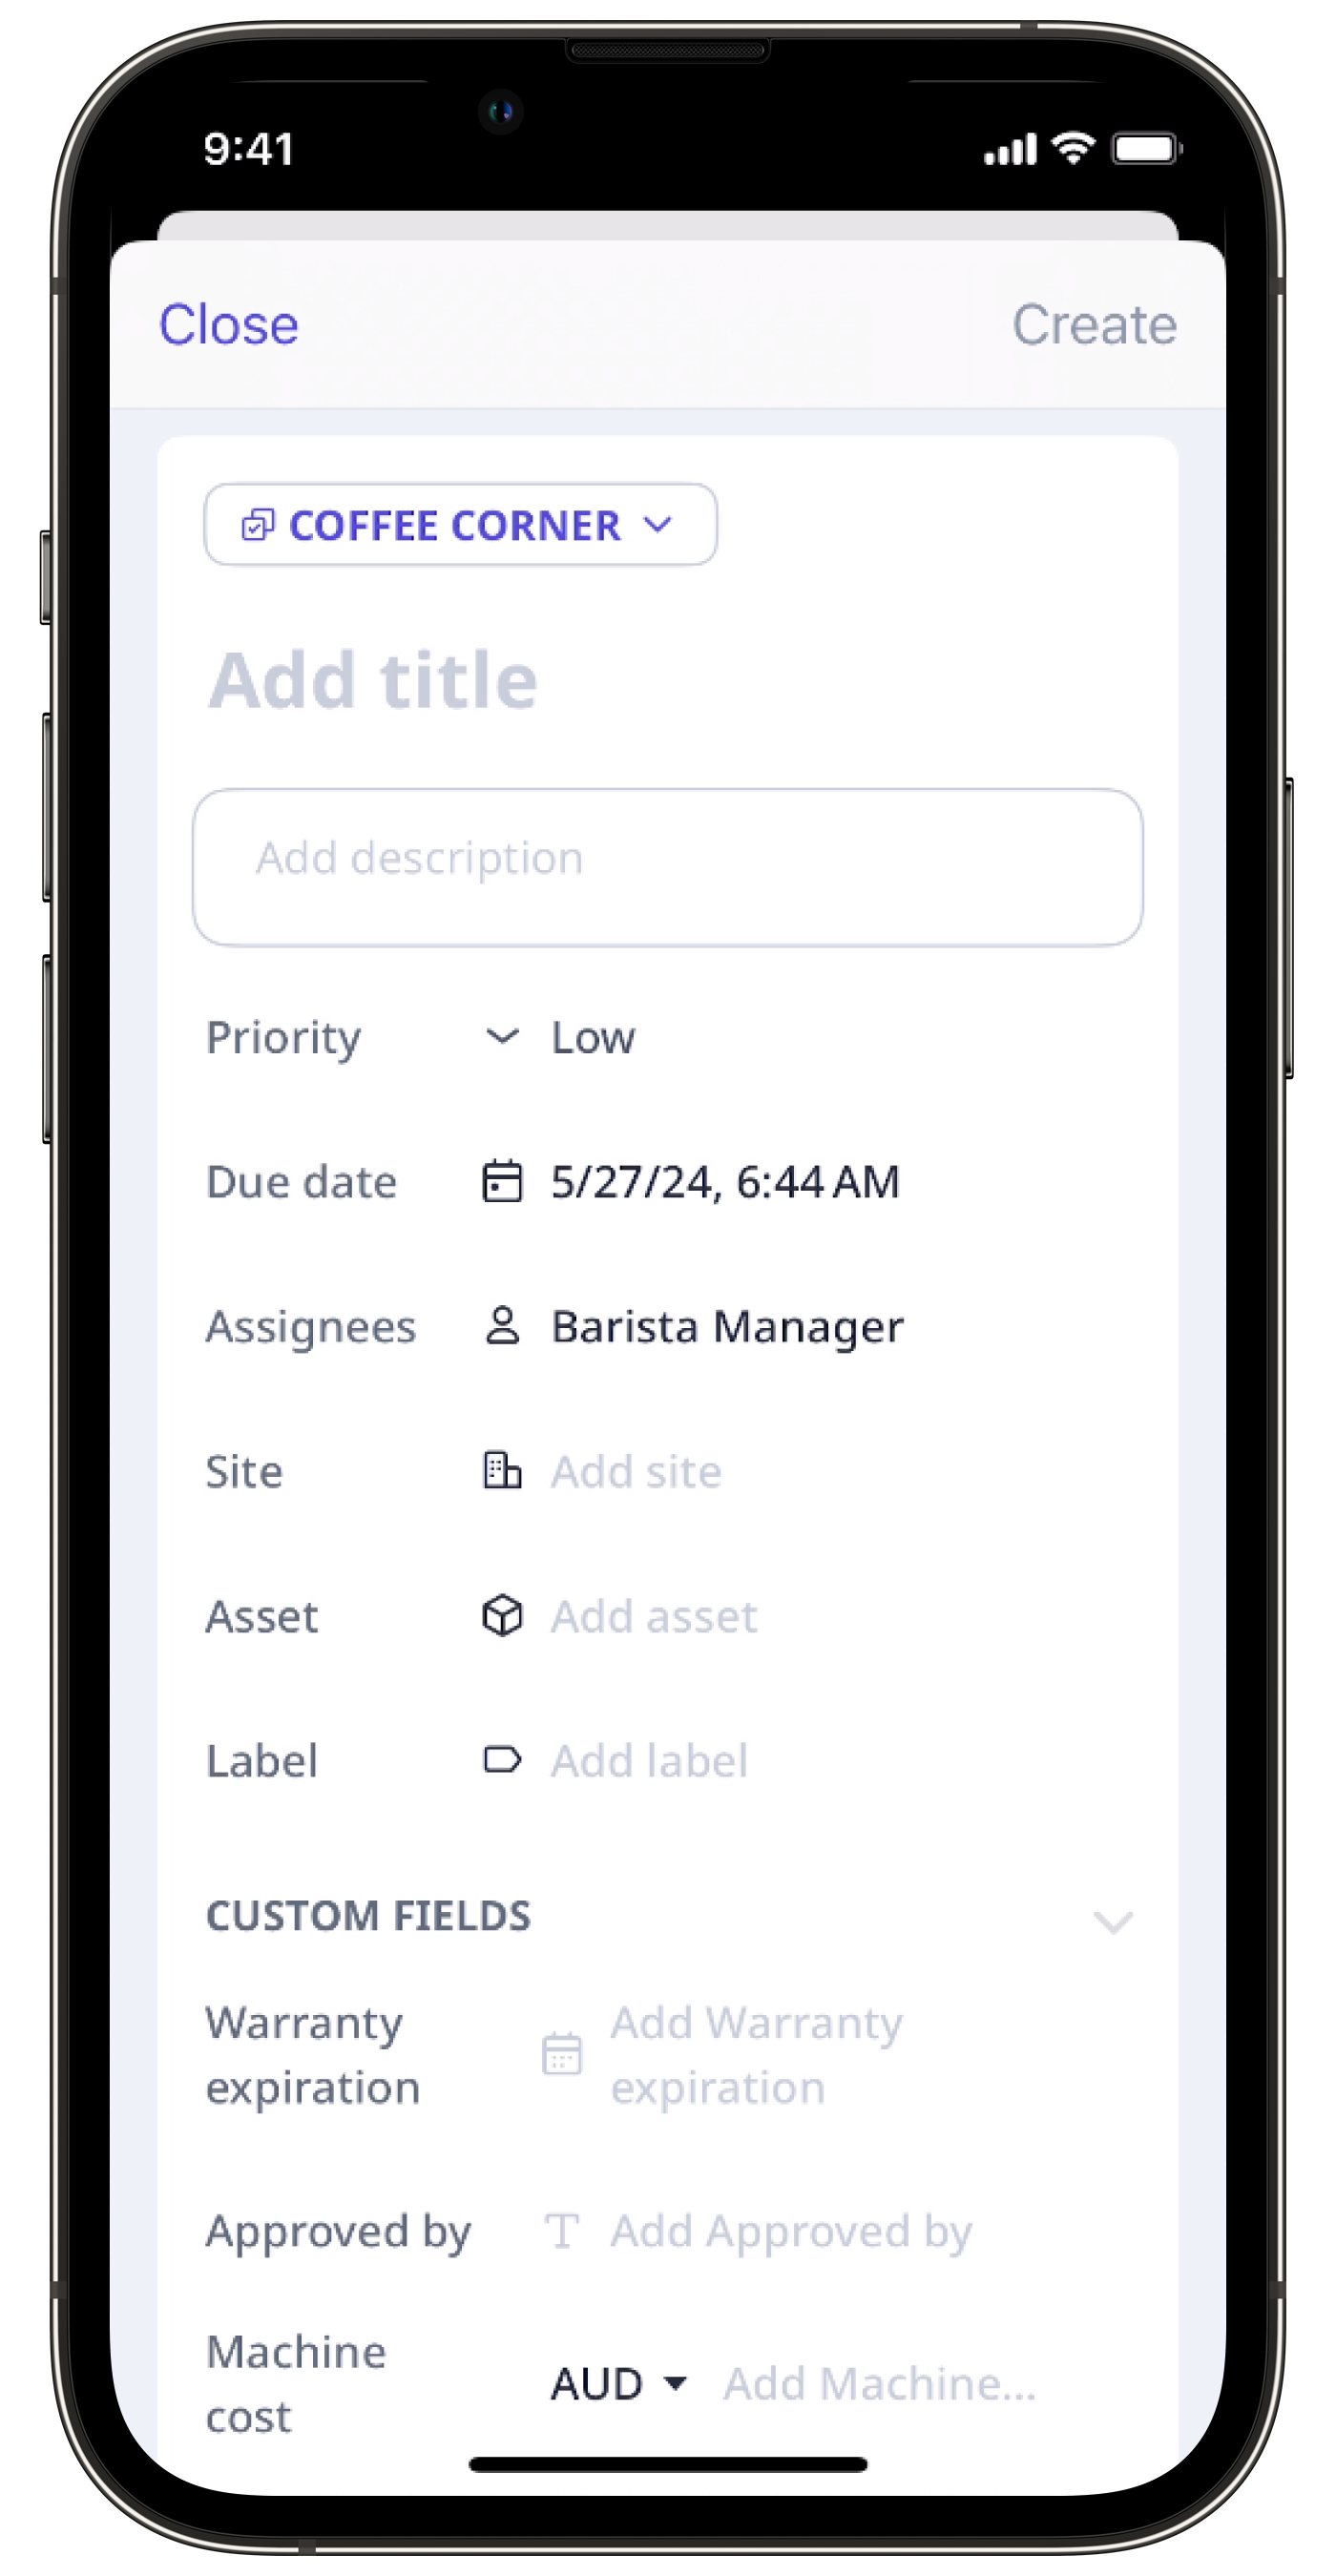
By default, standalone actions can be accessed by all users in your organization. You can configure access for standalone actions from the action settings page.
← Previous article: Trial with pilot users | Next article: Optimize your processes (Part 2) →