What are assets?
Assets are anything your team tracks and maintains, from machinery and vehicles to safety gear, facilities, and workspaces. Centralizing them in one place gives you a clear record of each item's condition and maintenance needs, so nothing is missed.
You can organize your assets by type and site, capture key data through inspections or integrations, connect them to actions and maintenance workflows, and report issues to keep a record of fault history. From tracking location and usage to automating maintenance based on readings, you can see each asset's status, condition, and upcoming needs across your operations.
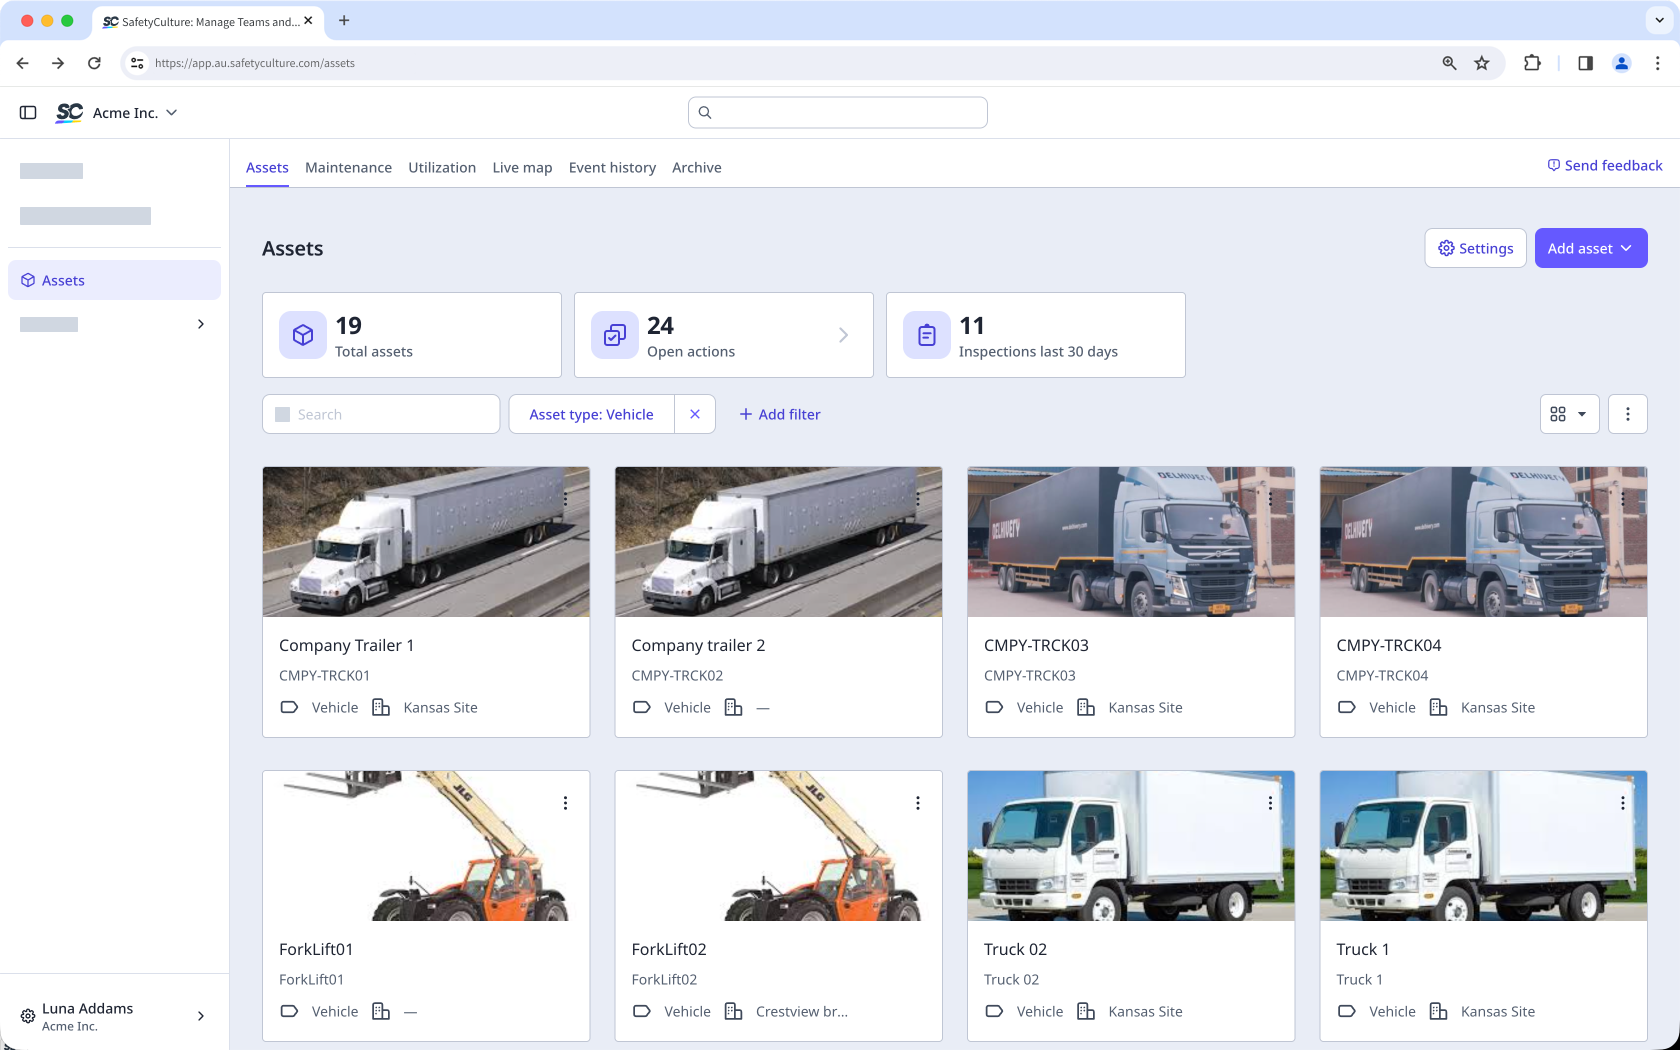
Once you've added assets to your organization, you can add an asset question to your templates and start monitoring your assets.
Add an asset
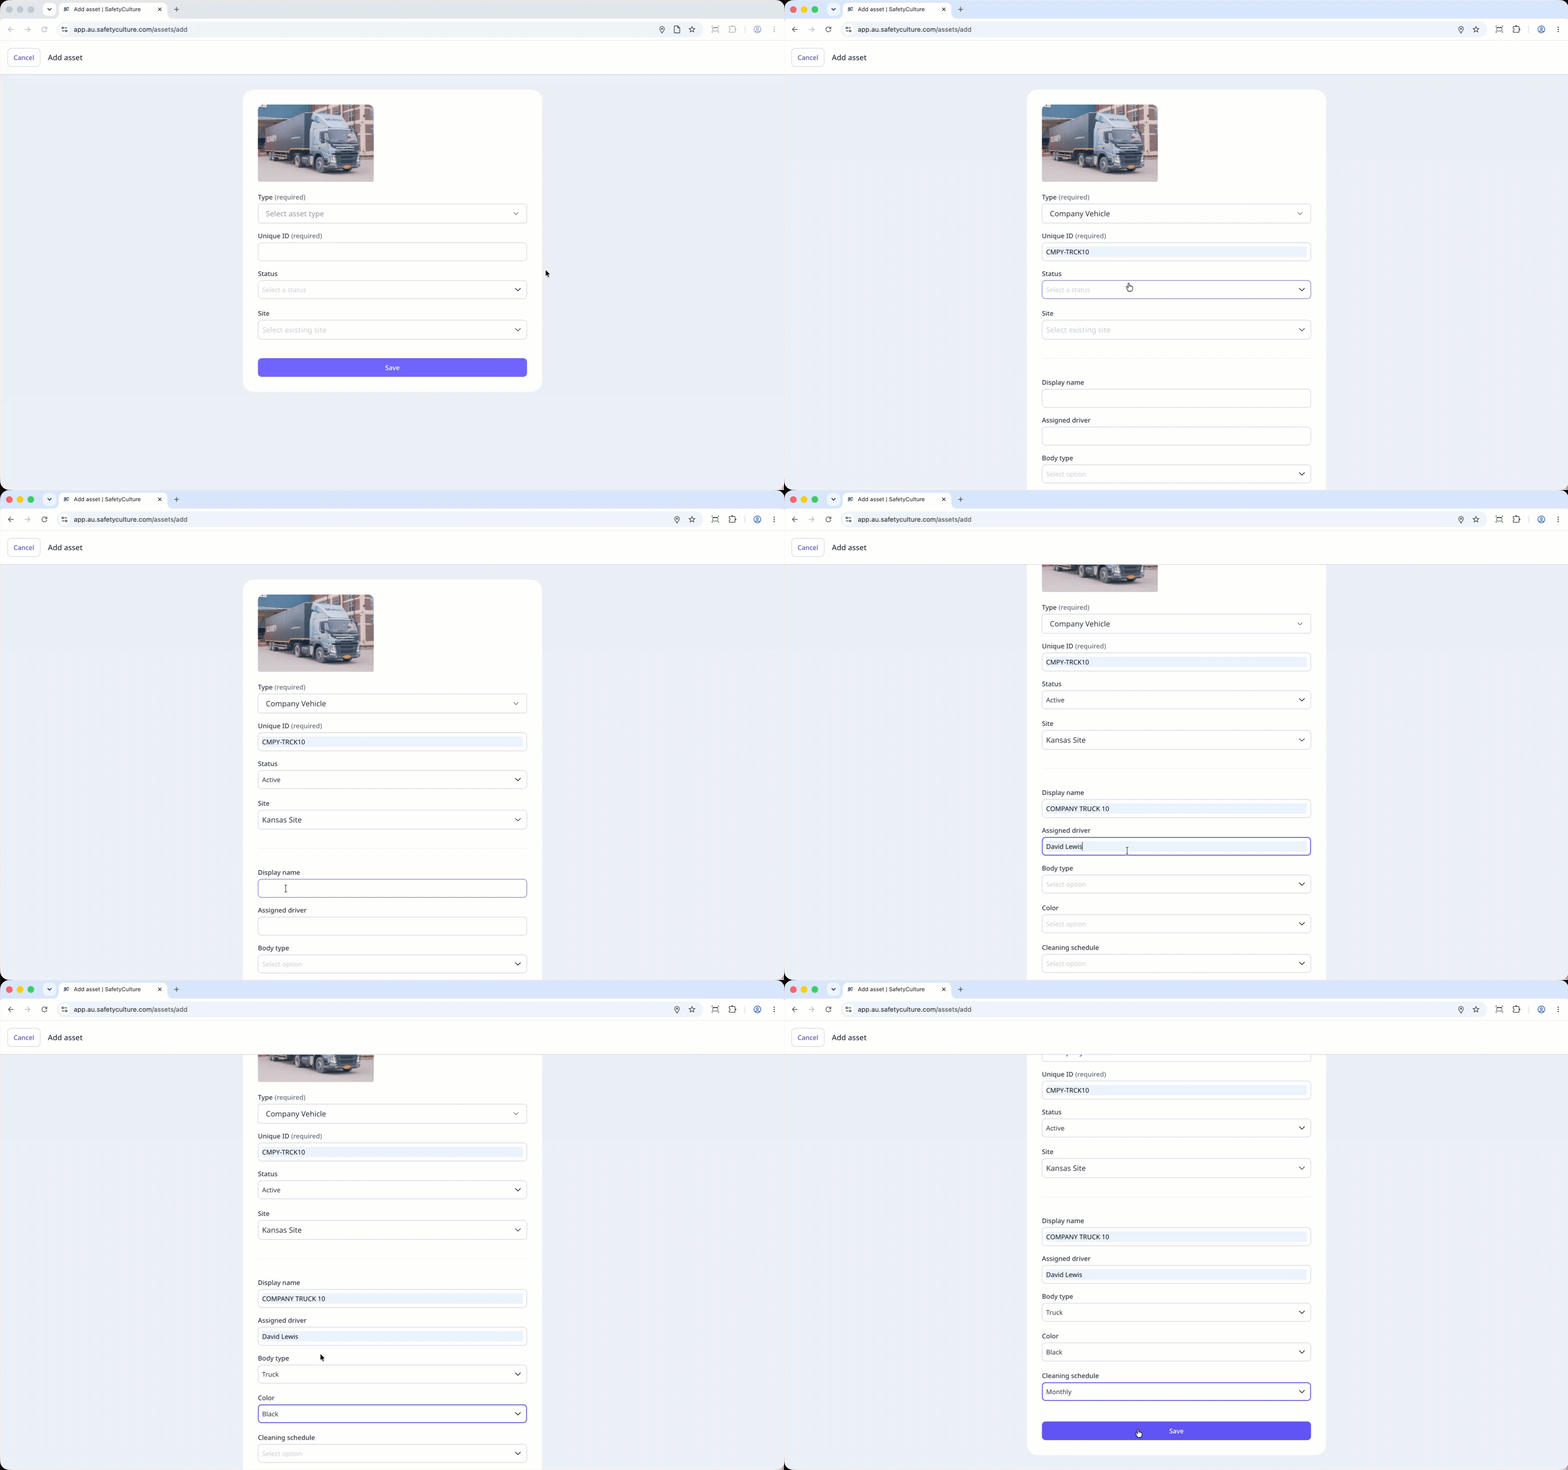
Click Assets from the sidebar or in More.
Click Add asset on the upper-right of the page and select New asset.
On this page, enter the following primary asset details:
Photo: Add an asset profile photo if applicable.
Type: Select the asset type from the predefined list and additional custom fields will appear below. This field is required.
Unique ID: Enter the unique identifier of the new asset in your organization. This field is required.
Status: If applicable, select a status.
Site: If applicable, select a site.
Click Save at the bottom of the page.
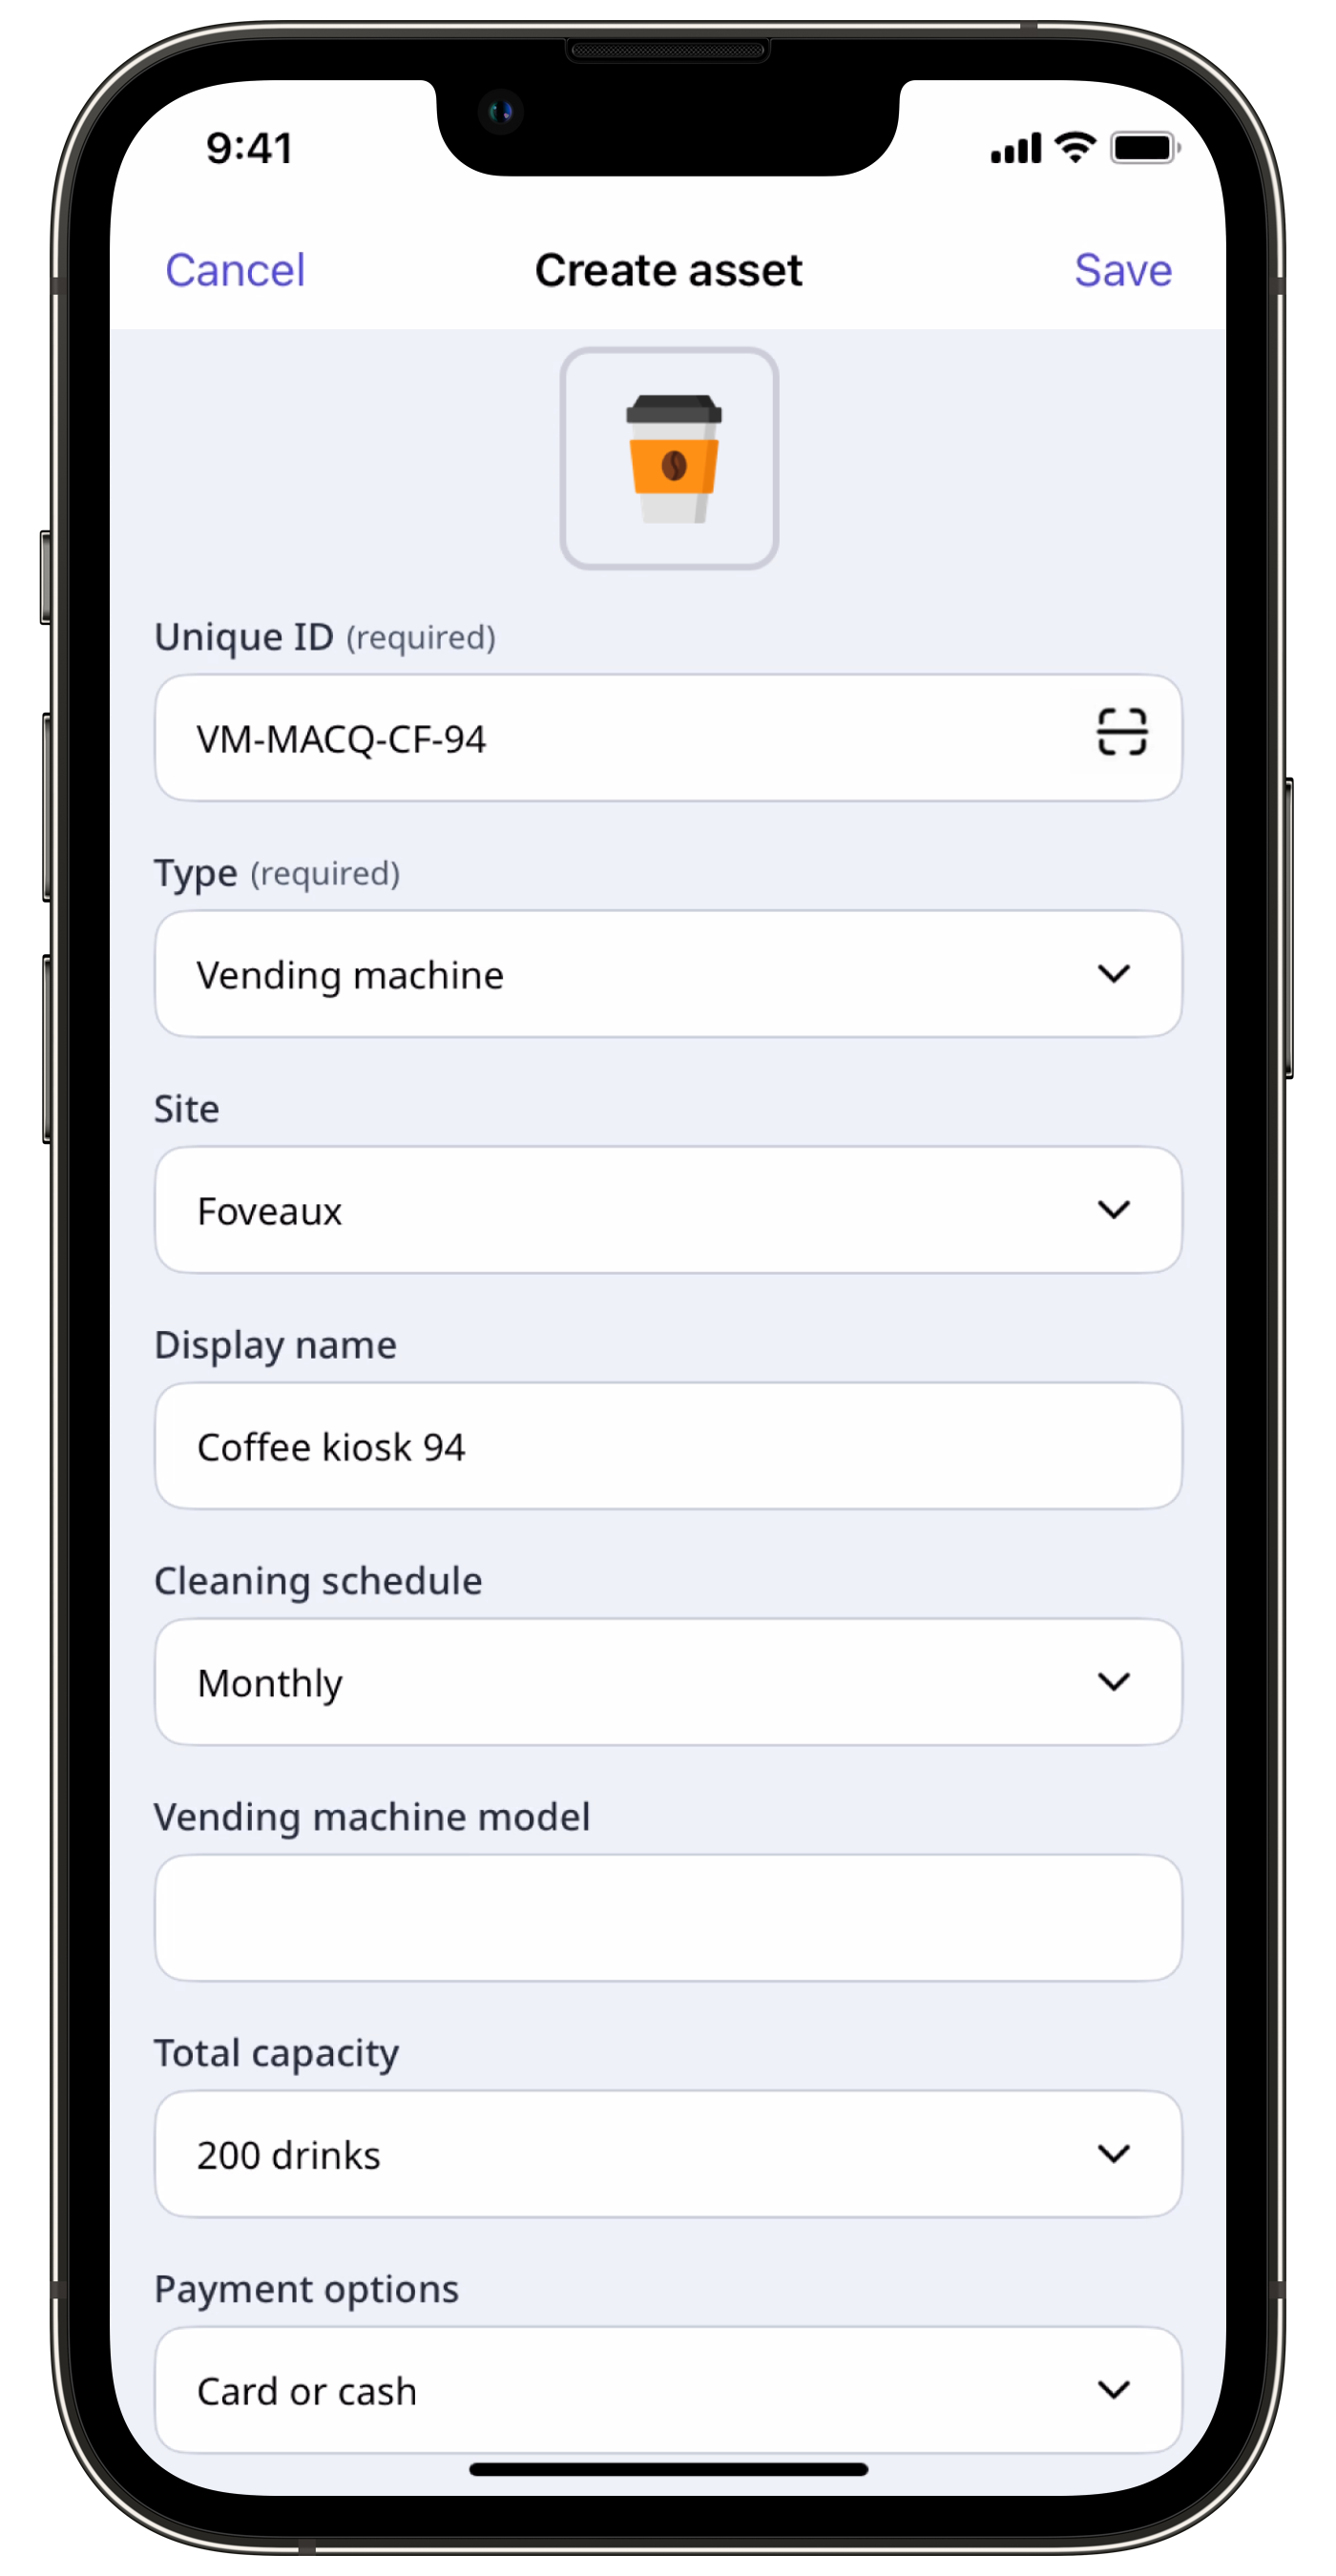
You can only upload or edit assets in bulk using CSV via the web app, one asset type at a time.
Bulk add assets
Select Assets in the sidebar or select it in More.
Click Add asset on the upper-right of the page and select Bulk upload (CSV).
Click Download CSV template at the bottom of the page.
In the pop-up window, select the asset types you want to add assets to. Then, click Done, and click Download.
Open each asset type's CSV template and prepare your assets according to the CSV guide section.
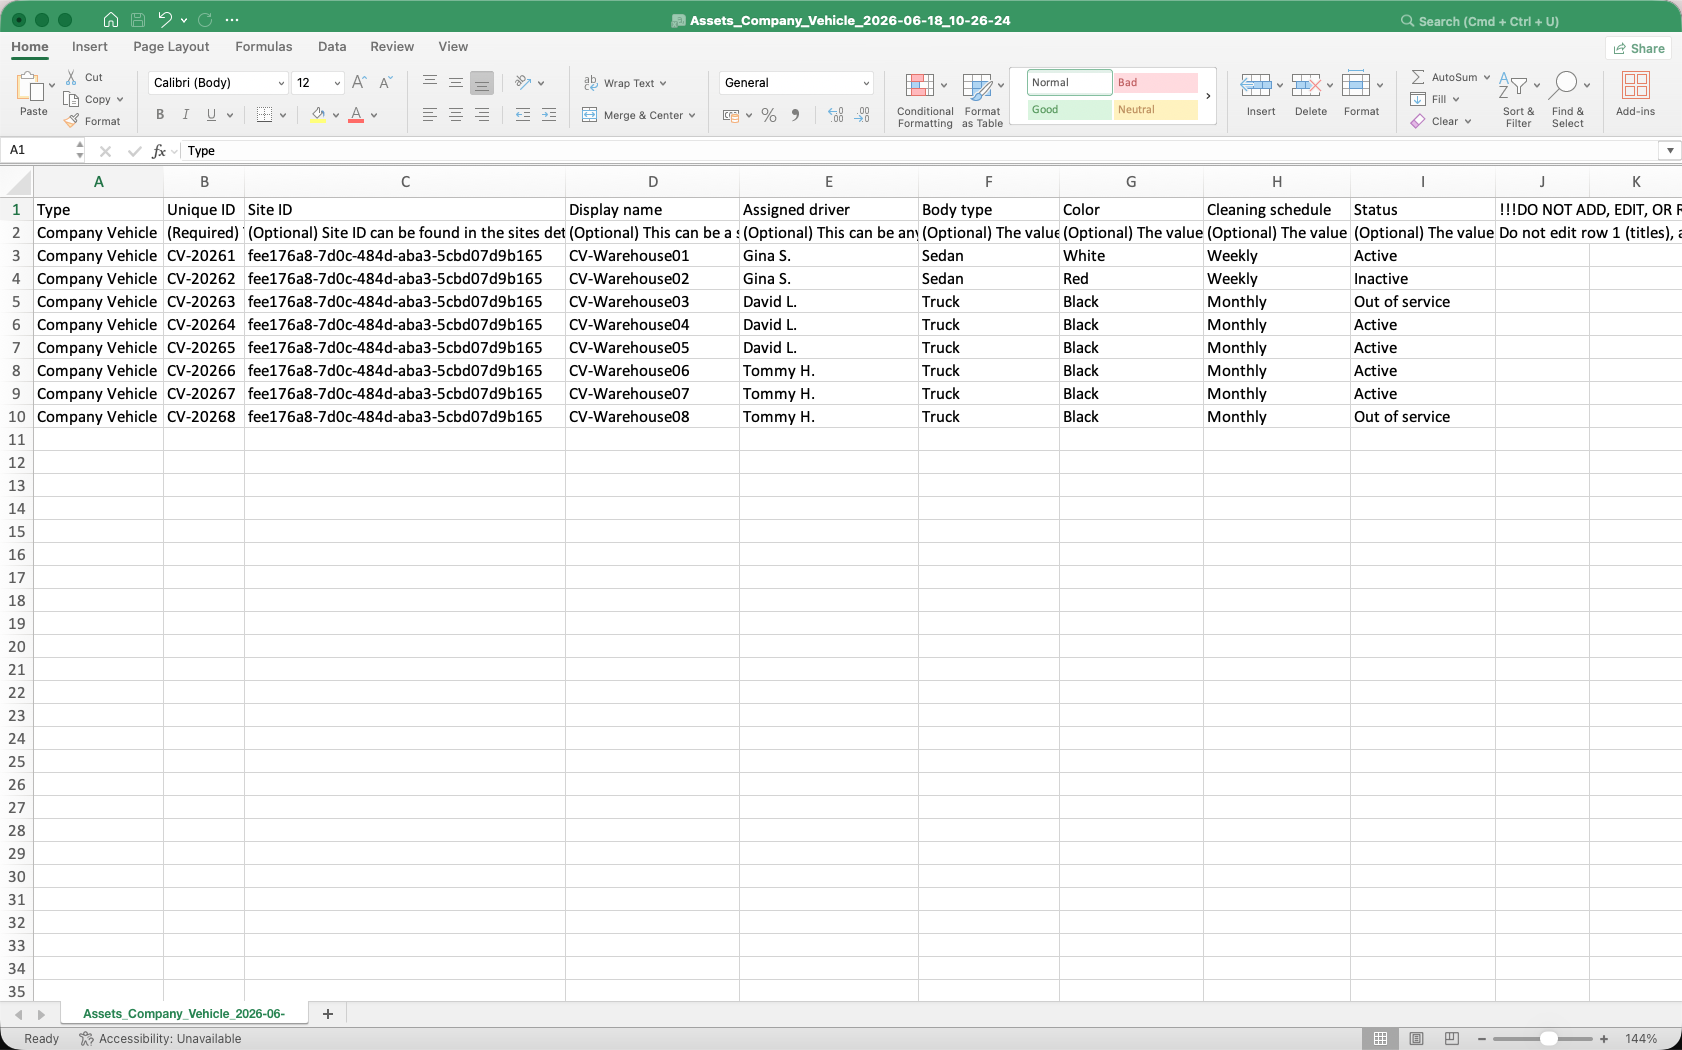
Once you're ready, your CSV should look something like the following example:
In Prepare CSV, click Continue at the bottom of the page.
In Upload CSV, click or drag and drop your files.
If there are any errors, download the error report and resolve them.
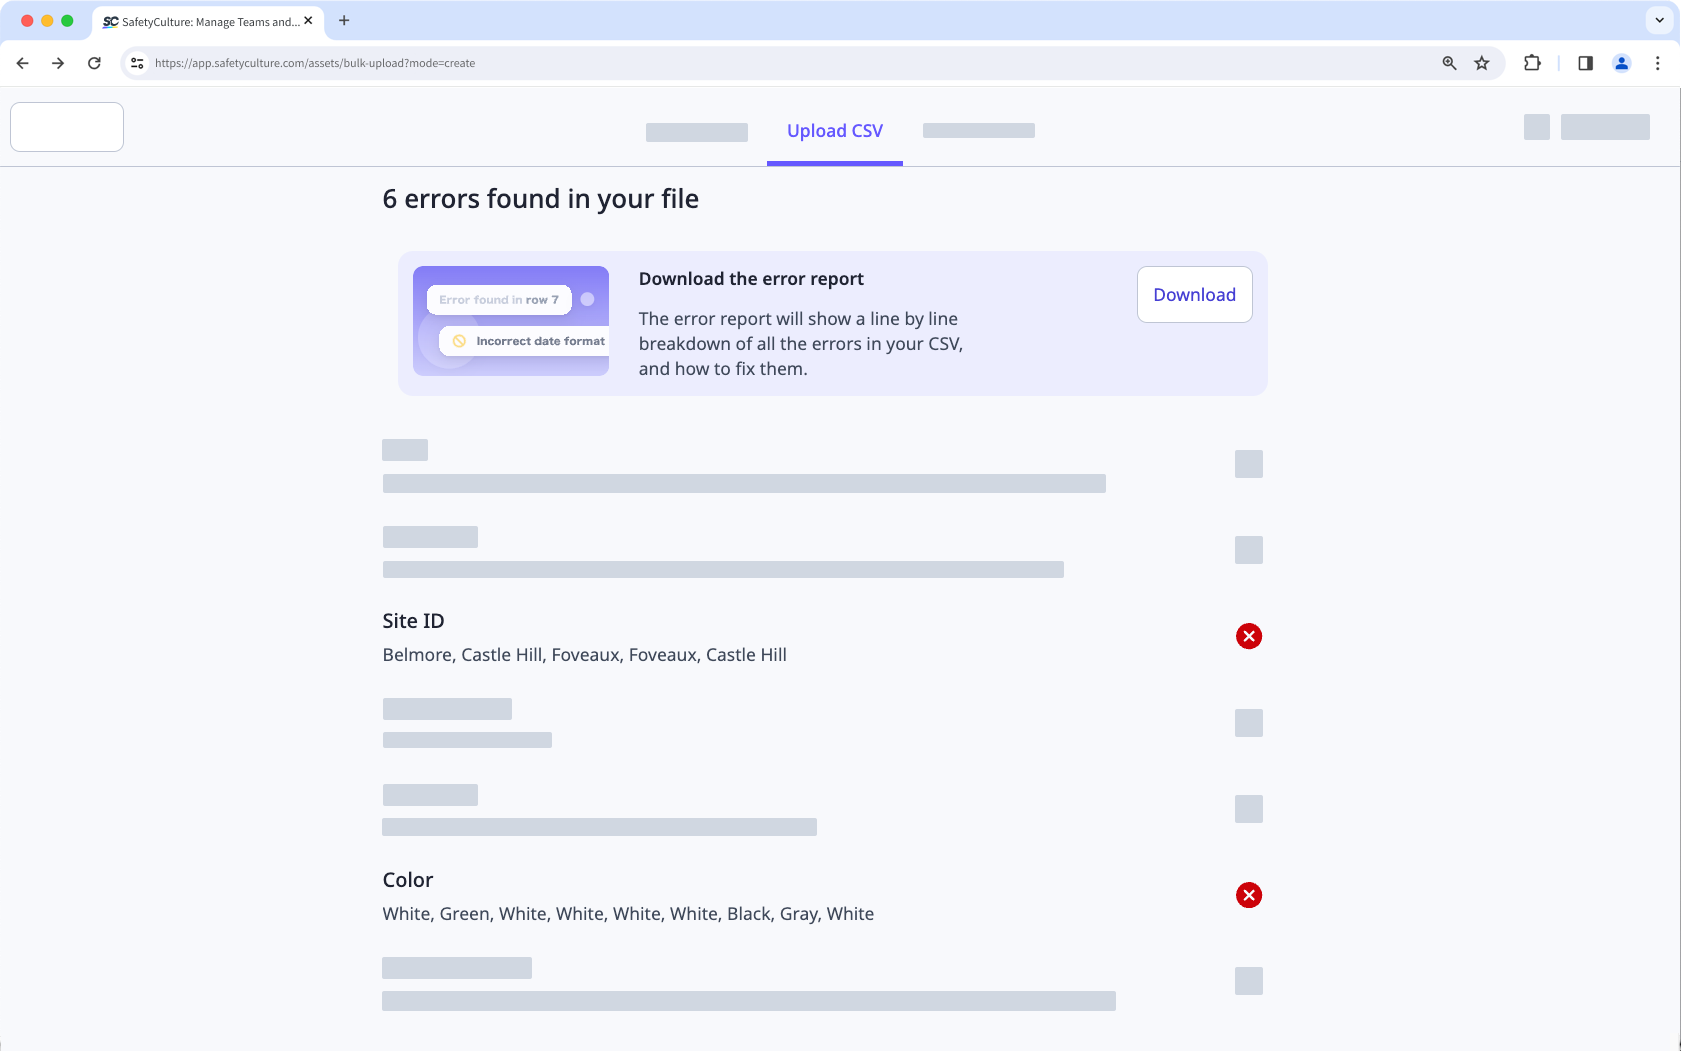
Once you're ready, click Re-upload and upload your new CSV.
Click Continue at the bottom of the page.
In Create assets, click Upload another CSV file to add more assets or click Finish on the lower-right of the page.
CSV guide
Add multiple assets at once using the CSV templates for the asset types you selected. Ensure your columns and values match the required format to prevent errors.
Fields
Each row in your CSV file represents a new asset for your selected asset type. Use this table to understand what each column means, how to complete it, and which fields are required.
The column names must match the CSV template exactly. To add new asset detail fields, update the asset type via the web app first, then download a new template with those fields included.
Field | Description |
|---|---|
Type (Required) | Enter the asset type selected when you downloaded the CSV template. This value must match an existing asset type in your organization. Each CSV should only include assets of that type. |
Unique ID (Required) | Enter a unique identifier for each asset in your own organization. This value must be different for every asset. |
Site ID | Enter the site ID where the asset should be assigned. Site IDs are unique strings and differ from site names. For example, a site "Belmore" might have the site ID "39c2f508-e0c9-420d-b35f-31fae5f80542". You can find the site ID in the site profile or by downloading your organization's site list. |
Display name | Enter the asset name as it's known to users in your organization. |
Detail fields | Detail fields are customizable, optional, and dependent on what you have set up in an asset's type. Each one appears as a separate column in the CSV. You can create detail fields in the following formats: • Text: This field is for free-text entries such as operator names, plate numbers, or any other custom fields. • Date: Enter dates in the same format as your profile's date settings. For example, if your profile's date format is "yyyy-MM-dd", you should format your dates similarly, such as "2021-02-21". Depending on the app you use to prepare your CSV file, dates might be formatted automatically. • Currency: Enter currencies based on the ISO 4217 code (opens in new tab), which excludes any commas or special characters. For example, "$1,200.95" in U.S. dollars should be entered as "1200.95 USD". • Single select: Enter one of the predefined options you have set for that field. |
Status group | Enter the name of the status group assigned to this asset type. The status group determines which statuses are available for the asset. |
Status | Enter one of the predefined statuses for this asset type. The status group you entered determines the available statuses. For example, if the status group includes "Active", "Inactive", and "Under maintenance", enter one of those values. |
Troubleshooting tips
Before uploading your CSV file, check for incorrect formatting, missing values, and data mismatches. Use this list to understand common errors and how to fix them.
Duplicate unique ID: Each asset must have a unique ID. Make sure no two assets share the same unique ID.
Missing asset type: Every asset must include a type that matches the asset type selected when downloading the CSV template.
Invalid site ID provided: Site IDs are unique strings used to identify lowest site levels in your organization. Do not enter the site name in place of a site ID. If you plan to assign assets to sites, make sure to get the correct site IDs before uploading your CSV.
Incorrectlyformatteddates: Make sure each date matches your profile's date format.
Incorrectlyformattedcurrencyvalues: Each currency must be based on the ISO 4217 code (opens in new tab), which doesn't have commas or special characters.
Invalid select option name: Make sure the value you enter matches one of the predefined options for the single select field.
Access required: You may not have access to the asset. Check your access level or contact your administrator.
← Previous article: Optimize your processes (Part 2) | Next article: Optimize your processes (Part 4) →