- Using SafetyCulture
- Issues
- What are issue profiles?
What are issue profiles?
Learn more about the features and benefits of the issue profile.What are issue profiles?
Every issue profile is your own incident management space, which your team can use to collaborate on the daily challenges of your business. As a start, you can choose to review an issue’s summary, any attached media, or just the activity log. Then you can modify most of the issue details in the profile, download a PDF copy, view the issue report, and even share it with your team or externally. This ensures you can readily document, analyze, and manage issues on the go.
Exploring issue profiles
Issue details
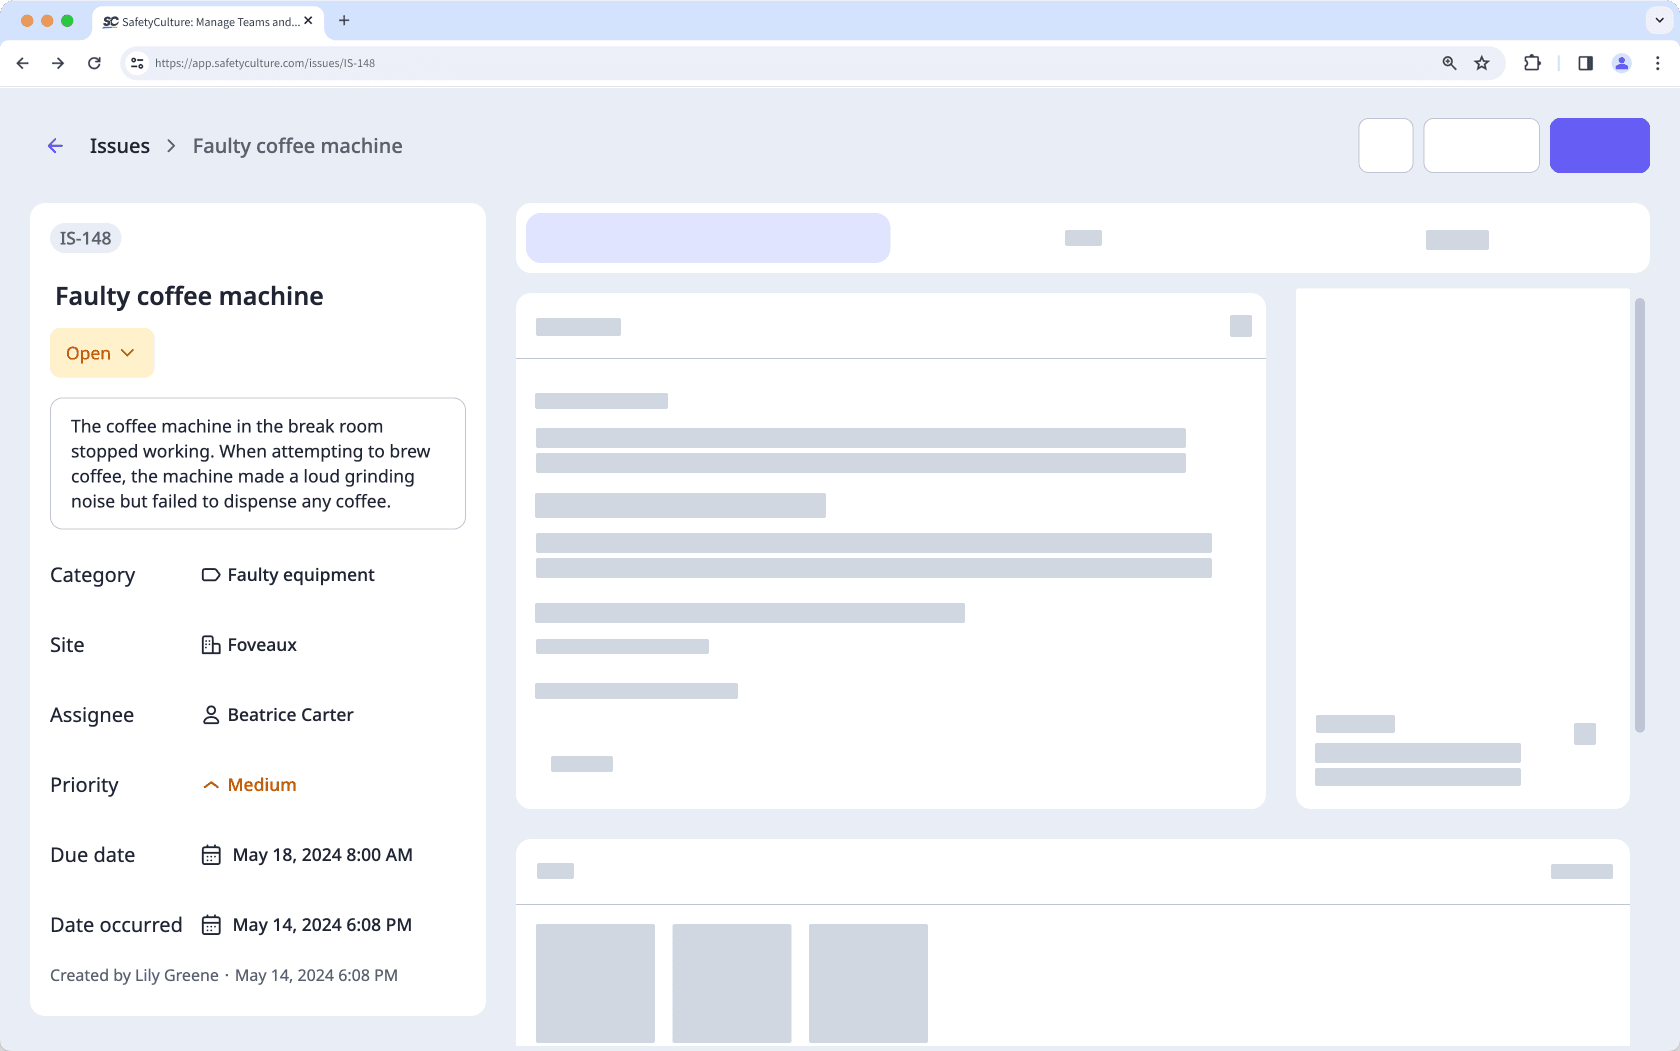
If you're after the big picture, the left side of the issue profile summarizes the key details you need to know from the start. To provide your team with as much detail as possible, you can fill out the following fields. Depending on the issue category, some fields may be hidden or required.

Field | Description |
|---|---|
Unique ID | Issue unique IDs are auto-generated and every issue is assigned one. You can use them to easily search through your issue list. |
Title (required) | Enter an issue title. Maximum of 255 characters. |
Status | By default, new issues are in “Open” status. Once the issue has been addressed, you can change the status to “Resolved” in the issue profile. This field is not customizable. |
Description | Enter a description of the issue. Maximum of 500 characters. |
Category | Select an issue category. Updating an issue category does not trigger new issue email notifications or Critical Alert notifications. To receive notifications, enable your account notifications. |
Site | Select a site for the issue. |
Assignee | You can assign an issue to a new user or to anyone in your organization. By default, assignees receive email and push notifications unless they update their preferences. Assigning issues to yourself doesn't trigger notifications. You can also edit the assignee for multiple issues in bulk. |
Priority | Select the level of priority for this issue. You can clear this field or choose between "Low priority", "Medium priority", and "High priority". This field is not customizable. |
Due date | Select the issue's due date and time. |
Date occurred | Select the date and time the issue occurred. |
Created by | This shows who created the issue. |
Created date | This shows when the issue was created. |
Answer custom questions
Answer custom questions to help your team assess the severity and impact of an issue. In the Overview tab, you can update answers to custom questions to provide more information and ensure an issue is resolved quickly.
View and add files
Visual aids enhance communication among team members, stakeholders, and external parties involved in resolving an issue. Consider adding photos, documents, and even videos to record conditions and specifics that may be difficult to capture using descriptions alone.
Start inspections and create actions
After you report an issue, you can conduct an inspection to gather more data or create a related task for someone in your team to handle.
View linked inspections and actions
When you start an inspection or create an action from an issue, they’re linked automatically to help you keep track of everything in one place. You can view all linked inspections and actions directly from the issue profile, giving your team full visibility into inspection findings and the progress of tasks assigned to your team to help resolve the issue.

View the issue timeline
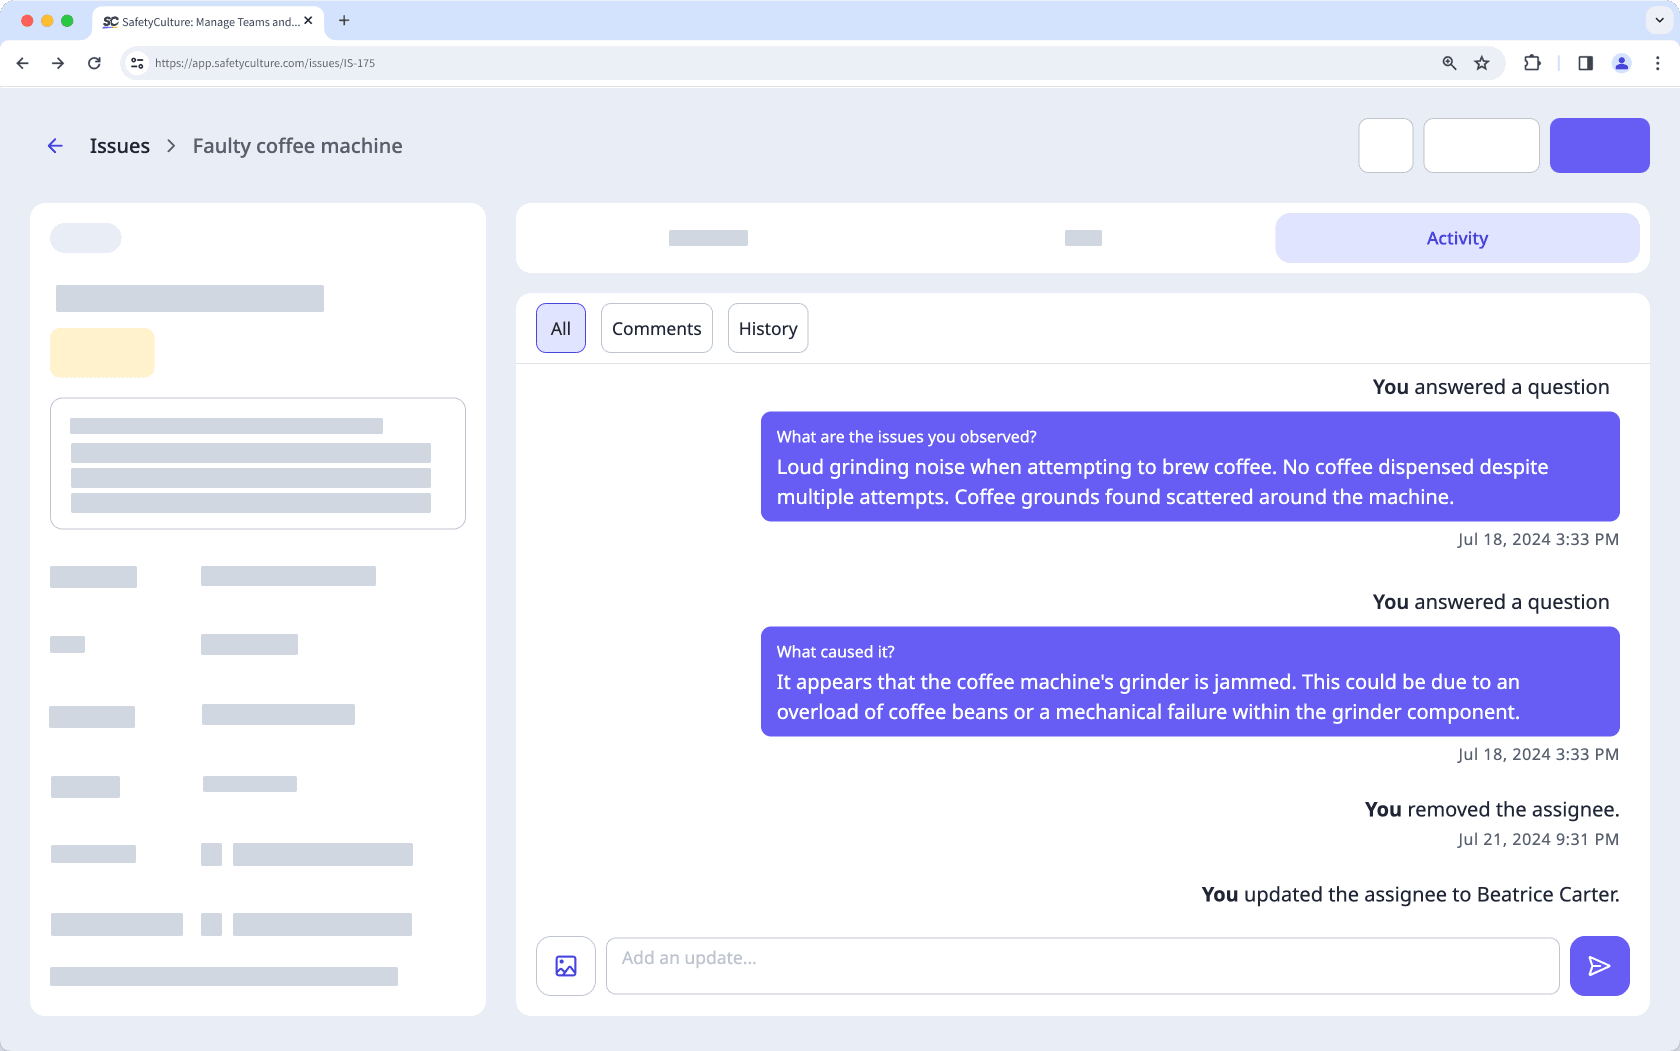
You can keep up to speed with all the updates associated with an issue in the Activity tab, which stores your issue timeline. You'll see who has access to the issue, who has started or completed an inspection, and what comments or media have been added by your team members.

Share issues
Often, you will want to send an issue to a team member or possibly even someone outside of your organization to help resolve it promptly. This makes it easy to refer to the issue when discussing it with stakeholders. You can do these by notifying your team directly or sharing a public link with external parties.

View and download issue reports
Issue reports contain all the relevant details for each issue, making them easy to share with stakeholders. You can generate a public link for real-time viewing or export it as a PDF for your team's records.

Was this page helpful?
Thank you for letting us know.