How do course translations work?
We understand that for a global organization, your staff might come from different backgrounds and speak different languages. With SafetyCulture, you can localize the training experience by adding translations to your courses, so your team members can take training in a language they're comfortable with.
Take a look at this example of a course being started in English and Spanish using the same content:
What you'll need
Add a course translation with AI
Select Training in the sidebar or select it in More.
If you're on the "Learn" page, click Content at the top of the page and select Courses.
Hover your cursor over the course and click View or Edit.
If you're editing an existing course and it's published, click Edit on the upper-right of the page.
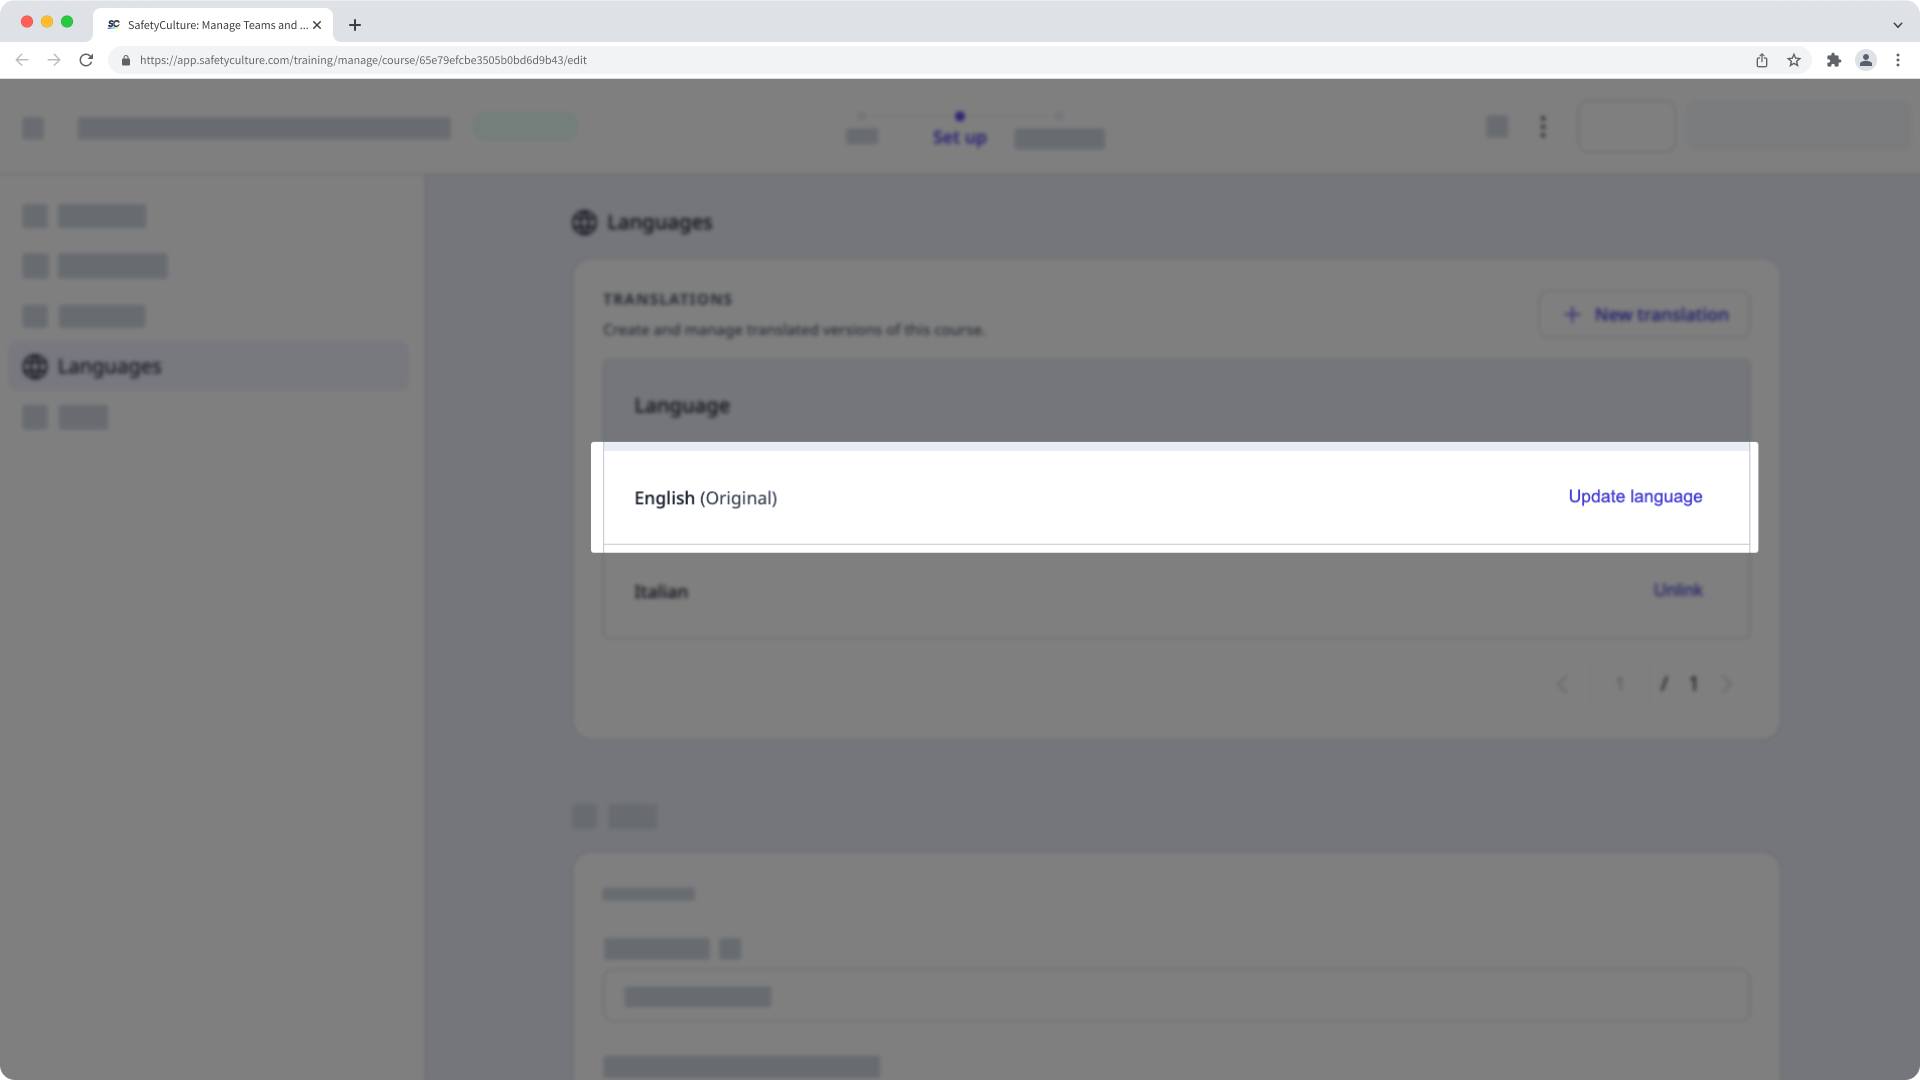
Select Set up at the top of the page and select Languages on the left-hand side.
In this section, ensure the course's original language matches the first row of the "Translations" table. If not, click Update language and update the language accordingly.
Click New translation.
In the pop-up window, select Automatic and click Next.
In the "Translate this course into..." field, search and select the language you want to translate to.
Check the box to turn "Use learners’ app language setting" on to automatically deliver the selected translation to users whose devices are set to that language.
Click Translate.
Once the translation is complete, click Close to translate your course into another language or click View to go to the translated course and publish it.
If you're translating your course using AI, we recommend that you review the content after the translation to make sure it's correct and accurately reflects your topic.
For any customers on the legacy experience, you can contact support or reach out to your Customer Success Manager to try out the new experience.
Add a course translation manually
If you’re using the new translation experience, make sure to switch to the original language before you can publish a course.
How are translated courses made available to users?
Depending on the platform you're on, the matching translated version will be shown to you instead of the original course by matching the following preferences:
Web app (web browser): The web browser's preferred language setting will be checked first. If no translated versions match the preference, your profile language settings will be checked instead.
Mobile app (Android device): The Android device's preferred language or region (opens in new tab) will be checked first. If no translated versions match the preference, the app-specific language (opens in new tab) for SafetyCulture will be checked instead.
Mobile app (iOS device): The iOS device's preferred language or region (opens in new tab) will be checked.
If no translated versions match your browser or device language preference, the original course will be shown as the fallback.
In the new translation experience, you can select your preferred language before starting each course. If you were to switch languages halfway through completing the course, all progress will be retained.
Supported languages
Afrikaans |
Albanian |
Amharic |
Arabic |
Armenian |
Assamese |
Aymara |
Azerbaijani |
Bambara |
Basque |
Belarusian |
Bengali |
Bhojpuri |
Bosnian |
Bulgarian |
Catalan |
Cebuano |
Chichewa |
Chinese, Simplified |
Chinese, Traditional |
Cantonese |
Corsican |
Croatian |
Czech |
Danish |
Dogri |
Dhivehi |
Dutch |
English (Australia) |
Esperanto |
Estonian |
Ewe |
Fijian |
Filipino |
Finnish |
French |
Frisian |
Gaelic (Irish) |
Gaelic (Scots) |
Galician |
Georgian |
German |
Guarani |
Gujarati |
Greek |
Hakha Chin |
Haitian Creole |
Hausa |
Hawaiian |
Hebrew |
Hiligaynon |
Hindi |
Hmong |
Hungarian |
Icelandic |
Igbo |
Indonesian |
Italian |
Japanese |
Javanese |
Kannada |
Kazakh |
Khmer |
Kinyarwanda |
Konkani |
Korean |
Krio |
Kurdish (Kurmanji) |
Kurdish (Sorani) |
Kyrgyz |
Latin |
Latvian |
Lithuanian |
Lingala |
Lao |
Luxembourgish |
Luganda |
Macedonian |
Malagasy |
Malay |
Malayalam |
Maithili |
Maltese |
Maori |
Marathi |
Meiteilon (Manipuri) |
Mizo |
Mongolian |
Myanmar (Burmese) |
Nepali |
Norwegian |
Odia (Oriya) |
Oromo |
Pashto |
Persian |
Polish |
Portuguese |
Punjabi |
Quechua |
Romanian |
Russian |
Samoan |
Sanskrit |
Sepedi |
Serbian |
Sesotho |
Shona |
Sindhi |
Sinhala |
Slovak |
Slovenian |
Somali |
Spanish |
Sundanese |
Swahili |
Swedish |
Tagalog |
Tajik |
Tamil |
Tatar |
Telugu |
Thai |
Tigrinya |
Tongan |
Tsonga |
Twi (Akan) |
Turkish |
Turkmen |
Uyghur |
Ukrainian |
Urdu |
Uzbek |
Vietnamese |
Welsh |
Xhosa |
Yiddish |
Yoruba |
Zulu |