What are sensors?
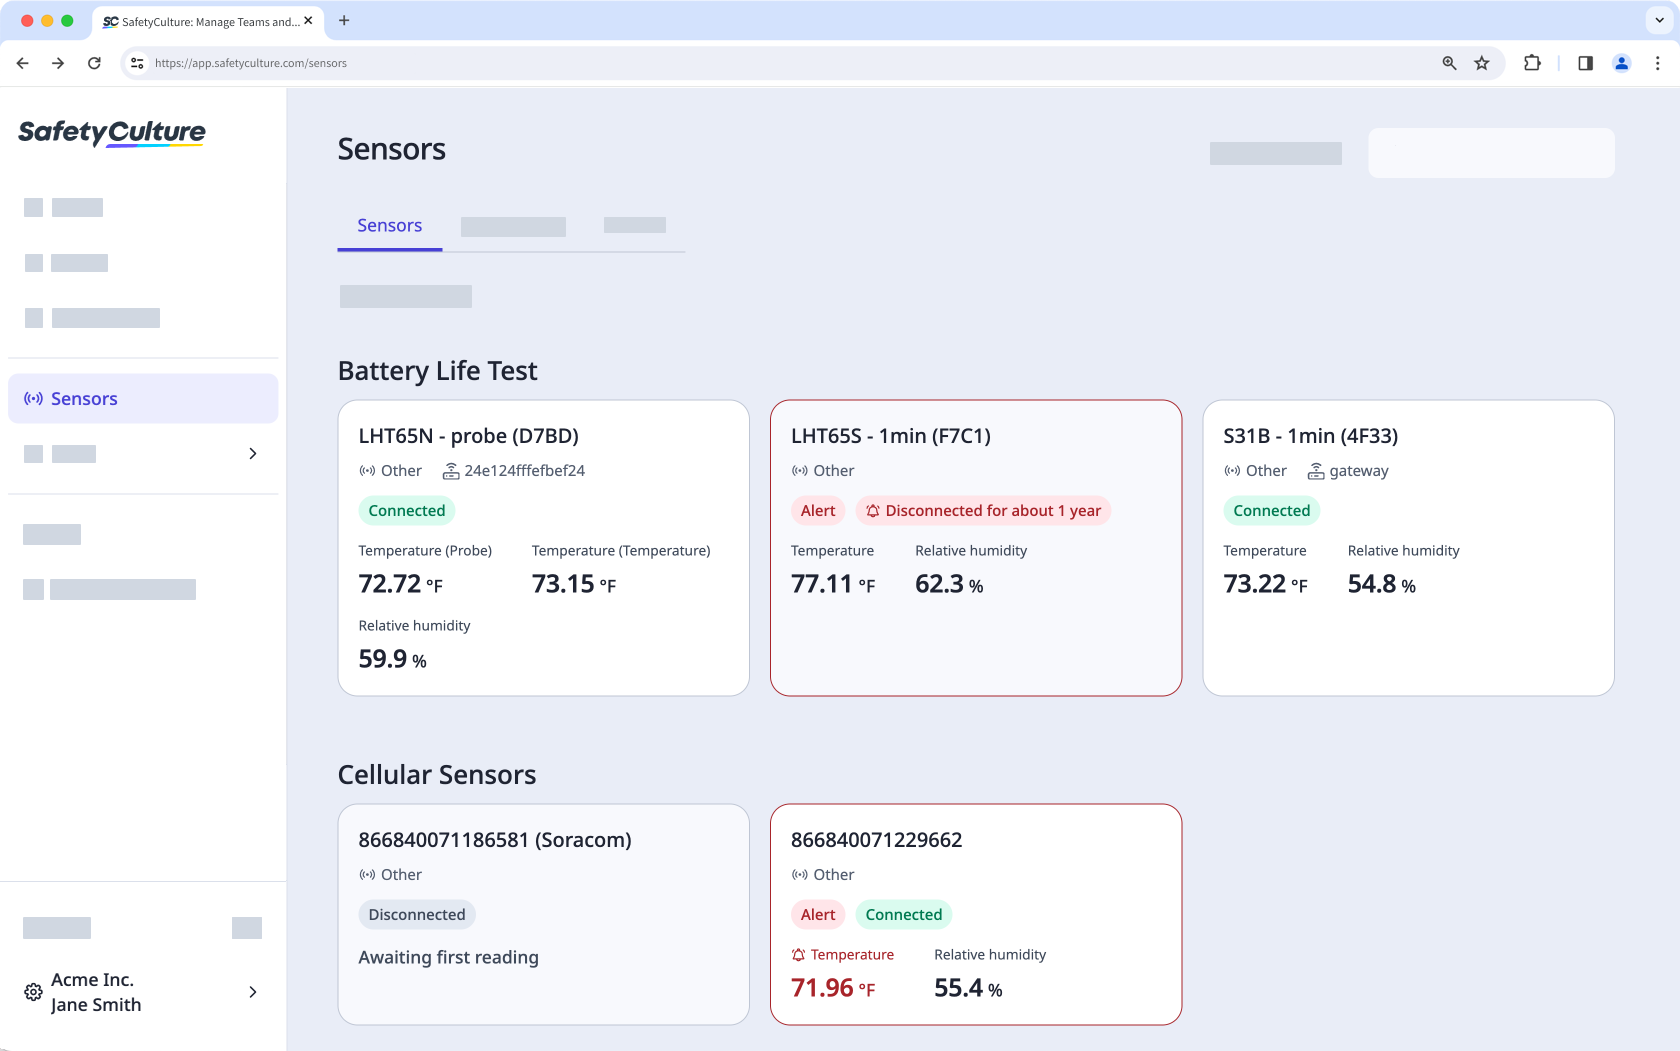
Sensors in SafetyCulture automatically track conditions like temperature in fridges, cool rooms, and other critical areas. Instead of relying only on manual checks or paper logs, they send regular readings into SafetyCulture, so your team can see what is happening now, review trends over time, and keep clear records for audits. When you set up alerts, SafetyCulture notifies the right people if readings move outside the range you choose, helping protect stock and equipment day to day.
Each sensor connects to a nearby gateway, which forwards the data to SafetyCulture. Gateways act as the bridge between your on-site devices and your account that collects readings from multiple sensors within range, so you can monitor several locations from one place.
If you already use sensors with SafetyCulture and want to add more gateways or sensors, contact your customer success manager. For new purchases or questions about buying from third parties or us, get in touch with our product experts.
What you'll need
Sensor locations are different from the sites used in other areas of SafetyCulture, such as Inspections and Actions. Check out our support articles for information on how to add and manage sensors in your organization.
What is Training in SafetyCulture?
Training in SafetyCulture lets you create, assign, and track bite-sized courses so frontline and operational teams can learn as part of their day-to-day work. It’s designed for people on site, on the road, or in the field, where learning needs to fit into short breaks rather than extended time away from the job.
With Training, everything is managed in one place, with clear visibility into who has completed each course and when. Admins can build their own courses or start from the Training Library, then assign them to individuals or groups. They can also set up quizzes, practical assessments, and assignments to reinforce key information after a course is completed, and facilitate group training and discussions across teams.
This helps bring new starters up to speed, cover safety and compliance requirements, explain new procedures after an incident or process change, and share quick refreshers to people across multiple sites.
What you'll need
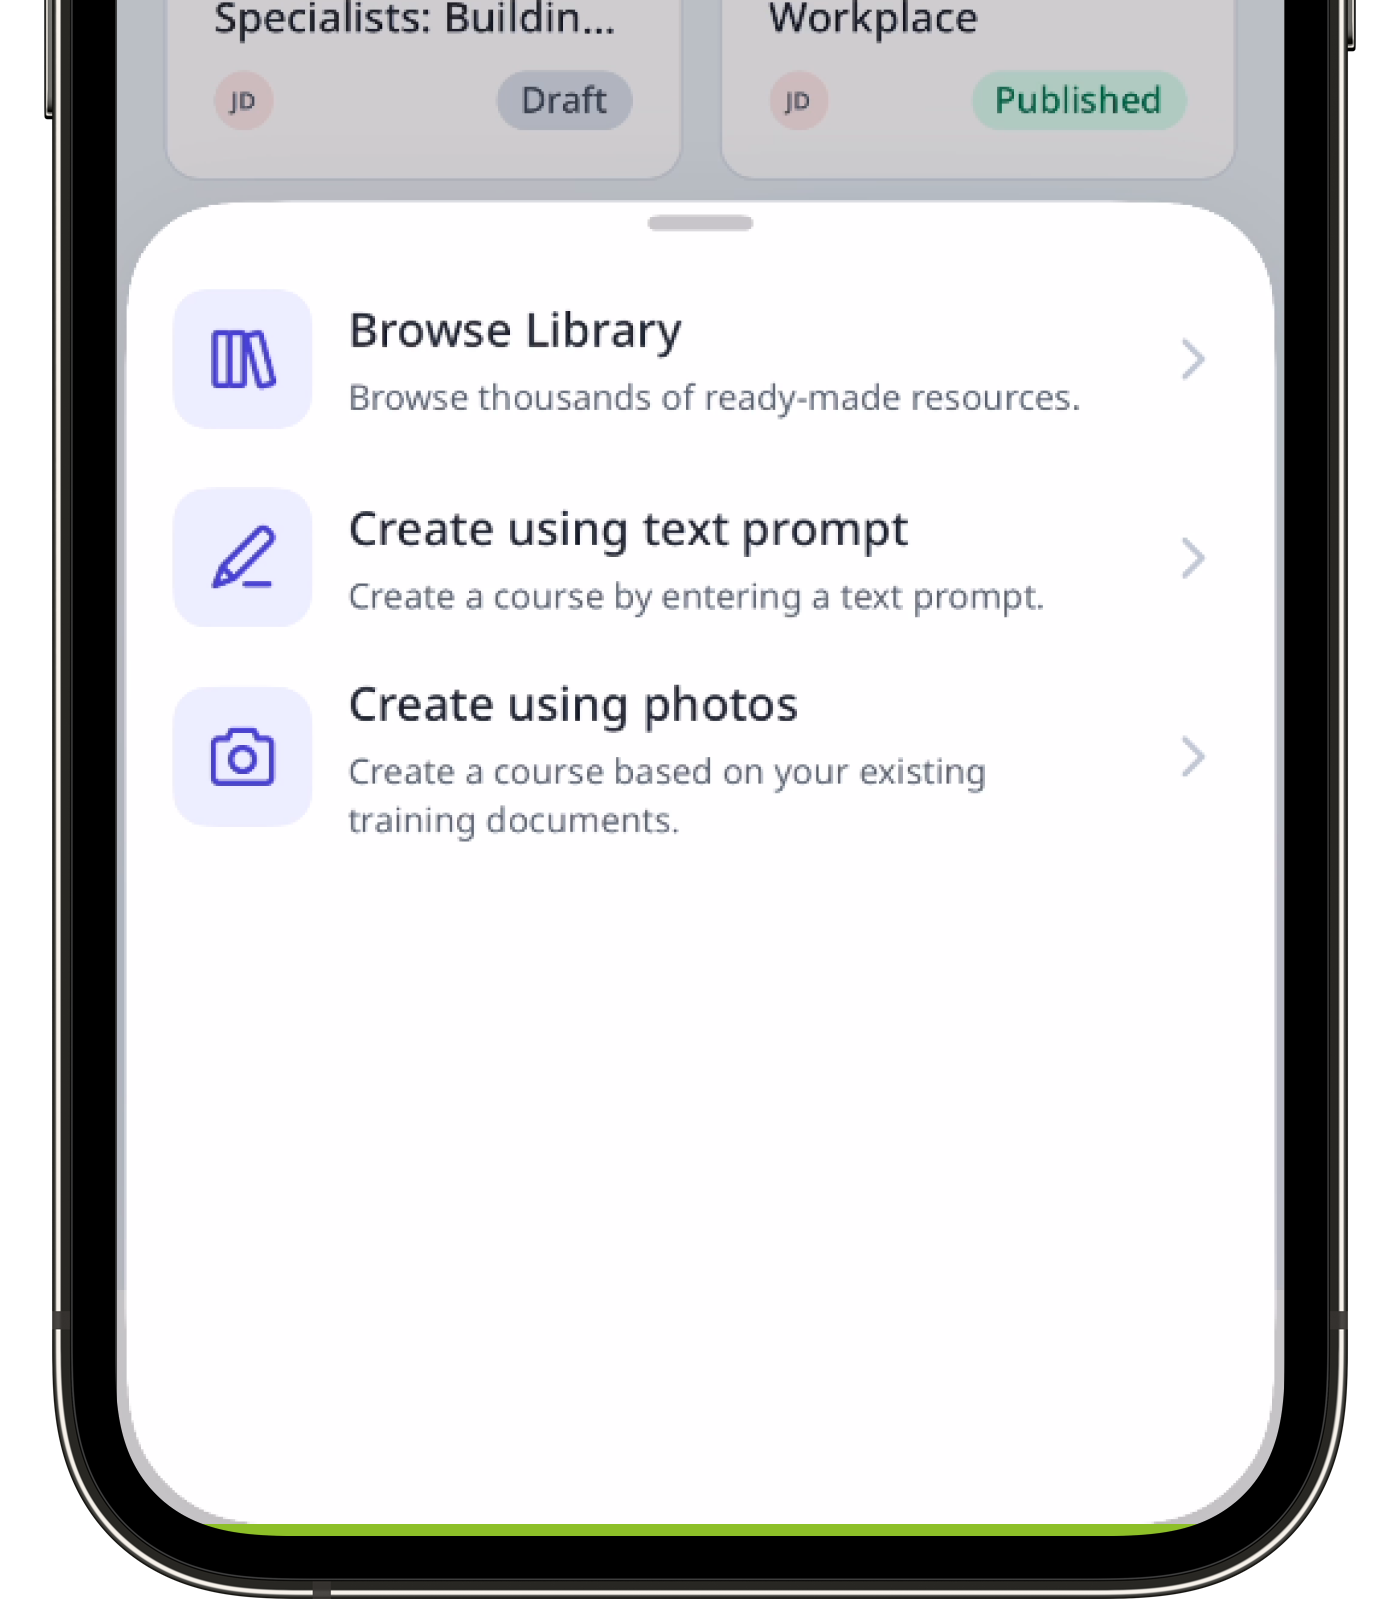
If you need help getting started with your training content, you can create a course, lesson, or lesson slide using AI by describing the topic or taking photos of your materials.
If you have your own existing training material, you can convert it into training courses using AI.
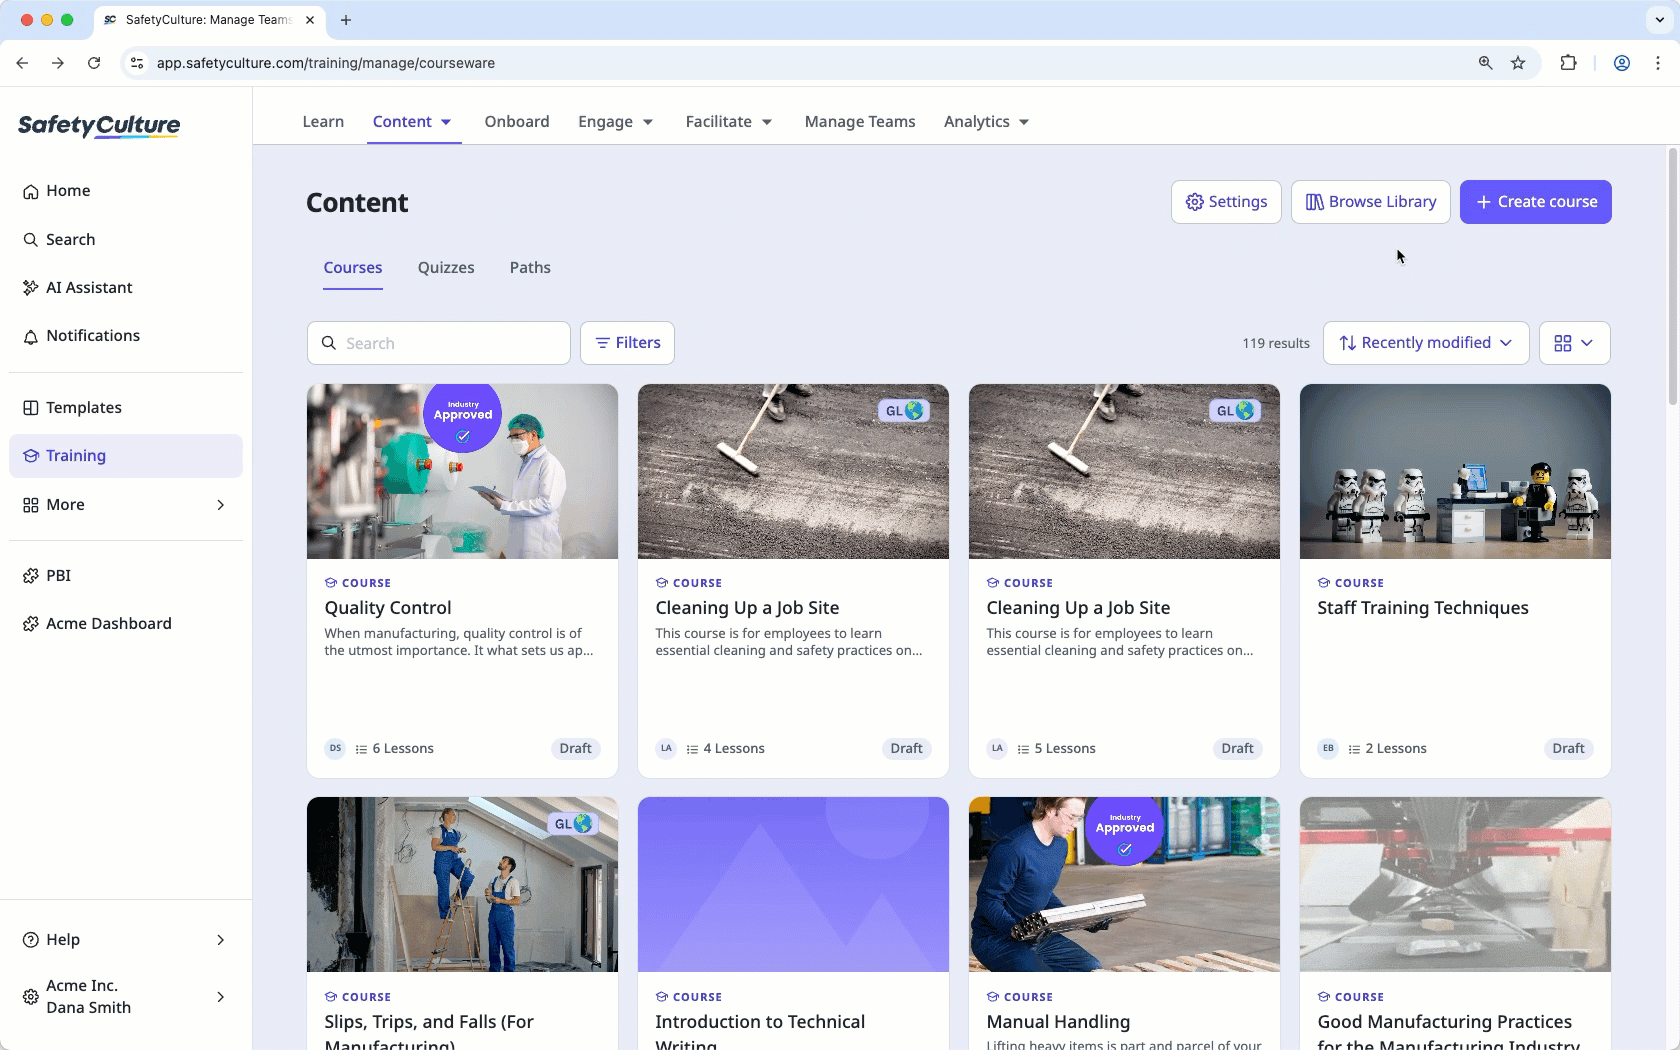
Create a course
Select Training in the sidebar or select it in More.
If you're on the "Learn" page, click Content at the top of the page and select Courses.
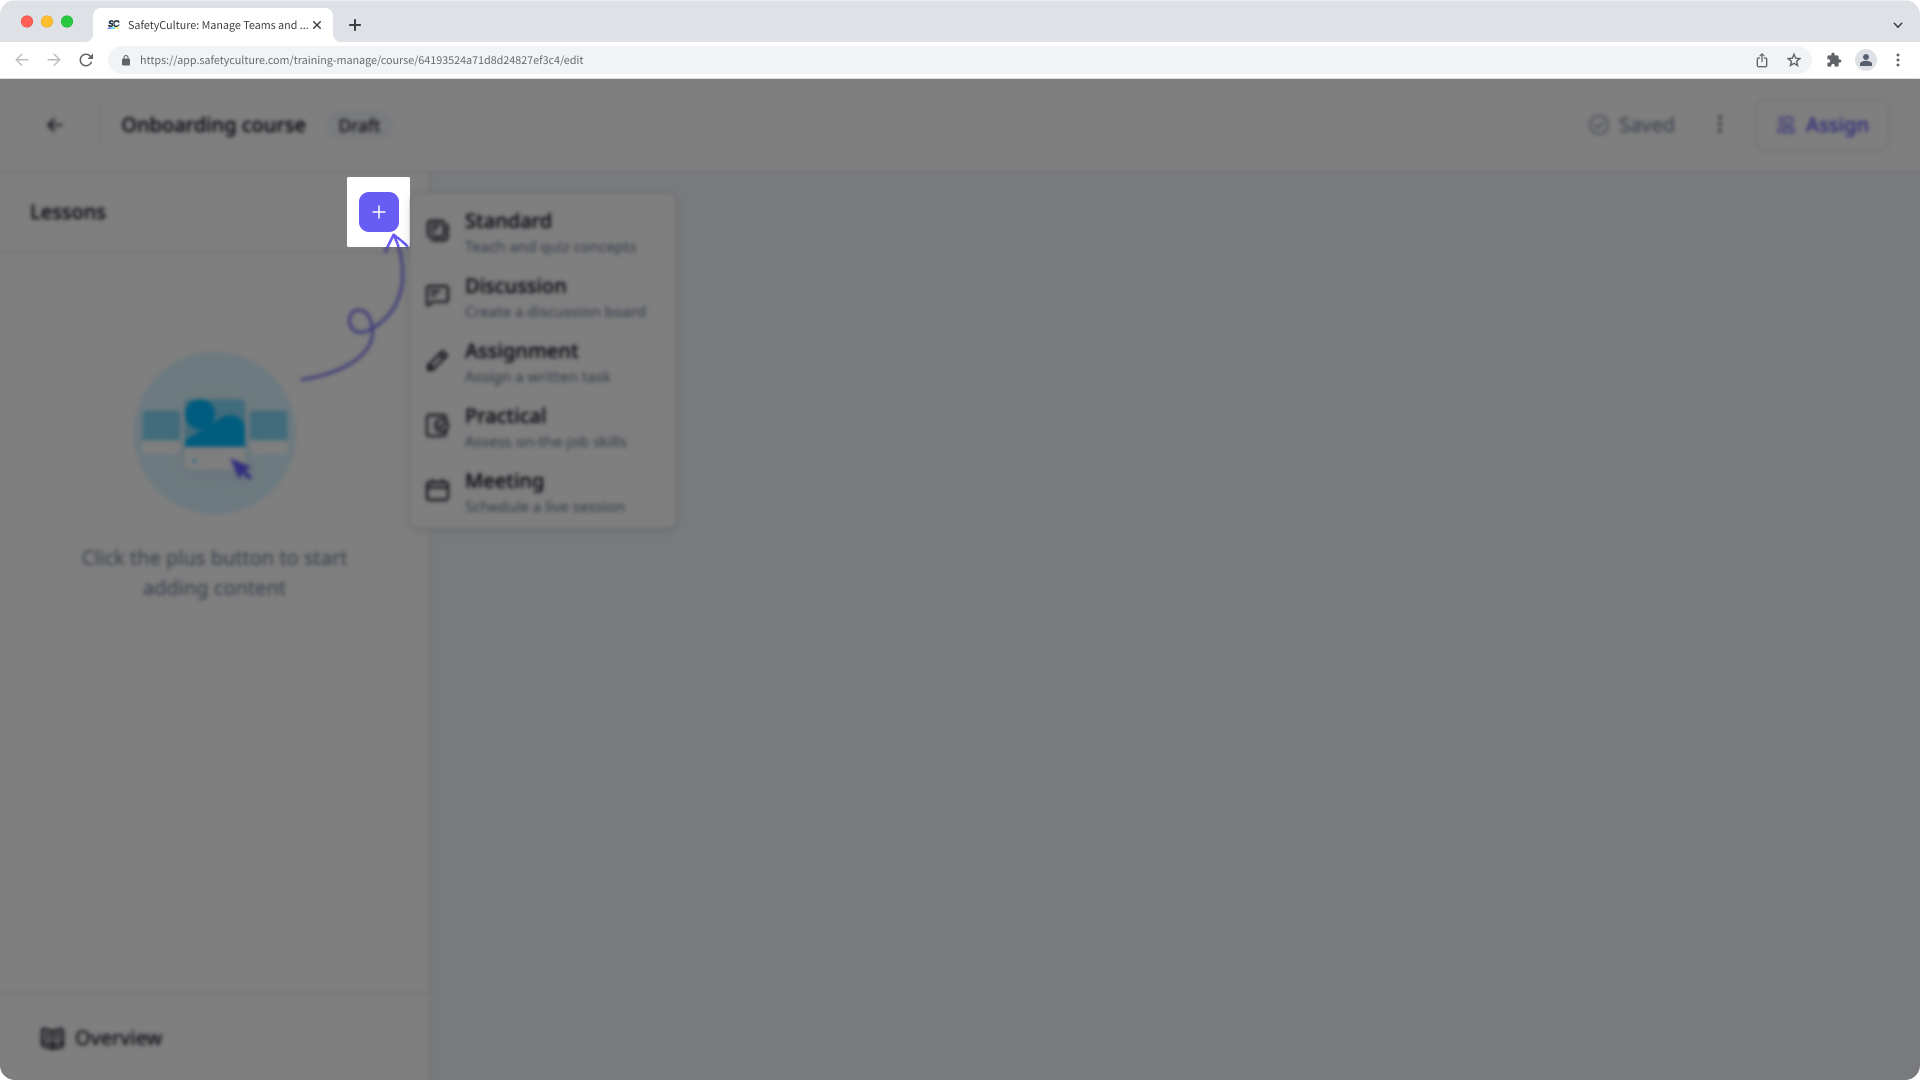
Click Create on the upper-right of the page and select how you want to create your course:
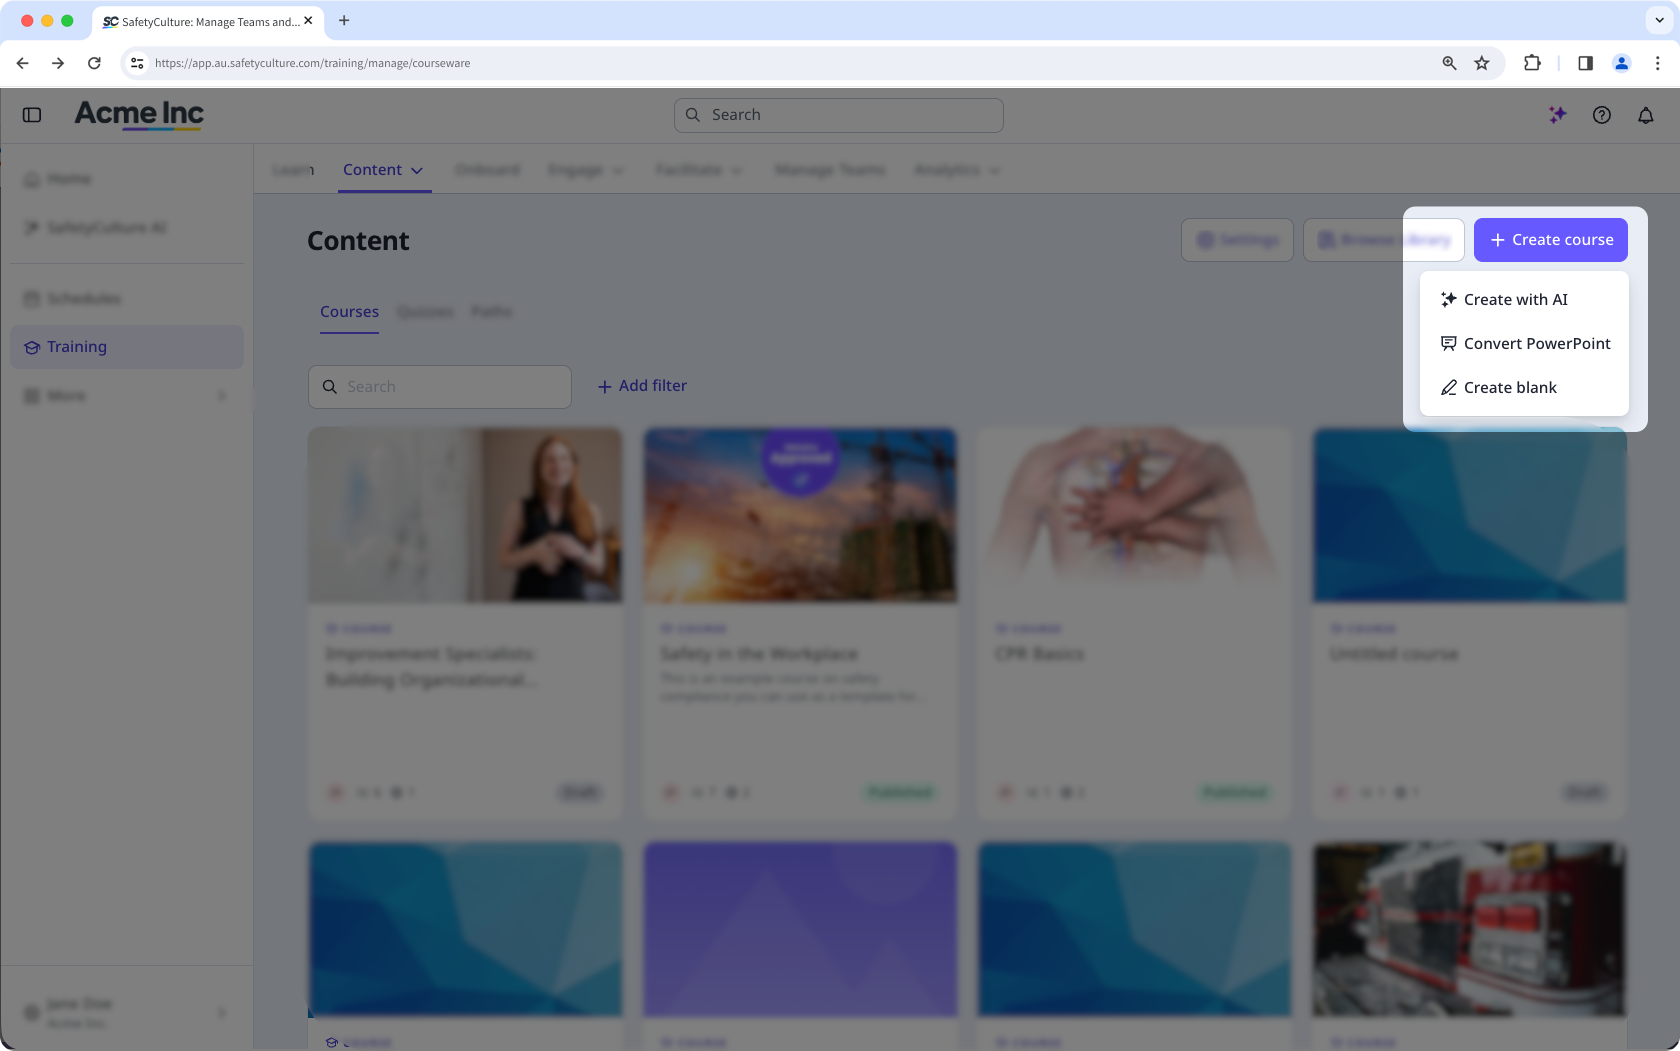
Create with AI: Describe the course you want to create, and the Al Assistant will generate suggested lessons to help you get started. You can also upload a PPTX, PDF, or DOCX file, and it'll convert it into a course.
Convert PowerPoint: Upload PPTX files and directly convert them into interactive, bite-size training courses.
Create blank: Start from scratch and tailor your course to your needs.
Continue to create lessons.
If you're creating a course via the mobile app, we currently only support editing and publishing courses via the web app. If your course is created using AI, log in to the web app to create or edit lessons and publish the course when ready.
If your course is currently a draft, remember to publish it to make your changes available to your team.
Create a lesson
Select Training in the sidebar or select it in More.
If you're on the "Learn" page, click Content at the top of the page and select Courses.
Create a new course or click View or Edit on an existing one.
If you're editing an existing course and it's published, click Edit on the upper-right of the page.
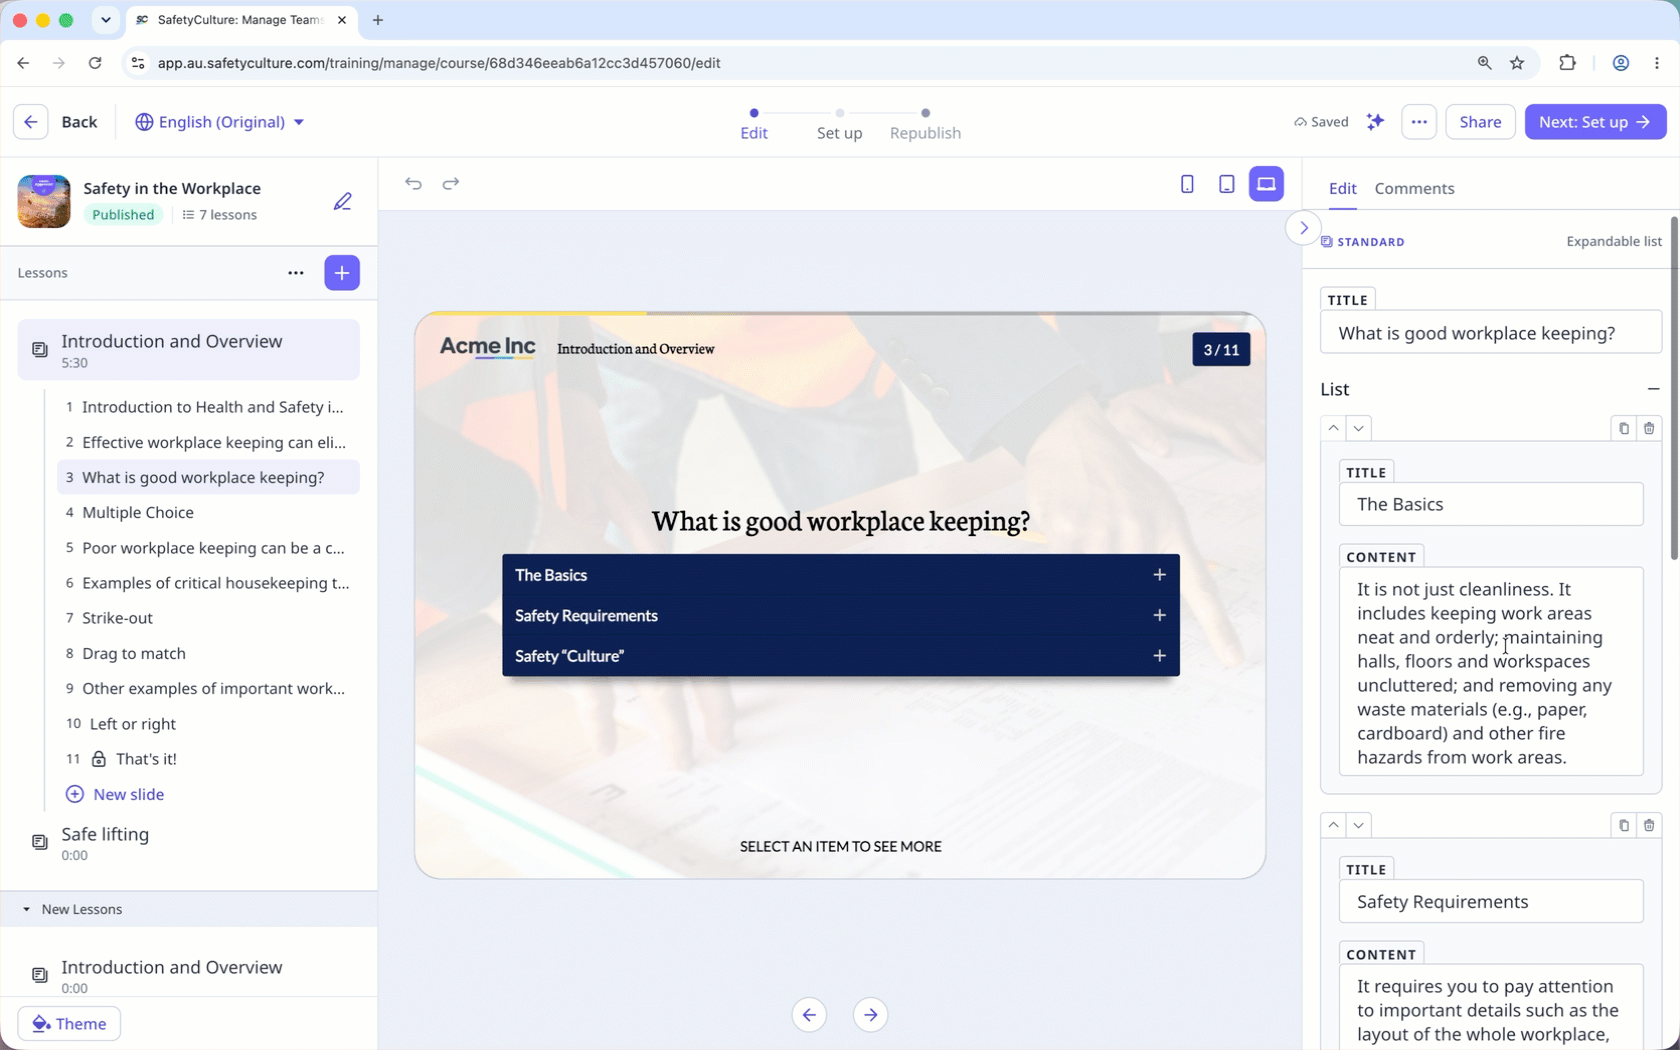
Click on the upper-left and select the lesson type. If you need some help to get started, you can create a lesson or lesson slide using AI.
Configure each lesson you create accordingly. For text fields, you can highlight your text and edit its text format, alignment, and style. You can also improve texts using AI Edit with these options:
Rewrite: Transform text into more engaging content.
Adjust tone: Adjust the tone of the text and make it Natural, Friendly, Excited, Persuasive, and Intellectual to suit your audience better.
Reduce: Trim down lengthy passages to keep your content concise and impactful.
Extend: Expand on ideas without rewriting entire paragraphs.
Changes are saved automatically.
Add special badges for users to earn as they go through their training, and use banners to draw attention to newly added or important courses.
← Previous article: Optimize your processes (Part 3) | Next article: Gather meaningful data (Part 1) →