Was sind Themenkategorien?
Mit Problemkategorien können Sie verwalten, wer in Ihrer Organisation Vorfälle melden kann, Informationen anordnen, die im ursprünglichen Bericht enthalten sind, und den Inhalt und die Empfänger Ihrer Problembenachrichtigungen bearbeiten. Sie können Kategorien auch verwenden, um Kritische Warnungen für Probleme mit hoher Priorität einzurichten, um sicherzustellen, dass Nutzer auch dann Benachrichtigungen erhalten, wenn ihre Geräte stummgeschaltet oder im Modus "Nicht stören" sind. Außerdem können Sie mit Problemkategorien Vorlagen für detailliertere Untersuchungen bestimmter Probleme vorschlagen.
Was Sie brauchen
Eeine Problemkategorie erstellen
Wählen Sie Probleme in der Seitenleiste oder in Mehr aus.
Wählen Sie am oberen Rand der Seite Kategorien aus.
Klicken Sie oben rechts auf der Seite auf Kategorie hinzufügen.
Geben Sie im Pop-up-Fenster einen Kategorienamen ein und klicken Sie auf Erstellen.
In Arbeitsablauf können Sie die folgenden Einstellungen anpassen:

Bearbeiten Sie die Kategoriedetails: Klicken Sie auf Bearbeiten auf der rechten Seite des Abschnitts "Kategoriedetails". Klicken Sie auf den Kategorienamen und geben Sie einen neuen Namen ein. Sie können auch eine Beschreibung in das Feld "Beschreibung" eingeben.
Richten Sie Ihre E-Mail-Benachrichtigungen ein: Klicken Sie auf Bearbeiten auf der rechten Seite des Bereichs "Benachrichtigungen". Wählen Sie die Empfänger Ihrer Benachrichtigungen aus dem Dropdown-Menü aus und wählen Sie den gewünschten E-Mail-Benachrichtigungstyp.
Kritische Alarme einrichten: Klicken Sie auf Bearbeiten auf der rechten Seite des Abschnitts "Kritische Alarme" und wählen Sie die Empfänger Ihrer Alarme aus dem Dropdown-Menü aus.
Problemfelder verwalten: Klicken Sie auf Bearbeiten auf der rechten Seite des Abschnitts "Problemfelder". Schalten Sie jedes Feld ein oder aus und markieren Sie das Kontrollkästchen auf der rechten Seite, um die Felder als erforderlich zu kennzeichnen. Klicken Sie auf , um die Felder neu anzuordnen.
Angepasste Fragen hinzufügen: Klicken Sie auf Bearbeiten auf der rechten Seite des Abschnitts "Benutzerdefinierte Fragen". Klicken Sie auf Frage hinzufügen, geben Sie die Fragen ein, die Sie in den Bericht aufnehmen möchten, und aktivieren Sie das Kontrollkästchen auf der rechten Seite, um die Frage als erforderlich zu markieren.
Verknüpfte Vorlagen: Klicken Sie auf Vorlagen verlinken auf der rechten Seite des Abschnitts " Verknüpfte Vorlagen" und wählen Sie die Vorlage aus dem Dropdown-Menü.
Klicken Sie auf Zugriff am oberen Rand der Seite, um die folgenden Einstellungen anzupassen:
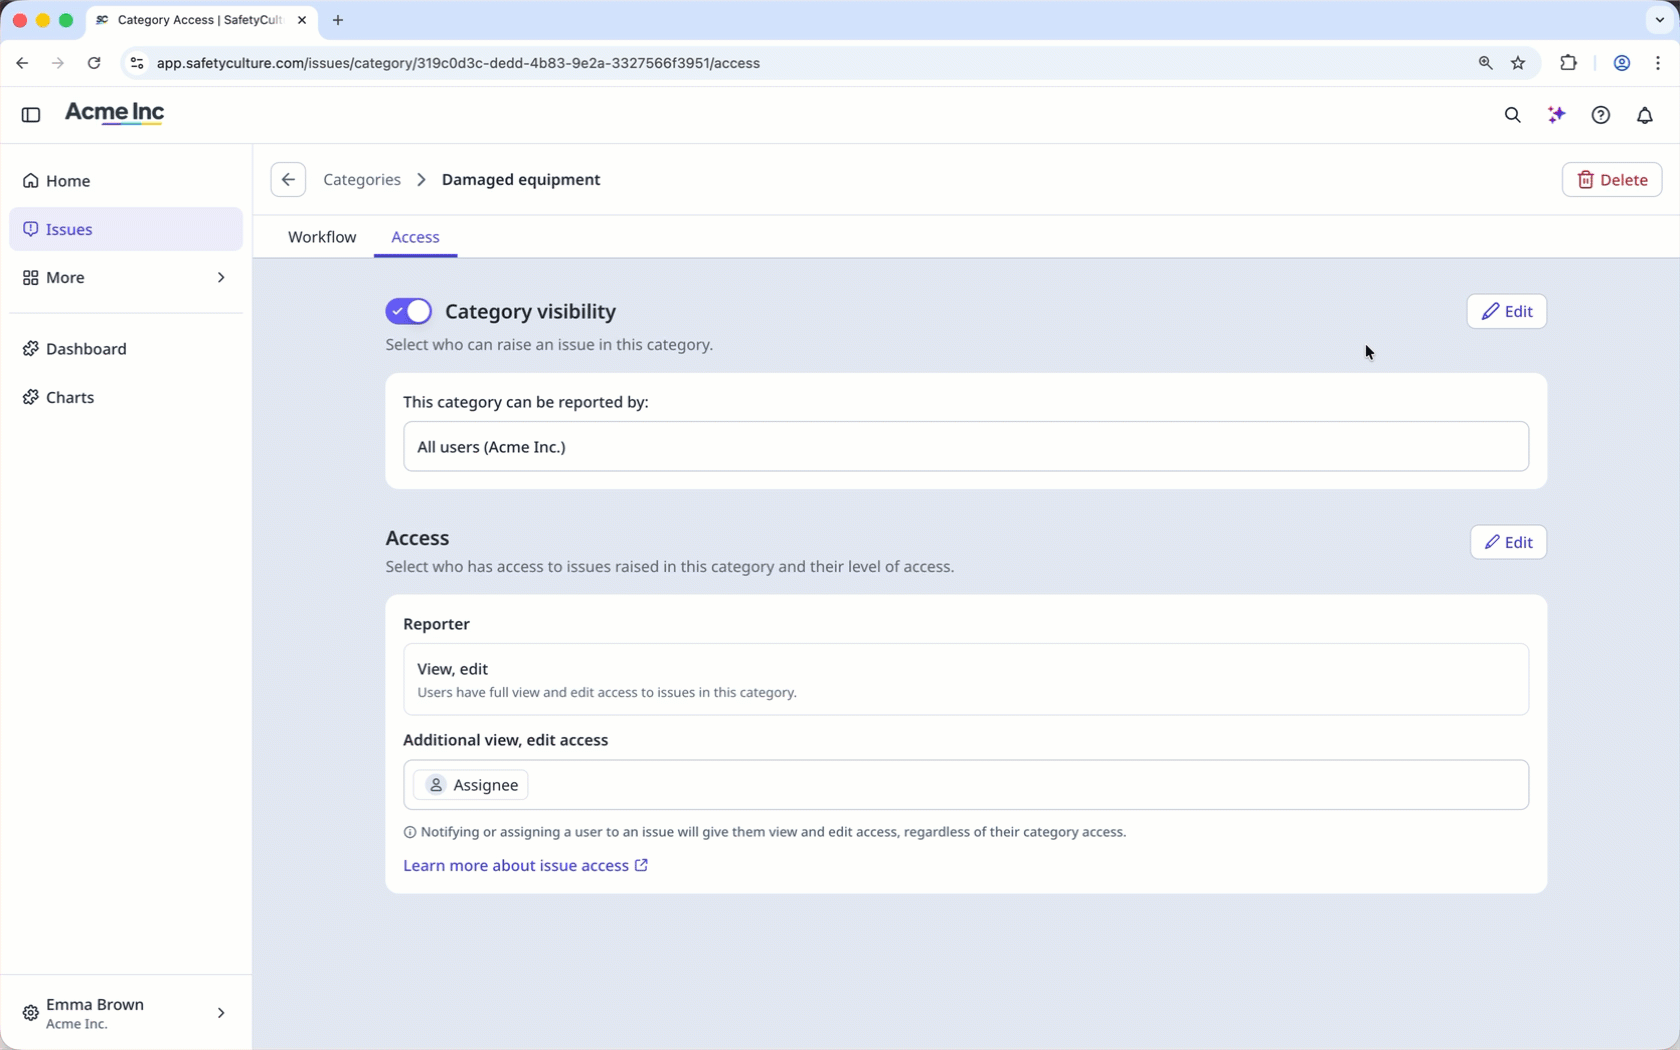
Sichtbarkeit der Kategorie verwalten: Schalten Sie Kategoriesichtbarkeit ein oder aus, um die Problemkategorie anzuzeigen oder zu verbergen. Klicken Sie auf Bearbeiten auf der rechten Seite und wählen Sie aus, wer Probleme im Zusammenhang mit dieser Kategorie melden kann.
Zugang zur Ausgabe einrichten: Klicken Sie auf Bearbeiten auf der rechten Seite des " Zugriff"- Abschnitts und wählen Sie die Reporter-Zugriffsstufe. Sie können auch zusätzlichen Ansichts- und Bearbeitungszugriff für Benutzer und Gruppen hinzufügen.
Adding descriptions to issue categories helps the AI categorize reports more accurately. The more specific the description, the better the match.