- Administration
- Organization settings and permissions
- Give users full access to manage or view all data
Give users full access to manage or view all data
Learn how to give users full access to your organization's templates, inspections, actions, and more via the web app.Why give full access to users?
Full access gives users complete visibility and control over your organization's data, including templates, inspections, actions, and more. In SafetyCulture, you can grant full access without manually setting up access rules. This is ideal for:
Team members who need to oversee or collaborate on all data
Certain users who require visibility to all data for reporting, dashboards, or integration with external tools
By giving full access, you can reduce admin overhead and manual setups, and ensure key users or systems can access the information they need when they need it.
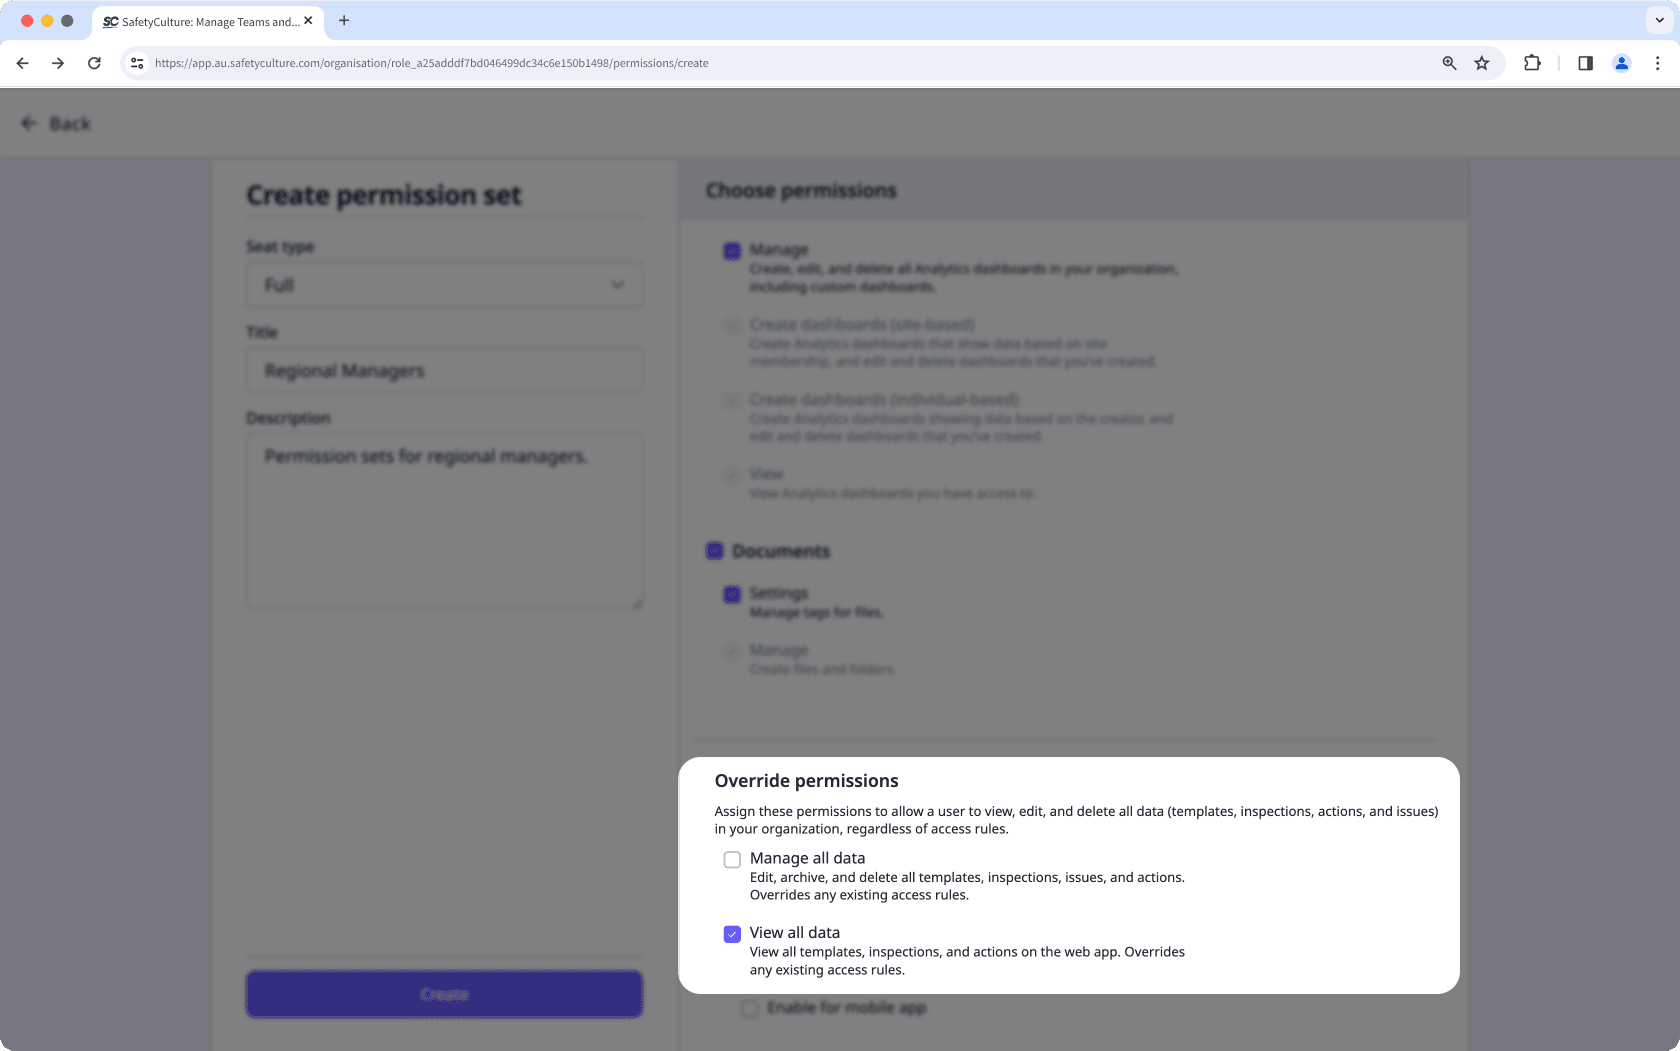
Override permissions
Full access can be given by assigning one of the two following override permissions to a permission set:
View all data: Gives view-only access to all templates, inspections, and actions in your organization.
Enable for mobile app: By default, the "View all data" permission only applies to the web app, with the option to apply to the mobile app as well. Please note that the mobile app option is not available for organizations with more than 200 active templates.
Manage all data: Gives edit and delete access to all templates, inspections, issues, and actions in your organization. Selecting this permission automatically selects the "View all data" permission.
Override permissions can only be assigned to permission sets for full seats. If granted, users will have full access to your organization's data, even if access rules are in place.
Give users full access to data
Click your organization name on the lower-left corner of the page and select Permissions.
Create a permission set or edit an existing one for full seat users.
When choosing permissions for the permission set, scroll to the "Override permissions" section and check either the "Manage all data" or "View all data" boxes accordingly.

Click Create to create the permission set or Save changes to save your changes.
Override permissions only apply to data created in the same organization. Users must have the appropriate access levels set up to edit or delete externally shared data, such as templates or inspections.
Was this page helpful?
Thank you for letting us know.