- Using SafetyCulture
- Issues
- Report issues
Report issues
Learn how to report issues via the web app and the mobile app.
What are issues?
The Issues feature allows you and your team to report things that don't look right. Be it observations, incidents, or hazards. The feature aims to empower your workers to report and collaborate with relevant teams to resolve issues as quickly as possible. As part of reporting each issue, users can capture key information such as location, weather condition, answer critical questions, and even attach photos or videos, to provide the full context.
What you'll need
If you have "Report only" access to an issue category, you can report an issue but cannot view or edit it afterward.
Report an issue
Select
 Issues from the menu on the left-hand side.
Click
 Report issue on the upper-right of the page.
On this page, select the issue category.
Enter an issue title, and answer any required fields accordingly. Depending on whether the field or question has been enabled for the issue category, you can:
Add a description, location, as well as photos or videos of the issue, to provide more context.
Select the site, if sites have been enabled in your organization.
Click Submit.
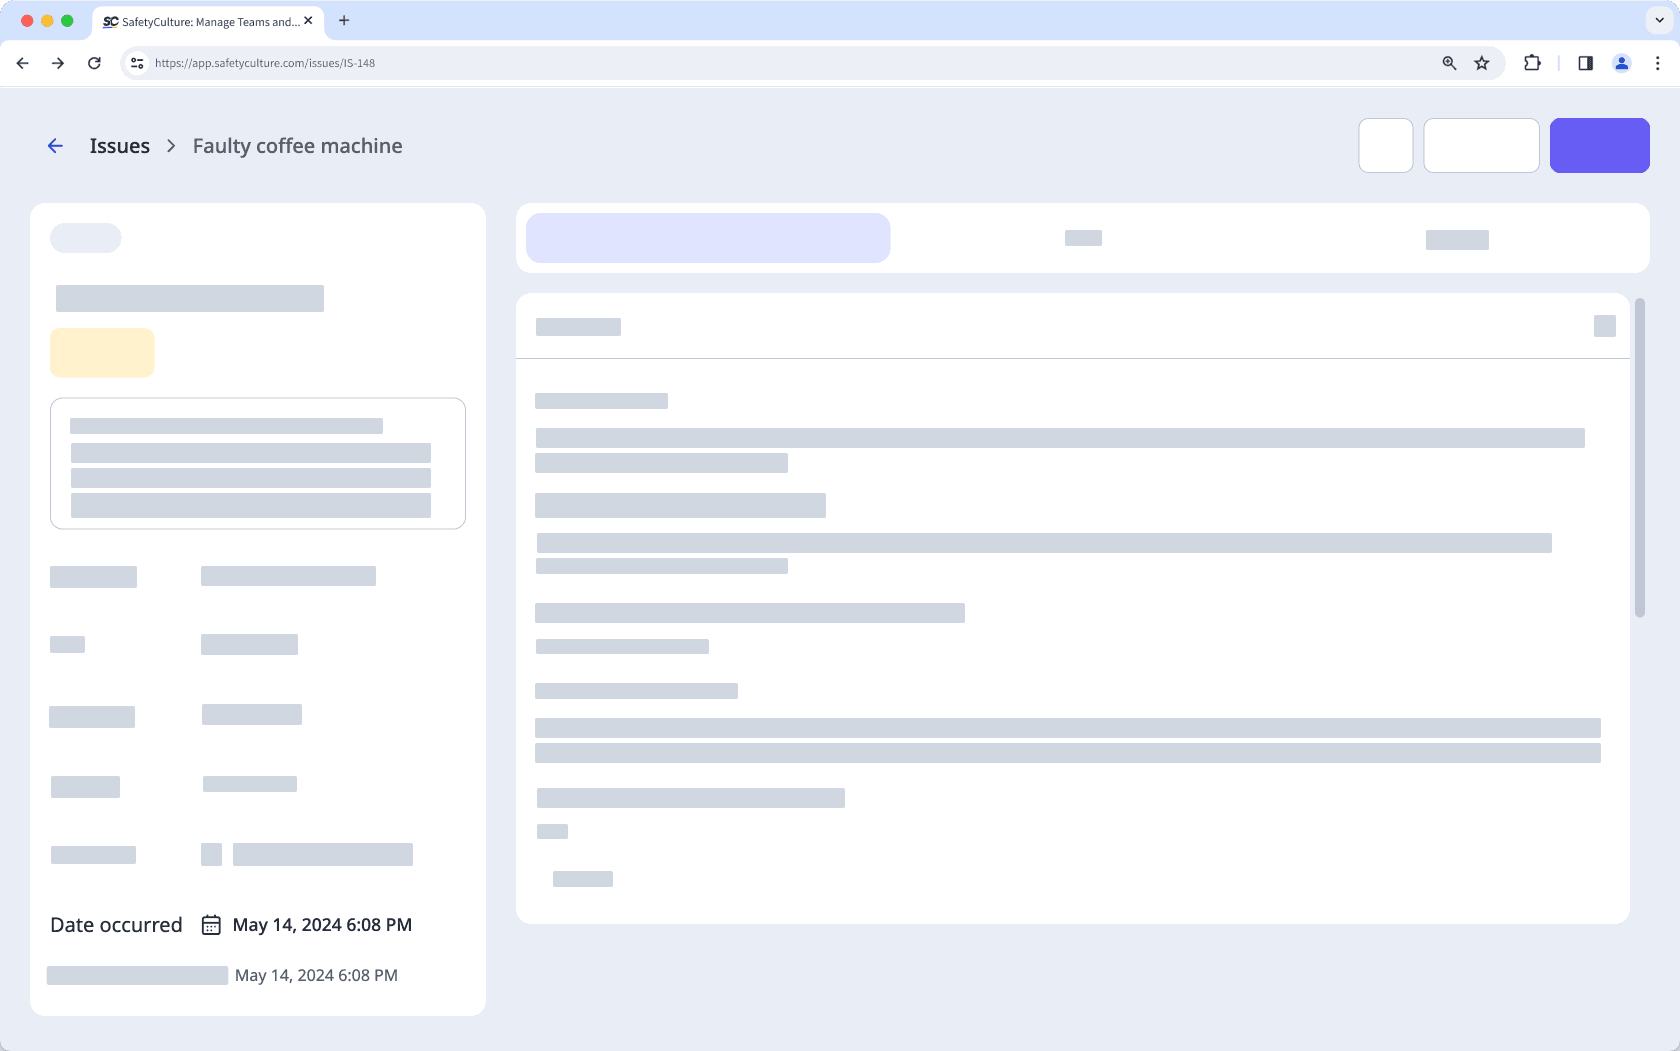
In the issue profile, you can find details about an issue in the following tabs:
Overview: You can view and update key issue details, check responses to any custom questions, see the location of the issue, view any media attachments, and see if the issue is linked to an inspection or action.
Files: You can view photos, videos, and PDF files attached to an issue.
Activity: You can keep track of the changes made to an issue and see any comments your team members added.
Open the mobile app.
Tap on
Issues at the bottom of your screen. If you see  Training at the bottom of your screen, tap
  More and select Issues.
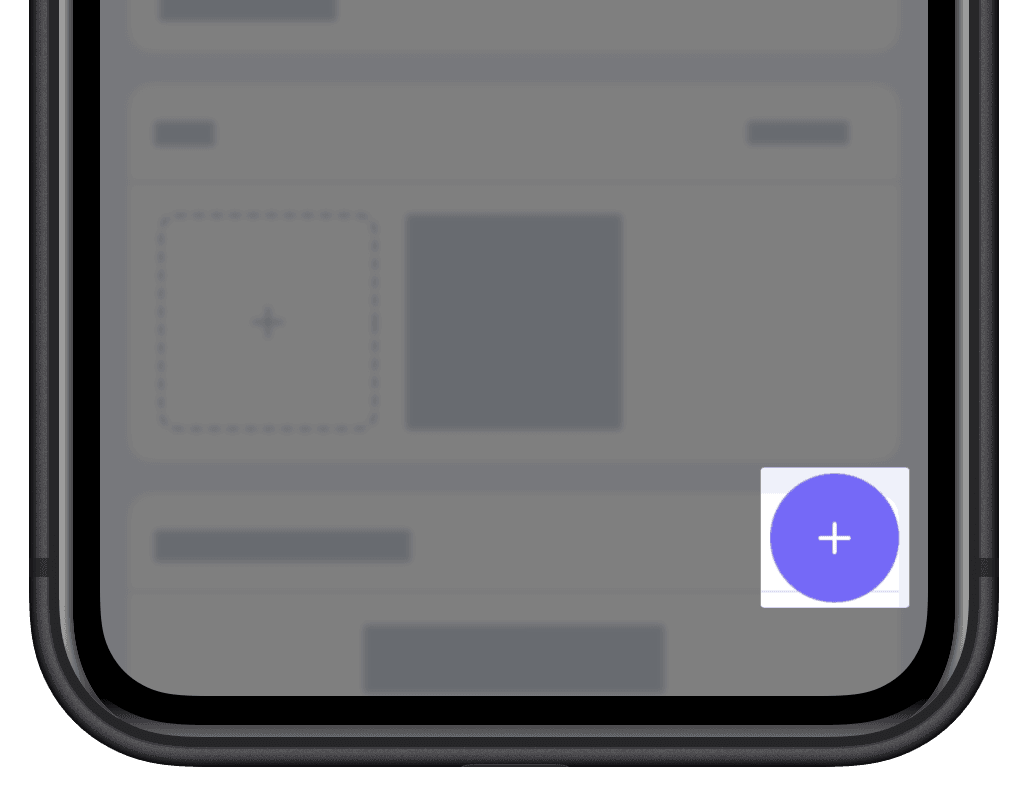
Tap
at the lower-right corner of your screen.In the pop-up window, tap the dropdown menu and select the issue category.
Enter an issue title, and answer any required fields accordingly. Depending on whether the field or question has been enabled for the issue category, you can:
Add a description, location, as well as photos or videos of the issue, to provide more context.
Select the site, if sites have been enabled in your organization.
Tap Submit.
In the issue profile, you can find details about an issue in the following tabs:
Overview: You can view the summary of the issue details, where you can check responses to any custom questions, see the location of the issue, view any media attachments, and see if the issue is linked to an inspection or action.
Details: You can view the key issue details and update the fields accordingly.
Activity: You can keep track of the changes made to an issue and see any comments your team members added.
Files: You can view photos, videos, and PDF files attached to an issue.
Tap
at the lower-right corner of your screen to:Upload media attachments.
Location access is required to capture the location when reporting issues.
When you report an issue while your device is offline, the issue will display the location coordinates instead of the full address.
Frequently asked questions
No, you cannot change any of the comments you posted or files you attached to issues. All of your changes are logged in the "Activity" tab, and all images, videos, or PDF files will remain available in the "Files" tab.
You can only upload one video at a time when reporting an issue via the mobile app, but you can upload more videos later on. Specifically, you can upload the following attachments to each issue:
PDF files: Up to 20MB per file
Photos: Up to 10MB per photo
Videos: Up to three minutes or 1.5GB in size per video
When you report an issue, the timestamp is captured automatically and you can't change it. However, if the issue category you used to report the issue includes a "Date occurred" field, you can change it to specify the date and time the issue happened.
Was this page helpful?
Thank you for letting us know.