Warum sollte ich Assets zu Standorten hinzufügen?
Das Hinzufügen von Assets zu Standorten hilft dabei, Ihre Liste zu organisieren, indem sie unter bestimmten Orten oder Projekten gruppiert werden. So können Sie Assets leichter in großem Umfang verwalten und schnell erkennen, welche zu welchem Standort gehören. Außerdem wird Ihr Inspektionsprozess verbessert. Wenn ein Standort in einer Inspektion ausgewählt wird, werden bei Ihrer Asset-Frage zuerst die relevanten Assets dieses Standorts angezeigt. Sie können Assets über die Asset-Liste zu Standorten oder per CSV-Datei entfernen.
Was Sie brauchen
Assets in großen Mengen über CSV zu einem Standort hinzufügen
Wählen Sie Assets in der Seitenleiste oder in Mehr aus.
Klicken Sie oben rechts auf der Seite auf Asset hinzufügen und wählen Sie Massen-Upload (CSV) aus.
Klicken Sie auf CSV-Vorlage herunterladen.
Wählen Sie im Popup-Fenster die Asset-Typen aus, zu denen Sie Assets hinzufügen möchten. Klicken Sie anschließend auf Fertig und dann auf Herunterladen.
Öffnen Sie die CSV-Vorlage für jeden einzelnen Asset-Typ und bereiten Sie Ihre Assets gemäß dem Abschnitt zur CSV-Anleitung für das Hinzufügen von Assets vor.
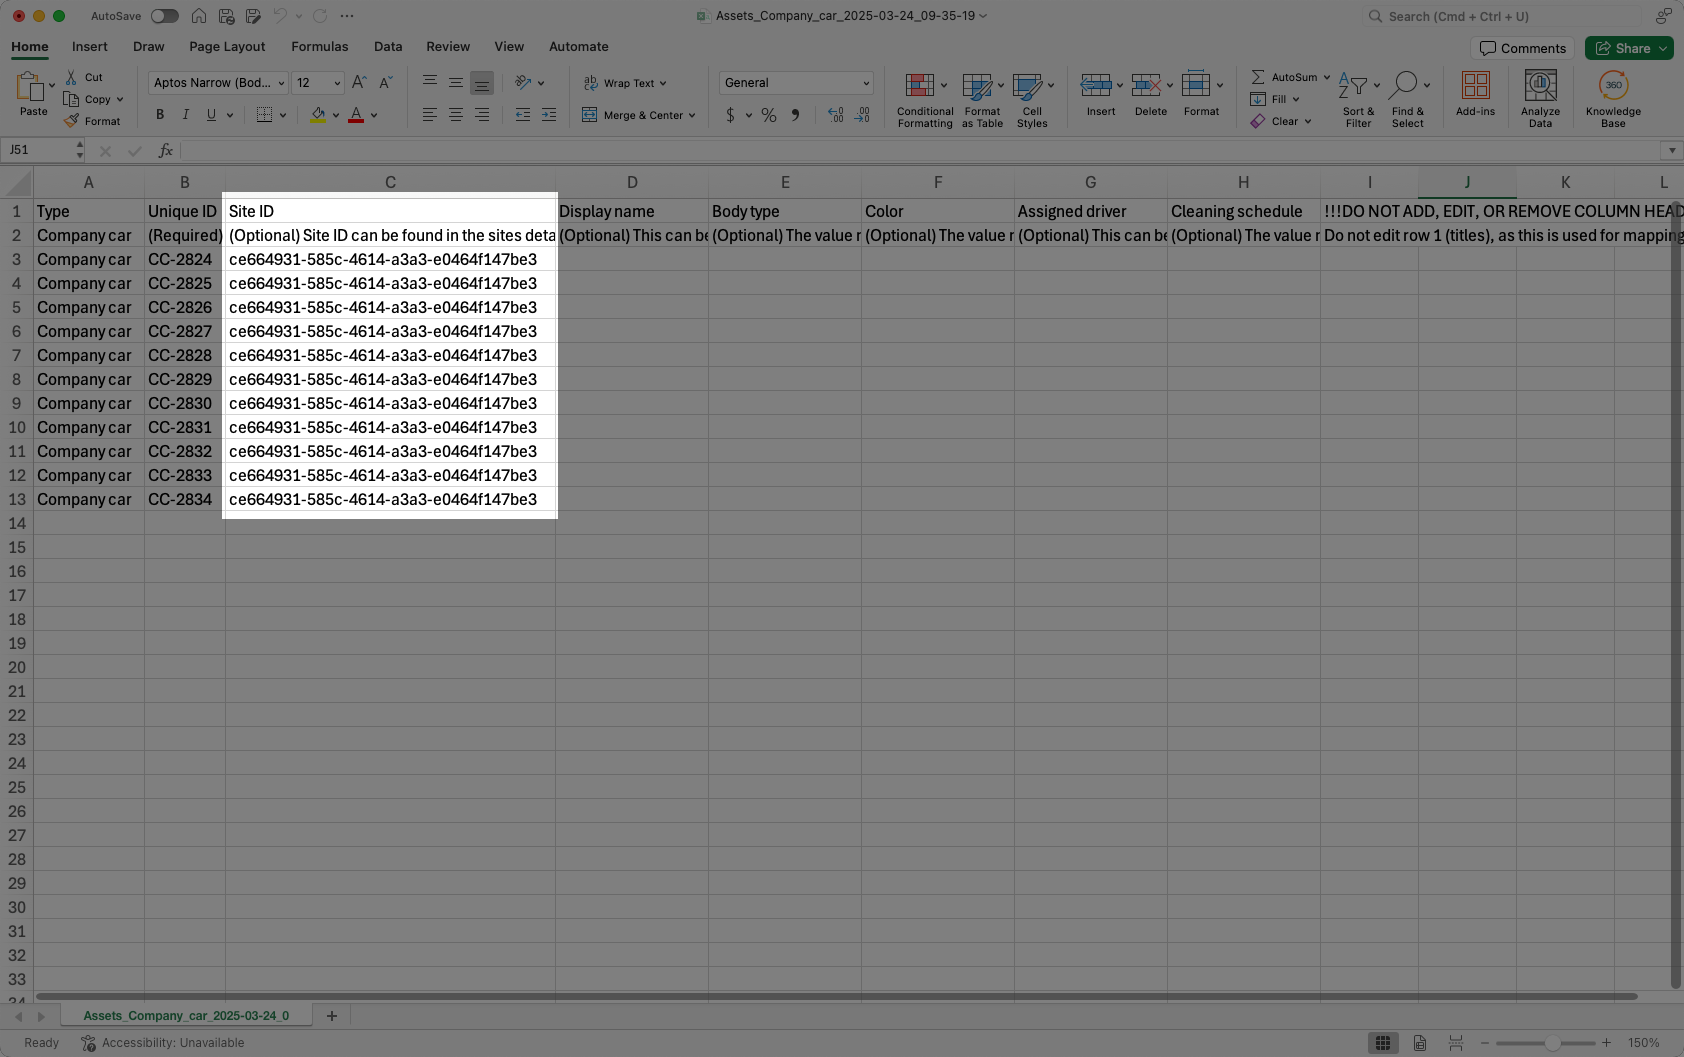
Wenn Sie fertig sind, sollte Ihre CSV-Datei etwa so aussehen wie das folgende Beispiel:
Klicken Sie in CSV-Datei vorbereiten am Ende der Seite auf Fortfahren.
Klicken Sie in CSV hochladen auf oder ziehen Sie Ihre Dateien und legen Sie sie ab.
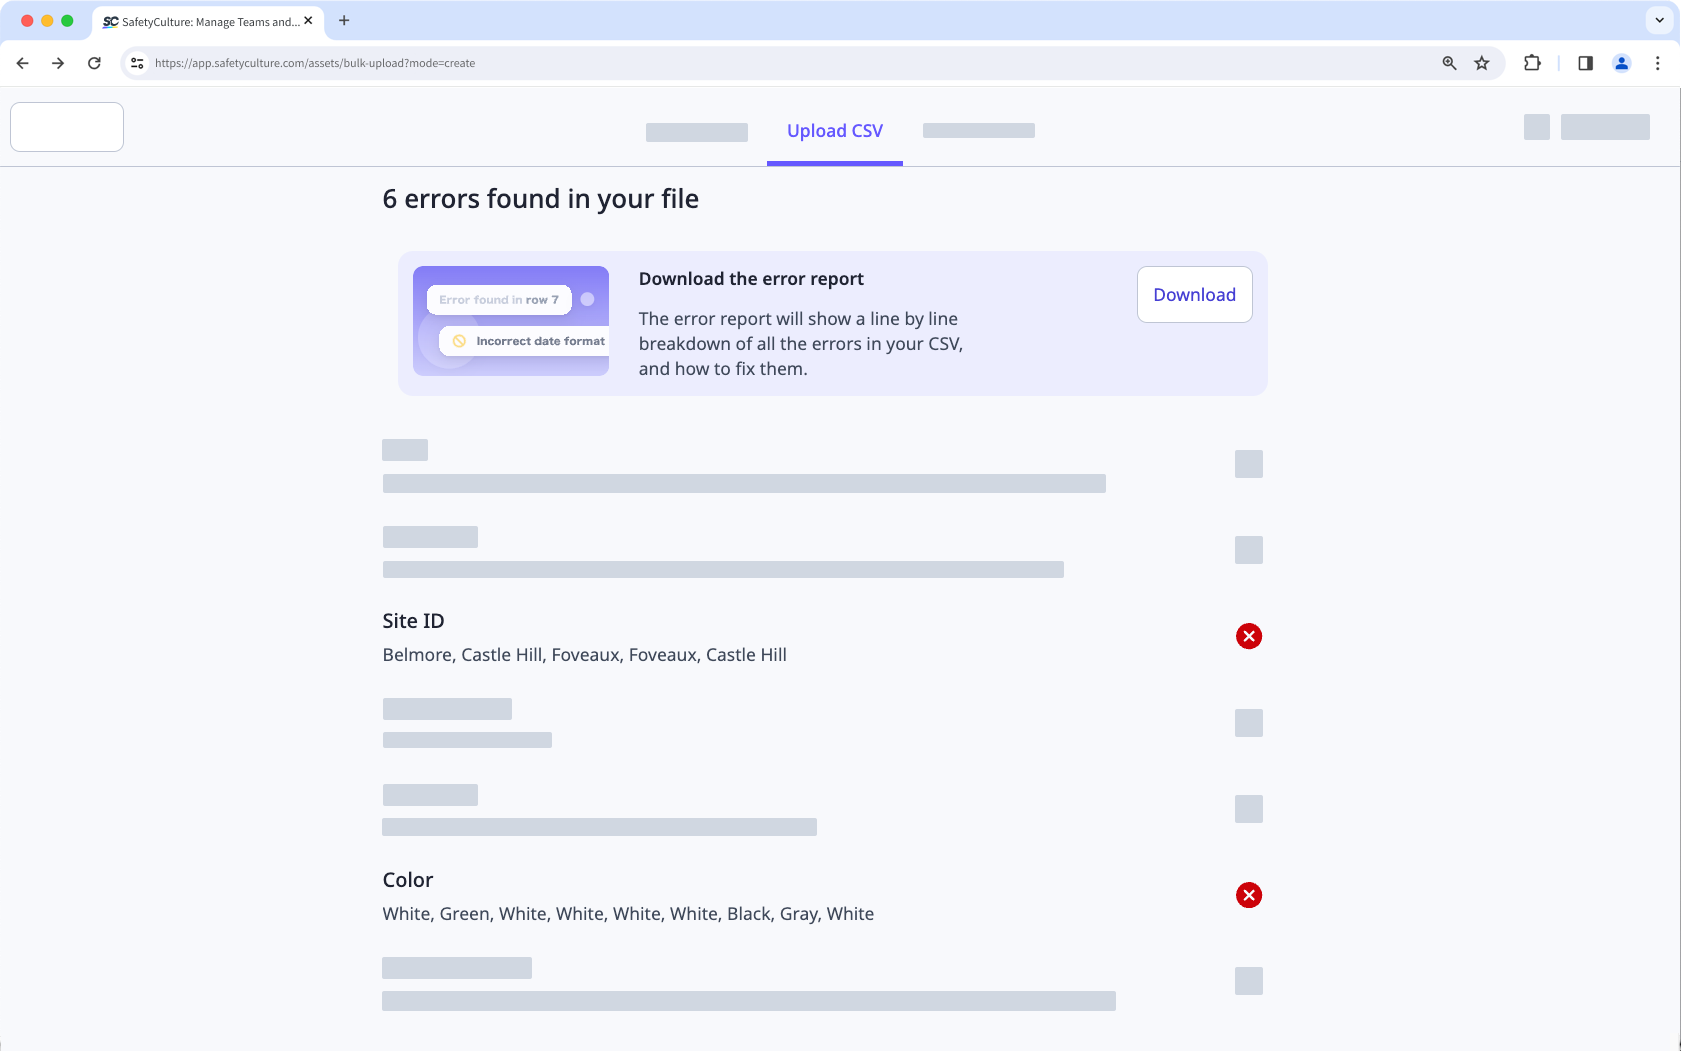
Wenn Fehler auftreten, laden Sie den Fehlerbericht herunter und beheben Sie sie.
Wenn Sie fertig sind, klicken Sie auf Erneut hochladen und laden Sie Ihre neue CSV-Datei hoch.
Klicken Sie unten auf der Seite auf Fortfahren.
Klicken Sie in Assets erstellen auf Andere CSV-Datei hochladen, um weitere Assets hinzuzufügen, oder klicken Sie unten rechts auf der Seite auf Fertigstellen.
CSV-Anleitung
Fügen Sie mehrere Assets gleichzeitig mithilfe der CSV-Vorlagen für die ausgewählten Asset-Typen hinzu. Stellen Sie sicher, dass Ihre Spalten und Werte dem erforderlichen Format entsprechen, um Fehler zu vermeiden.
Feld
Jede Zeile in Ihrer CSV-Datei stellt ein neues Asset für den ausgewählten Assettyp dar. In dieser Tabelle erfahren Sie, was die einzelnen Spalten bedeuten, wie sie ausgefüllt werden und welche Felder erforderlich sind.
Die Spaltenüberschriften müssen genau mit der CSV-Vorlage übereinstimmen. Um neue Asset-Detailfelder hinzuzufügen, aktualisieren Sie zuerst den Asset-Typ über die Web-App und laden Sie dann eine neue Vorlage mit diesen Feldern herunter.
Feld | Beschreibung |
|---|---|
Typ (Pflichtfeld) | Geben Sie den Asset-Typ ein, den Sie beim Herunterladen der CSV-Vorlage ausgewählt haben. Dieser Wert muss mit einem bestehenden Asset-Typ in Ihrer Organisation übereinstimmen. Jede CSV-Datei sollte nur Assets dieses Typs enthalten. |
Eindeutige Kennung (erforderlich) | Geben Sie für jedes Asset in Ihrer eigenen Organisation eine eindeutige Kennung ein. Dieser Wert muss für jedes Asset unterschiedlich sein. |
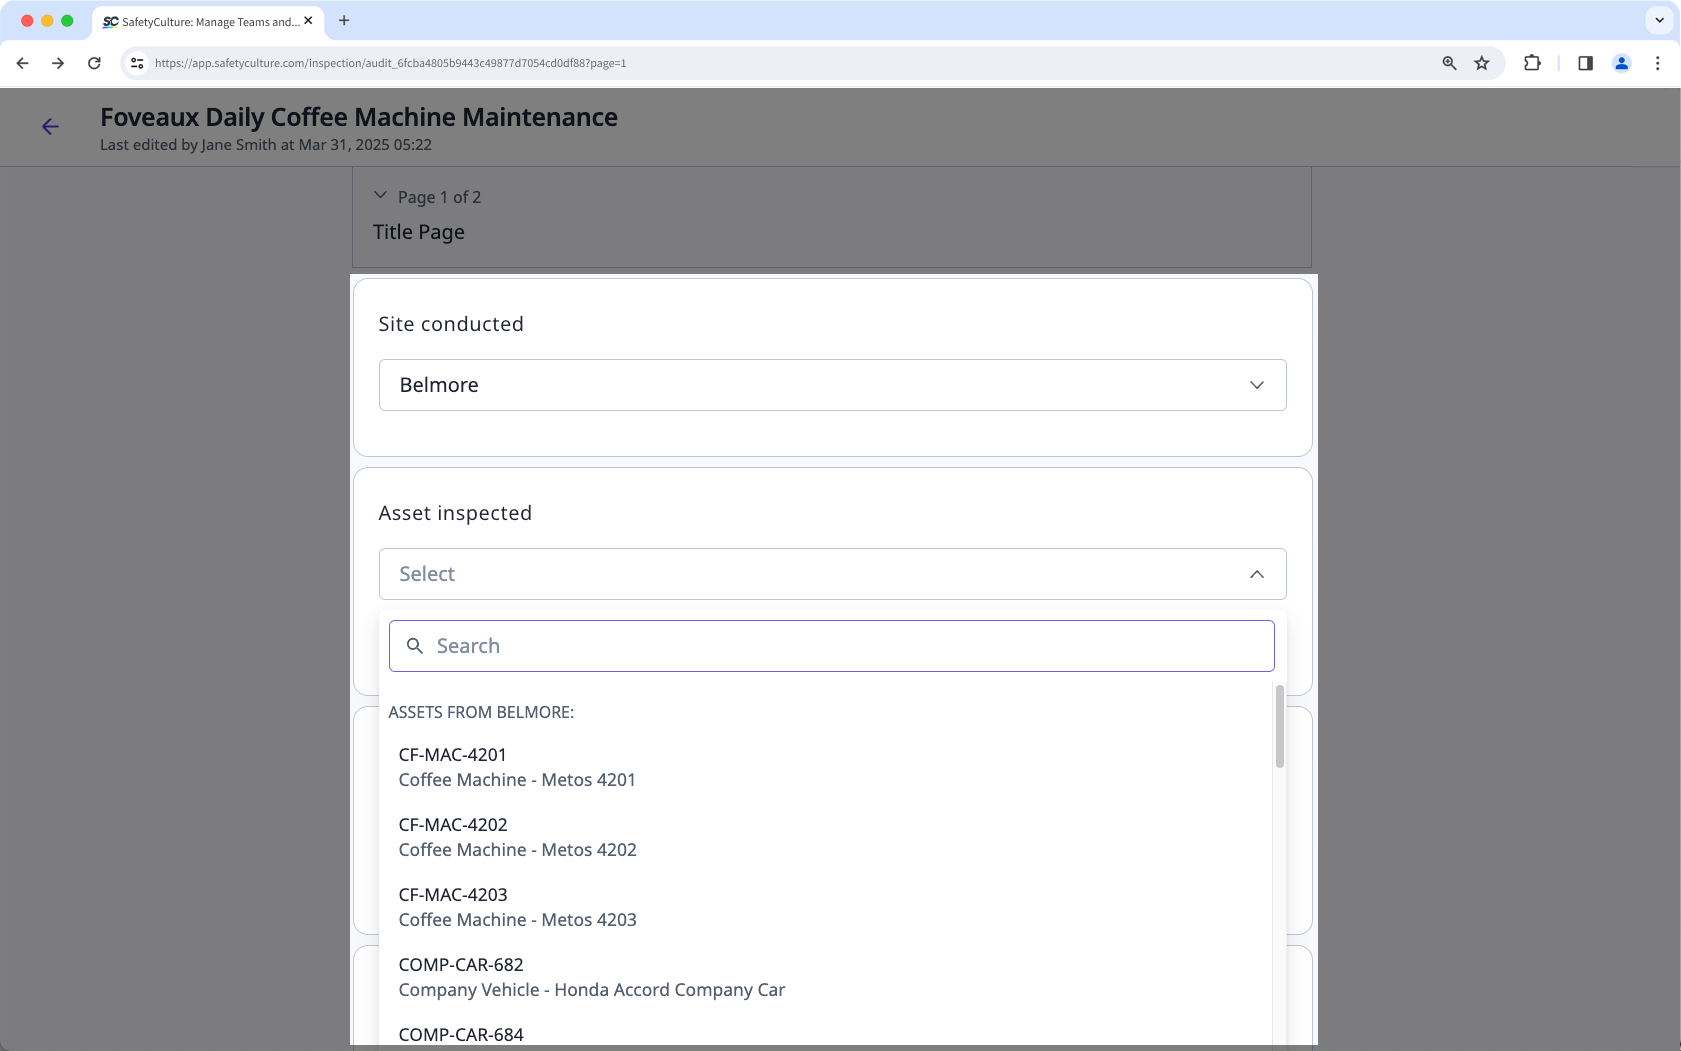
Standort-Kennung | Geben Sie die Standort-Kennung ein, der das Asset zugewiesen werden soll. Standort-Kennungen sind eindeutige Zeichenfolgen und unterscheiden sich von Standortnamen. Ein Standort "Belmore" könnte zum Beispiel die Standort-Kennung "39c2f508-e0c9-420d-b35f-31fae5f80542" haben. Sie können im Standortprofil oder durch Herunterladen der Standortliste Ihrer Organisation die Standort-Kennung finden. |
Anzeigename | Geben Sie den Asset-Namen so ein, wie er den Nutzern in Ihrer Organisation bekannt ist. |
Detailfelder | Detailfelder sind anpassbar, optional und hängen davon ab, was Sie im Asset-Typ festgelegt haben. Jedes Feld wird in der CSV-Datei als separate Spalte angezeigt. Sie können Detailfelder in den folgenden Formaten erstellen: - Text: Dieses Feld ist für Freitexteinträge wie Betreibernamen, Kennzeichen oder andere benutzerdefinierte Felder vorgesehen. - Datum: Geben Sie das Datum im Format, das auch in Ihrem Profil eingestellt ist ein. Wenn das Datumsformat Ihres Profils beispielsweise "jjjj-MM-tt" lautet, sollten Sie Ihre Daten ähnlich formatieren, z. B. "2021-02-21". Je nach der App, die Sie zur Vorbereitung Ihrer CSV-Datei verwenden, werden die Datumsangaben möglicherweise automatisch formatiert. • Währung: Geben Sie Währungen gemäß dem ISO 4217-Code (opens in new tab) ein, ohne Kommas und Sonderzeichen. Beispielsweise sollte „1.200,95 $“ in US-Dollar als „1200,95 USD“ eingegeben werden. - Einzelauswahl: Geben Sie eine der vordefinierten Optionen ein, die Sie für dieses Feld festgelegt haben. |
Tipps zur Fehlerbehebung
Überprüfen Sie Ihre CSV-Datei vor dem Hochladen auf falsche Formatierungen, fehlende Werte und Datenabweichungen. Diese Liste hilft Ihnen, häufige Fehler zu erkennen und zu beheben.
Doppelte eindeutige Kennung: Jedes Asset muss eine eindeutige Kennung haben. Stellen Sie sicher, dass keine zwei Assets die gleiche eindeutige Kennung haben.
Fehlender Asset-Typ: Jedes Asset muss einen Typ enthalten, der dem beim Herunterladen der CSV-Vorlage ausgewählten Asset-Typ entspricht.
Ungültige Standortkennung angegeben: Standortkennung sind eindeutige Zeichenfolgen zur Identifizierung der untersten Standort-Ebenen in Ihrer Organisation. Geben Sie nicht den Standort-Namen anstelle einer Standortkennung ein. Wenn Sie Assets Standorten zuweisen möchten, stellen Sie sicher, dass Sie die richtigen Standortkennungen abrufen, bevor Sie Ihre CSV-Datei hochladen.
Falsch formatierte Daten: Vergewissern Sie sich, dass jedes Datum so formatiert ist, wie das Datumsformat Ihres Profils.
Falsch formatierte Währungs werte: Jede Währung muss auf ISO 4217 Code (opens in new tab) basieren und darf keine Komma-Trennzeichen oder Sonderzeichen enthalten.
Ungültiger Name für Auswahloption: Stellen Sie sicher, dass der eingegebene Wert mit einer der vordefinierten Optionen für das Einzelauswahlfeld übereinstimmt.
Zugriff erforderlich: Möglicherweise haben Sie keinen Zugriff auf das Asset. Überprüfen Sie Ihre Zugriffsebene oder wenden Sie sich an Ihren Administrator.
Assets in großen Mengen über CSV zu einem Standort hinzufügen
Wählen Sie Assets in der Seitenleiste oder in Mehr aus.
Klicken Sie in der oberen rechten Ecke der Assets auf und wählen Sie aus.
Klicken Sie auf Bestehende Assets herunterladen.
Wählen Sie im Popup-Fenster die Asset-Typen der Assets aus, die Sie bearbeiten möchten. Klicken Sie anschließend auf Fertig und dann auf Herunterladen.
Öffnen Sie die CSV-Vorlage für jeden einzelnen Asset-Typ und bereiten Sie Ihre Assets gemäß dem Abschnitt zur Bearbeitung von Assets in der CSV-Anleitung vor.
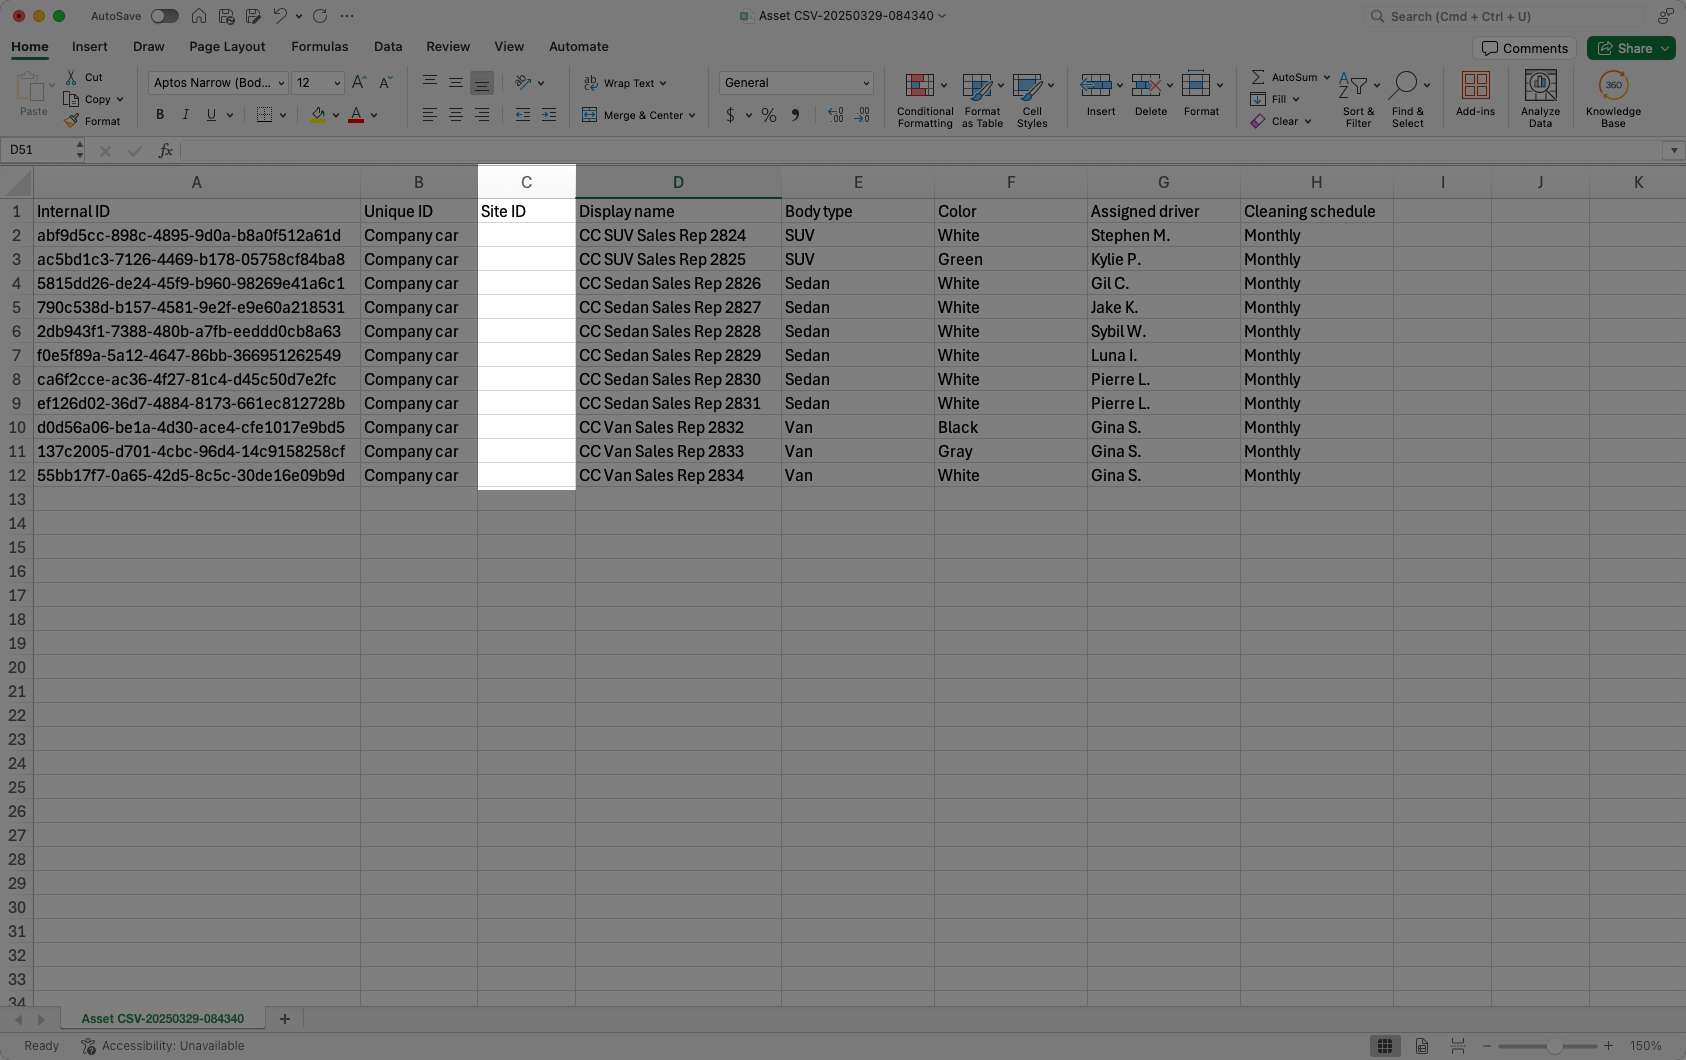
Wenn Sie fertig sind, sollte Ihre CSV-Datei etwa so aussehen wie das folgende Beispiel:
Klicken Sie in CSV-Datei vorbereiten am Ende der Seite auf Fortfahren.
Klicken Sie in CSV hochladen auf oder ziehen Sie Ihre Dateien und legen Sie sie ab.
Wenn Fehler auftreten, laden Sie den Fehlerbericht herunter und beheben Sie sie.
Wenn Sie fertig sind, klicken Sie auf Erneut hochladen und laden Sie Ihre neue CSV-Datei hoch.
Klicken Sie unten auf der Seite auf Fortfahren.
Klicken Sie in Assets aktualisieren auf Andere CSV-Datei hochladen, um weitere Assets hinzuzufügen, oder klicken Sie unten rechts auf der Seite auf Fertigstellen.
CSV-Anleitung
Mithilfe der CSV-Vorlagen für die ausgewählten Asset-Typen können Sie mehrere Assets gleichzeitig bearbeiten. Stellen Sie sicher, dass Ihre Spalten und Werte dem erforderlichen Format entsprechen, um Fehler zu vermeiden.
Feld
Jede Zeile in Ihrer CSV-Datei stellt einen vorhandenen Asset für den ausgewählten Assettyp dar. In dieser Tabelle erfahren Sie, was die einzelnen Spalten bedeuten, wie sie ausgefüllt werden und welche Felder erforderlich sind.
Die Spaltenüberschriften müssen genau mit der CSV-Vorlage übereinstimmen. Um neue Asset-Detailfelder hinzuzufügen, aktualisieren Sie zuerst den Asset-Typ über die Web-App und laden Sie dann eine neue Vorlage mit diesen Feldern herunter.
Feld | Beschreibung |
|---|---|
Interne Kennung | Eine eindeutige Kennung, die in SafetyCulture automatisch nach der Erstellung eines Assets generiert wird. Sie hilft bei der Verfolgung jedes Assets im System. Dieses Feld darf nicht ausgefüllt oder bearbeitet werden. |
Eindeutige Kennung (erforderlich) | Geben Sie für jedes Asset in Ihrer eigenen Organisation eine eindeutige Kennung ein. Dieser Wert muss für jedes Asset unterschiedlich sein. |
Standort-Kennung | Geben Sie die Standort-Kennung ein, der das Asset zugewiesen werden soll. Standort-Kennungen sind eindeutige Zeichenfolgen und unterscheiden sich von Standortnamen. Ein Standort "Belmore" könnte zum Beispiel die Standort-Kennung "39c2f508-e0c9-420d-b35f-31fae5f80542" haben. Sie können im Standortprofil oder durch Herunterladen der Standortliste Ihrer Organisation die Standort-Kennung finden. |
Typ (Pflichtfeld) | Diese Spalte wird auf der Grundlage des von Ihnen ausgewählten Assettyps vorausgefüllt. Jede CSV-Datei sollte nur Assets dieses Typs enthalten. |
Anzeigename | Geben Sie den Asset-Namen so ein, wie er den Nutzern in Ihrer Organisation bekannt ist. |
Detailfelder | Detailfelder sind optionale Spalten, die vom ausgewählten Asset-Typ abhängen. Jedes Feld erscheint als separate Spalte in der CSV-Datei und muss dem für das jeweilige Feld definierten Format entsprechen. - Text: Dieses Feld ist für Freitexteinträge wie Betreibernamen, Kennzeichen oder andere benutzerdefinierte Felder vorgesehen. - Datum: Geben Sie das Datum im Format, das auch in Ihrem Profil eingestellt ist ein. Wenn das Datumsformat Ihres Profils beispielsweise "jjjj-MM-tt" lautet, sollten Sie Ihre Daten ähnlich formatieren, z. B. "2021-02-21". Je nach der App, die Sie zur Vorbereitung Ihrer CSV-Datei verwenden, werden die Datumsangaben möglicherweise automatisch formatiert. • Währung: Geben Sie Währungen gemäß dem ISO 4217-Code (opens in new tab) ein, ohne Kommas und Sonderzeichen. Beispielsweise sollte „1.200,95 $“ in US-Dollar als „1200,95 USD“ eingegeben werden. - Einzelauswahl: Geben Sie eine der vordefinierten Optionen ein, die Sie für dieses Feld festgelegt haben. |
Statusgruppe | Geben Sie den Namen der Statusgruppe ein, die diesem Asset-Typ zugewiesen ist. Die Statusgruppe legt fest, welche Status für das Asset verfügbar sind. |
Status | Geben Sie einen der vordefinierten Status für diesen Asset-Typ ein. Die verfügbaren Status werden durch die Statusgruppe bestimmt, die Sie eingegeben haben. Wenn die Statusgruppe beispielsweise „Aktiv", „Inaktiv" und „In Wartung" enthält, geben Sie einen dieser Werte ein. |
Tipps zur Fehlerbehebung
Überprüfen Sie Ihre CSV-Datei vor dem Hochladen auf falsche Formatierungen, fehlende Werte und Datenabweichungen. Diese Liste hilft Ihnen, häufige Fehler zu erkennen und zu beheben.
Keine interne Kennung gefunden: Eine interne Kennung wird in SafetyCulture automatisch generiert, nachdem ein Asset erstellt wurde. Sie dürfen sie nicht eingeben oder bearbeiten.
Doppelte eindeutige Kennung: Jedes Asset muss eine eindeutige Kennung haben. Stellen Sie sicher, dass keine zwei Assets die gleiche eindeutige Kennung haben.
Fehlender Asset-Typ: Jedes Asset muss einen Typ enthalten, der dem beim Herunterladen der CSV-Vorlage ausgewählten Asset-Typ entspricht.
Ungültige Standortkennung angegeben: Standortkennung sind eindeutige Zeichenfolgen zur Identifizierung der untersten Standort-Ebenen in Ihrer Organisation. Geben Sie nicht den Standort-Namen anstelle einer Standortkennung ein. Wenn Sie Assets Standorten zuweisen möchten, stellen Sie sicher, dass Sie die richtigen Standortkennungen abrufen, bevor Sie Ihre CSV-Datei hochladen.
Falsch formatierte Daten: Vergewissern Sie sich, dass jedes Datum so formatiert ist, wie das Datumsformat Ihres Profils.
Falsch formatierte Währungs werte: Jede Währung muss auf ISO 4217 Code (opens in new tab) basieren und darf keine Komma-Trennzeichen oder Sonderzeichen enthalten.
Ungültiger Name für Auswahloption: Stellen Sie sicher, dass der eingegebene Wert mit einer der vordefinierten Optionen für das Einzelauswahlfeld übereinstimmt.
Zugriff erforderlich: Möglicherweise haben Sie keinen Zugriff auf das Asset. Überprüfen Sie Ihre Zugriffsebene oder wenden Sie sich an Ihren Administrator.