- SafetyCulture nutzen
- Assets
- Assets zu einem Standort hinzufügen oder entfernen
Assets zu einem Standort hinzufügen oder entfernen
In diesem Artikel erfahren Sie, wie Sie mithilfe der Web-App und der Mobile-App Bezeichnungen von Aktionen hinzufügen oder entfernen können.Warum sollte ich Assets zu Standorten hinzufügen?
Das Hinzufügen von Assets zu Standorten hilft dabei, Ihre Liste zu organisieren, indem sie unter bestimmten Orten oder Projekten gruppiert werden. So können Sie Assets leichter in großem Umfang verwalten und schnell erkennen, welche zu welchem Standort gehören. Außerdem wird Ihr Inspektionsprozess verbessert. Wenn ein Standort in einer Inspektion ausgewählt wird, werden bei Ihrer Asset-Frage zuerst die relevanten Assets dieses Standorts angezeigt. Sie können Assets über die Asset-Liste zu Standorten oder per CSV-Datei entfernen.
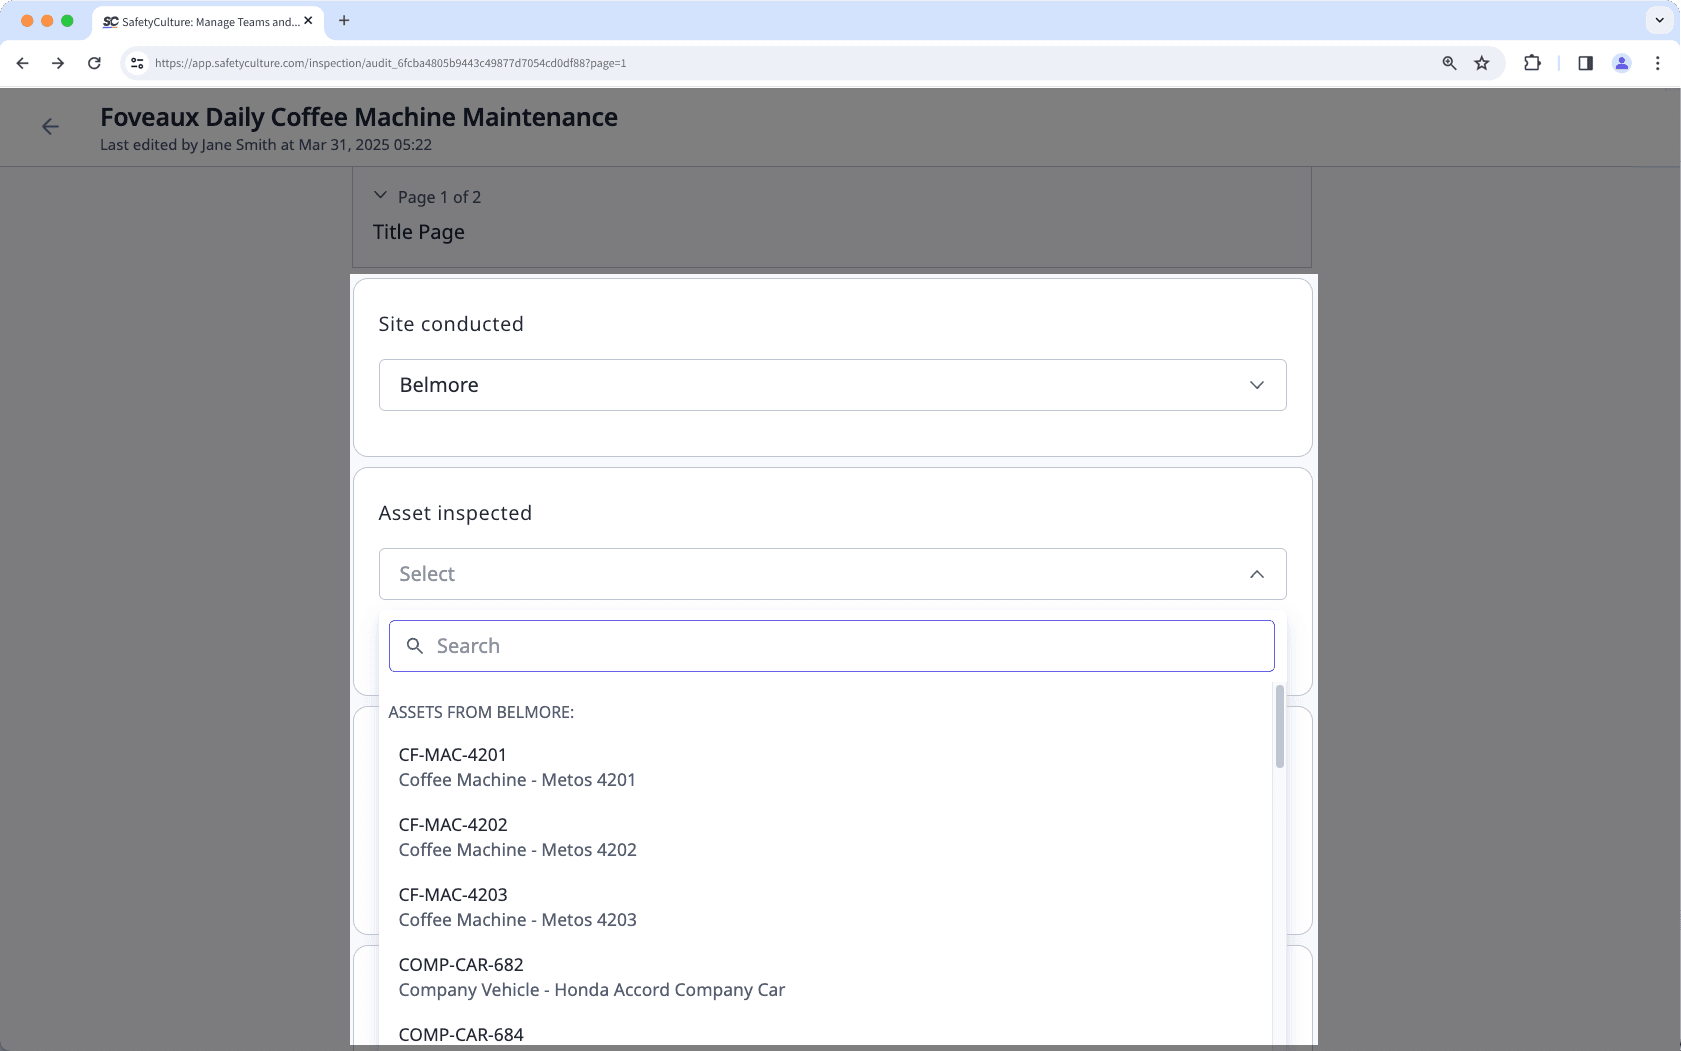
Jedes Asset kann nur zu einem Standort hinzugefügt werden. In der Web-App können Sie Assets über die Ansicht "Liste" zu Standorten hinzufügen.
Wenn Sie mehrere Assets verwalten, können Sie sie auch über CSV zu Standorten hinzufügen oder aus ihnen entfernen.
Assets zu einem Standort hinzufügen
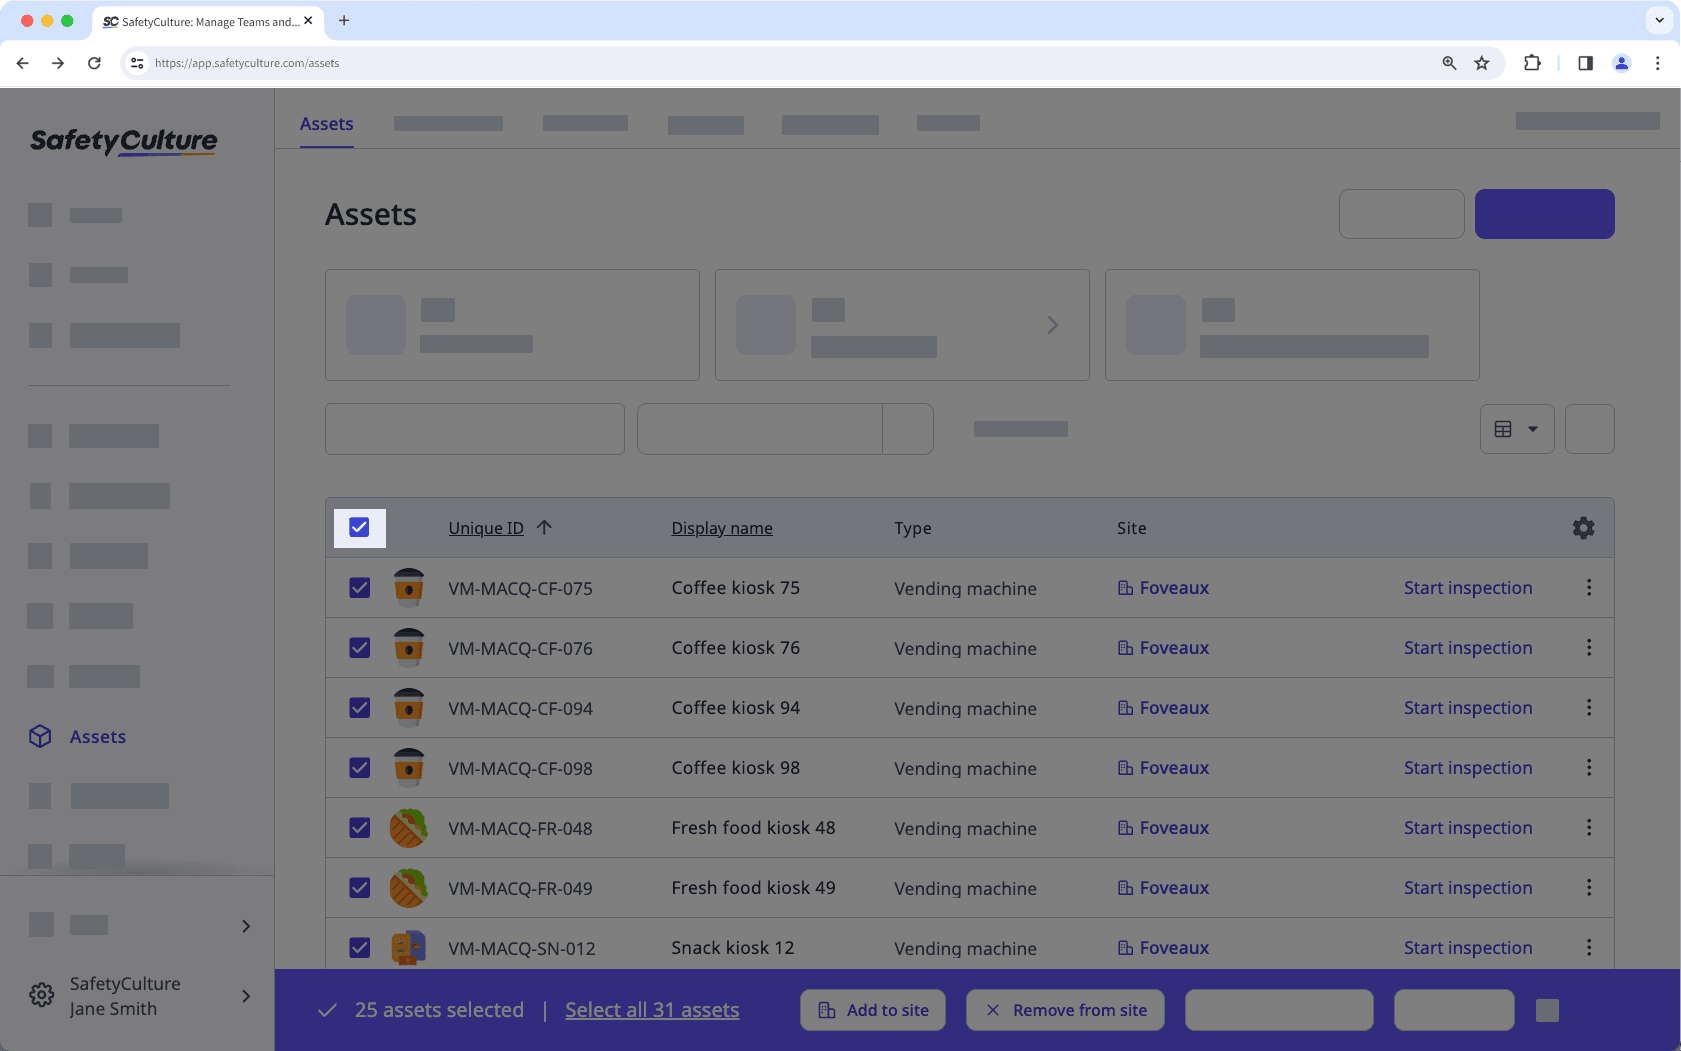
Wählen Sie
 Assets aus dem Menü auf der linken Seite.
Markieren Sie das Kästchen des Assets, das Sie zu einem Standort hinzufügen möchten. Sie können auch mehrere Assets auswählen, indem Sie die entsprechenden Kästchen markieren.
Klicken Sie unten rechts auf der Seite auf
 Zu Standort hinzufügen .
Zu Standort hinzufügen
Zu Standort hinzufügen .
Zu Standort hinzufügenAuf das Drop-down-Menü in der Seitenleiste klicken und den Standort auswählen.
Klicken Sie auf Speichern und anwenden.
Öffnen Sie die mobile App.
Tippen Sie auf
 Mehr in der unteren rechten Ecke Ihres Bildschirms.
Wählen Sie in der Liste der Optionen
Assets aus.Wählen Sie das Asset aus, das Sie einer Website hinzufügen möchten.
Tippen Sie in der oberen rechten Ecke Ihres Bildschirms auf
 und wählen Sie Asset bearbeiten aus.
Wählen Sie einen Standort aus.
Tippen Sie oben rechts auf Ihrem Bildschirm auf Speichern.
Über die Mobile-App können Sie jeweils nur ein Element von einem Standort entfernen.
Assets von einem Standort entfernen
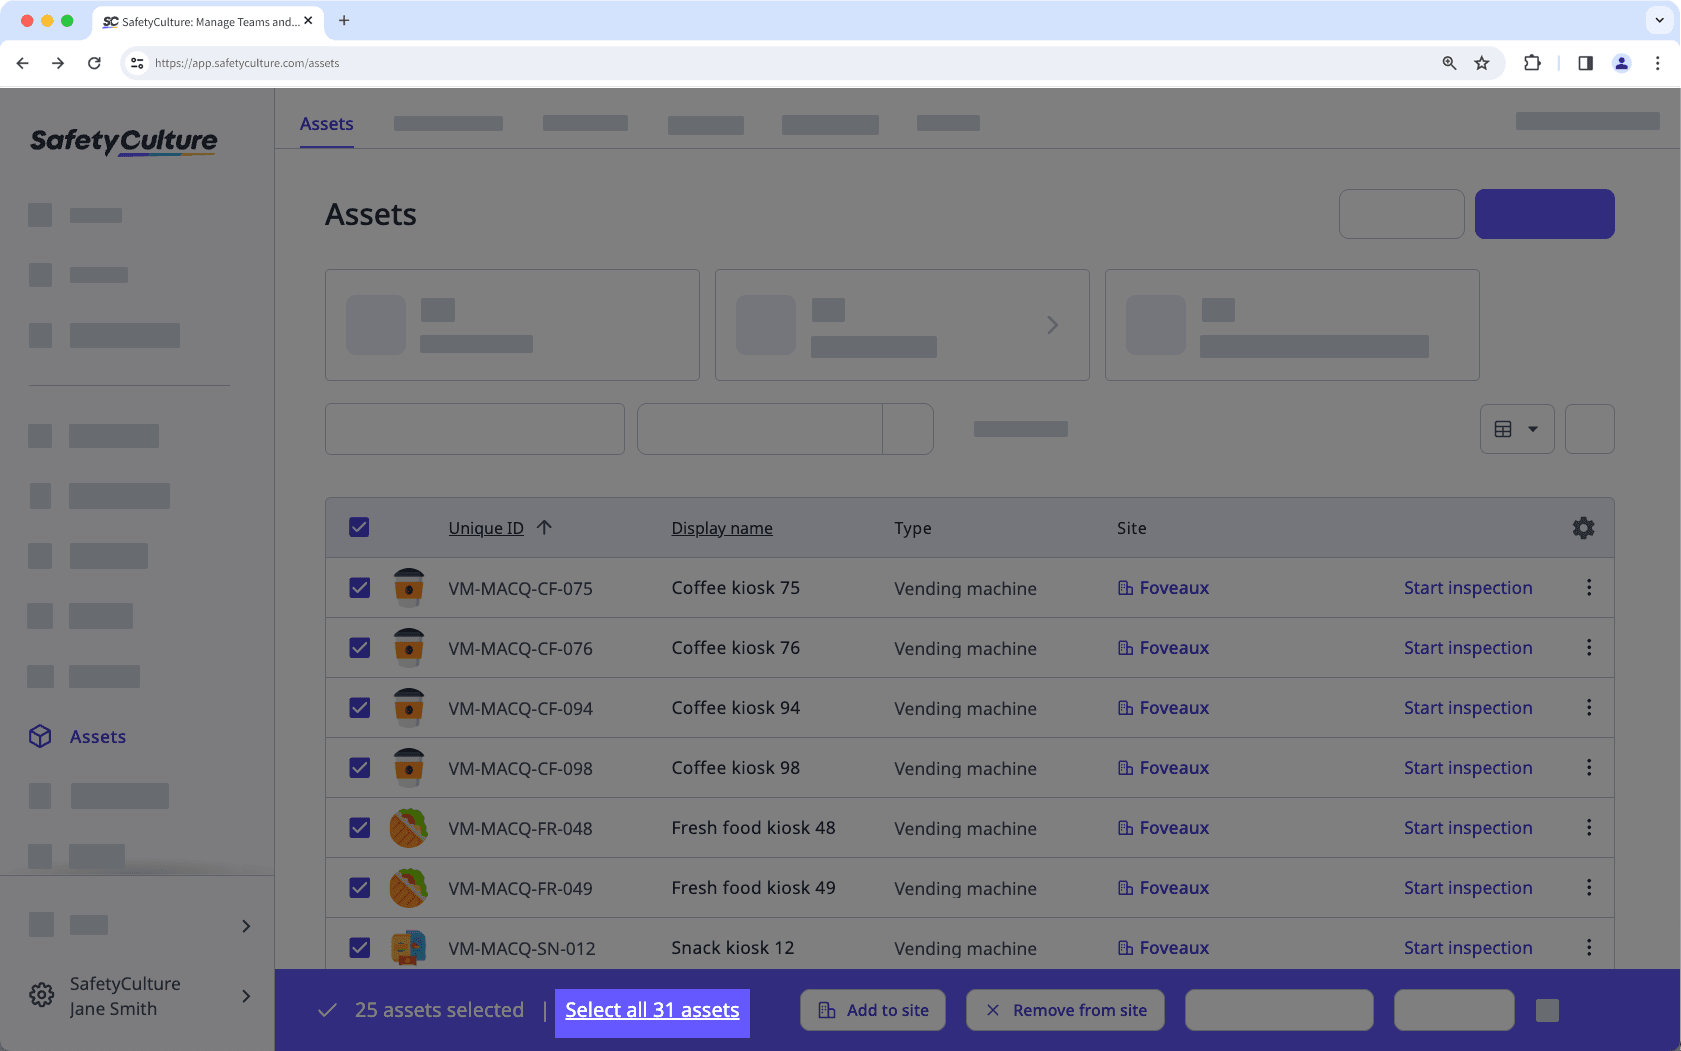
Select
Assets in the sidebar or select it in Mehr.Select the assets you want to remove from a site.
To select a single asset, click
 on the left-hand side of the asset.

To select multiple assets, click
in the table header to select all assets currently visible.
If you want to include all assets in the list, click Alle Assets auswählen at the bottom of the page.
Click
 Von Standort entfernen at the bottom of the page.
In the pop-up window, click Entfernen.
Öffnen Sie die mobile App.
Tippen Sie auf
Mehr in der unteren rechten Ecke Ihres Bildschirms.Wählen Sie in der Liste der Optionen
Assets aus.Wählen Sie das Asset aus, das Sie von einem Standort entfernen möchten.
Tippen Sie in der oberen rechten Ecke Ihres Bildschirms auf
und wählen Sie Asset bearbeiten aus.Tippen Sie auf den Standort und dann in der oberen linken Ecke Ihres Bildschirms auf Löschen.
Tippen Sie oben rechts auf Ihrem Bildschirm auf Speichern.
War diese Seite hilfreich?
Vielen Dank für Ihre Anmerkungen.