- Integrationen
- Zapier
- Zapier: Inspektionen durch Google Kalender-Ereignisse auslösen
Zapier: Inspektionen durch Google Kalender-Ereignisse auslösen
In diesem Artikel erfahren Sie, wie Sie einen Zap erstellen, um Inspektionen automatisch durch Google-Kalender-Ereignisse auszulösen.Produkte von Drittanbietern können sich im Laufe der Zeit ändern, so dass einige Labels oder Bildschirmlayouts in diesem Artikel in Ihrer Umgebung möglicherweise anders aussehen. Wenn Sie feststellen, dass etwas nicht mehr aktuell ist, verwenden Sie das Feedback-Formular am Ende dieser Seite, um uns dies mitzuteilen.
Wir wissen, dass die effektive Verwaltung von Zeitplänen ein entscheidender Bestandteil Ihres Erfolgs sein kann, insbesondere wenn Sie mehrere Aufgaben an verschiedene Nutzer und Gruppen delegieren müssen. Mit Integrationstools wie Zapier können Sie Aufgaben als Ereignisse im Google Kalender erstellen und jedes Ereignis so einstellen, dass SafetyCulture Inspektionen automatisch gestartet werden. Dies ist eine gute Möglichkeit, Ihre Inspektionen basierend auf den Zeitplänen Ihrer Organisation zu automatisieren.
Hinweis
Dieser Zap nutzt Google Kalendar als Online-Kalender, um neue Inspektionen auszulösen. Dies ist mit anderen Connectors wie z.B. Calendly austauschbar.
Vorlagen, die für neue Inspektionen verfügbar sind, basieren auf den Inspektionen, auf die Ihr Konto Zugriff hat. Erfahren Sie, wie Sie sich selbst durch Zuweisung der Berechtigung "Übergeordnete Berechtigungen: Alle Daten anzeigen" Zugriff zu Vorlagen gewähren können.
Neue Inspektionen, die aus dem Zap heraus gestartet werden, übernehmen die Inspektionszugriffsregeln der Vorlage. Erfahren Sie, wie Sie Inspektionszugriffsregeln für Ihre Vorlagen einrichten können.
Wenn Sie Mitglied in mehreren Organisationen sind, wenden Sie sich bitte an unser Kundensupport-Team, um Unterstützung bei der Verbindung von Zapier mit der richtigen SafetyCulture-Organisation zu erhalten.
Wenn Sie auf Enterprise-Tarifsind, wenden Sie sich an Ihren Customer Success Manager, um Hilfe zu erhalten: mit SSO, User Provisioningoder Integrationen von Drittanbietern (Power Automate, Power BI, Zapier). Unser Kundensupport-Team kann in diesen Bereichen nur begrenzte Unterstützung leisten.
1. Ereignis-Start in Google Kalender
Oben links auf der Seite auf
 Erstellenklicken.
Suchen und unter "1. Auslöser" Google Kalender auswählen.
Klicken Sie auf das Dropdown-Menü „Auslöser“ und wählen Sie Ereignisstart aus.
Auf Fortfahrenklicken.
Wählen Sie Ihr Google Kalender-Konto aus dem Dropdown-Menü aus. Wenn dies Ihr erstes Zap mit Google Kalender ist, klicken Sie auf Bei Google Kalender anmelden, melden Sie sich dann bei Google an und fügen es zu Zapier hinzu.
Auf Fortfahrenklicken.
Auf das Dropdown-Menü "Kalender" klicken und den Kalender auswählen, den Sie verwenden möchten, um neue Inspektionen auszulösen.
Auf Fortfahrenklicken.
Klicken Sie auf Auslöser testen und auf Fortfahren, wenn ein Ereignis gefunden wurde.
2. Inspektion in SafetyCulture starten
Suchen und wählen Sie SafetyCulture unter "2. Aktion" aus.
Klicken Sie auf das Dropdown-Menü "Aktions-Ereignis" und wählen Sie Inspektion beginnen.
Auf Fortfahrenklicken.
Wählen Sie Ihr SafetyCulture-Konto aus dem Dropdown-Menü aus. Wenn dies Ihr erster Zap mit SafetyCulture ist, klicken Sie auf Bei SafetyCulture anmelden und fügen Sie dann Ihr SafetyCulture-Konto zu Zapier hinzu, indem Sie sich anmelden.
Auf Fortfahrenklicken.
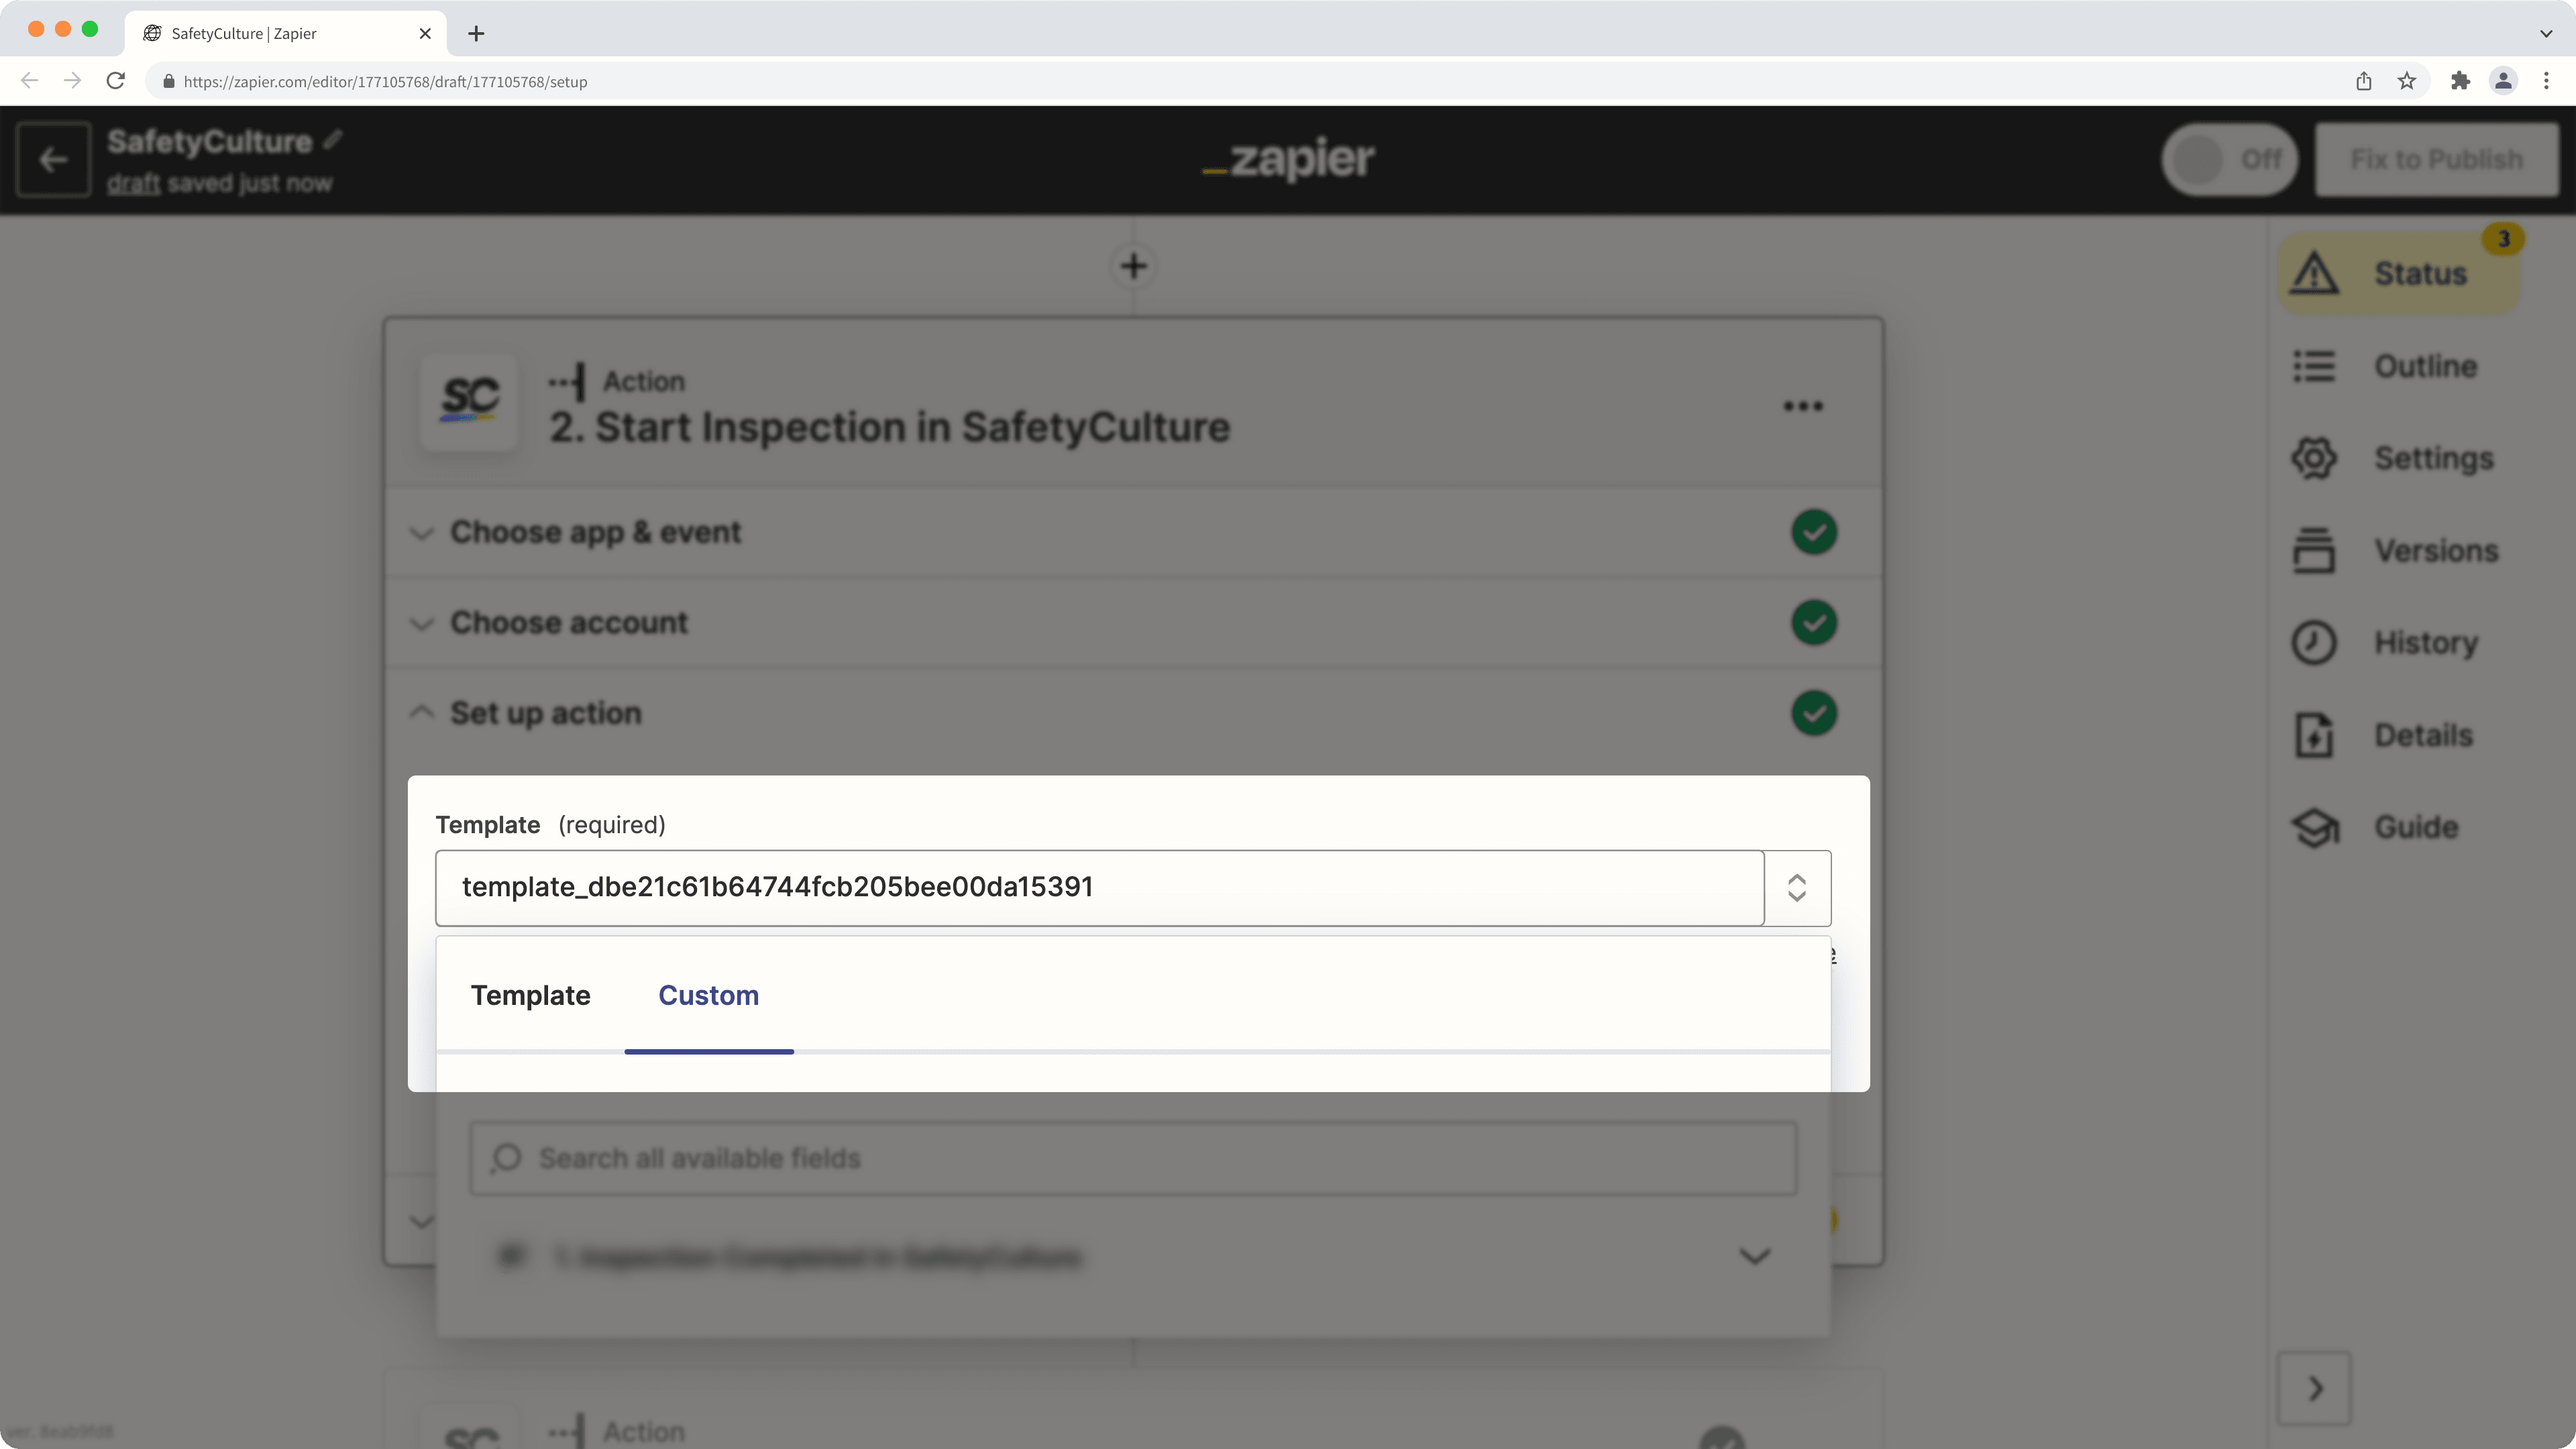
Klicken Sie auf das Dropdown-Menü, um die Vorlage auszuwählen. Bitte beachten Sie, dass nur die 20 zuletzt geänderten Vorlagen angezeigt werden. Wenn die gewünschte Vorlage nicht in der Liste enthalten ist, wählen Sie die Registerkarte e Nutzerdefiniert aus dem Dropdown-Menü aus und geben Sie die eindeutige Kennung der Vorlage in das Textfeld ein.
Klicken Sie auf Testen & Weiter. Dadurch wird eine neue Inspektion mit der angegebenen Vorlage gestartet.
Veröffentlichen Sie Ihren Zap, um eine neue Inspektion für jedes Ereignis in Ihrem Google Kalender zu erstellen. Wir empfehlen außerdem, dass Sie Ihrem Zap in der oberen linken Ecke der Seite einen Namen geben.
(Optional) 3. E-Mail in Gmail senden
Sie können eine zusätzliche Aktion hinzufügen, um Teammitglieder über die neue Inspektion zu benachrichtigen und sogar einen Deep Link im E-Mail-Text erstellen, der die Empfänger direkt zur Inspektion in der Web-App oder in der Mobile-App führt.
Klicken Sie auf
 am unteren Rand des Zap.
Suchen und wählen Sie Gmail aus.
Klicken Sie auf das Dropdown-Menü "Aktions-Ereignis" und wählen Sie E-Mail senden aus.
Auf Fortfahrenklicken.
Wählen Sie Ihr Gmail-Konto aus dem Dropdown-Menü aus. Wenn dies Ihr erster Zap mit Gmail ist, klicken Sie auf Bei Gmail anmelden, melden Sie sich dann bei Google an und fügen es zu Zapier hinzu.
Auf Fortfahrenklicken.
Folgende Felder konfigurieren:
An: Auf das Feld klicken und die E-Mail-Empfänger angeben, die Sie über eine neue Inspektion informieren möchten.
Betreff: Klicken Sie auf das Feld und geben Sie den E-Mail-Betreff an. Sie können Details aus dem Kalenderereignis und der neuen Inspektion im Dropdown-Menü verwenden, um eine Benennungsregel zu erstellen. Zum Beispiel: "[1. Zusammenfassung]: [2. Vorlagendaten Metadatenname]".
Body: Klicken Sie auf das Feld und geben Sie den Text der E-Mail an. Ähnlich wie beim Betreff-Feld können Sie Details aus dem Kalenderereignis und der neuen Inspektion verwenden, um den E-Mail-Text zu erstellen. Sie können auch die "Audit-Kennung" als Teil der Details der neuen Inspektion verwenden, um einen Deep Link zu erstellen, der die Empfänger direkt zur Inspektion in der Web-App oder Mobile-App führt. Sehen Sie sich hierzu folgendes Beispiel als Referenz an:

Auf Fortfahrenklicken.
Klicken Sie auf Testen & Weiter. Dadurch wird eine E-Mail an die von Ihnen angegebenen Empfänger gesendet.
Aktivieren Sie Ihren Zap, um zu beginnen, eine neue Inspektion zu erstellen und die angegebenen Empfänger für jedes Ereignis in Ihrem Google Kalender per E-Mail zu benachrichtigen. Wir empfehlen, dass Sie auch Ihren Zap in der oberen linken Ecke der Seite benennen.
War diese Seite hilfreich?
Vielen Dank für Ihre Anmerkungen.