- Intégrations
- Zapier
- Zapier : commencer des inspections à partir d'événements Google Calendar
Zapier : commencer des inspections à partir d'événements Google Calendar
Comment créer un Zap pour commencer automatiquement des inspections à partir d'événements Google Agenda ?Les produits tiers peuvent évoluer au fil du temps, c'est pourquoi certaines étiquettes ou mises en page d'écran mentionnées dans cet article peuvent être différentes. Si vous remarquez des informations obsolètes, veuillez nous en faire part à l'aide du formulaire de commentaires situé au bas de cette page.
La gestion efficace des plannings peut être un élément essentiel de la réussite, en particulier lorsque vous avez plusieurs tâches à déléguer à différents utilisateurs et groupes. Grâce à des outils d'intégration tels que Zapier, vous pouvez créer des tâches en tant qu'événements sur Google Calendar et définir chaque événement pour commencer automatiquement les inspections SafetyCulture. Cela peut être un excellent moyen d'automatiser vos inspections en fonction des plannings de votre organisation.
Veuillez noter
Ce Zap utilise Google Agenda comme calendrier en ligne pour déclencher de nouvelles inspections, ce qui peut être interchangé avec d'autres connecteurs tels que Calendly.
Les modèles disponibles pour les nouvelles inspections sont basés sur les inspections auxquelles votre compte a accès. Apprenez à vous donner un accès aux modèles en vous attribuant l'autorisation « Outrepasser l'autorisation : afficher toutes les données ».
Les nouvelles inspections commencées à partir du Zap héritent des règles d'accès à l'inspection du modèle. Apprenez à configurer des règles d'accès aux inspections pour vos modèles.
Si vous faites partie de multiples organisations, veuillez contacter notre équipe de support etchnique client pour obtenir de l'aide afin de connecter Zapier à la bonne organisation de SafetyCulture.
Si vous êtes sur Offre Enterprise, contactez votre responsable de la réussite client pour obtenir de l'aide avec SSO, le provisioning des utilisateurs, ou les intégrations tierces (Power Automate, Power BI, Zapier). Notre équipe d'assistance technique ne peut fournir qu'une assistance limitée dans ces zones.
1. Commencement de l'événement dans Google Agenda
Cliquez sur
 Créer en haut à gauche de la page.
Cherchez et sélectionnez Calendrier Google sous « 1. déclencheur ».
Cliquez sur le menu déroulant « Déclencher événement » et sélectionnez Début de l'événement.
Cliquez sur Continuer.
Sélectionnez votre compte Calendrier Google dans le menu déroulant. S'il s'agit de votre premier Zap avec le Calendrier Google, cliquez sur Se connecter à Google Calendar, puis connectez-vous à Google et ajoutez-le à Zapier.
Cliquez sur Continuer.
Cliquez sur le menu déroulant « Calendrier » et sélectionnez le calendrier que vous souhaitez utiliser et déclencher de nouvelles inspections.
Cliquez sur Continuer.
Cliquez sur Déclencheur de test et cliquez sur Continuer une fois qu'un évènement a été trouvé.
2. Commencer une inspection dans SafetyCulture
Dans « 2. Action », recherchez et sélectionnez SafetyCulture.
Cliquez sur le menu déroulant « Événement d'action » et sélectionnez Commencer l'inspection.
Cliquez sur Continuer.
Sélectionnez votre compte SafetyCulture dans le menu déroulant. S'il s'agit de votre premier Zap avec SafetyCulture, cliquez sur Se connecter à SafetyCulture et ajoutez ensuite votre compte SafetyCulture à Zapier en vous connectant.
Cliquez sur Continuer.
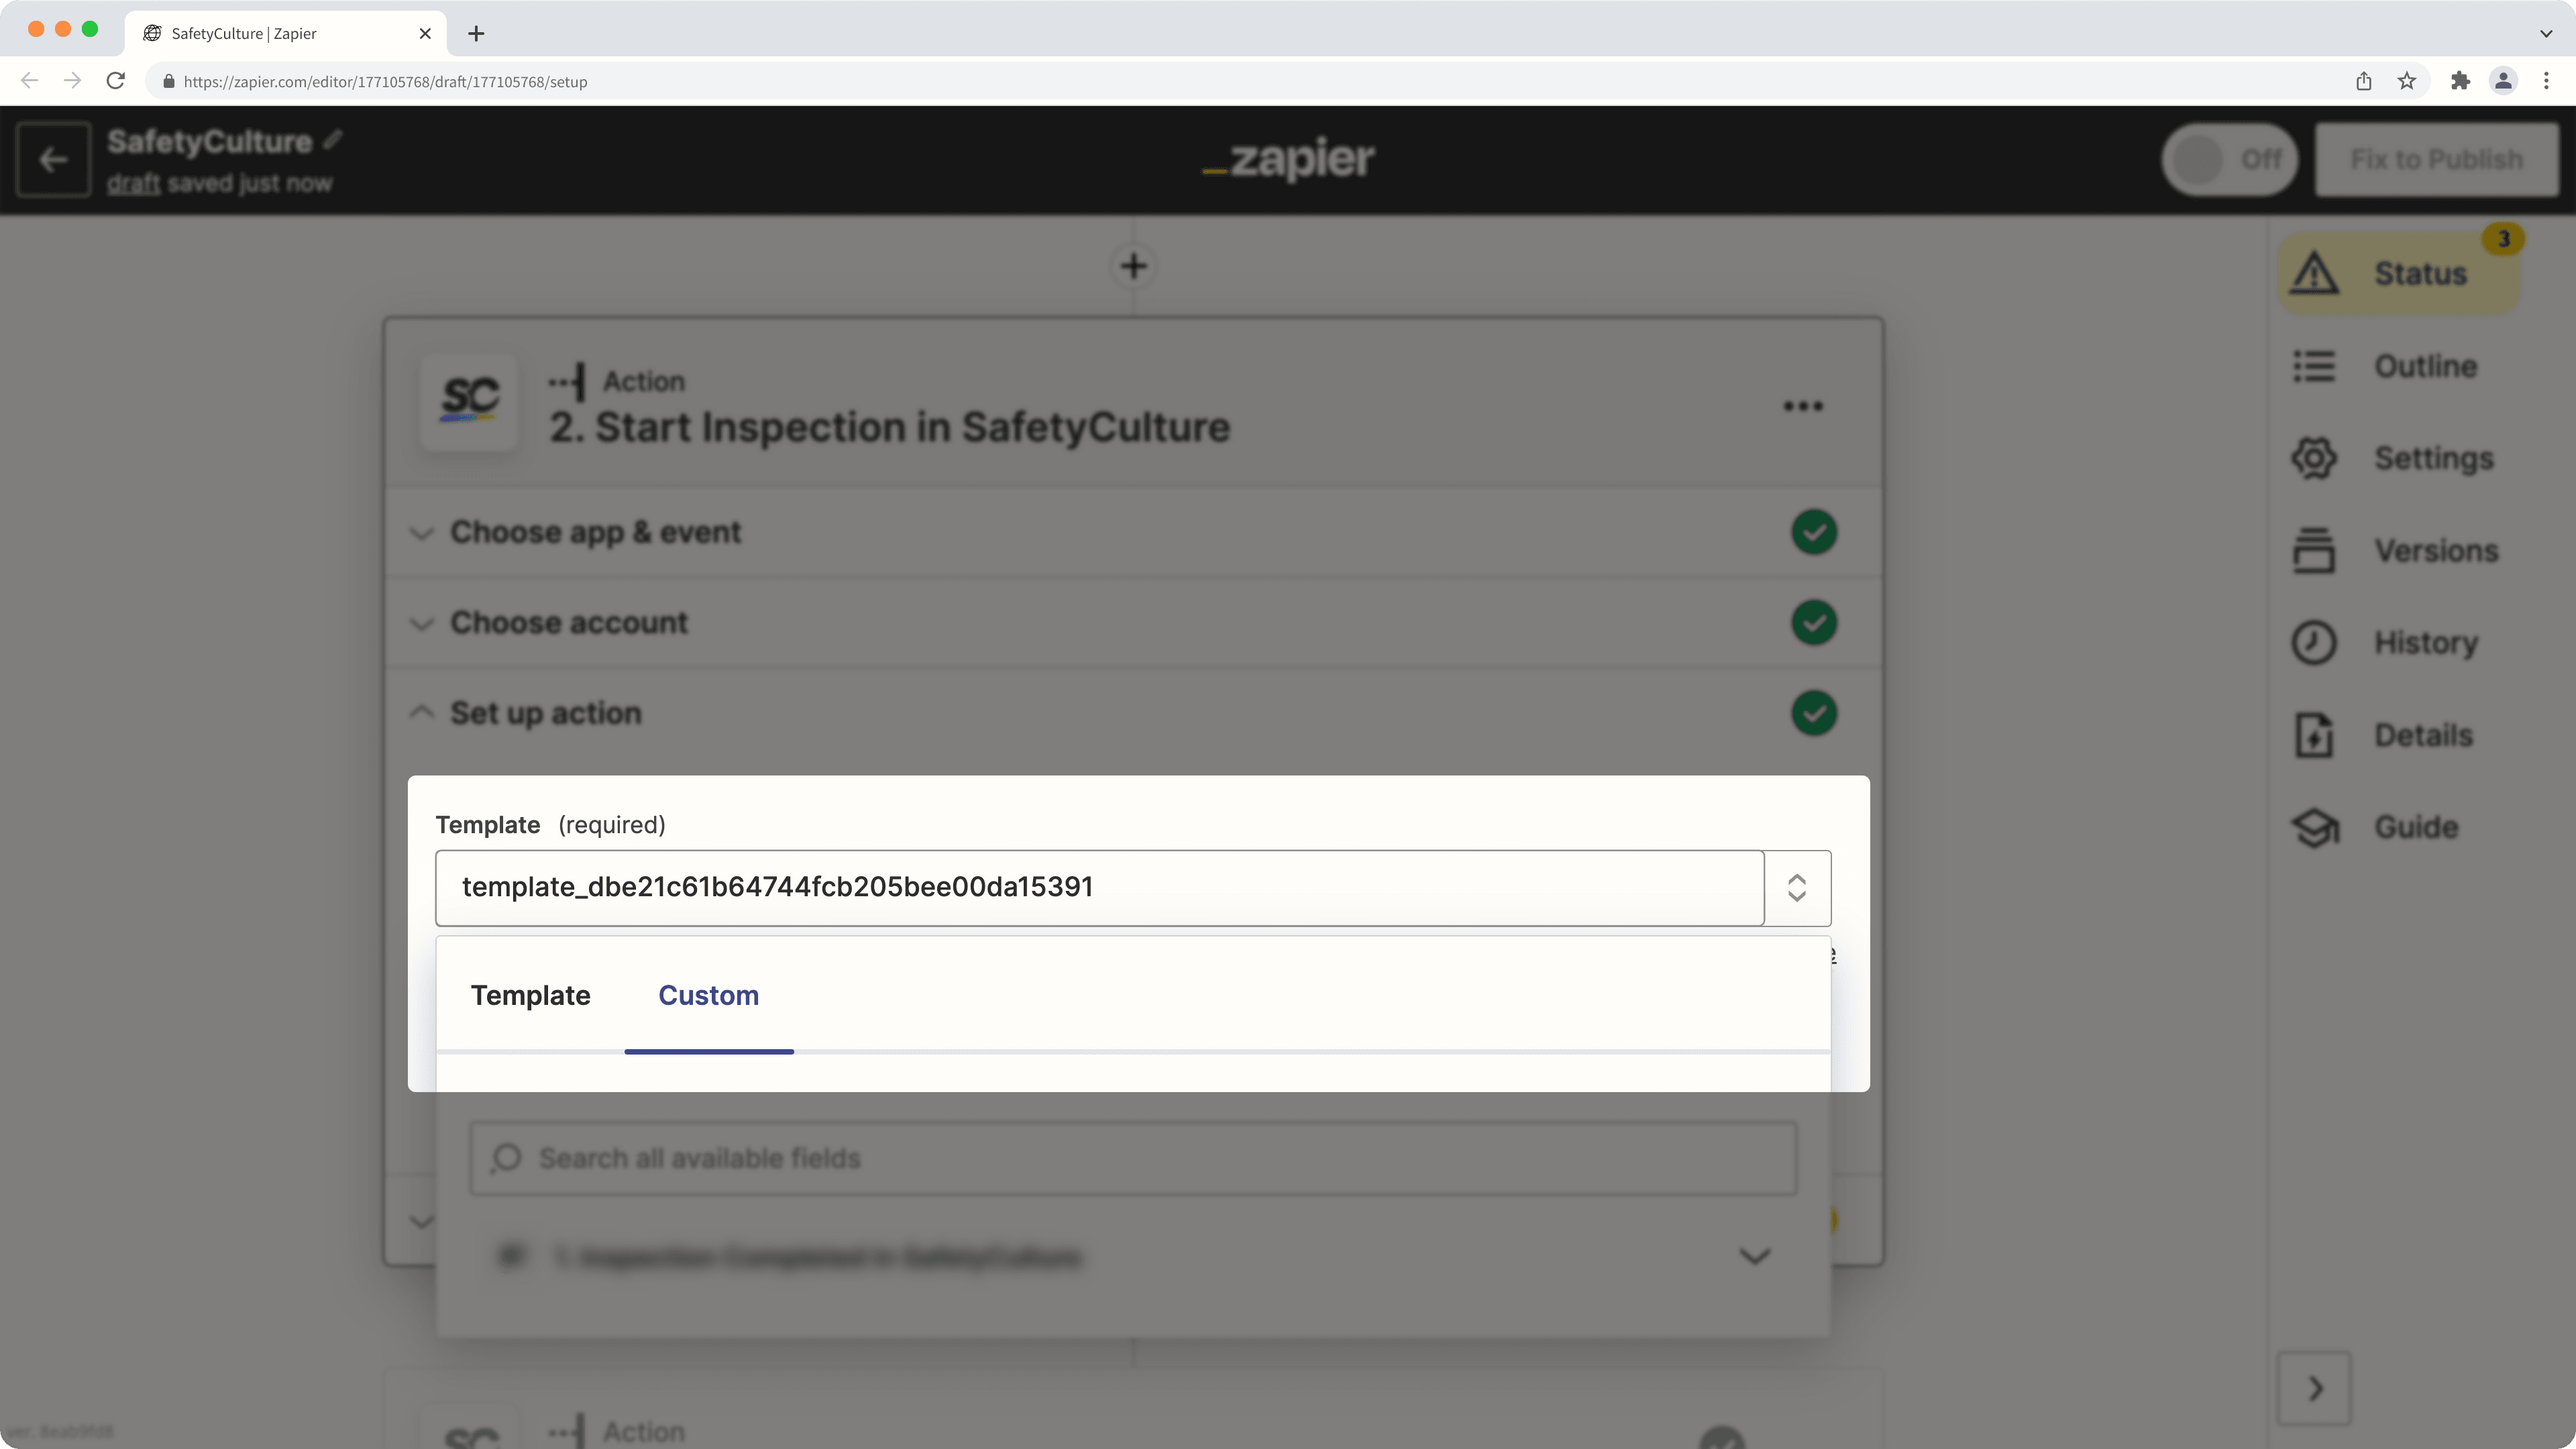
Cliquez sur le menu déroulant « Nom du modèle » pour sélectionner le modèle que vous souhaitez utiliser pour les nouvelles inspections. Veuillez noter que seuls les 20 modèles les plus récemment modifiés sont affichés. Si le modèle que vous souhaitez utiliser ne figure pas dans la liste, sélectionnez l'onglet Personnalisé dans le menu déroulant et saisissez l'identifiant unique du modèle dans le champ de texte.
Cliquez sur Tester et continuer. Une nouvelle inspection est commencée à l'aide du modèle précisé.
Publiez votre Zap pour commencer à créer une nouvelle inspection pour chaque événement de votre Google Agenda. Nous vous recommandons également de donner un nom à votre Zap en haut à gauche de la page.
(Facultatif) 3. Envoyer un e-mail dans Gmail
Vous pouvez ajouter une action supplémentaire pour informer les membres de l'équipe de la nouvelle inspection et même créer un lien profond dans le corps de l'e-mail pour amener les destinataires directement à l'inspection sur l'application Web et l'application portable.
Cliquez sur
 en bas du Zap.
Recherchez et sélectionnez Gmail.
Cliquez sur le menu déroulant « Événement d'action » et sélectionnez Envoyer un e-mail.
Cliquez sur Continuer.
Sélectionnez votre compte Gmail dans le menu déroulant. S'il s'agit de votre premier Zap avec Gmail, cliquez sur Se connecter à Gmail, puis connectez-vous à Google et ajoutez-le à Zapier.
Cliquez sur Continuer.
Configurez les champs suivants :
À : cliquez sur le champ et spécifiez les destinataires de l'e-mail que vous souhaitez notifier d'une nouvelle inspection.
Objet : cliquez sur le champ et indiquez l'objet de l'e-mail. Vous pouvez utiliser les détails de l'événement du calendrier et la nouvelle inspection dans le menu déroulant pour créer une convention de nommage. Par exemple, « [1. Résumé] : [2. Nom des métadonnées des données modèles] ».
Corps : cliquez sur le champ et indiquez le corps du message. Comme pour le champ Objet, vous pouvez utiliser les détails de l'événement du calendrier et de la nouvelle inspection pour créer le corps de l'e-mail. Vous pouvez également utiliser l'ID d'audit dans le cadre des détails de la nouvelle inspection pour créer un lien profond qui peut amener les bénéficiaires directement à l'inspection sur l'application Web ou l'application portable. Consultez l'exemple suivant à titre de référence :

Cliquez sur Continuer.
Cliquez sur Tester et continuer. Cela devrait permettre d'envoyer un e-mail aux destinataires que vous avez précisés.
Activez votre Zap pour commencer à créer une nouvelle inspection et notifier par e-mail lesdestinataires pour chaque événement de votre Google Agenda. Nous vous recommandons de nommer votre Zap en haut à gauche de la page.
Cette page vous a-t-elle été utile?
Merci pour votre commentaire.