¿Qué son las categorías de contratiempos?
Las categorías de contratiempos le permiten gestionar quién puede informar de incidencias en su organización, organizar la información que se incluye en el informe inicial y editar el contenido y los destinatarios de las notificaciones de contratiempos. También puede utilizar las categorías para configurar Alertas críticas para contratiempos de alta prioridad, a fin de garantizar que los usuarios reciban notificaciones incluso cuando sus dispositivos estén en silencio o en modo «No molestar». Además, con las categorías de contratiempos, puede proponer plantillas para investigaciones más detalladas de contratiempos específicos.
Lo que necesitarás
Crear una categoría de contratiempos
Seleccione Contratiempos en la barra lateral o selecciónelo en Más.
Seleccione Categorías de la parte superior de la página.
Haga clic en Añadir categoría en la parte superior derecha de la página.
En la ventana emergente, introduzca un nombre de categoría y haga clic en Crear.
En Flujo de trabajo, puede personalizar los siguientes ajustes:

Edite los detalles de la categoría: Haga clic en Editar en el lado derecho de la sección "Detalles de la categoría". Haga clic en el nombre de la categoría e introduzca un nuevo nombre. También puede añadir una descripción en el campo "Descripción".
Configure sus notificaciones por correo electrónico: Haga clic en Editar en el lado derecho de la sección "Notificaciones". Seleccione los destinatarios de sus notificaciones en el menú desplegable y seleccione el tipo de notificación por correo electrónico que prefiera.
Configure alertas críticas: Haga clic en Editar en el lado derecho de la sección "Alertas críticas" y seleccione los destinatarios de sus alertas en el desplegable.
Gestione los campos del contratiempo: Haga clic en Editar en el lado derecho de la sección "Campos de contratiempo". Active o desactive cada campo y marque la casilla de verificación en el lado derecho para marcar los campos como obligatorios. Haga clic en para reordenar los campos.
Añada preguntas personalizadas: Haga clic en Editar en el lado derecho de la sección "Preguntas personalizadas". Haga clic en Añadir pregunta, introduzca las preguntas que desea incluir en el informe y marque la casilla de verificación en el lado derecho para marcar la pregunta como obligatoria.
Vincule plantillas: Haga clic en Vincular plantillas en el lado derecho de la sección " Plantillas vinculadas" y seleccione la plantilla en el desplegable.
Haga clic en Acceso en la parte superior de la página para personalizar los siguientes ajustes:
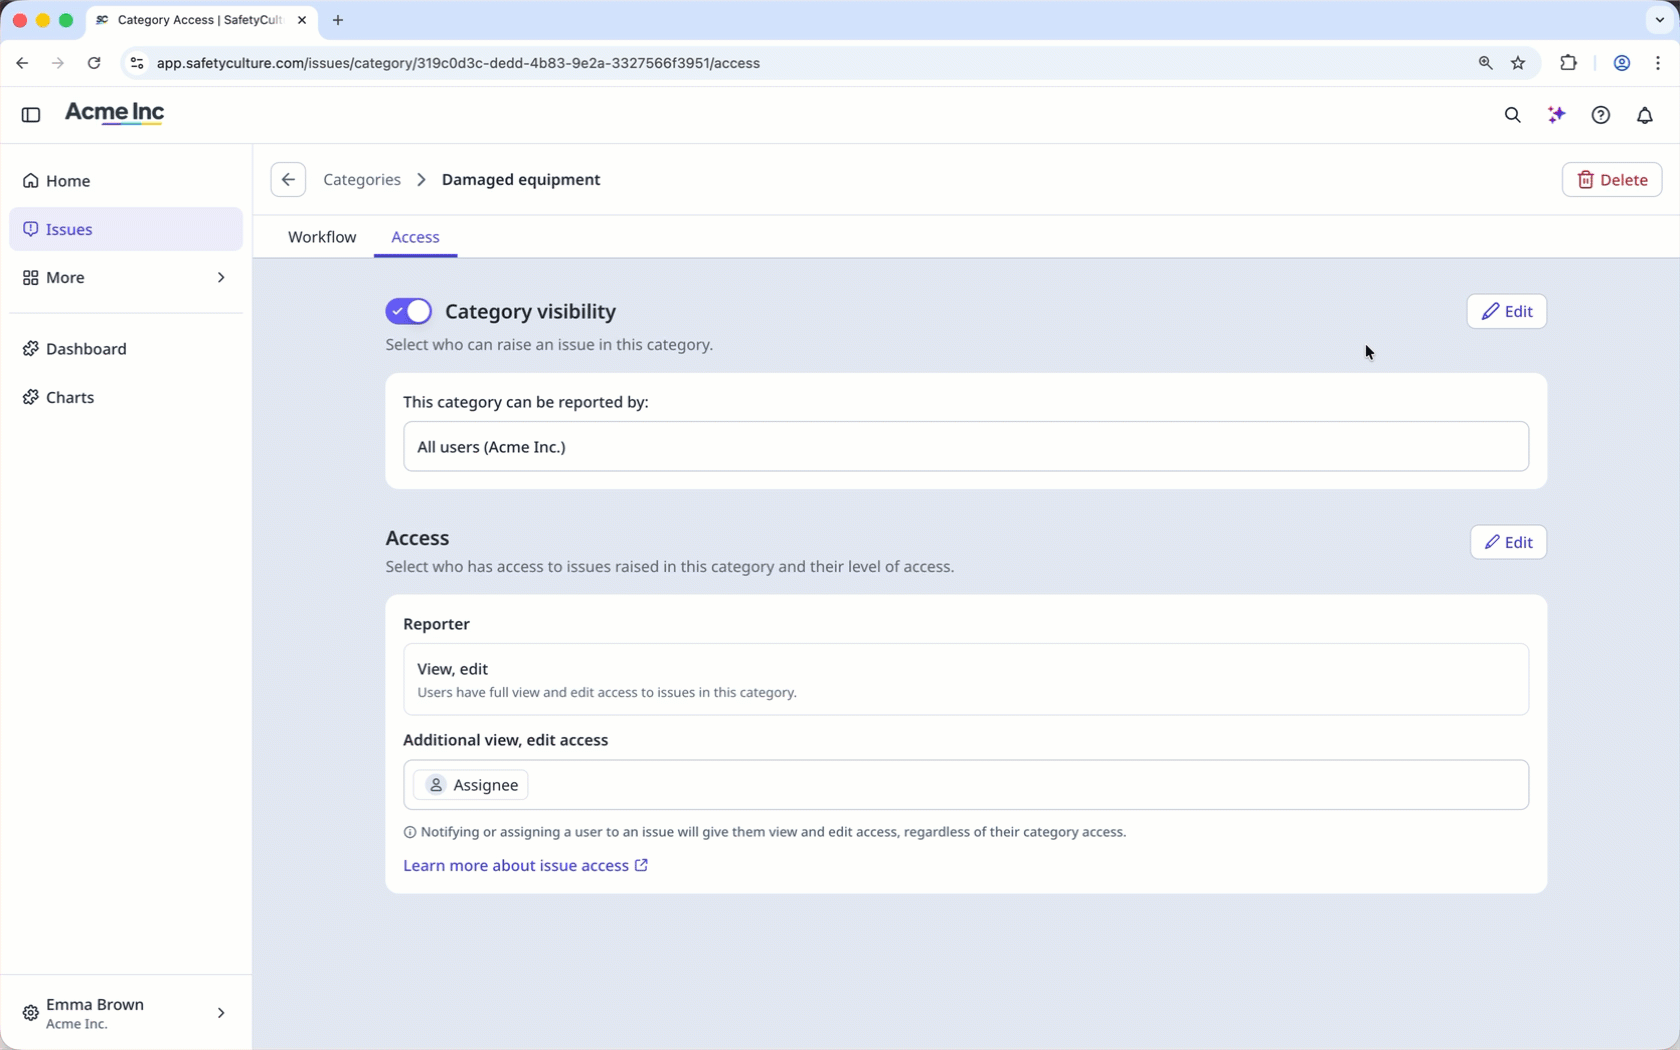
Gestione la visibilidad de la categoría: active o desactive la visibilidad de la categoría para mostrar u ocultar la categoría del contratiempo. Haga clic en Editar en el lado derecho para seleccionar quién puede identificar contratiempos relacionados con esta categoría.
Configure el acceso a contratiempos: Haga clic en Editar en el lado derecho de la sección " Acceso", y seleccione el nivel de acceso de la persona que lo identificó. También puede añadir acceso adicional para ver y editar a usuarios y grupos.
Adding descriptions to issue categories helps the AI categorize reports more accurately. The more specific the description, the better the match.