- Using SafetyCulture
- Assets
- Edit asset types and fields
Edit asset types and fields
Learn how to edit asset types and fields to keep your asset information accurate and up to date.Changes to asset type fields, such as renaming fields or modifying options for single select fields, apply to all assets of that type.
In addition, names for asset types and fields must be unique. You can add up to 200 custom fields for your asset types.
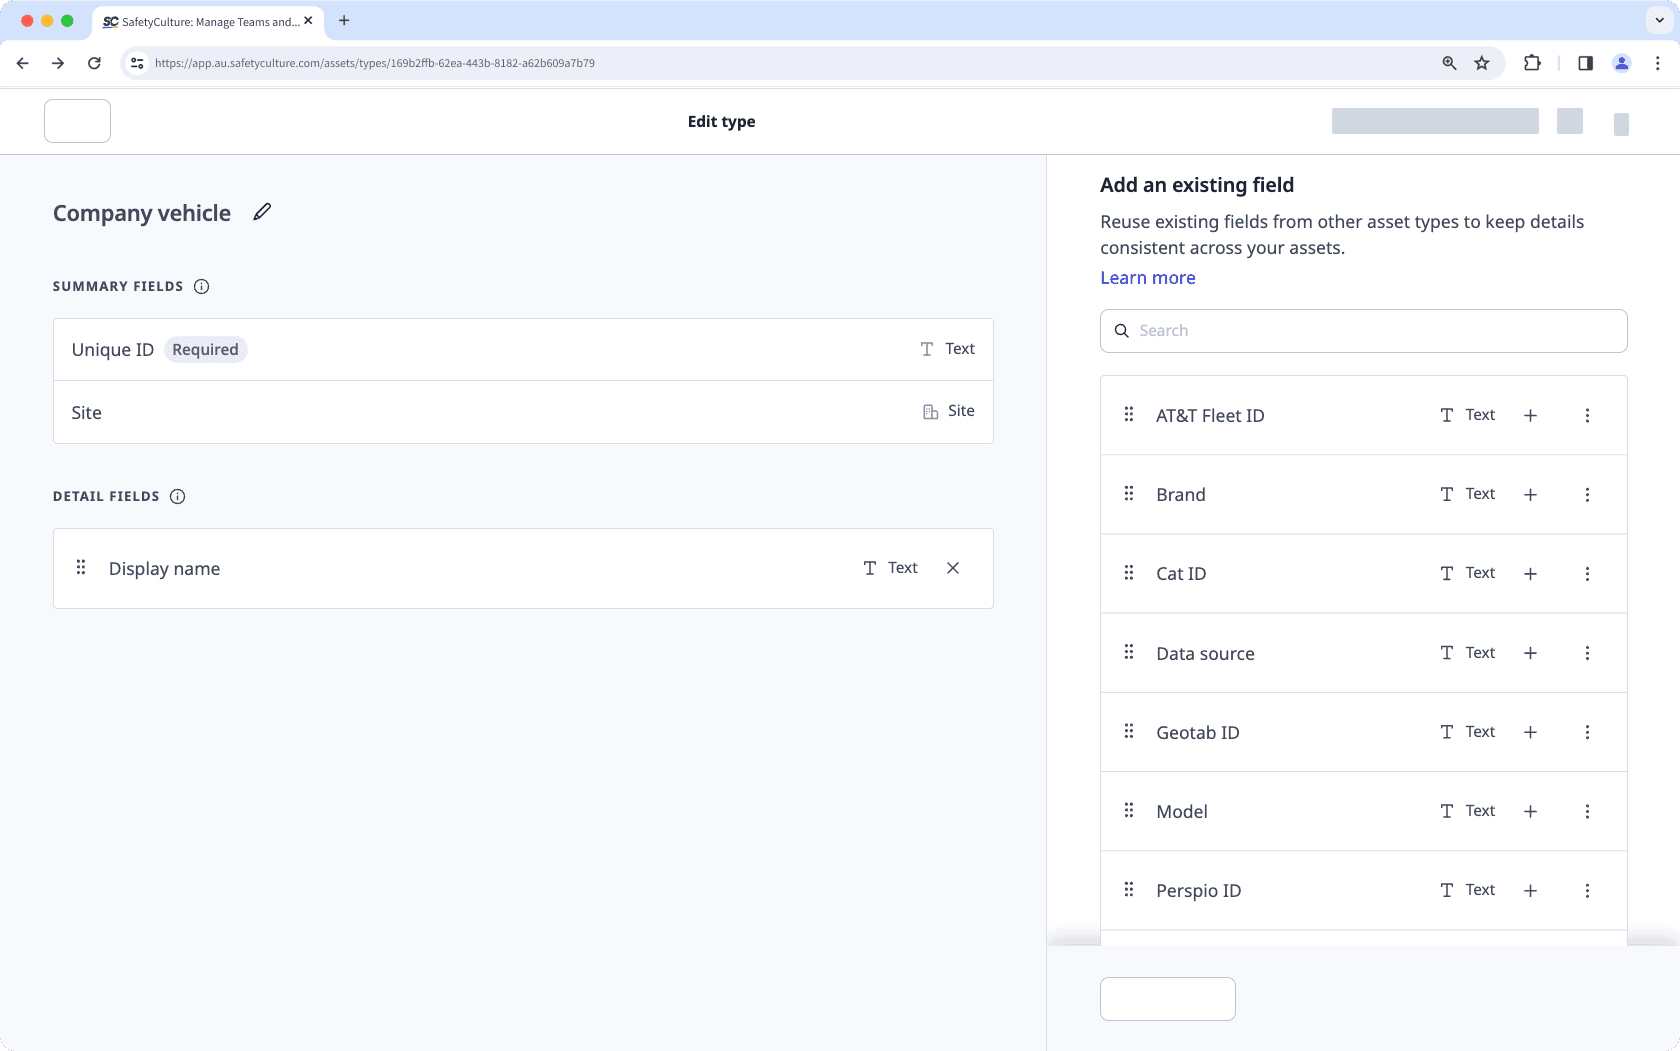
Edit an asset type and fields
Select
 Assets in the sidebar or select it in
  More.
More.Click
 Settings on the upper-right of the page.
In Types, select the asset type you want to edit.
Click
 on the upper-left of the page to rename the type.
On the right-hand side of the page, create new or manage existing asset fields accordingly.
Create a new field: Click
 Create field on the lower-right of the page. In the pop-up window, enter the name of the field and select the field type. Then, click Save.
Add an existing field: Click
on a field's right-hand side. Alternatively, click  to drag and drop the field to the "Detail fields" section on the left-hand side of the page.
Edit a field: Click
 on a field's right-hand side and select Edit field. In the pop-up window, you can rename the field or edit any options for single select fields.
On the left-hand side of the page, manage your detail fields accordingly.
Remove a field: Click
 on a field's right-hand side or click to drag and drop the field to the right-hand side of the page.
Reorder detail fields: Click
to drag and drop the field to your preferred arrangement.
Click Done on the upper-left of the page.
Frequently asked questions
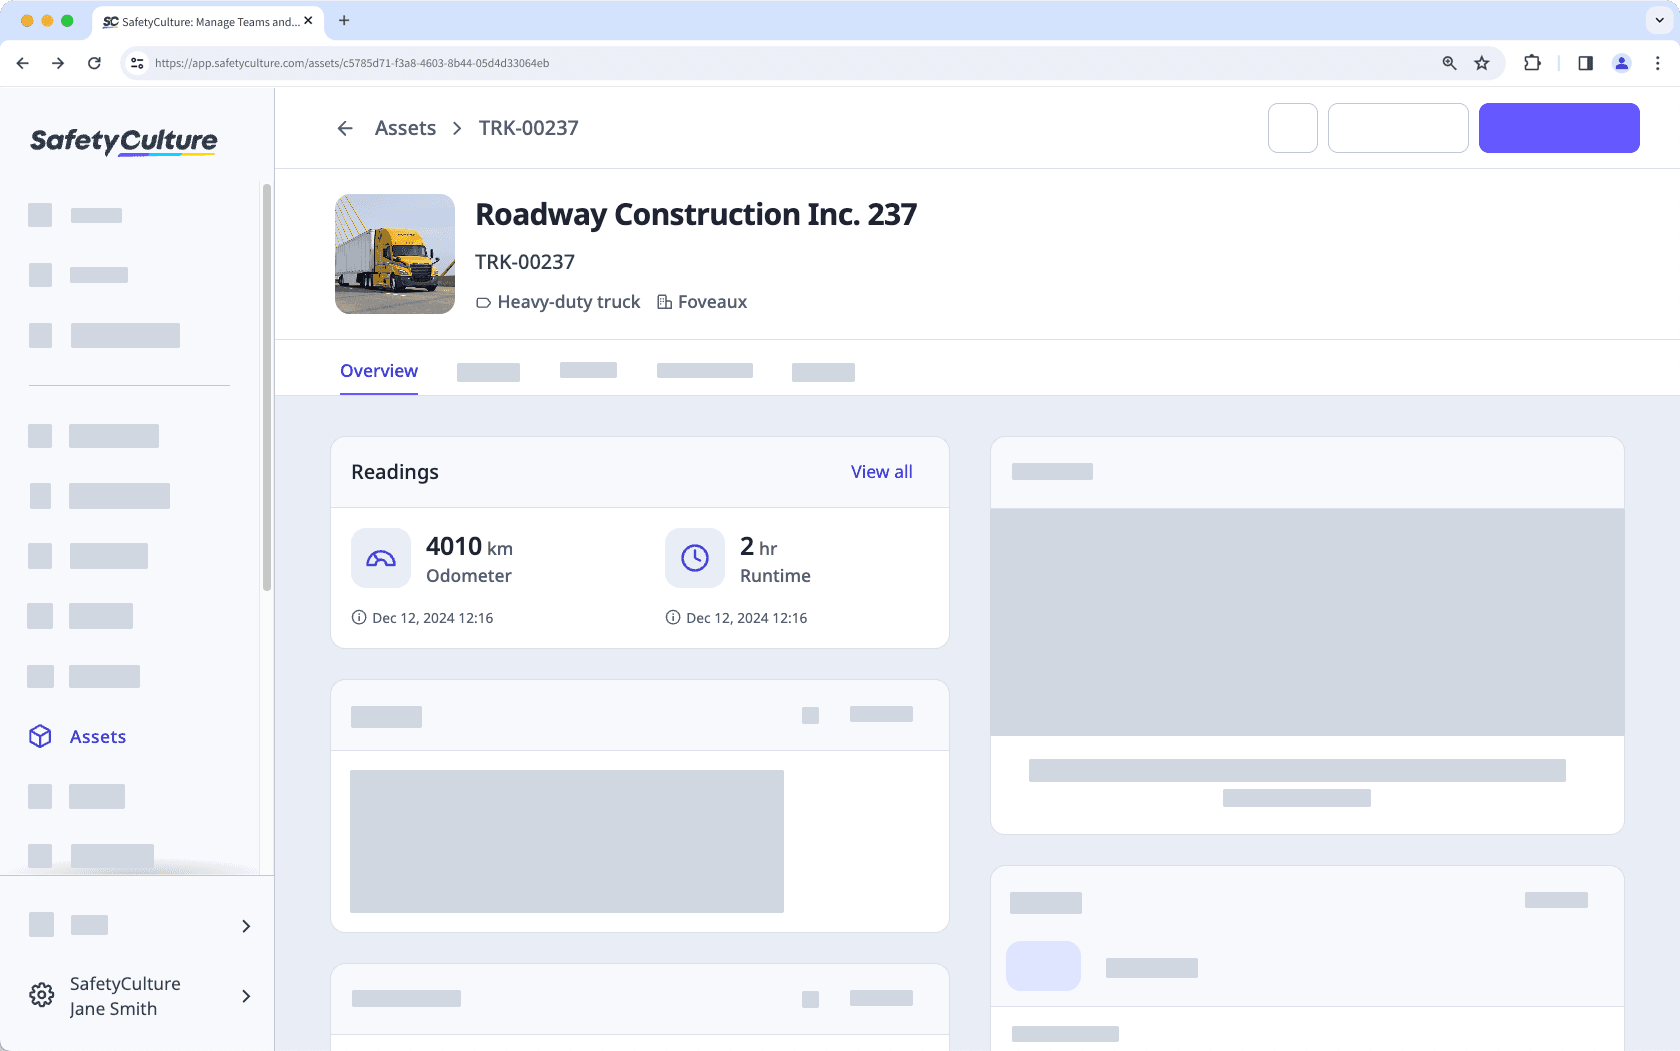
When you create asset types for the first time, you'll have access to predefined fields like unique ID, site, and display name, plus others such as AT&T Fleet ID, brand, registration number, and VIN. These built-in fields can't be renamed or deleted, but they're available for you to use. They help organize your assets and support automation, especially when integrating with solutions like Samsara or Geotab.
No, custom asset fields from asset types are not connected to asset readings. Users will have to set up readings manually, either through inspections or telematics.
Was this page helpful?
Thank you for letting us know.