- Using SafetyCulture
- Actions
- Manage action types and fields
Manage action types and fields
Learn how to manage action types and fields via the web app.What can I do with action types and detail fields?
With action types and detail fields, you can fully tailor your actions to meet your organization's unique needs. Creating custom action types allows you to maintain your information structure within each action and define different categories of tasks, each with its own set of requirements.
For example, a "Work order" action might need specific details, while a "Corrective action" type might require different information. Moreover, to ensure details are only updated by authorized team members, you can control which users can edit fields in each action, ensuring data integrity and operational efficiency.
By default, users with "Override permissions: Manage all data" permission have full access to actions in your organization, meaning they can edit fields, update statuses, and delete actions.
Manage custom types
Select
 Actions in the sidebar or select it in
  More.
More.Click
 Settings on the upper-right of the page.
Under the "Action types" section, manage your custom types accordingly.
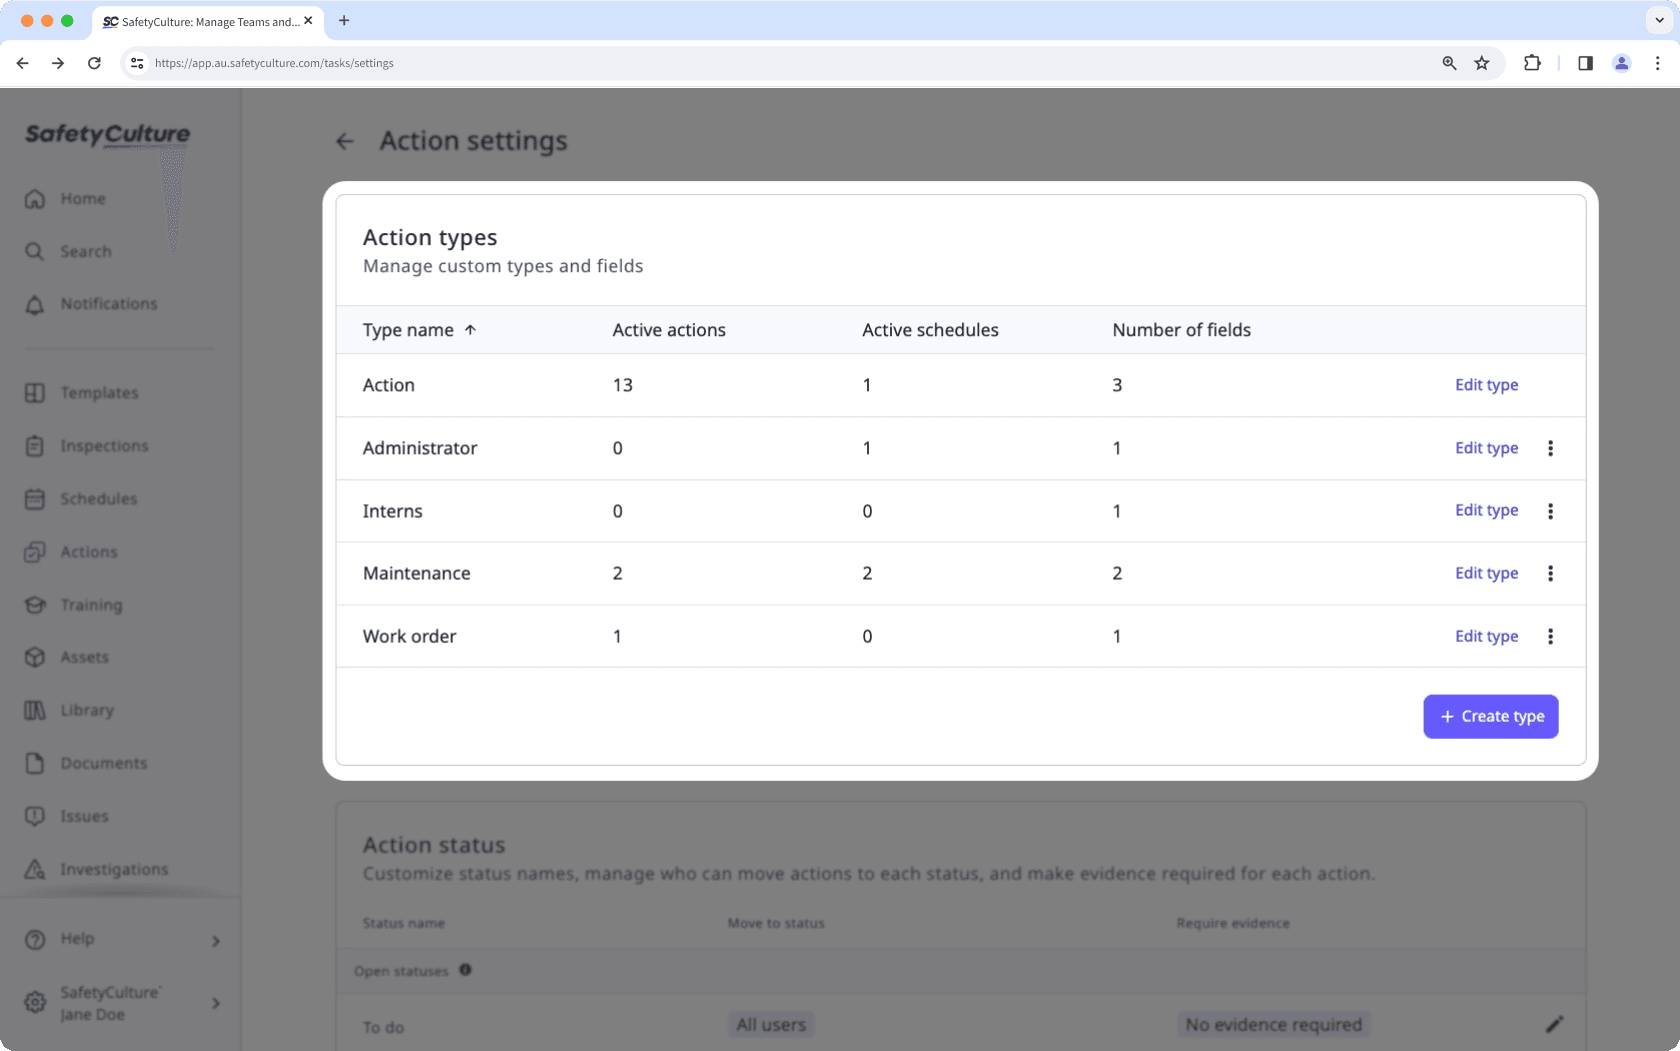
Create action type: Click
 Create type on the lower-right of the section. Then, in the pop-up window, enter the type name, and click Create type.
Edit type: Click Edit type to manage the custom fields in each custom type.
Rename type: Click
 , then click
  Rename type. In the pop-up window, enter the new type name and select Rename.
Delete type: Click
, then click  Delete type. In the pop-up window, click Delete.
Manage custom fields
Select
Actions in the sidebar or select it in More.Click
Settings on the upper-right of the page.Under the "Types" section, click Edit type.
On this page, manage your custom fields accordingly.
Create field: Click
Create field at the lower-left of the page. Then in the pop-up window, enter the name of the field, select the type from the drop-down, and click Create field.Rename field: Click
, then click Rename field on the field's right-hand side. Then in the pop-up window, rename the field, and click Confirm.Reuse or remove an existing field: Click
 to add or remove an existing field.
Delete field: Click
, then click Delete field on the field's right-hand side. Then in the pop-up window, type "DELETE FIELD" and click Delete field.
Manage detail field editing
Select
Actions in the sidebar or select it in More.Click
Settings on the upper-right of the page.Scroll down to the "Detail fields" section and click the fields.
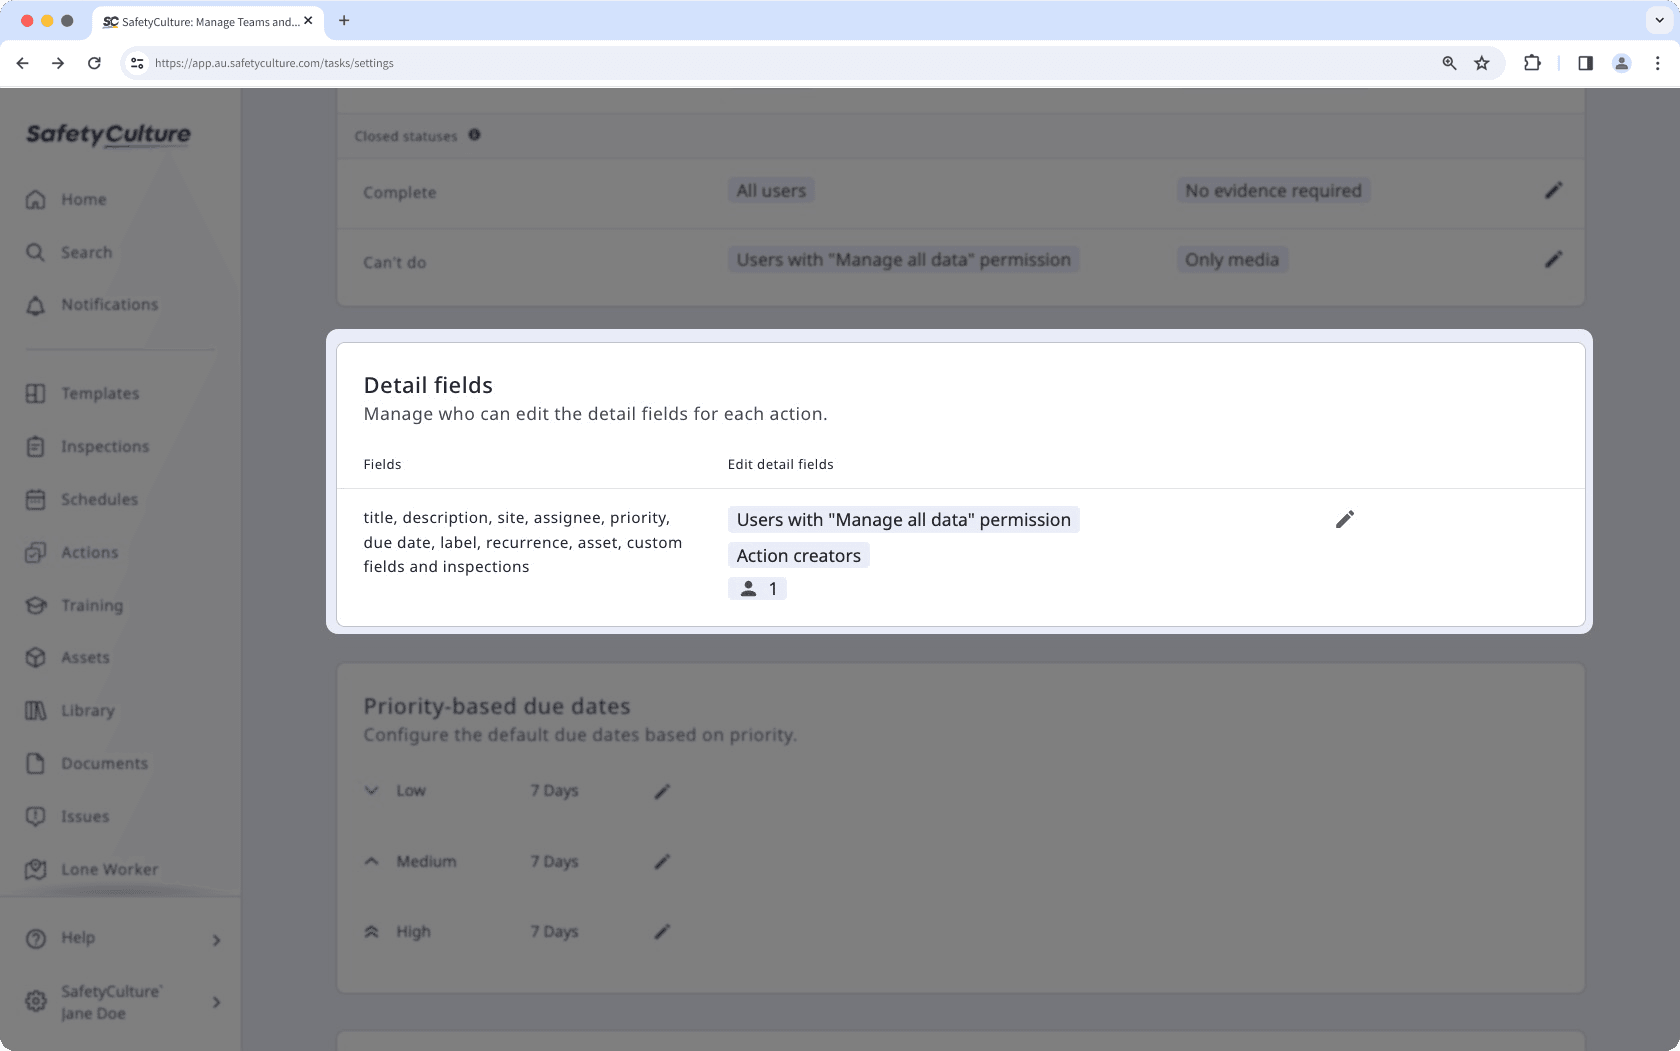
In the side panel, choose who can edit fields for each action by selecting either All users with edit access or Restricted.
If you selected Restricted:
Click the dropdown menu.
Check the boxes of users or groups that should have the ability to edit fields for each action.
Click Done in the dropdown menu.
Click Save and apply.
Users restricted from editing detail fields can still start, continue, and view inspections created from actions as long as they have the required access level for the relevant templates and inspections.
Limitations
You can add up to 1000 custom action types for your organization. Each type can have up to 200 custom fields, with a limit of 2,000 custom fields across your organization.
Custom type and field names have a maximum limit of 130 characters.
Text custom fields can hold up to 1,000 characters.
Was this page helpful?
Thank you for letting us know.