What SSO settings are available?
To tailor the SafetyCulture authentication flow to something that makes the most sense to your organization, you can manage SSO settings to shape how your users log in to the platform.
Login type
The login type setting controls whether your users can use their own SafetyCulture account password or can only log in via SSO.
Enforce SSO for named domains
This setting prompts users to log in via SSO or their SafetyCulture account password based on their account email. This is the default login type when setting up a new connection.
If a user's email domain matches the ones configured for their organization's SSO connection, they can only log in using their SSO account.
If a user's email domain doesn't match the ones configured for their organization's SSO connection, they can log in using their password and still have the option of using their SSO account if it applies to them.
Allow SSO and native login
This setting allows users to choose between logging in with their SSO account or their SafetyCulture account password. 
Allow SSO login only
This setting allows users to log in using their SSO account only. If a user is only in one organization, they'll be taken directly to their SSO portal after entering their account email. 
IdP-initiated login
The IdP-initiated login setting controls whether your users can log in to SafetyCulture from your SSO portal. Please note that some identity providers might not support this login method.
When turned on: Users can log in to their SSO portal first, then open SafetyCulture from the portal and log in at the same time.
When turned off: Users can only log in directly from SafetyCulture.
What you'll need
Manage SSO login type
Click your organization name on the lower-left corner of the page and select Organization settings.
Select Security at the top of the page.
Click Edit in the "Single sign-on (SSO)" box.
Click the dropdown menu for "Login type" and select one of the options accordingly.
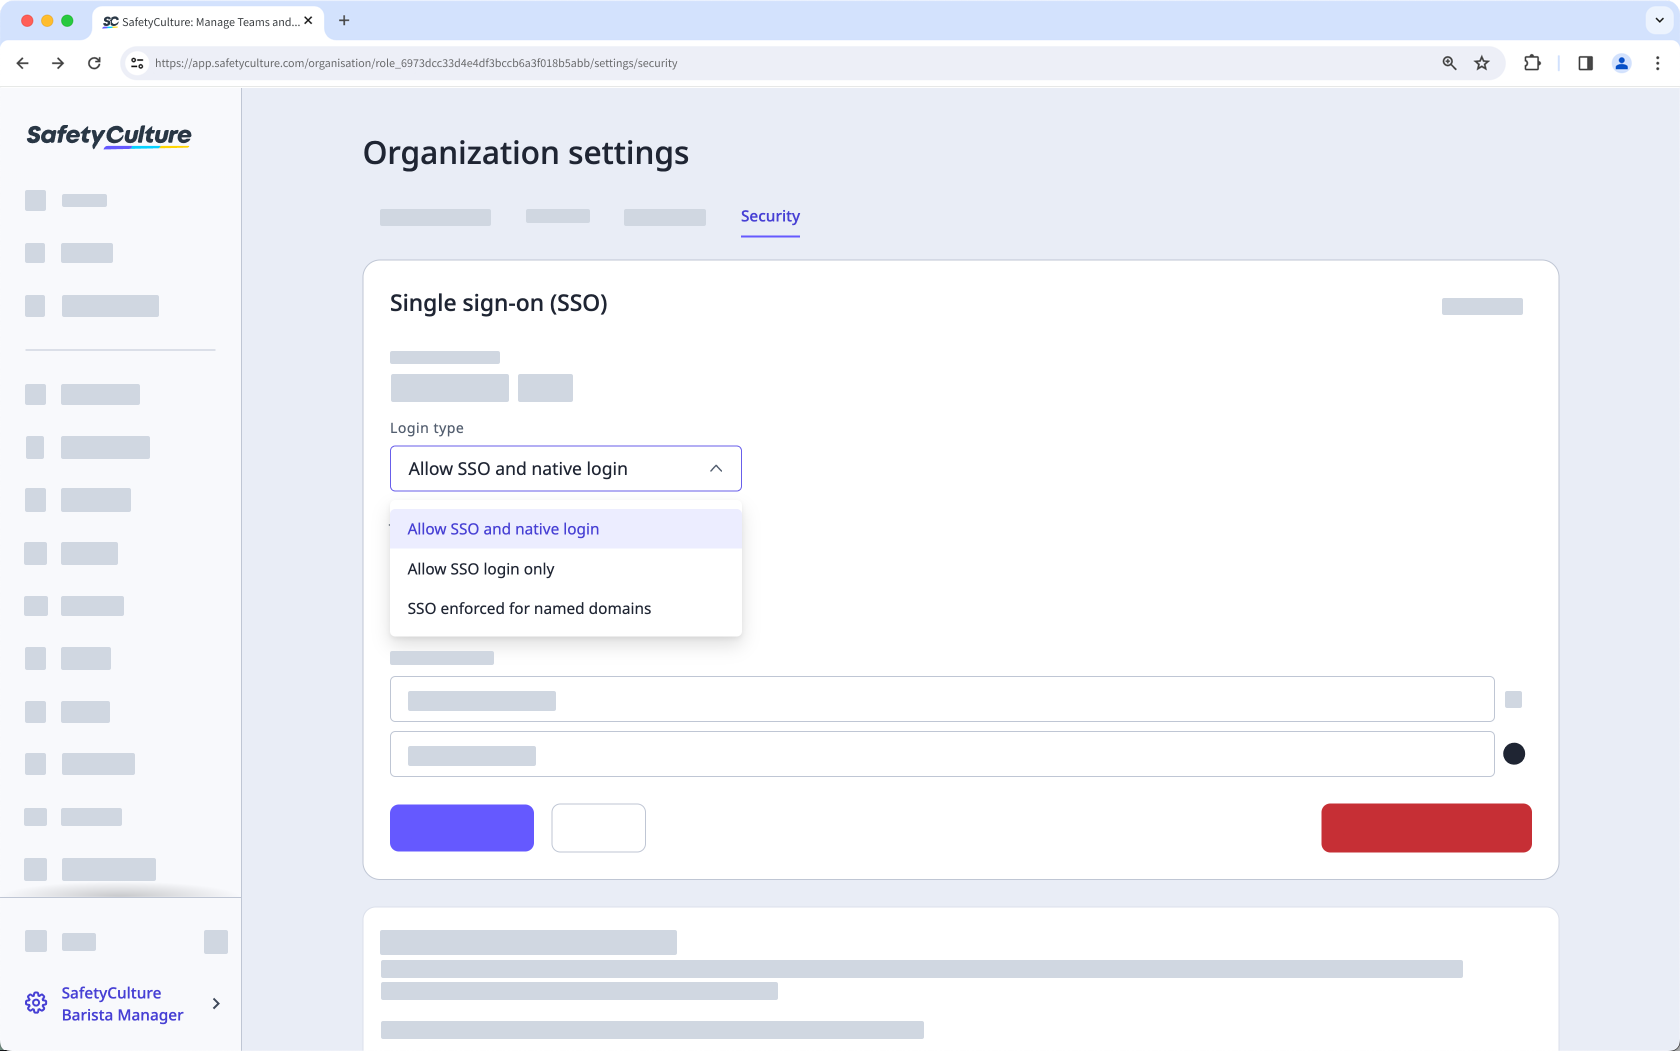
Click Save changes.
Turn IdP-initiated login on or off
Click your organization name on the lower-left corner of the page and select Organization settings.
Select Security on the top of the page.
Click Edit in the "Single sign-on (SSO)" box.
Turn "IdP-initiated login" on or off accordingly.
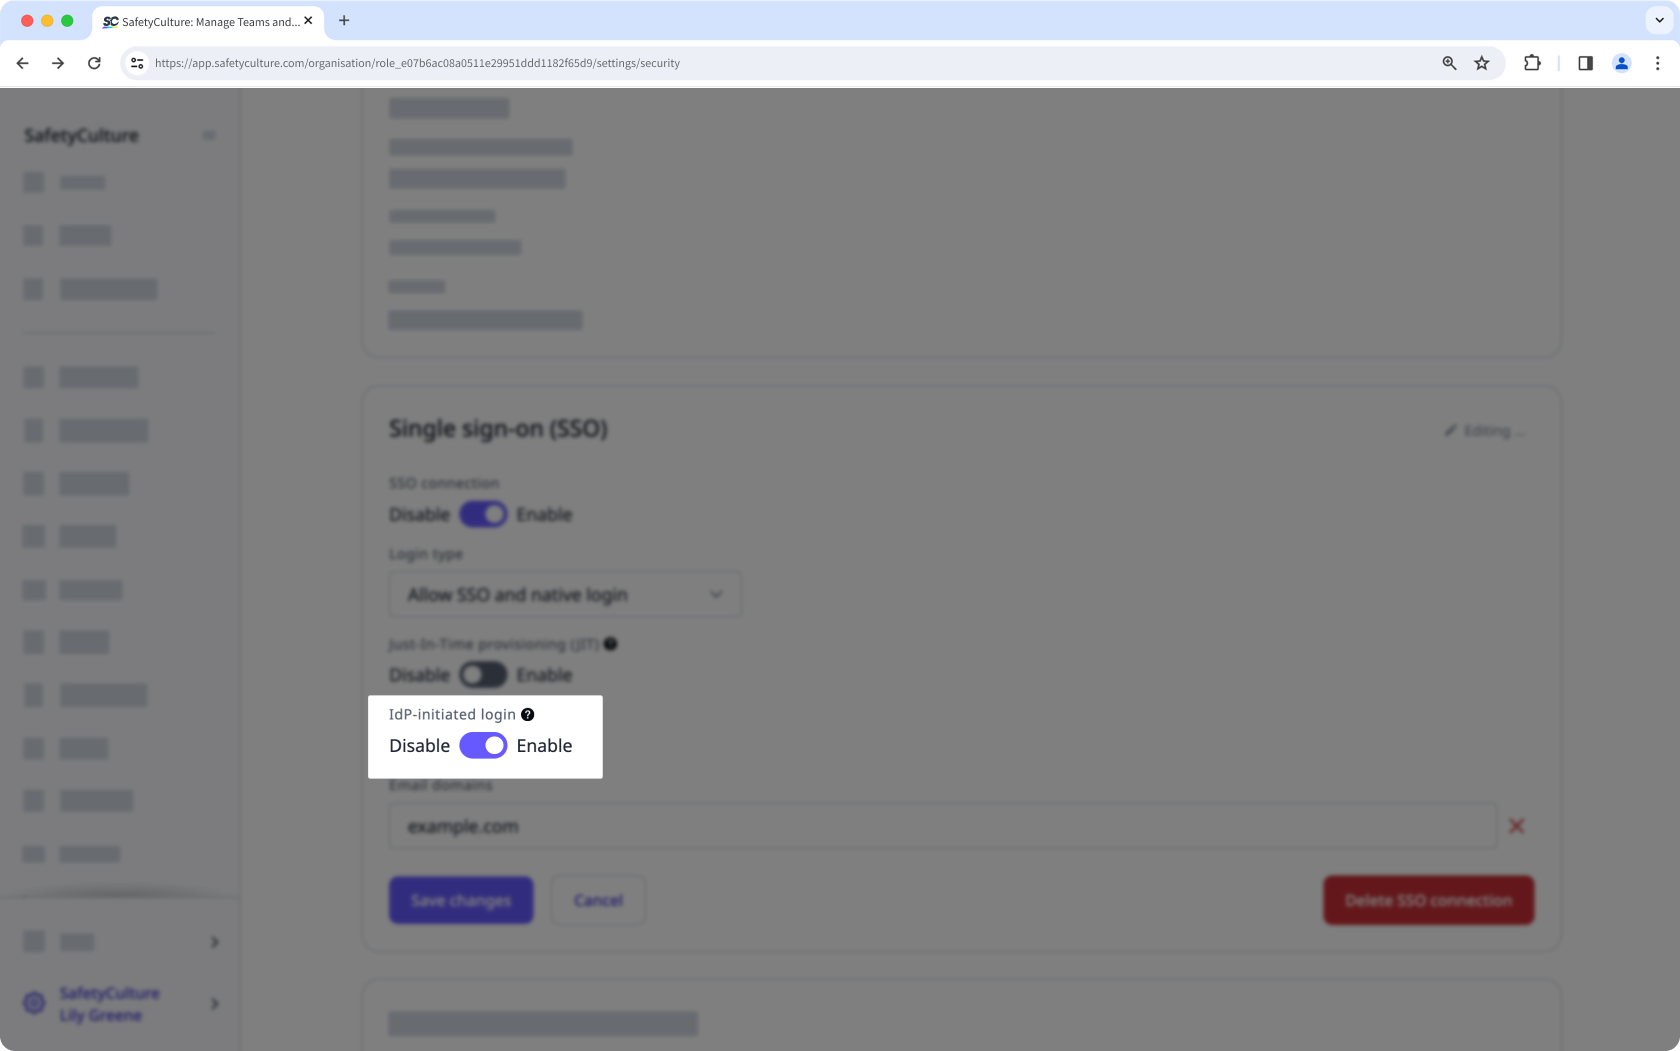
Click Save changes.
We advise against turning "IdP-initiated login" on as it may pose security risks.