Que sont les liens d'inscription ?
Les liens d'inscription sont des URL partageables qui permettent aux employés d'accéder facilement et de commencer les flux de travail d'implémentation ou les cours de formation obligatoires, ce qui évite aux administrateurs d'avoir à attribuer manuellement et individuellement les formations ou les processus d'implémentation. Ils offrent aux utilisateurs un moyen simple de commencer et aux administrateurs un moyen évolutif de distribuer les formations et les processus d'implémentation. Cela permet de rationaliser les processus et d'améliorer les taux d'achèvement et d'adoption au sein des équipes.
Les administrateurs peuvent gérer deux types de liens d'inscription :
Liens d'implémentation: Dirigez les employés vers un processus d'implémentation complet, en les guidant à travers toutes les étapes obligatoires, du début à la fin.
Liens vers les cours: Offrez un accès immédiat à un cours de formation spécifique, afin que les employés puissent suivre la formation sans avoir à la sélectionner manuellement.
Ce dont vous aurez besoin
Pour créer un lien d'inscription, commencez par partager le flux de travail d'implémentation ou le cours avec « Toute personne disposant du lien ».
Modifier un lien d'inscription
Cliquez sur le nom de votre organisation en bas à gauche de la page et sélectionnez Utilisateurs.
Cliquez sur Gérer les invitations en haut à droite de la page.
Cliquez sur Ajouter un filtre en haut à gauche de la liste et cliquez sur Type de lien.
Sélectionnez Inscription, et ensuite cliquez sur .
Sélectionnez le lien que vous souhaitez modifier.
Dans le panneau latéral, cliquez sur .
Dans la section « Détails », cliquez sur Modifier.
Modifiez les champs suivants en conséquence :
Type de licence : Sélectionnez le type de licence pour les utilisateurs qui se connectent via ce lien. Veuillez noter que vous ne pouvez sélectionner qu'une licence Complète ou une licence Lite.
Ensemble d'autorisations: Sélectionnez les autorisations pour les utilisateurs qui se connectent via ce lien.
Mot de passe du lien : Activez cette option, puis définissez un mot de passe obligatoire pour ouvrir le lien. Pour les codes QR des liens d'inscription, partagez-les en interne avec les membres de votre équipe.
Expiration : Activez, puis sélectionnez la date d'expiration du lien.
Limite d'invitation : Activez cette option, puis saisissez le nombre maximal d'utilisateurs pouvant rejoindre l'organisation via ce lien.
Demander le nom du prestataire: Activez l'option pour que les invités puissent sélectionner leur prestataire.
Sites : Sélectionnez les sites auxquels les utilisateurs vont adhérer.
Groupes: Sélectionnez les groupes auxquels les utilisateurs vont adhérer.
Cliquez sur Enregistrer.
Si vous partagez votre flux de travail d'implémentation avec Toute personne ayant le lien, les utilisateurs rejoindront une licence Lite avec un ensemble d'autorisations basique.
Désactiver un lien d'inscription
Cliquez sur le nom de votre organisation en bas à gauche de la page et sélectionnez Utilisateurs.
Cliquez sur Gérer les invitations en haut à droite de la page.
Cliquez sur Ajouter un filtre en haut à gauche de la liste et choisissez les filtres :
Cliquez sur à droite de la ligne de l'utilisateur et sélectionnez Désactiver.
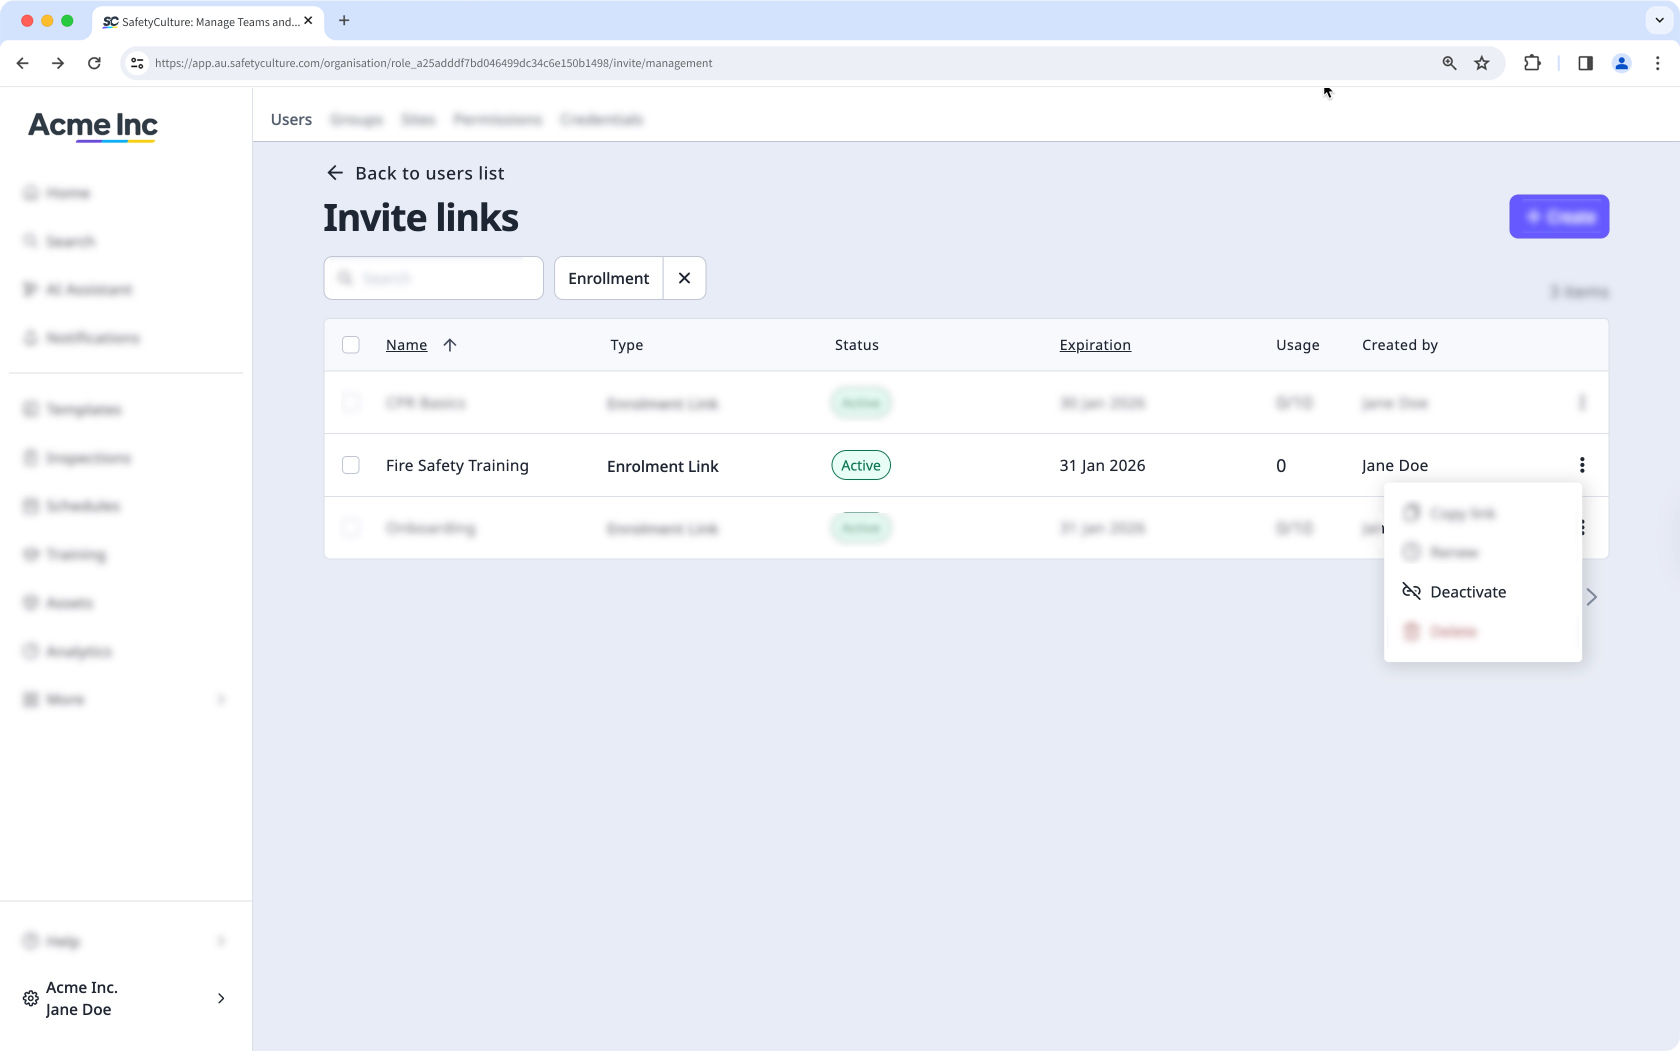
Dans la fenêtre contextuelle, cliquez sur Désactiver.
Supprimer un lien d'inscription
Cliquez sur le nom de votre organisation en bas à gauche de la page et sélectionnez Utilisateurs.
Cliquez sur Gérer les invitations en haut à droite de la page.
Cliquez sur Ajouter un filtre en haut à gauche de la liste et cliquez sur Type de lien.
Sélectionnez Inscription.
Cliquez sur à droite du lien et sélectionnez Supprimer.
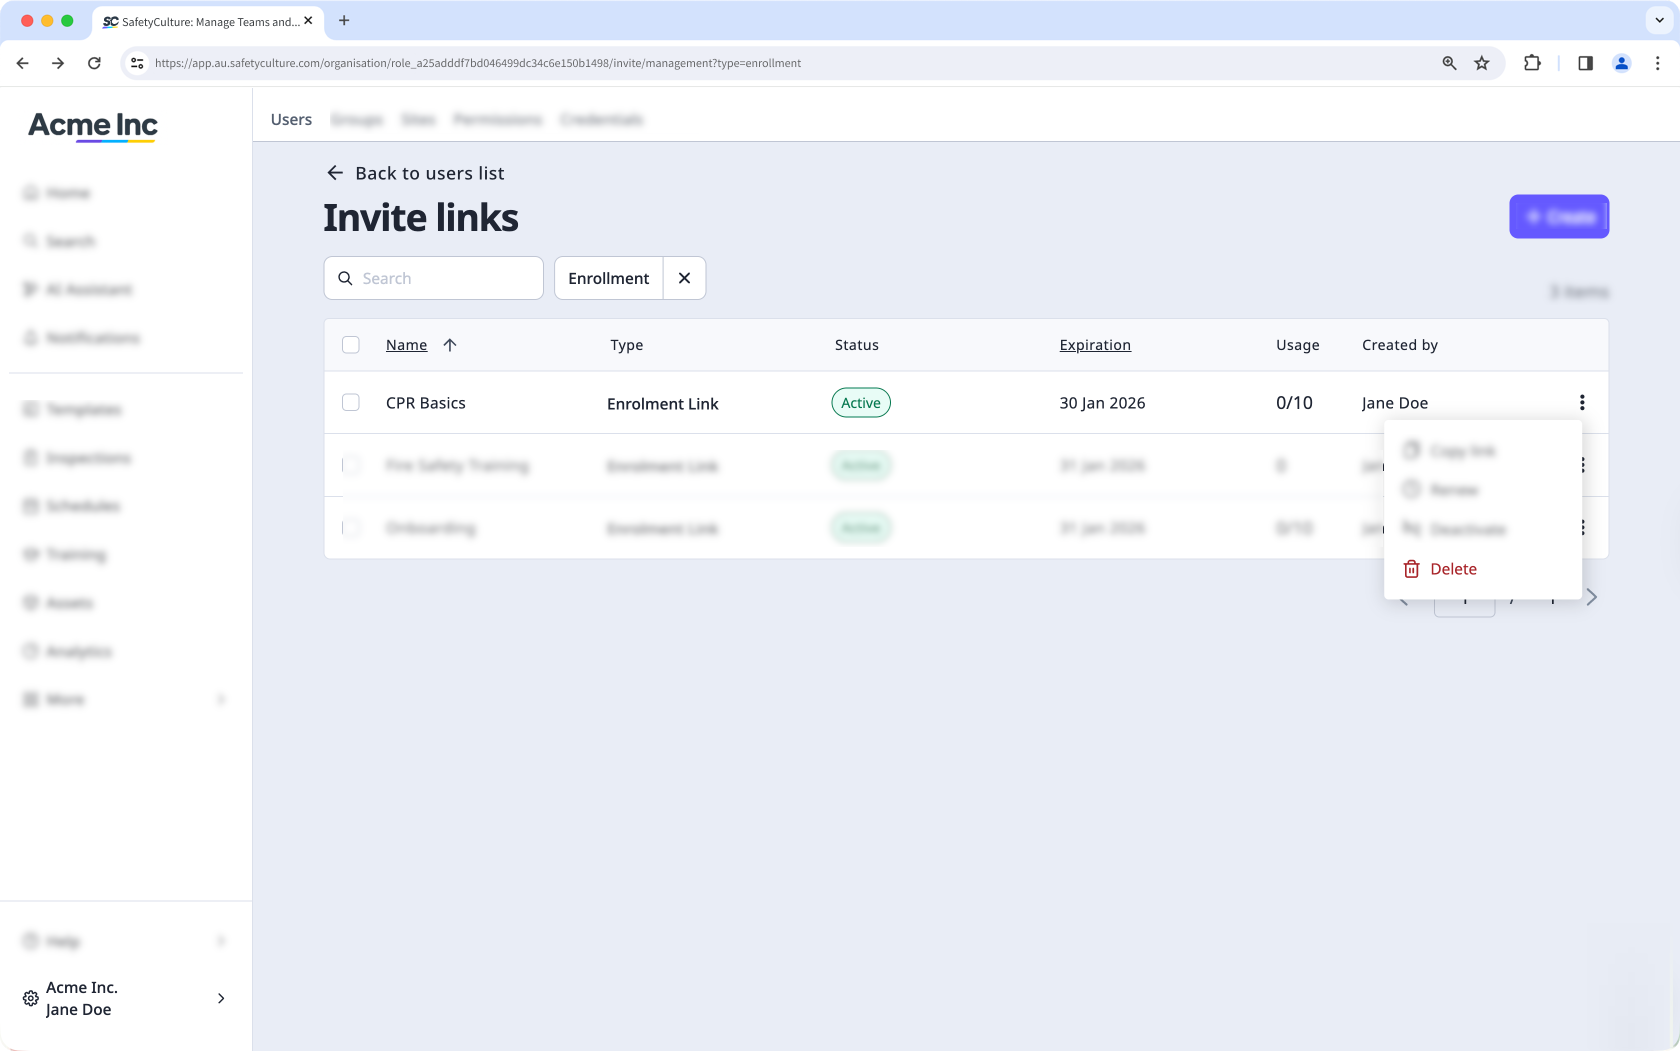
Dans la fenêtre contextuelle, cliquez sur Supprimer.
Modifier des liens d'inscription de façon groupée
Cliquez sur le nom de votre organisation en bas à gauche de la page et sélectionnez Utilisateurs.
Cliquez sur Gérer les invitations en haut à droite de la page.
Cliquez sur Ajouter un filtre en haut à gauche de la liste et cliquez sur Type de lien.
Sélectionnez Inscription.
Cochez les cases à gauche des liens que vous souhaitez modifier.
Au bas de la page, cliquez sur Modifier et mettez à jour l'une des options suivantes pour les utilisateurs :
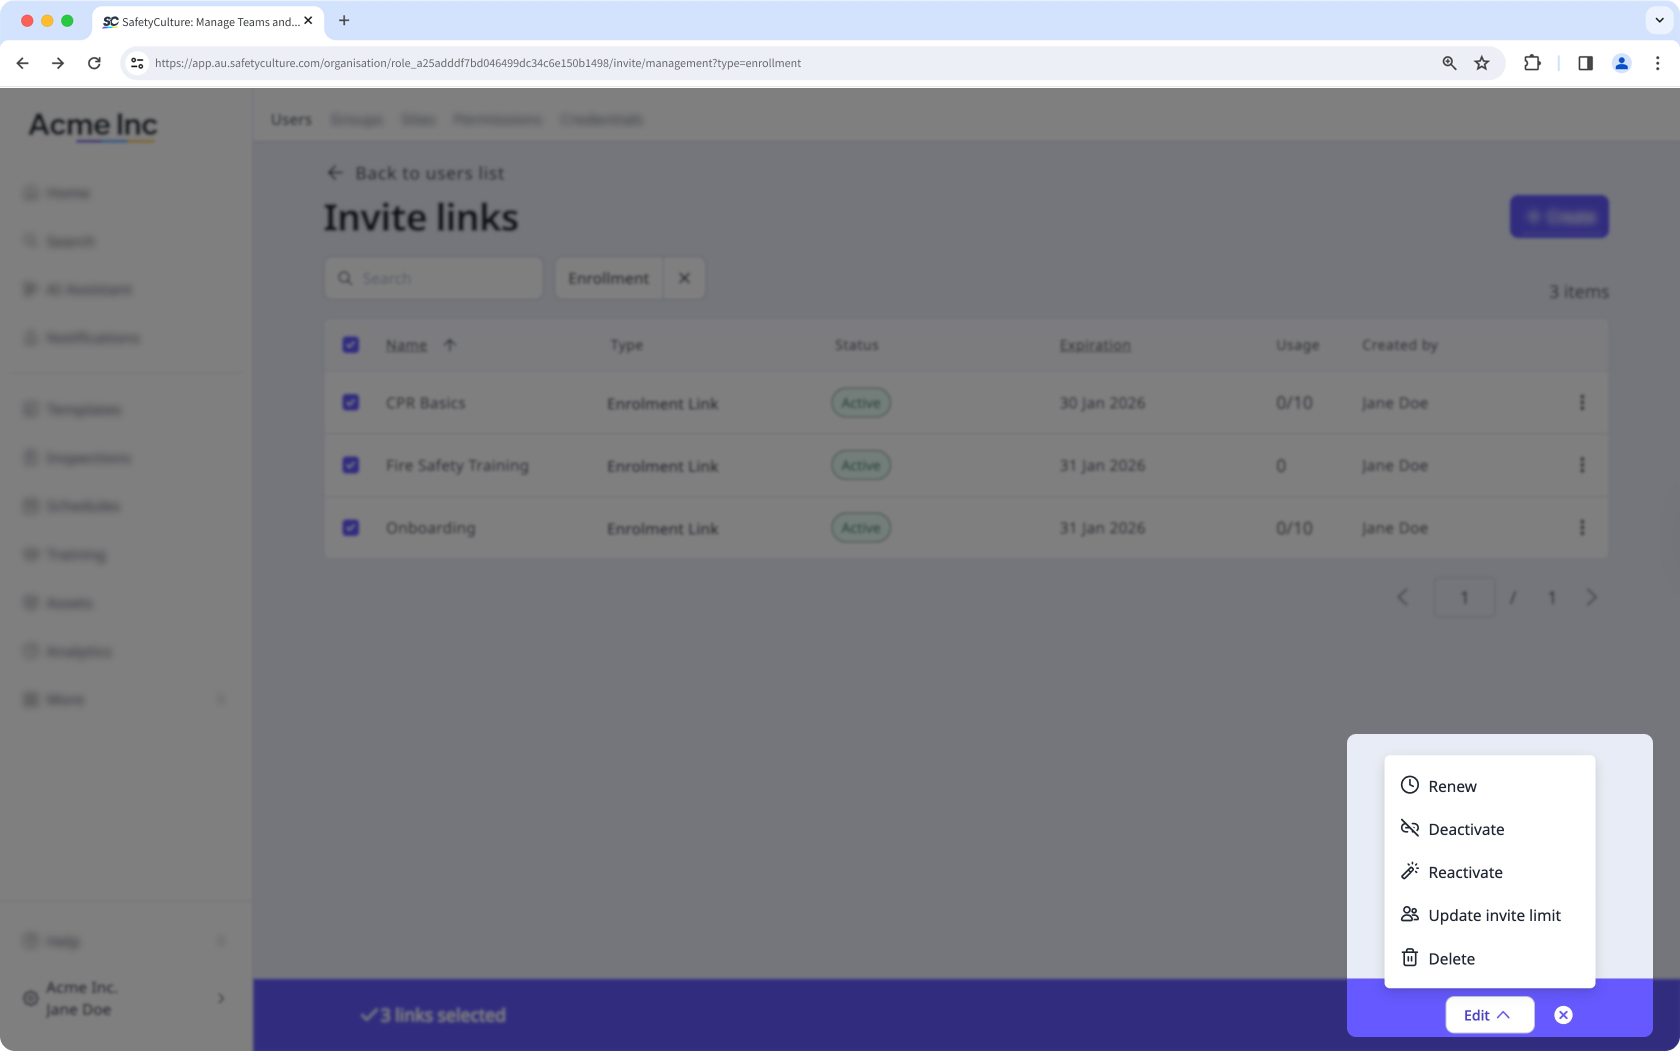
Renouveler: Sélectionnez une nouvelle date d'expiration pour les liens d'inscription et cliquez sur Renouveler
Désactiver: Cliquez sur Désactiver pour désactiver les liens.
Réactiver: Cliquez sur Réactiver pour réactiver les liens.
Mise à jour de la limite d'invitations: Saisissez le nombre d'utilisateurs pouvant accéder au lien d'invitation à rejoindre l'organisation et cliquez sur Mettre à jour.
Supprimer: Cliquez sur Supprimer pour supprimer les liens.
Gérez et personnalisez vos liens d'inscription dans les liens d'invitation créés dans votre organisation.