What are enrollment links?
Enrollment links are shareable URLs that allow workers to easily access and start required onboarding workflows or training courses, removing the need for admins to manually assign onboarding or courses individually. They give users a simple way to get started and offer admins a scalable way to distribute onboarding and training. This helps streamline processes and improve completion and adoption rates across teams.
Admins can manage two types of enrollment links:
Onboarding links: Direct workers into a complete onboarding workflow, guiding them through all required steps from start to finish.
Course links: Provide immediate access to a specific training course, so workers can complete training without manual assignment.
What you'll need
To create an enrollment link, first share the onboarding workflow or course with “Anyone with the link.”
Edit an enrollment link
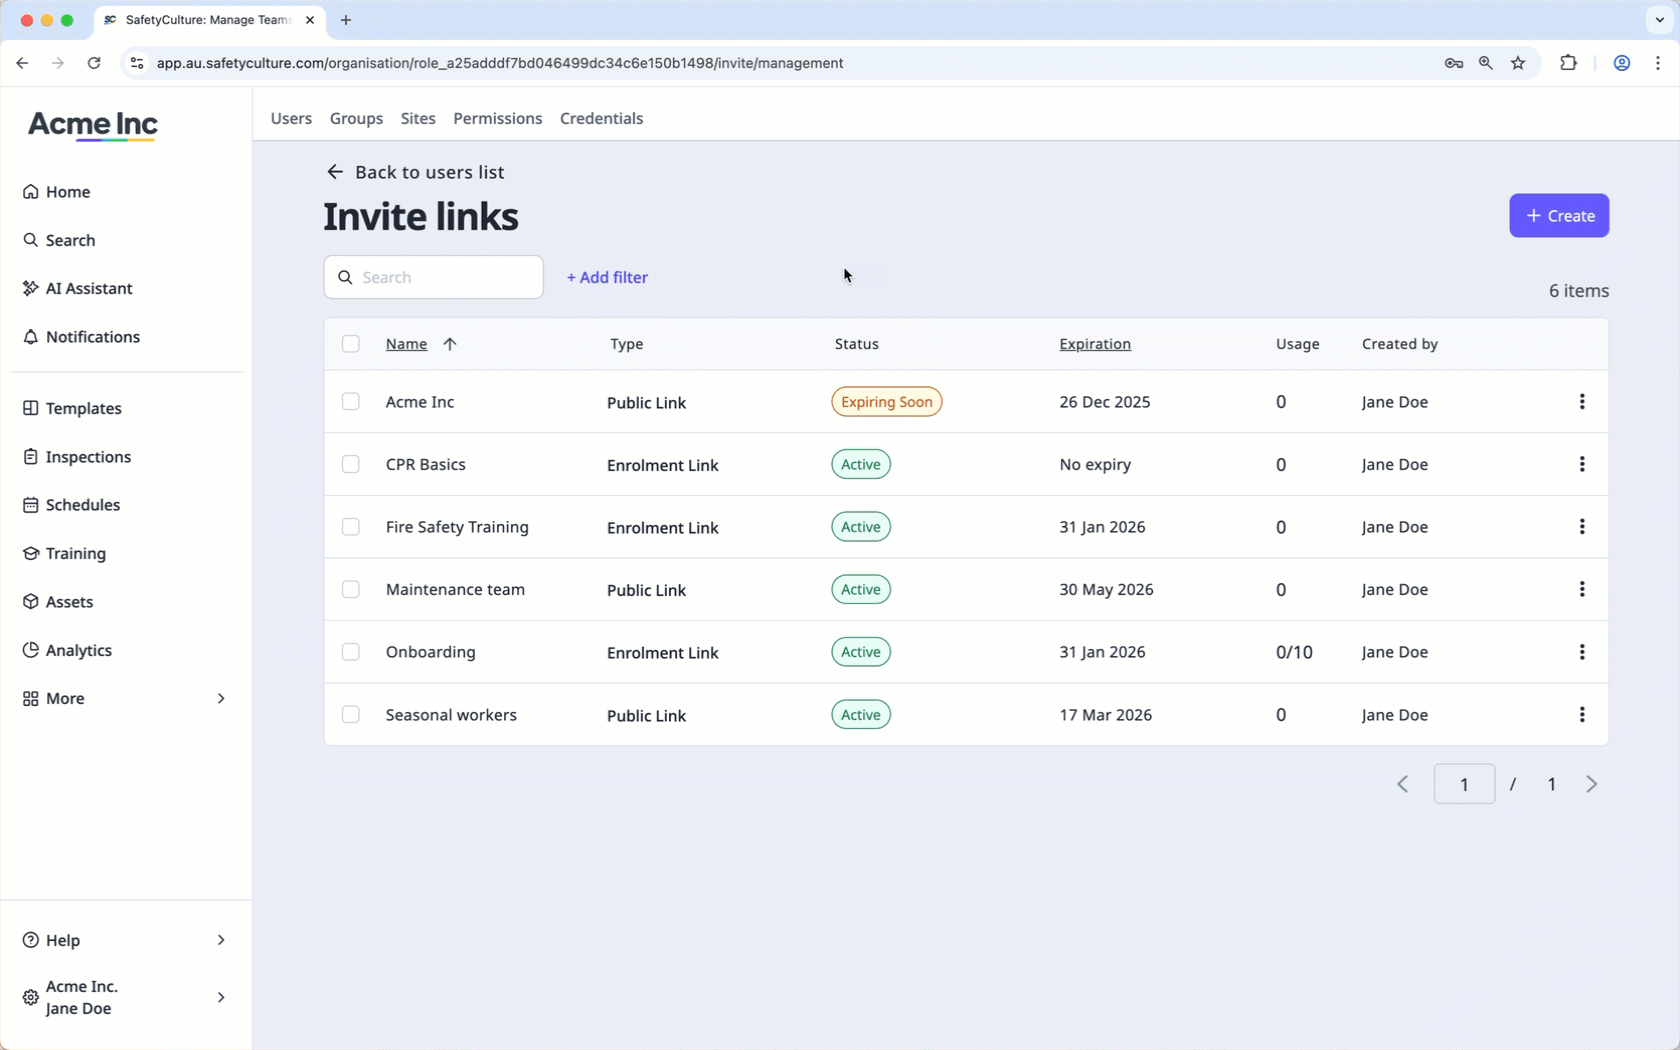
Click your organization name on the lower-left corner of the page and select Users.
Click
 Manage invites on the upper-right corner of the page.
Click Add filter on the upper-left of the list and click Link type.
Select Enrollment, and then click Done.
Select the link you want to edit.
In the side panel, click Settings.
In the "Details" section, click Edit.
Edit the following fields accordingly:
Seat type: Select the seat type for users joining via this link. Note that you can only select a full or lite seat.
Permission set: Select the permissions for users joining via this link.
Link password: Turn on, then set a password required to open the link. For enrollment link QR codes, share them with your team members internally.
Expiration: Turn on, then select the date the link expires.
Invite limit: Turn on, then enter the maximum number of users who can join the organization via this link.
Request company name: Turn on to allow invitees to select their company.
Sites: Select the sites that users will join.
Groups: Select the groups that users will join.
Click Save.
If you share your onboarding workflow with Anyone with the link, users will join on a lite seat with a "Basic" permission set.
Deactivate an enrollment link
Click your organization name on the lower-left corner of the page and select Users.
Click
Manage invites on the upper-right corner of the page.Click Add filter on the upper-left of the list and click Link type.
Select Enrollment.
Click on the link’s right-hand side and select Deactivate.
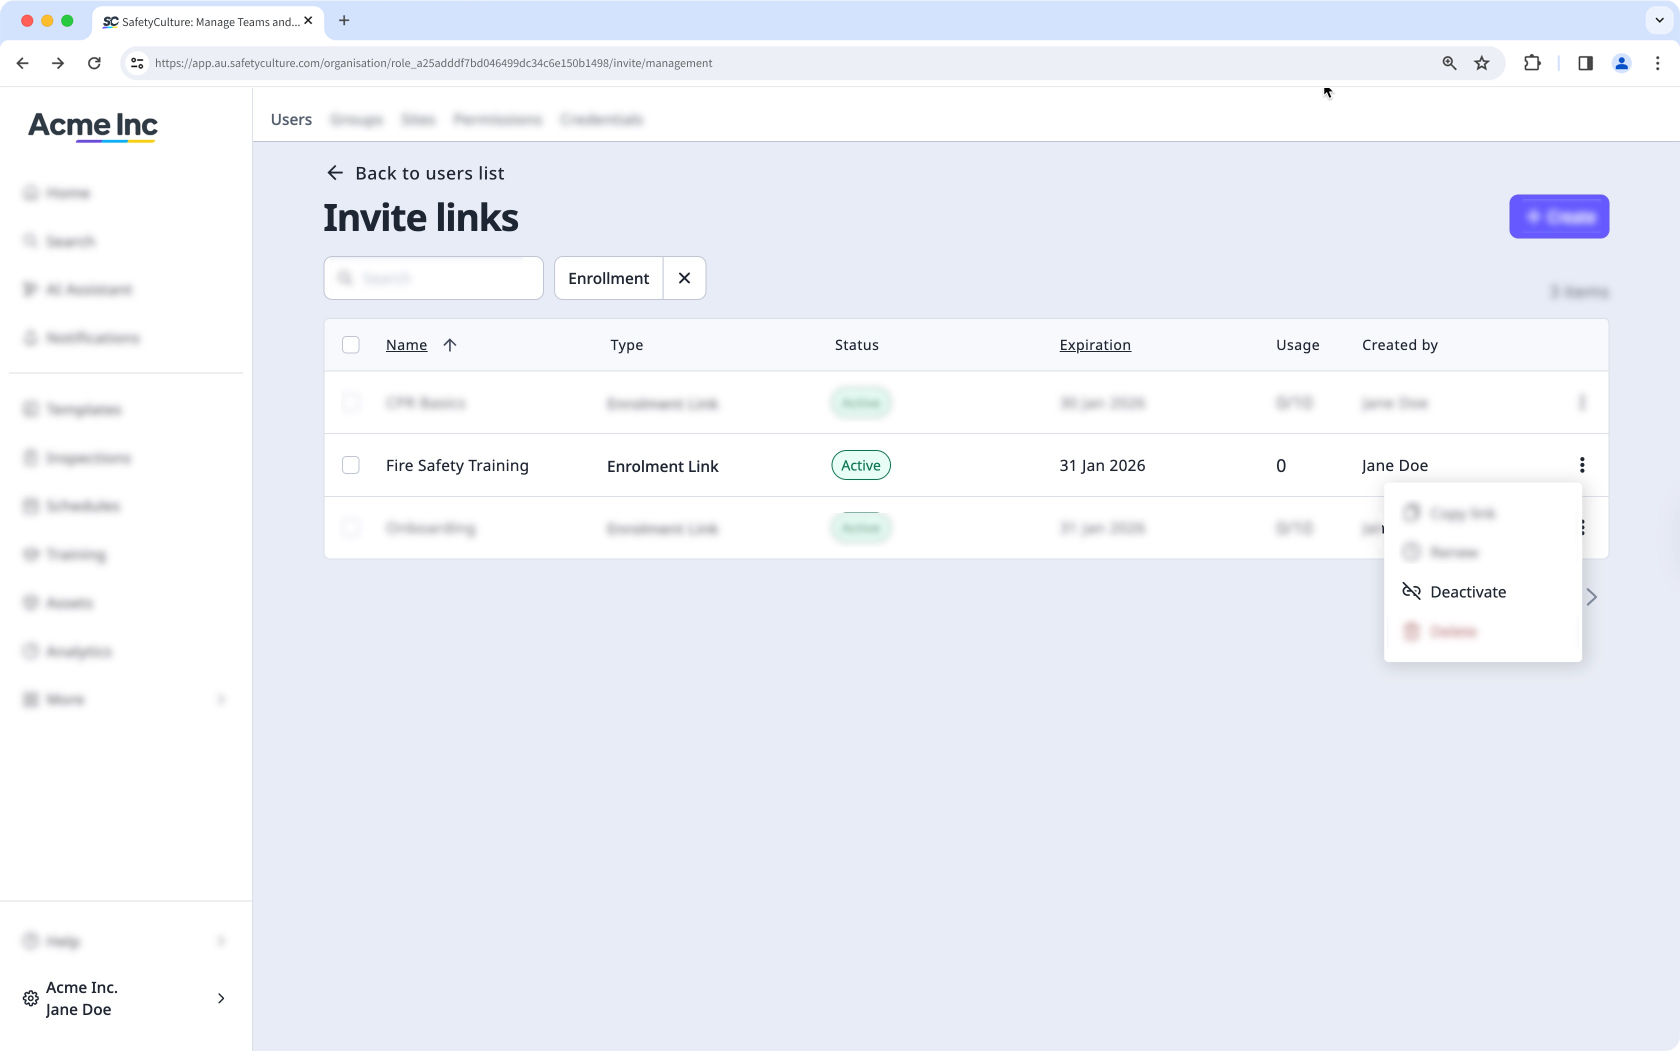
In the pop-up window, click Deactivate.
Delete an enrollment link
Click your organization name on the lower-left corner of the page and select Users.
Click
Manage invites on the upper-right corner of the page.Click Add filter on the upper-left of the list and click Link type.
Select Enrollment.
Click on the link's right-hand side and select Delete.
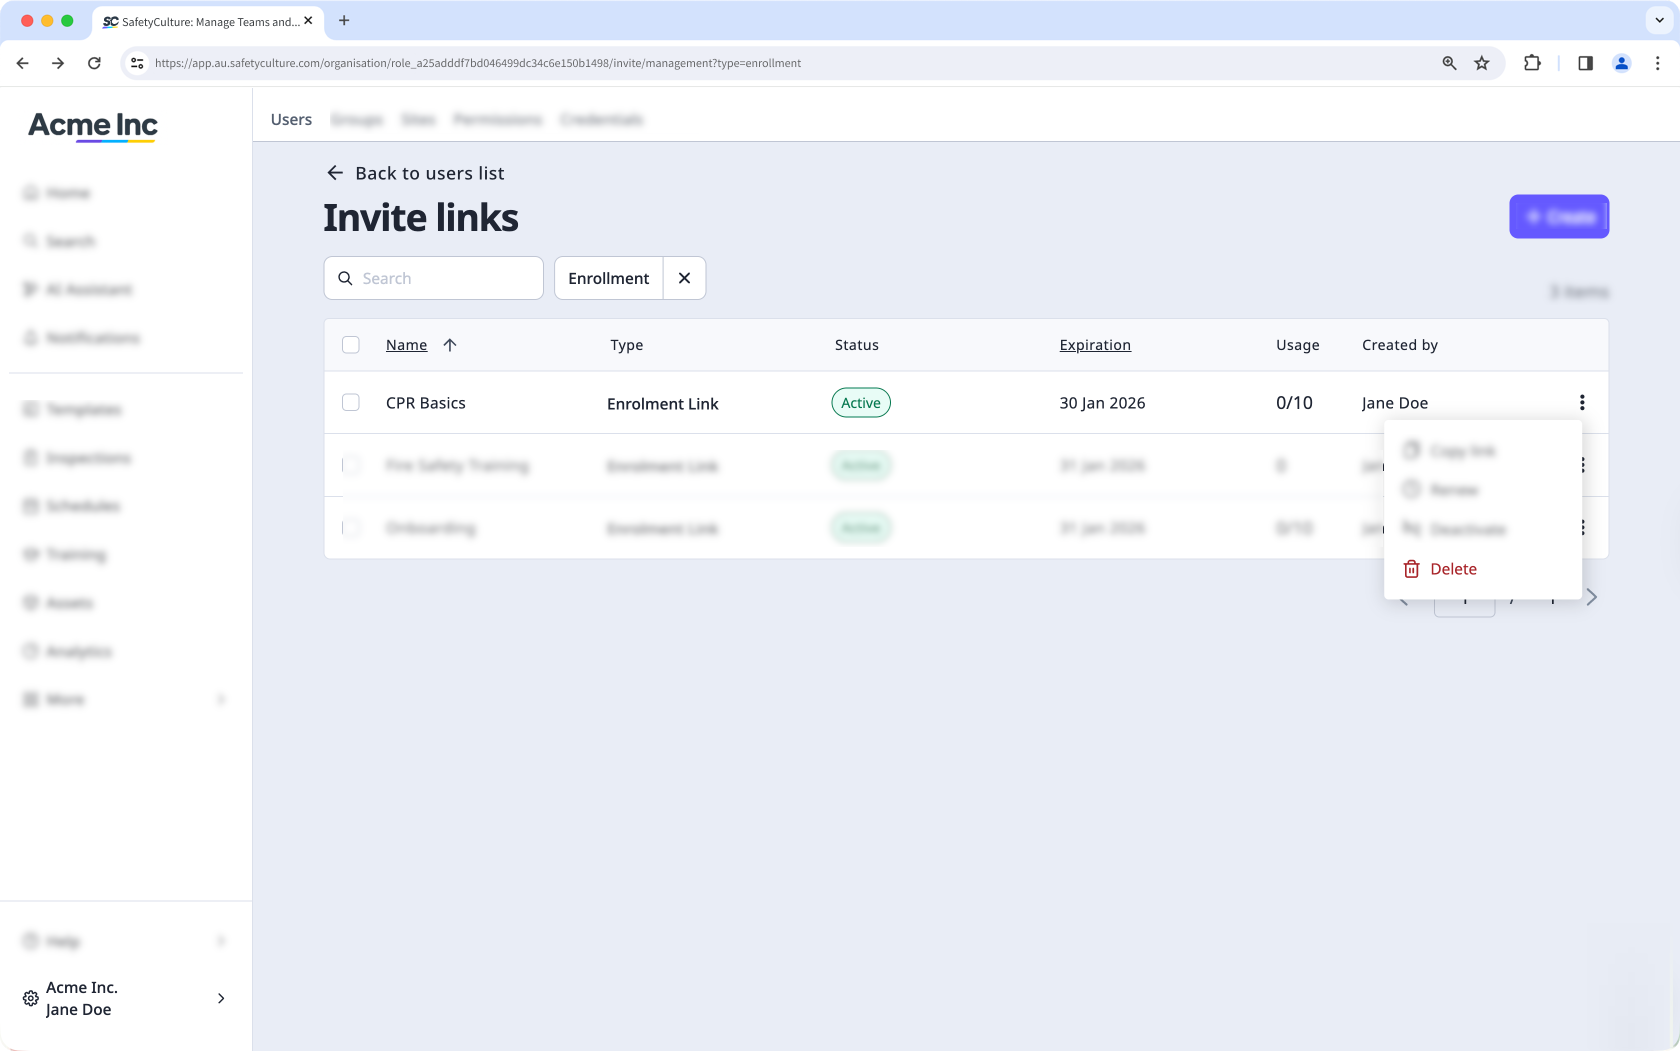
In the pop-up window, click Delete.
Bulk edit enrollment links
Click your organization name on the lower-left corner of the page and select Users.
Click
Manage invites on the upper-right corner of the page.Click Add filter on the upper-left of the list and click Link type.
Select Enrollment.
Check the boxes on the left-hand side of the links you want to edit.
At the bottom of the page, click Edit and update one of the following options for the users:
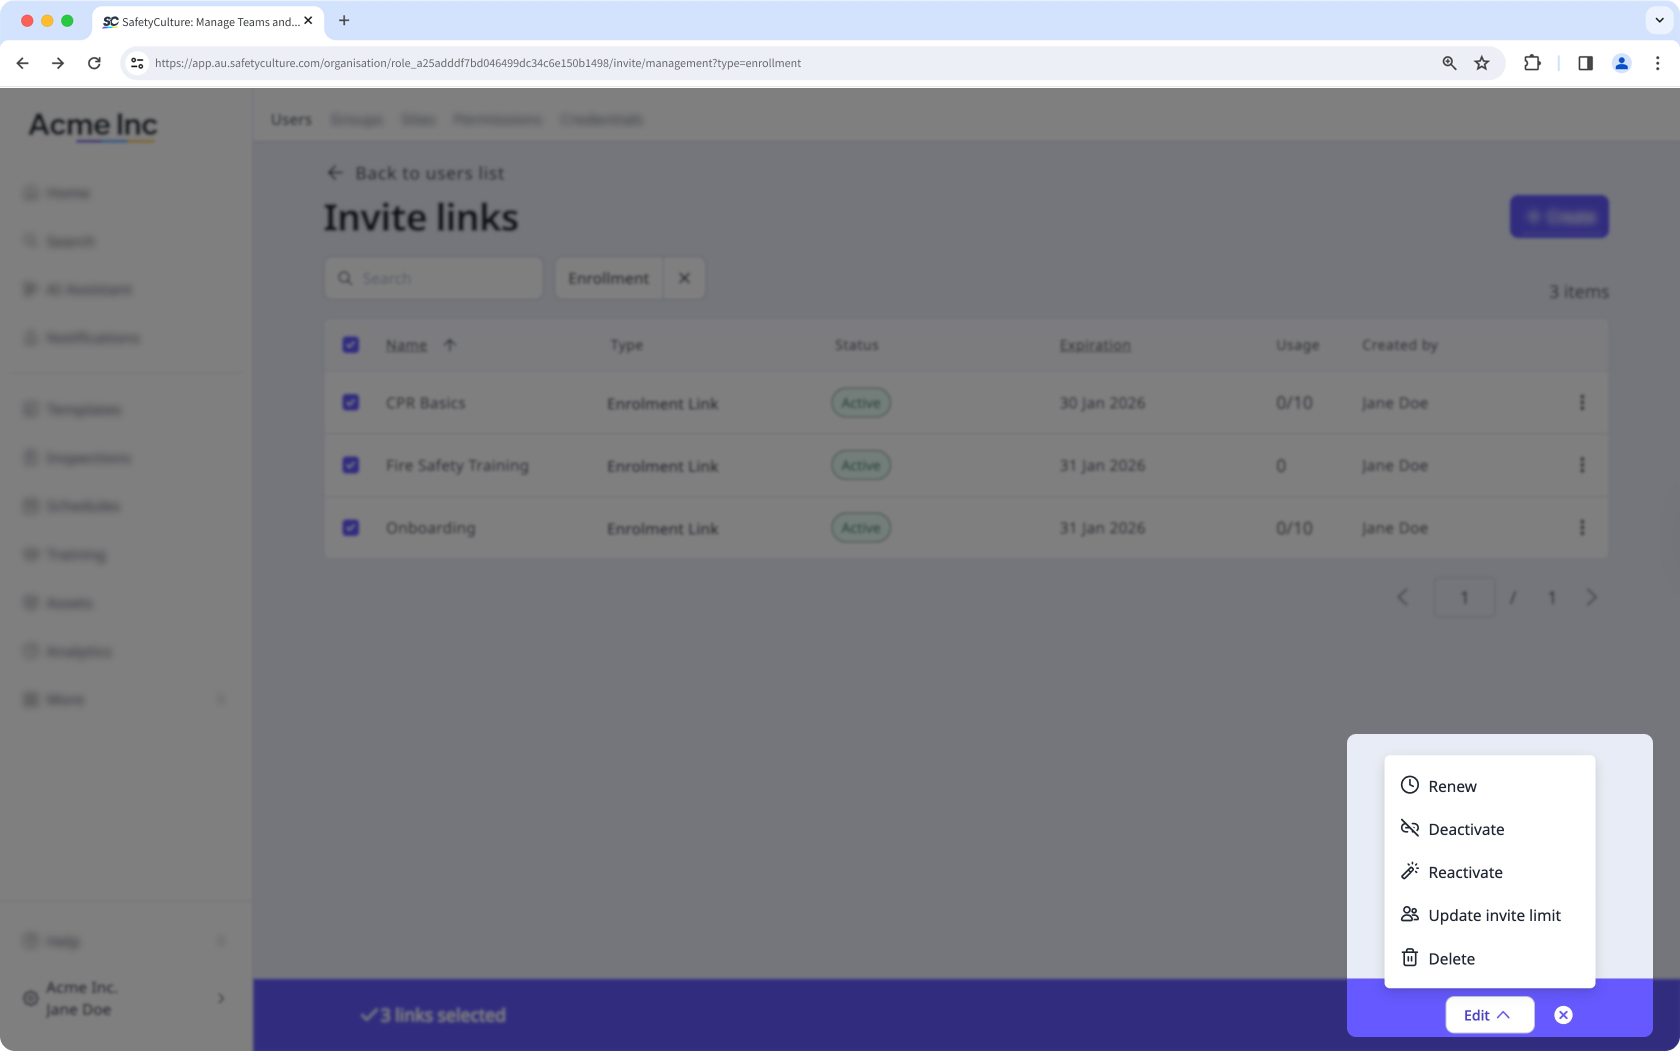
Renew: Select a new expiration date for the enrollment links and click Renew.
Deactivate: Click Deactivate to deactivate the links.
Reactivate: Click Reactivate to reactivate the links.
 Update invite limit: Enter the number of users that can access the enrollment link to join the organization and click Update.
Delete: Click Delete to delete the links.
You can also manage and customize your enrollment links within the invite links created in your organization.