Why set expiration date for files?
Setting expiration dates for time-sensitive files, such as safety forms, licenses, and certificates, streamlines file management and ensures timely updates. This is ideal for industries where compliance, safety, or regulatory requirements are critical, as it lets file owners see which files are about to expire or have already expired, helping teams keep files up to date.
By making it easy to track and manage file expirations, you lower the risk of using outdated or non-compliant files, save time on manual follow-ups, and keep your team running smoothly. This helps everyone quickly identify which documents need attention, making file management simpler, safer, and more reliable.
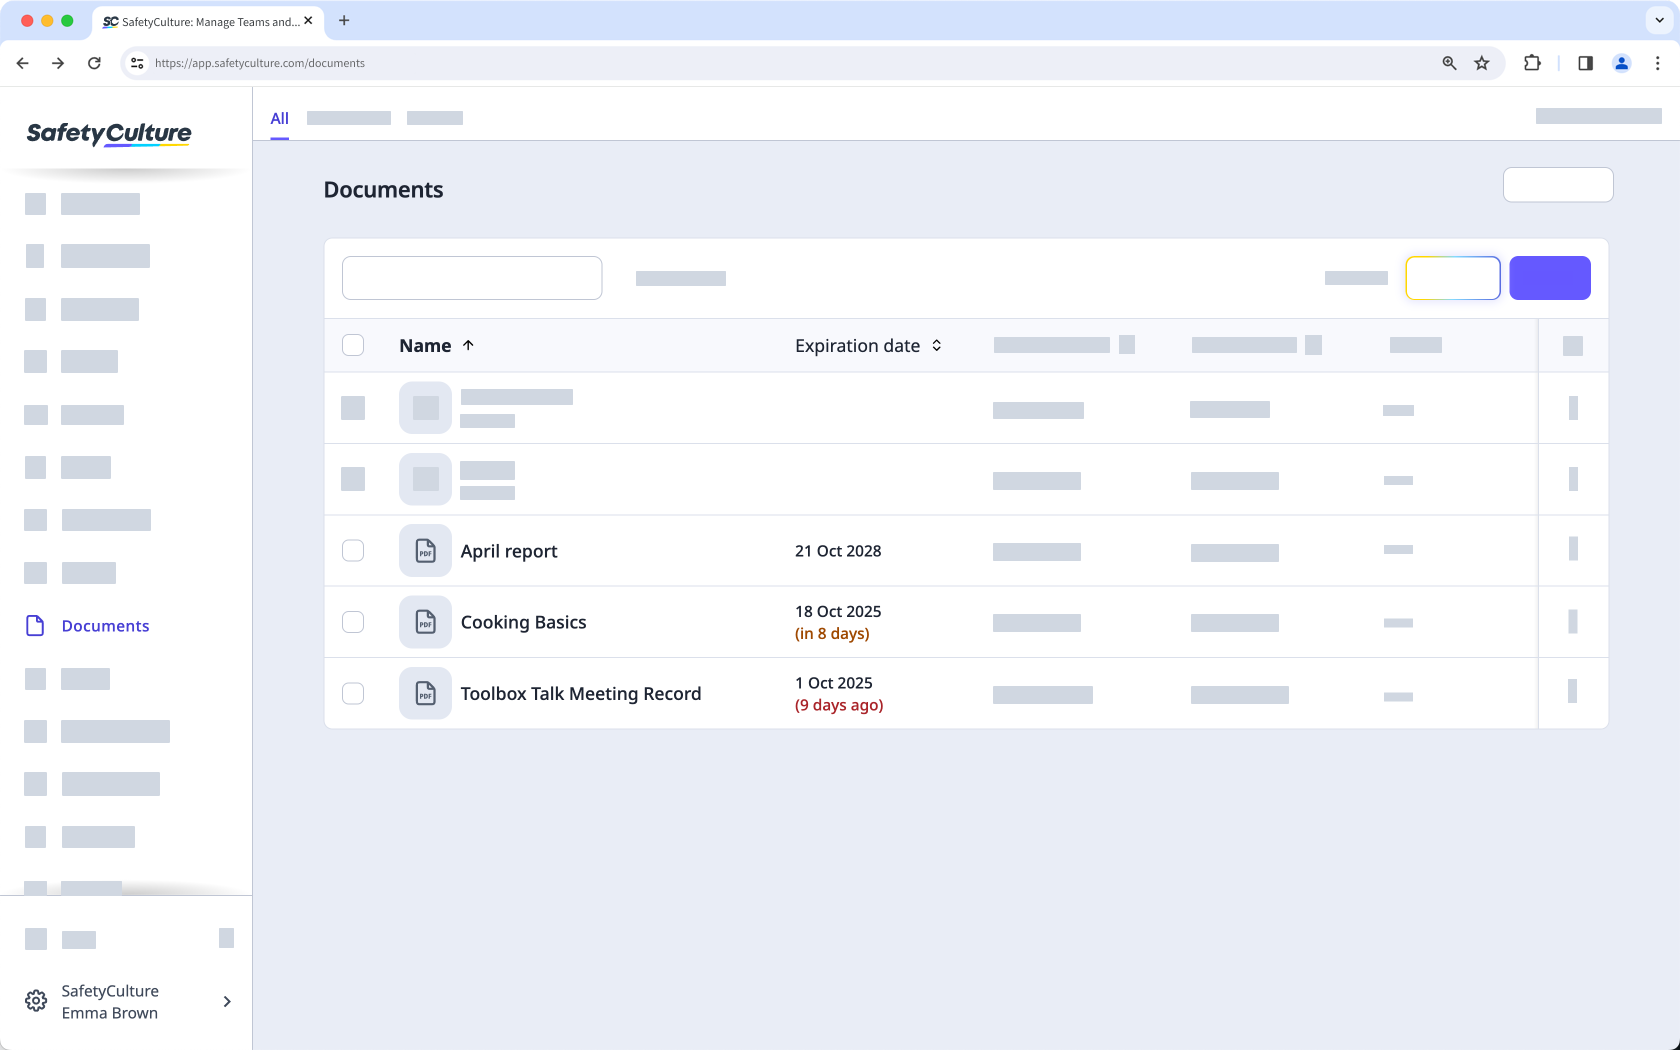
File owners will receive notifications when their files are about to expire or have already expired, making it easier to stay organized and up to date.
If you have "Documents: Administrator" permission, you can set an expiration date for any file in your organization.
Set an expiration date for a file
Select
 Documents in the sidebar or select it in More.
Select a folder if your file is in it.
Click on the file's right-hand side and select Edit file.
In the side panel, click the dropdown under "Expiration date" and select a date.
If the file doesn't have an owner, add a file owner to notify them about the expiration.
Click Save on the upper-right of the page.
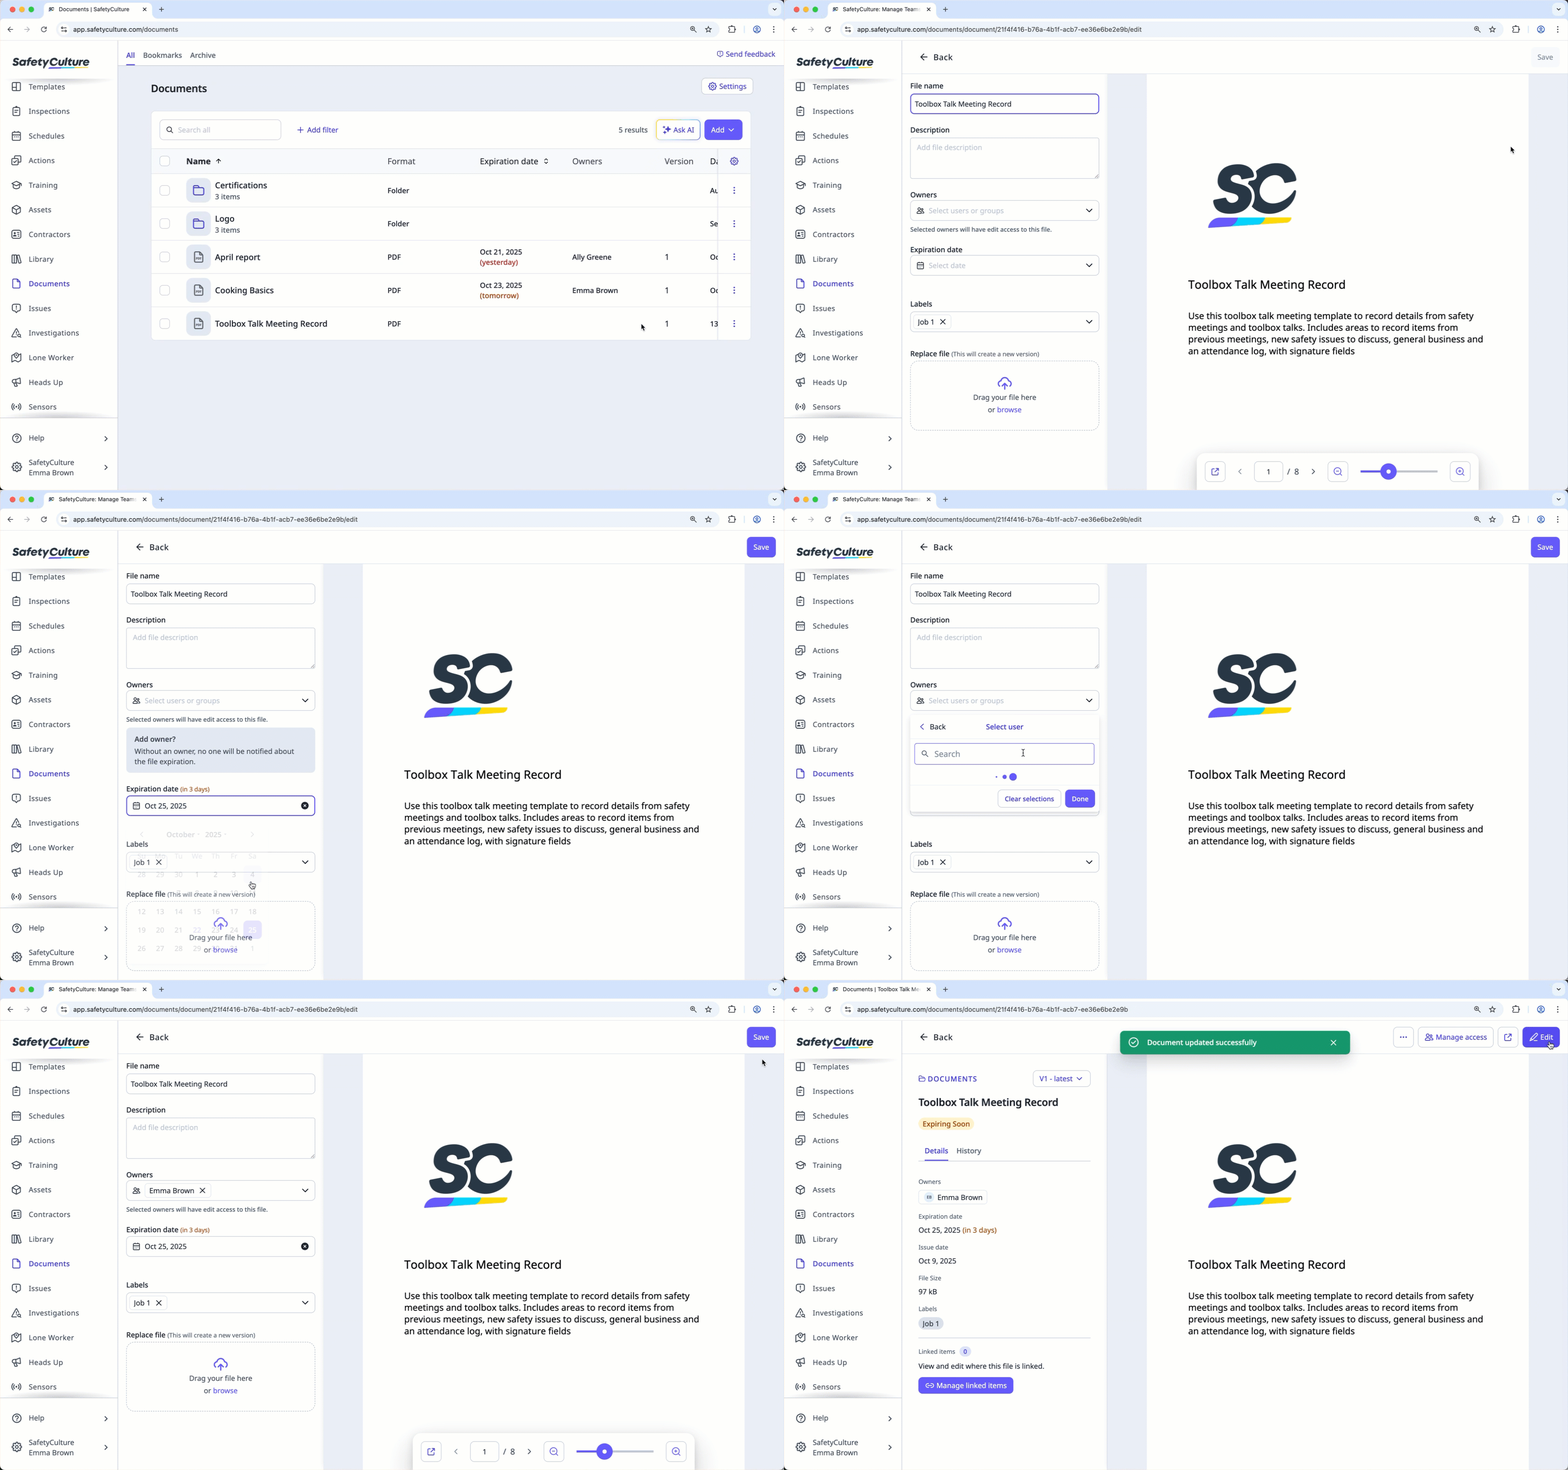
If a file doesn't have an owner, no one will be notified about the file expiration.
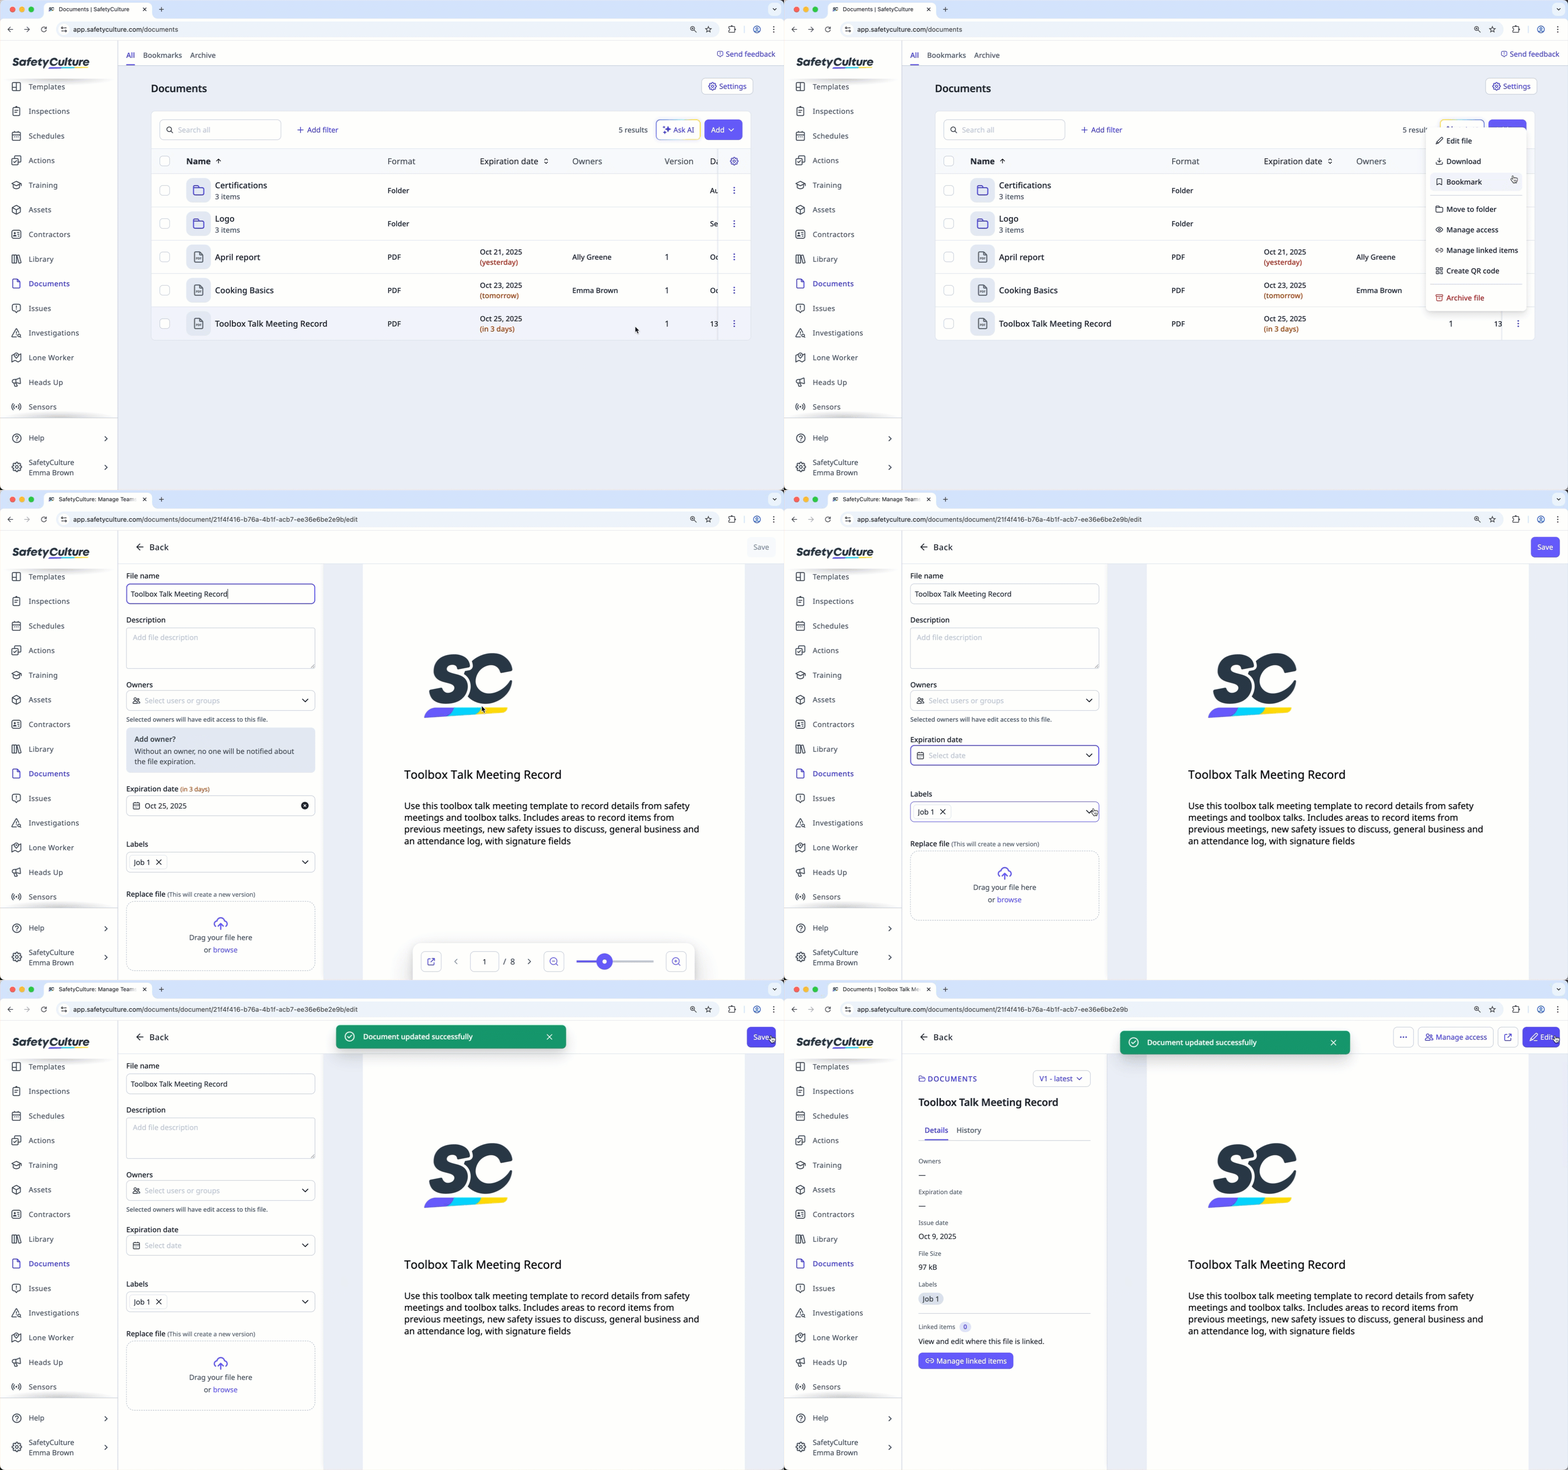
Remove an expiration date for a file
Select
Documents in the sidebar or select it in More.Select a folder if your file is in it.
Click on the file's right-hand side and select Edit file.
Under "Expiration date", click on the right-hand side of the date.
Click Save on the upper-right of the page.