- Integrations
- Direct integrations
- Automatically upload inspection reports to Procore projects
Automatically upload inspection reports to Procore projects
Learn how to automatically upload completed inspection reports as PDFs to Procore projects so your team can keep site documentation in one place via the web app.Why connect SafetyCulture to my Procore projects?
When you connect SafetyCulture with Procore, you can send completed inspection reports from SafetyCulture directly into the right Procore project. This helps site teams keep forms and reports together with drawings, RFIs, and other project documents.
The integration uploads a PDF report to Procore when an inspection is completed in SafetyCulture, and the inspection includes a response from the Procore Projects Global Response Set. Each connected Procore company also receives a SafetyCulture Inspections folder in its Documents tool so teams can quickly find reports that came from SafetyCulture.
The integration only exports inspections that you complete after you set it up. It does not automatically upload inspections that you completed before you connected this integration.
What you'll need
If the "Procore Projects" Global Response Set in SafetyCulture or the "SafetyCulture Inspections" folder in Procore gets deleted at any time, please contact our customer support team for assistance.
1. Install the Procore integration in your organization
Click your organization name on the lower-left corner of the page and select Integrations.
Search for "Procore" and select the integration.
Click Install at the center of the page.
In the pop-up window, click Install.
Log in to your Procore account.
When prompted, click Allow to authorize SafetyCulture.
Click the "Procore companies" dropdown menu.
Select the Procore companies you want to connect and click Save and apply. Please only select the companies that you have Company level Admin permission over.
This should create a Global Response Set for each company that you've selected, containing your Procore projects as responses. Each Global Response Set should be named as "Procore Projects", followed by the company name in Procore.
2. Add a "Procore Projects" Global Response Set to a template
Select Templates in the sidebar or select it in
More.
Click the template and select Edit template in the side panel.
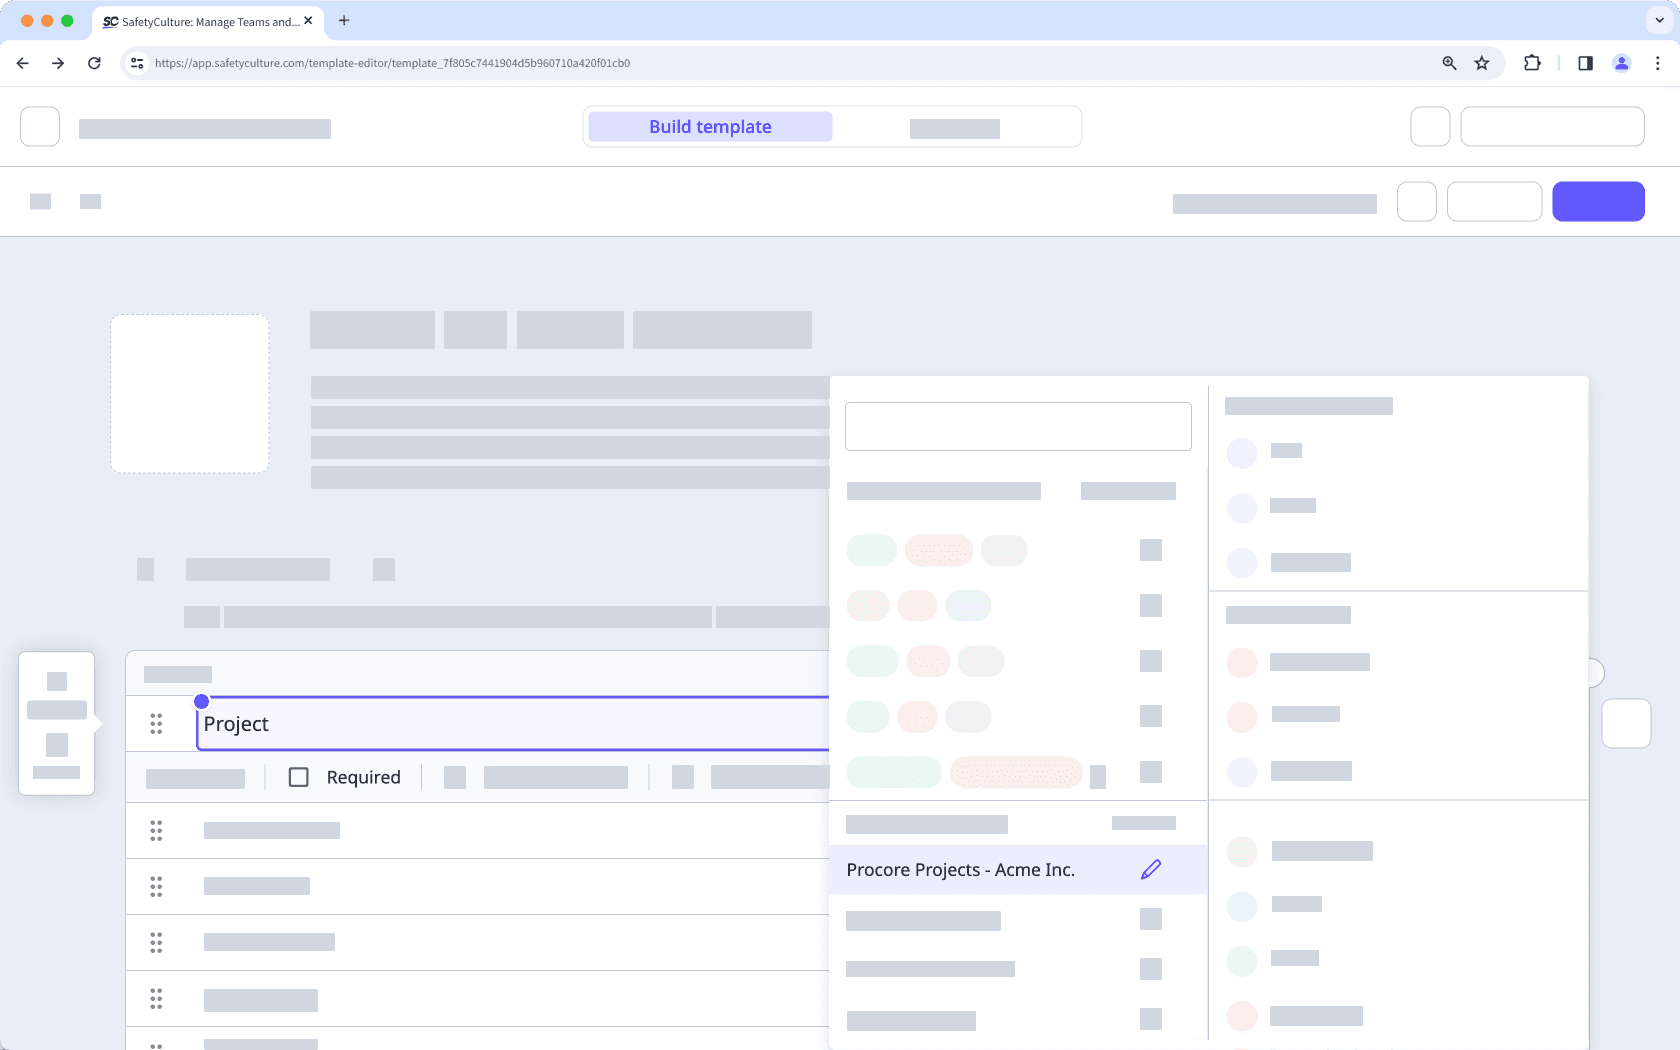
Add a new question or select an existing one to use as the Procore projects question.
Click the down arrow on the question's right-hand side, under "Type of response".
Search and select the "Procore Projects" Global Response Set. If you want to make sure this question always gets answered, check the "Required" box below the question label.

Click Back to list on the upper-left corner of the page. Repeat the steps to add "Procore Projects" Global Response Sets to other templates.
3. Test the integration (optional)
Start an inspection with the template that has a "Procore Projects" Global Response Set.
Answer the Procore question, then complete the inspection.
In Procore, go to the selected project's "Documents" tool.
Open the "SafetyCulture Inspections" folder and you should see the completed inspection's PDF report.
Frequently asked questions
Currently, the Procore integration offers a Global Response Set that can be used for inspections, and uploads any inspections that have used the Global Response Set to relevant Procore projects as PDF reports.
If you want to see more capabilities added to this integration with Procore, please let us know by providing your feedback.
The error is likely caused by one of the following:
Your Procore account doesn't have the Admin permission.
The "SafetyCulture" app was uninstalled by someone in your Procore company. You can reinstall the app in Procore and then try installing in SafetyCulture again.
In November 2022, we renamed "iAuditor" as "SafetyCulture". As part of this rename, we also updated the various references of "iAuditor" including the Procore integration, so that any new setups will use "SafetyCulture Inspections" instead. However, to minimize disruption to existing setups, we decided to continue exporting inspection reports to your existing "iAuditor Inspections" folders.
If you want to align the name of your folders for consistency, you can rename your "iAuditor Inspections" folders as "SafetyCulture Inspections".
If you get a connection error while installing the integration, it's likely because your browser is blocking third-party cookies on SafetyCulture websites. To fix this, we recommend that you turn on third-party cookies in your browser settings and try installing the integration again.

Was this page helpful?
Thank you for letting us know.