- Integrations
- Power Automate
- Power Automate: Start and prefill inspections with SharePoint items
Power Automate: Start and prefill inspections with SharePoint items
Learn how to create a Power Automate flow to start and prefill inspections whenever an item is added on a SharePoint list.Third-party products can change over time, so some labels or screen layouts in this article may look different in your environment. If you notice anything out of date, use the feedback form at the bottom of this page to let us know.
Preparations
This is an advanced flow that requires the use of a start inspection request in JSON format. We recommend that you prepare the request body in a text editor such as Visual Studio Code, then copy and paste it into the flow accordingly. If you're unsure of how to build your request, check out this start_inspection.json sample as a reference. You can also review our API documentation for more information.
The easiest way to construct a request is by retrieving the information of an existing inspection that has answered the question items you want to prefill. Then copy the question items of interest and clear their responses to prepare for the SharePoint items in the Power Automate flow. If the questions you want to prefill are on the title page, then the request array should be "header_items". For all other inspection pages, the array should be "items".
Before you start building the flow, ensure you have an existing list in your organization's SharePoint site with columns created for each inspection question you want to prefill. This can be interchanged with other connectors such as Google Sheets and Microsoft Excel Online.
Please note that if you have the inspection title format set up for the template you want to use, questions that are prefilled and used to populate the inspection title won't take effect until the inspection is modified on the web app or the mobile app.
1. When an item is created
Click Create from the menu on the left-hand side and select Automated cloud flow.
In the pop-up window, configure the following fields:
Flow name: Add a name for your flow so you can refer back to it easily.
Choose your flow's trigger: Search and select When an item is created from SharePoint.
Click Create to create the flow and its first step.
If you encounter any error related to "Data loss Prevention (DLP) policy" when creating the connection to SafetyCulture or any other apps, please contact your IT team to review Microsoft's DLP and unblock the connection.
2. Initialize variable
Click
below "When an item is created" and select Add an action.
Search and select Initialize variable under the "Variable" connector.
In the side panel, configure the following fields:
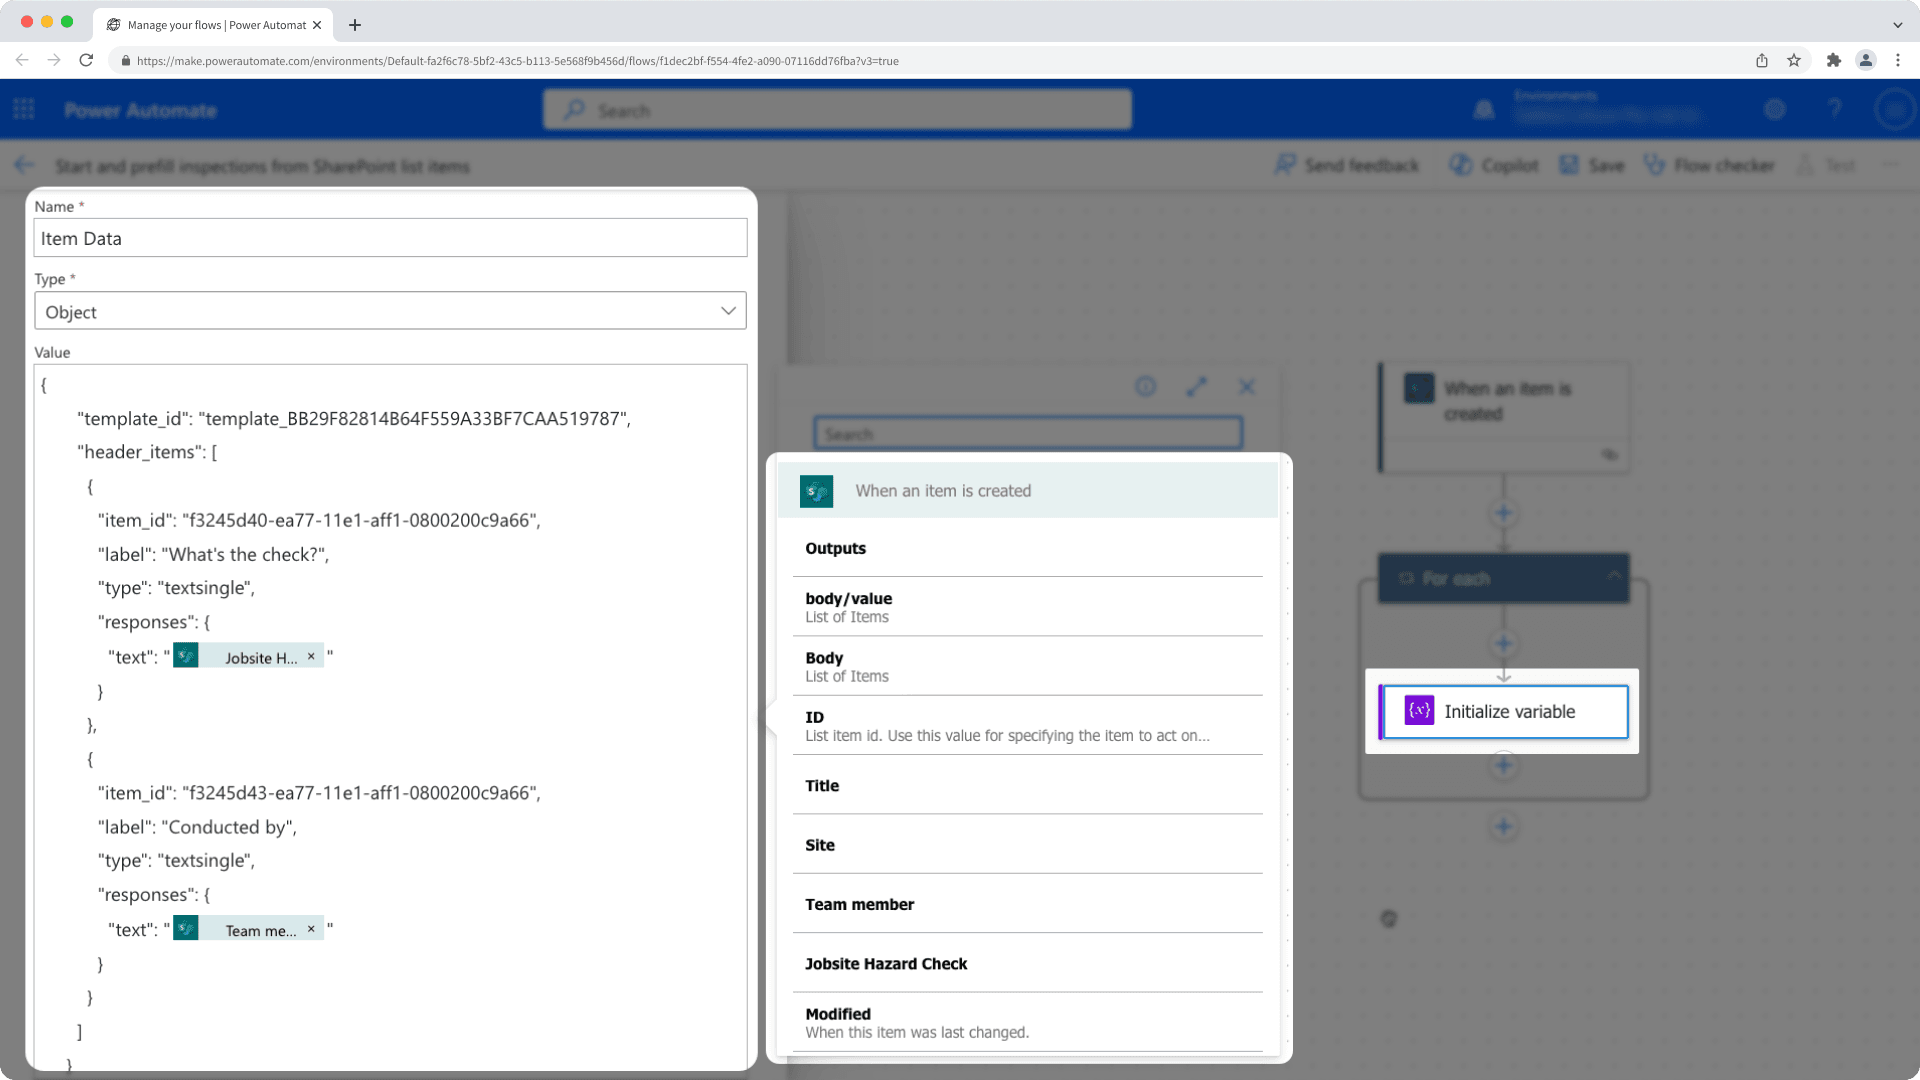
Name: Click the field and enter "Item Data".
Type: Click the field and select Object.
Value: Copy and paste in your start inspection request JSON. Then for each inspection response you want to prefill, click
and select the SharePoint list item from the list.
You should see something that resembles the following example:

3. HTTP
Click
below "Initialize variable" and select Add an action.
Search and select HTTP under the "HTTP" connector.
In the side panel, configure the following fields:
URI: Click the field and enter "https://api.safetyculture.io/audits".
Method: Click the field and select POST.
Headers (Enter key): Click the field and enter "Authorization".
Headers (Enter value): Click the field and enter your API token in the format of "Bearer [token]". Make sure there is a space between "Bearer" and the API token.
Body: Click the field, then click
and select Item Data from the list.
Click Save on the upper-right of the page to save the flow.
Test the flow (optional)
Make sure the flow is turned on.
Create a new item on the SharePoint list you're using for the flow.
If successful, a new inspection should be started using the template you selected and prefilled with information from the item you created.
If you're on Enterprise Plan, contact your customer success manager for help with SSO, user provisioning, or third-party integrations (Power Automate, Power BI, Zapier). Our customer support team can only provide limited assistance in these areas.
Was this page helpful?
Thank you for letting us know.