Dernière mise à jour:

Turn sensors and gateways on or off

Learn how to efficiently activate your sensors and gateways prior to adding them to SafetyCulture.

Que sont les capteurs ?
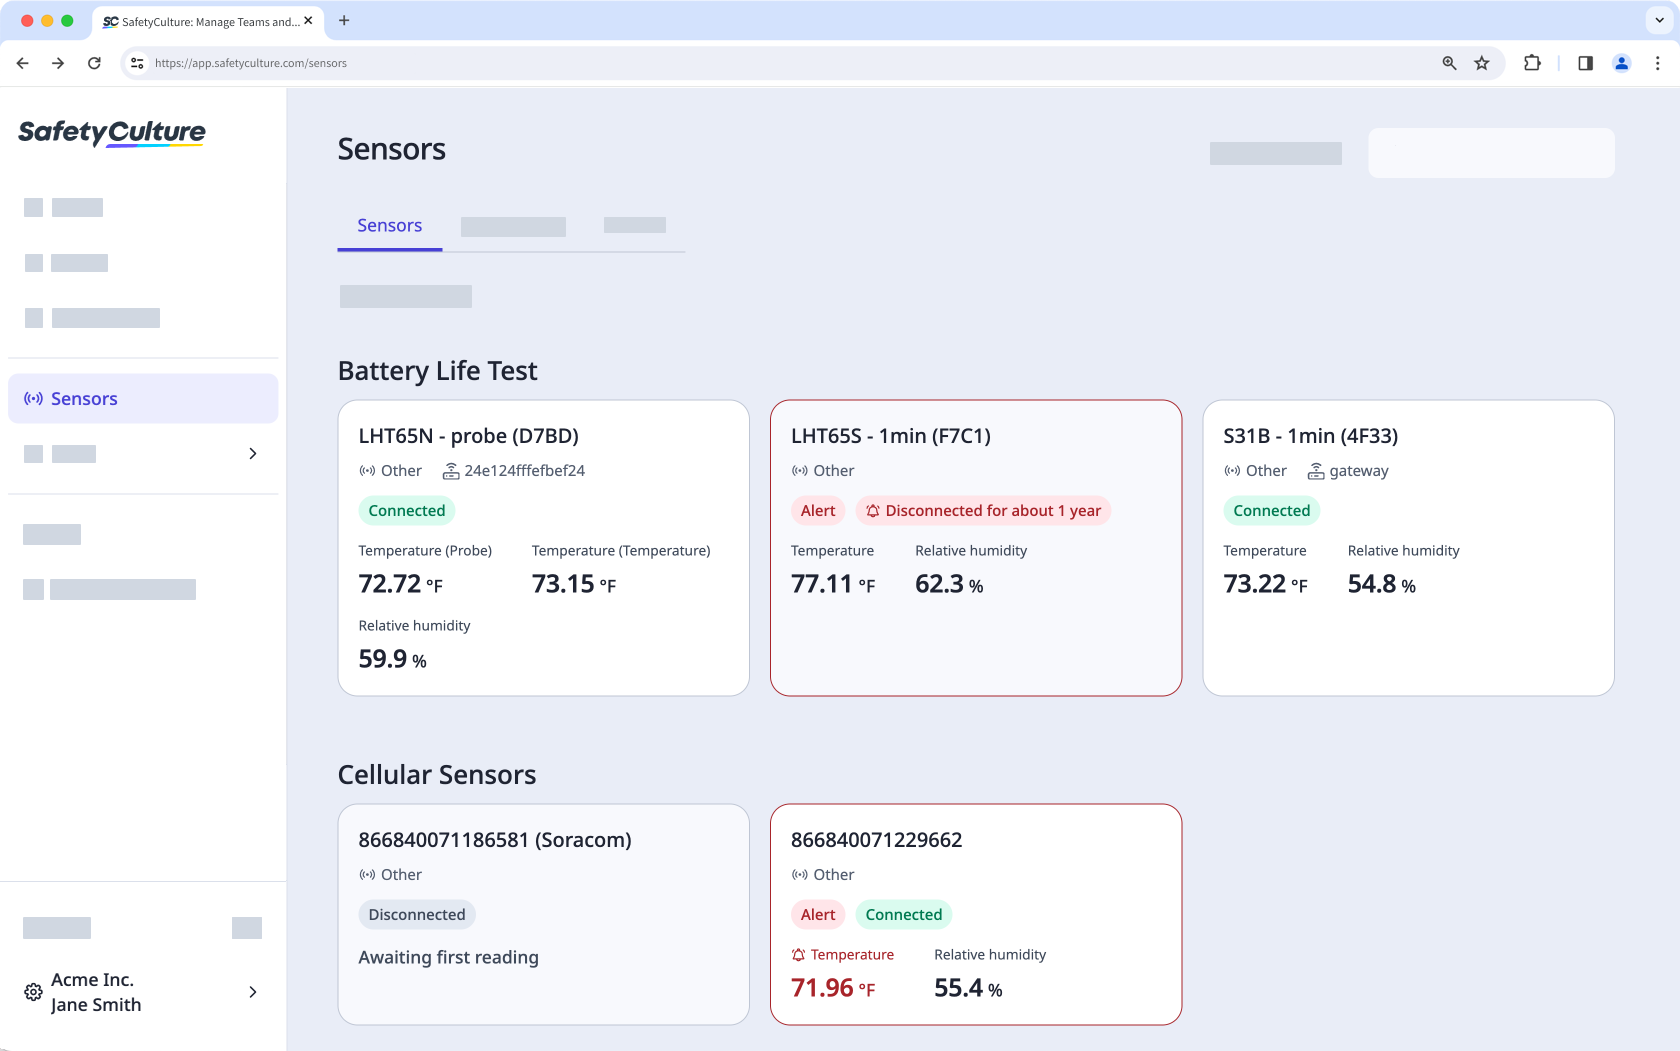
Grâce aux capteurs de SafetyCulture, vous pouvez surveiller vos actifs en temps réel 24 heures sur 24, 7 jours sur 7, recevoir des alertes en cas de dépassement des seuils critiques et enregistrer automatiquement les données essentielles à votre activité. Cela vous permet de rester conforme, de prévenir la perte d'actifs et de prendre des décisions éclairées basées sur les tendances des données historiques des capteurs.

Si vous êtes un client de capteurs intéressé par l'achat de passerelles et de capteurs supplémentaires, veuillez contacter votre responsable de la réussite des clients. Sinon, veuillez-nous contacter si vous êtes :

  • Intéressé par l'achat de capteurs et de passerelles chez nous.

  • Envisager l'achat de capteurs et de passerelles auprès de tiers.

  • Vous souhaitez en savoir plus sur nos solutions de capteurs ?

Page des capteurs de SafetyCulture.

Sensors upload a reading every 10 minutes and you will receive readings until the device is offline. For the sensor to register as offline in the app, the device must be offline for 60 minutes.

Turn sensors on or off

Le capteur de température et d'humidité &  Dragino LHT65N standard.

Turn on

  1. Press and hold the ACT button on the front of the device for at least five seconds. If you're using an older device, the ACT button is at the bottom. You can use a pen or something similar to press the button more firmly.

  2. A green light should flash five times, followed by a red light.

  3. If a gateway is within range, another green light should flash briefly, indicating that a reading is sent and received successfully.

Turn off

  1. Press the ACT button on the front of the device five times in a row. If you're using an older device, the ACT button is at the bottom.

  2. A red light should display briefly, indicating that the device is off.

Reset

  1. Press and hold the ACT button on the front of the device for at least five seconds. If you're using an older device, the ACT button is at the bottom.

  2. A green light should flash five times, followed by a red light.

  3. If a gateway is within range, another green light should flash briefly, indicating that a reading is sent and received successfully.

Send a reading manually

  1. Press and hold the ACT button on the front of the device for three seconds.

  2. A red light should flash, indicating that you sent a reading manually. If you have an external probe attached to your device, a blue light should flash instead. You can send a reading manually for this device once every ten minutes.

Cet appareil existe en deux versions. Si vous utilisez une version plus ancienne, il n'y a pas de bouton ACT et vous aurez besoin d'un tournevis cruciforme. Les processus peuvent donc différer entre ces versions.

Nouvelle version de l'appareil

Le capteur industriel de température et d'humidité Dragino S31B.

Activer

  1. Appuyez et maintenez le bouton ACT sur l'avant de l'appareil.

  2. La LED clignote cinq fois en vert, puis en bleu.

  3. Si une passerelle est à portée, un voyant vert clignote brièvement. Cela indique qu'une lecture a été envoyée et reçue avec succès.

Éteindre

  1. Appuyez cinq fois de suite sur le bouton ACT situé à l'avant de l'appareil.

  2. Un voyant rouge s'affiche brièvement, indiquant que vous avez réussi à éteindre l'appareil.

Réinitialiser

  1. Appuyez et maintenez le bouton ACT sur l'avant de l'appareil.

  2. La LED clignote cinq fois en vert, puis en bleu.

  3. Si une passerelle est à portée, un voyant vert clignote brièvement. Cela indique qu'une lecture a été envoyée et reçue avec succès.

Envoyer un relevé manuellement

  1. Appuyez sur le bouton ACT situé à l'avant de l'appareil et maintenez-le enfoncé pendant trois secondes.

  2. Un voyant bleu clignote, indiquant que vous avez envoyé un relevé manuellement. Vous pouvez envoyer un relevé manuellement pour cet appareil une fois toutes les dix minutes.

Cet appareil existe en deux versions. Si vous utilisez une version plus ancienne, il n'y a pas de bouton ACT et vous aurez besoin d'un tournevis cruciforme. Les processus peuvent donc différer entre ces versions.

Ancienne version de l'appareil

[IMAGE]

Activer

  1. À l'aide d'un tournevis Phillips, retirez les quatre vis situées à l'avant de l'appareil.

  2. Retirez le couvercle.

  3. Retirez le trépan jaune de la broche. [IMAGE]

  4. Placez le trépan jaune sur les deux broches. La LED de la carte mère clignote en vert. [IMAGE]

  5. Replacez le couvercle sur l'appareil.

  6. À l'aide d'un tournevis Phillips, fixez les quatre vis situées à l'avant de l'appareil.

Éteindre

  1. À l'aide d'un tournevis Phillips, retirez les quatre vis situées à l'avant de l'appareil.

  2. Retirez le couvercle.

  3. Retirez le trépan jaune des deux broches. [IMAGE]

  4. Placez le trépan jaune sur l'une des broches. [IMAGE]

  5. Replacez le couvercle sur l'appareil.

  6. À l'aide d'un tournevis Phillips, fixez les quatre vis situées à l'avant de l'appareil.

Réinitialiser

  1. À l'aide d'un tournevis Phillips, retirez les quatre vis situées à l'avant de l'appareil.

  2. Retirez le couvercle.

  3. Appuyez sur le bouton de réinitialisation. Le voyant de la carte mère clignote en vert. [IMAGE]

  4. Replacez le couvercle sur l'appareil.

  5. À l'aide d'un tournevis Phillips, fixez les quatre vis situées à l'avant de l'appareil.

Use the Standard Temperature Sensor (with digital display and probe) to monitor temperature for deployments where a screen is necessary.

Turn on

  1. Connect the probe to the bottom of the device.

  2. Press and hold the power button on the right-hand side of the device for more than three seconds.

  3. Icons are displayed on the screen for three seconds. If you turn the device on before connecting the probe, the screen appears blank until it is connected.

Turn off

  1. Use a Phillips screwdriver to remove the four screws on the back of the device.

  2. Remove the back cover and the batteries.

  3. Re-attach the back cover.

  4. Use a Phillips screwdriver to secure the four screws on the back of the device.

Reset

  1. Use a Phillips screwdriver to remove the four screws on the back of the device. 

  2. Press and hold the reset button for 10 seconds. 

  3. A green light displays.

  4. When the light disappears, continue to hold the reset button for another ten seconds.

  5. The screen turns off.

The Dragino Capteur de basse température LTC2-LT.

Activer

  1. À l'aide d'un tournevis Phillips, retirez les quatre vis situées à l'avant de l'appareil.

  2. Retirez le couvercle.

  3. Retirez le trépan jaune de la broche. [IMAGE]

  4. Placez le cavalier jaune sur les deux broches. [IMAGE]

  5. Replacez le couvercle sur l'appareil.

  6. À l'aide d'un tournevis Phillips, fixez les quatre vis situées à l'avant de l'appareil.

Éteindre

  1. À l'aide d'un tournevis Phillips, retirez les quatre vis situées à l'avant de l'appareil.

  2. Retirez le couvercle.

  3. Retirez le trépan jaune des deux broches. [IMAGE]

  4. Placez le trépan jaune sur l'une des broches. [IMAGE]

  5. Replacez le couvercle sur l'appareil.

  6. À l'aide d'un tournevis Phillips, fixez les quatre vis situées à l'avant de l'appareil.

Réinitialiser

  1. À l'aide d'un tournevis Phillips, retirez les quatre vis situées à l'avant de l'appareil.

  2. Retirez le couvercle.

  3. Appuyez sur le bouton de réinitialisation. La LED sur la carte de circuit imprimé clignote. [IMAGE]

  4. Replacez le couvercle sur l'appareil.

  5. À l'aide d'un tournevis Phillips, fixez les quatre vis situées à l'avant de l'appareil.

Le capteur de haute température Dragino LTC2-HT.

Activer

  1. À l'aide d'un tournevis Phillips, retirez les quatre vis situées à l'avant de l'appareil.

  2. Retirez le couvercle.

  3. Retirez le trépan jaune de la broche. [IMAGE]

  4. Placez le cavalier jaune sur les deux broches. [IMAGE]

  5. Replacez le couvercle sur l'appareil.

  6. À l'aide d'un tournevis Phillips, fixez les quatre vis situées à l'avant de l'appareil.

Éteindre

  1. À l'aide d'un tournevis Phillips, retirez les quatre vis situées à l'avant de l'appareil.

  2. Retirez le couvercle.

  3. Retirez le trépan jaune des deux broches. [IMAGE]

  4. Placez le trépan jaune sur l'une des broches. [IMAGE]

  5. Replacez le couvercle sur l'appareil.

  6. À l'aide d'un tournevis Phillips, fixez les quatre vis situées à l'avant de l'appareil.

Réinitialiser

  1. À l'aide d'un tournevis Phillips, retirez les quatre vis situées à l'avant de l'appareil.

  2. Retirez le couvercle.

  3. Appuyez sur le bouton de réinitialisation. La LED sur la carte de circuit imprimé clignote. [IMAGE]

  4. Replacez le couvercle sur l'appareil.

  5. À l'aide d'un tournevis Phillips, fixez les quatre vis situées à l'avant de l'appareil.

Le détecteur d'ouverture et de fermeture Dragino LDS02.

Turn on

  1. Slide the battery cover off the back of the device.

  2. Insert two standard AAA batteries. The sensor automatically turns on.

  3. Slide the battery cover back on the device.

Turn off 

  1. Slide the battery cover off the back of the device.

  2. Remove the standard AAA batteries. The sensor automatically turns off.

  3. Slide the battery cover back on the device.

Reset

  1. Slide the battery cover off the back of the device.

  2. Remove the standard AAA batteries. The sensor resets.

  3. Slide the battery cover back on the device.

Use the Industrial Open & Close Sensor to monitor doors and windows in more robust environments.

Turn on

  1. Use a Phillips screwdriver to remove the four screws on the front of the device. 

  2. Remove the lid.

  3. Remove the yellow jumper from the pin. Yellow jumper over one pin in an Industrial Open & Close Sensor.

  4. Place the yellow jumper over both pins vertically. Yellow jumper over both pins vertically in an Industrial Open & Close Sensor.

  5. Place the lid back on the device.

  6. Use a Phillips screwdriver to secure the four screws on the front of the device.

Turn off

  1. Use a Phillips screwdriver to remove the four screws on the front of the device. 

  2. Remove the lid.

  3. Remove the yellow jumper from the two pins. Yellow jumper over both pins vertically in an Industrial Open & Close Sensor.

  4. Place the yellow jumper over one of the pins horizontally. Yellow jumper over one pin in an Industrial Open & Close Sensor.

  5. Place the lid back on the device.

  6. Use a Phillips screwdriver to secure the four screws on the front of the device.

Reset

  1. Use a Phillips screwdriver to remove the four screws on the front of the device. 

  2. Remove the lid.

  3. Press the reset button. A light should flash briefly. Reset an Industrial Open & Close Sensor.

  4. Place the lid back on the device.

  5. Use a Phillips screwdriver to secure the four screws on the front of the device.

Le Capteur de dioxyde de carbone Milesight AM103 standard.

Turn on

  1. Remove the cover at the back of the device.

  2. Insert the two batteries included in the package.

  3. Place the cover at the back of the device.

  4. Press and hold the power button on the top of the device for three seconds or longer. The E-ink screen should flash, indicating that the device is on.

Turn off

1. Press and hold the power button on the top of the device for three seconds or longer.

Reset

  1. Press and hold the power button for more than 10 seconds. The device resets to its default factory settings.

Le capteur de qualité de l'air Milesight AM319.

Turn on

  1. Using a Phillips screwdriver, remove the screw from the back cover.

  2. Connect the cable included in the package to the power adapter.

  3. Connect the device to a power source.

  4. Place the cover back on the device.

  5. Using a Phillips screwdriver, secure the screw on the back cover.

  6. Plug in the device.

  7. Press and hold the power button for three seconds or longer. The E-ink screen should flash, indicating that the device is on.

Turn off

1. Press and hold the power button for three seconds or longer.

Reset

  1. Press and hold the power button for more than 10 seconds. The device resets to its default factory settings.

Use the Standard Air Pressure Differential Sensor to monitor positive or negative differential air pressure.

Turn on

  1. Use a Phillips screwdriver to remove the two screws on the front of the device.

  2. Remove the cover.

  3. Insert two x AA batteries.

  4. Move the ON switch to the right. Turn on the Standard Air Pressure Differential Sensor.

  5. The Status will begin to flash red.  The Status in the Standard Air Pressure Differential Sensor.

  6. Place the cover back on the device.

  7. Use a Phillips screwdriver to secure the two screws on the front of the device.

  8. Once the device is connected to a gateway, the Mode should flash green five times. The Mode in a Standard Air Pressure Differential Sensor.

Turn off

  1. Use a Phillips screwdriver to remove the two screws on the front of the device.

  2. Remove the cover.

  3. Move the ON switch to the left. Turn off the Standard Air Pressure Differential Sensor.

  4. Place the cover back on the device.

  5. Use a Phillips screwdriver to secure the two screws on the front of the device.

Reset

  1. Use a Phillips screwdriver to remove the two screws on the front of the device.

  2. Remove the cover.

  3. Move the ON switch to the left. Turn off the Standard Air Pressure Differential Sensor.

  4. Move the ON switch to the right. Turn on the Standard Air Pressure Differential Sensor.

  5. The Status will begin to flash red.  The Status in the Standard Air Pressure Differential Sensor.

  6. Place the cover back on the device.

  7. Use a Phillips screwdriver to secure the two screws on the front of the device.

  8. Once the device is connected to a gateway, the Mode should flash green five times. The Mode in a Standard Air Pressure Differential Sensor.

Le capteur de monoxyde de carbone (CO) Polysense WxS 8800-012.

Turn on

  1. Using a Phillips screwdriver, remove the four screws on the back of the device.

  2. Remove the back panel.

  3. Insert the two batteries included in the package.

  4. Place the cover at the back of the device.

  5. Using a Phillips screwdriver, secure the four screws on the back of the device.

Turn off

  1. Using a Phillips screwdriver, remove the four screws on the back of the device.

  2. Remove the back panel.

  3. Remove the two batteries.

  4. Place the cover at the back of the device.

  5. Using a Phillips screwdriver, secure the four screws on the back of the device.

Reset

  1. Using a Phillips screwdriver, remove the four screws on the back of the device.

  2. Remove the back panel.

  3. Remove the two batteries.

  4. Place the cover at the back of the device.

  5. Using a Phillips screwdriver, secure the four screws on the back of the device.

Use the Electrical Current Sensor to monitor energy consumption minute-by-minute.

We recommend that this sensor is only installed by professionals with knowledge of electrical systems.

Turn on

  1. Clip the sensor around an appropriate wire. This sensor draws its power from an active wire and requires no further action.

Turn off

  1. Unclip the sensor from the installed wire and remove the device. The capacitor of this device will hold power after being disconnected and will drain over time. You do not need to take any further action.

Reset

  1. Unclip the sensor from the installed wired and remove the device.

  2. Clip the sensor around the appropriate wire.

Use the Standard 3-Phase Power Sensor to monitor power usage using three dimensions with revenue grade accuracy.

We recommend that this sensor is only installed by professionals with knowledge of electrical systems.

Turn on

  1. Clip the sensor around an appropriate wire. This sensor draws its power from an active wire and requires no further action.

Turn off

  1. Unclip the sensor from the installed wire and remove the device.

Reset

  1. Unclip the sensor from the installed wired and remove the device.

  2. Clip the sensor around the appropriate wire.

Use the Standard Sound Sensor to monitor sound levels indoors.

Turn on

  1. Press and hold the power button on the back of the device for more than three seconds.

  2. A green light should flash.

Turn off

  1. Press and hold the power button on the back of the device for at least five seconds.

  2. The green light should remain on while you are holding the button.

Reset

  1. Press and hold the power button for 10 to 15 seconds. 

  2. A green light should flash briefly.

Use the Standard Vibration Sensor to monitor sound levels indoors.

Turn on

  1. Press and hold the power button for at least three seconds. You may use a pen or something similar to press the button firmly.

  2. A green light should appear and start to flash as it searches for a gateway. 

  3. The light turns off when it has connected to a gateway successfully.

Turn off

  1. Use a screwdriver to remove the screws on the top of the device.

  2. Remove the battery by carefully sliding it out of the base.

  3. Remove the wire with the white connector.

Reset

  1. Use a screwdriver to remove the screws on the top of the device.

  2. Remove the battery by carefully sliding it out of the base.

  3. Remove and then reattach the wire with the white connector.

  4. Slide the battery back into the base.

  5. Use a screwdriver to fasten the screws on the top of the device.

  6. Press and hold the power button for at least three seconds. You may use a pen or something similar to press the button firmly.

  7. A green light should appear and start to flash as it searches for a gateway. 

  8. The light turns off when it has connected to a gateway successfully.

Use the Signal Capture & IoT Controller to take an analog output and convert this to be visible in SafetyCulture.

Turn on

  1. Connect the sensor to the included power supply.

  2. The System LED should appear static green.

Turn off

  1. Remove the power supply. 

Reset

  1. Remove the power supply. 

  2. Reconnect the sensor to the included power supply.

  3. The System LED should appear static green.

Use the Outdoor GPS Tracker (small) for basic GPS tracking.

Turn on

  1. Use a Phillips screwdriver to remove the screws on the rear cover. 

  2. Insert three AAA batteries.

  3. The LED should flash and connect to a GPS. We recommend for you to be in an area with a good GPS reception, ideally outside if possible.

Turn off

  1. Use a Phillips screwdriver to remove the screws on the rear cover. 

  2. Remove the batteries from the device.

Reset

  1. Use a Phillips screwdriver to remove the screws on the rear cover. 

  2. Remove and then insert the batteries again.

  3. The LED should flash and connect to a GPS. We recommend for you to be in an area with a good GPS reception, ideally outside if possible.

Use the Outdoor GPS Tracker for seamless indoor or outdoor asset management.

Turn on

  1. Use a Phillips screwdriver to remove the screws on the rear cover. 

  2. Insert three AAA batteries.

  3. The LED should flash and connect to a GPS. We recommend for you to be in an area with a good GPS reception, ideally outside if possible.

Turn off

  1. Use a Phillips screwdriver to remove the screws on the rear cover. 

  2. Remove the batteries from the device.

Reset

  1. Use a Phillips screwdriver to remove the screws on the rear cover. 

  2. Remove and then insert the batteries again.

  3. The LED should flash and connect to a GPS. We recommend for you to be in an area with a good GPS reception, ideally outside if possible.

Use the Off-road Vehicle Tracker for fleet management and heavy equipment monitoring in tough environments.

This sensor requires more detailed installation, please contact our Support team.

Use the On-road Fleet & Cold Chain Temperature Tracker to monitor temperature of vehicles or goods alongside driver behavior.

Turn on

  1. Connect the device to an available OBDII socket in your vehicle.

Turn off

  1. Remove the device from the OBDII socket in your vehicle.

Turn gateways on or off

La passerelle IoT Tektelic KONA Mircro.

Please note that the LED indicator on the front of the device flashes green periodically and sometimes changes to solid green to indicate that the device is operating normally.

Turn on

  1. Attach the antenna included in the package.

  2. Connect the device to a power source.

  3. Plug in the device.

Turn off

  1. Unplug the device.

  2. Remove the screws from the battery cover on the bottom of the device.

  3. Remove the battery cover.

  4. When you see a cable with a white connector, pull the connector to disconnect the battery backup.

  5. Reconnect the battery backup.

  6. Place the battery cover back on the bottom of the device.

  7. Secure the screws on the battery cover.

Reset

  1. Unplug the device.

  2. Remove the screws from the battery cover on the bottom of the device.

  3. Remove the battery cover.

  4. When you see a cable with a white connector, pull the connector to disconnect the battery backup.

  5. Wait for 20 seconds.

  6. Reconnect the battery backup.

  7. Place the battery cover back on the bottom of the device.

  8. Secure the screws on the battery cover.

  9. Plug in the device.

Passerelle Femto d'intérieur Ethernet et Wi-Fi.

Activer

  1. Fixez l'antenne fournie dans l'emballage.

  2. Connectez l'appareil à une source d'alimentation.

  3. Branchez l'appareil sur une prise Ethernet. Vous pouvez également consulter le guide de configuration et de connexion des passerelles via Wi-Fi.

  4. Branchez l'appareil sur une source d'alimentation.

Éteindre

  1. Débranchez l'appareil de la source d'alimentation.

Réinitialiser

  1. Débranchez l'appareil de la source d'alimentation.

  2. Déconnectez le port Ethernet s'il est connecté.

  3. Attendez quelques secondes.

  4. Reconnectez le port Ethernet.

  5. Branchez l'appareil sur une source d'alimentation. Le voyant d'alimentation devient vert lorsque l'appareil s'allume.

Informations complémentaires

Le voyant d'alimentation passe au vert lorsque l'appareil est mis sous tension, mais après quelques secondes, il passe au rouge et tous les autres voyants d'état doivent être verts. Si le voyant d'alimentation n'affiche pas ce schéma à un moment donné, passez en revue les étapes de dépannage suivantes.

  • Alimentation : Ce voyant doit être rouge. Si ce n'est pas le cas, assurez-vous que le câble d'alimentation est correctement connecté et qu'il est branché sur une source d'alimentation en état de marche. Si le problème persiste, essayez une autre source d'alimentation.

  • LoRa : Ce voyant doit être vert. Si ce n'est pas le cas, assurez-vous que l'antenne est correctement fixée.

  • WAN (symbole Globe) : Ce voyant doit être vert. Si ce n'est pas le cas, assurez-vous que le câble Ethernet est correctement connecté à un port disposant d'une connectivité. Si ce n'est pas le cas, vérifiez [LINK].

  • Wi-Fi (symbole Wi-Fi) : Ce voyant doit être vert. Si ce n'est pas le cas, consultez le guide de configuration et de connexion des passerelles via Wi-Fi.

Besoin d'aide supplémentaire?
Dans cet article