- Using SafetyCulture
- Sensors
- Set up and connect Ethernet & Wi-Fi gateway via Wi-Fi
Set up and connect Ethernet & Wi-Fi gateway via Wi-Fi
Learn how to set up and connect the Ethernet & Wi-Fi gateway via Wi-Fi.What are the differences between Ethernet and Wi-Fi gateways?
The key difference between Ethernet and Wi-Fi gateways lies in how they connect to your network. Ethernet uses a wired connection for maximum reliability and performance, while Wi-Fi connects wirelessly for greater flexibility and easier setup. Ethernet gateways are best suited to fixed environments where uptime and data consistency are critical, whereas Wi-Fi gateways work well in locations where cabling is difficult or mobility is needed. By supporting both options, gateways ensure your sensors remain connected and your data stays accurate, no matter the environment.
Set up and connect Ethernet & Wi-Fi gateway via Wi-Fi
Plug the gateway into a power source, and it will turn on automatically.
Add your gateway by following the first step from the guide.
Once the gateway is successfully added, it will appear in the Sensors tab. It won't appear as "Connected" as it still requires a Wi-Fi connection to be set up.
Disconnect your computer from its current Wi-Fi network.
Open network settings on your computer and create a new Wi-Fi network.
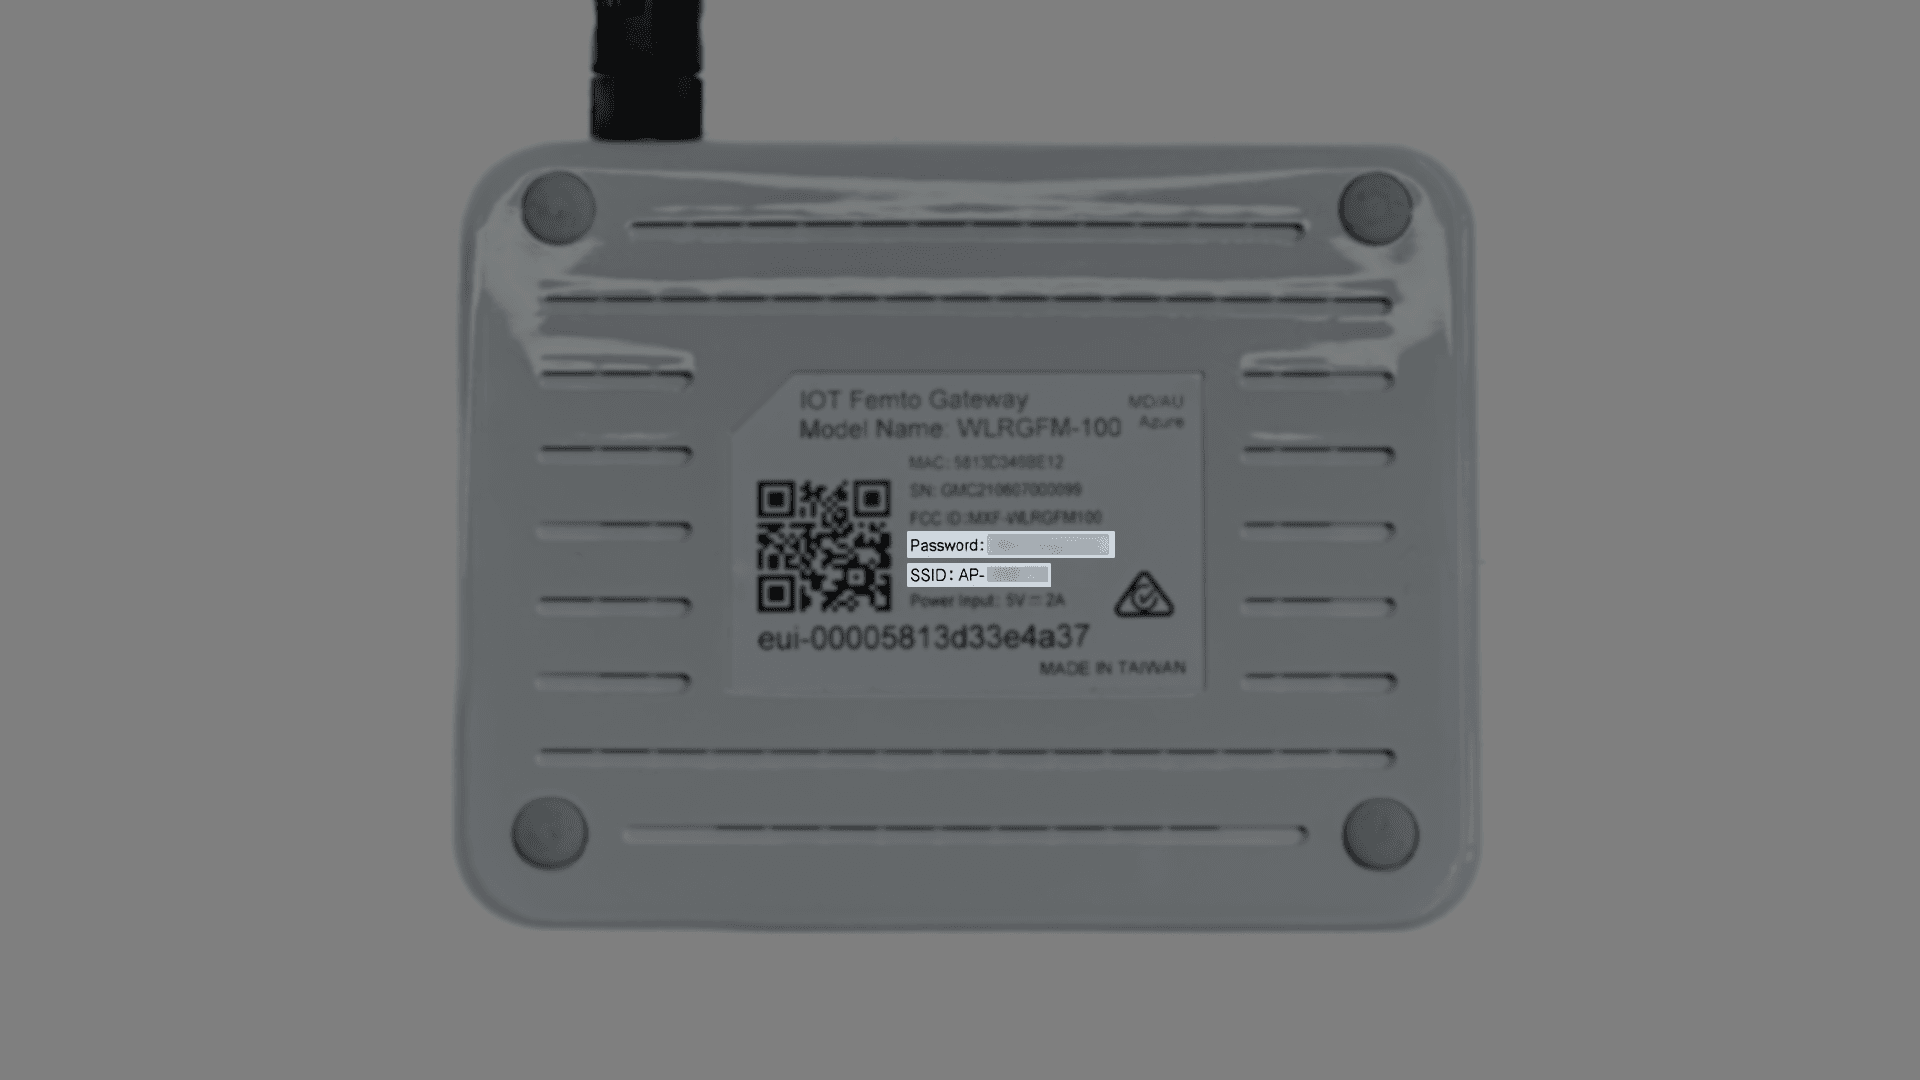
Flip the gateway and enter the following details to complete the Wi-Fi network setup:
Network Name: Gateway's SSID
Security Type: WPA2/WPA3 Personal
Security Key: Gateway password

Connect to the new network you've created.
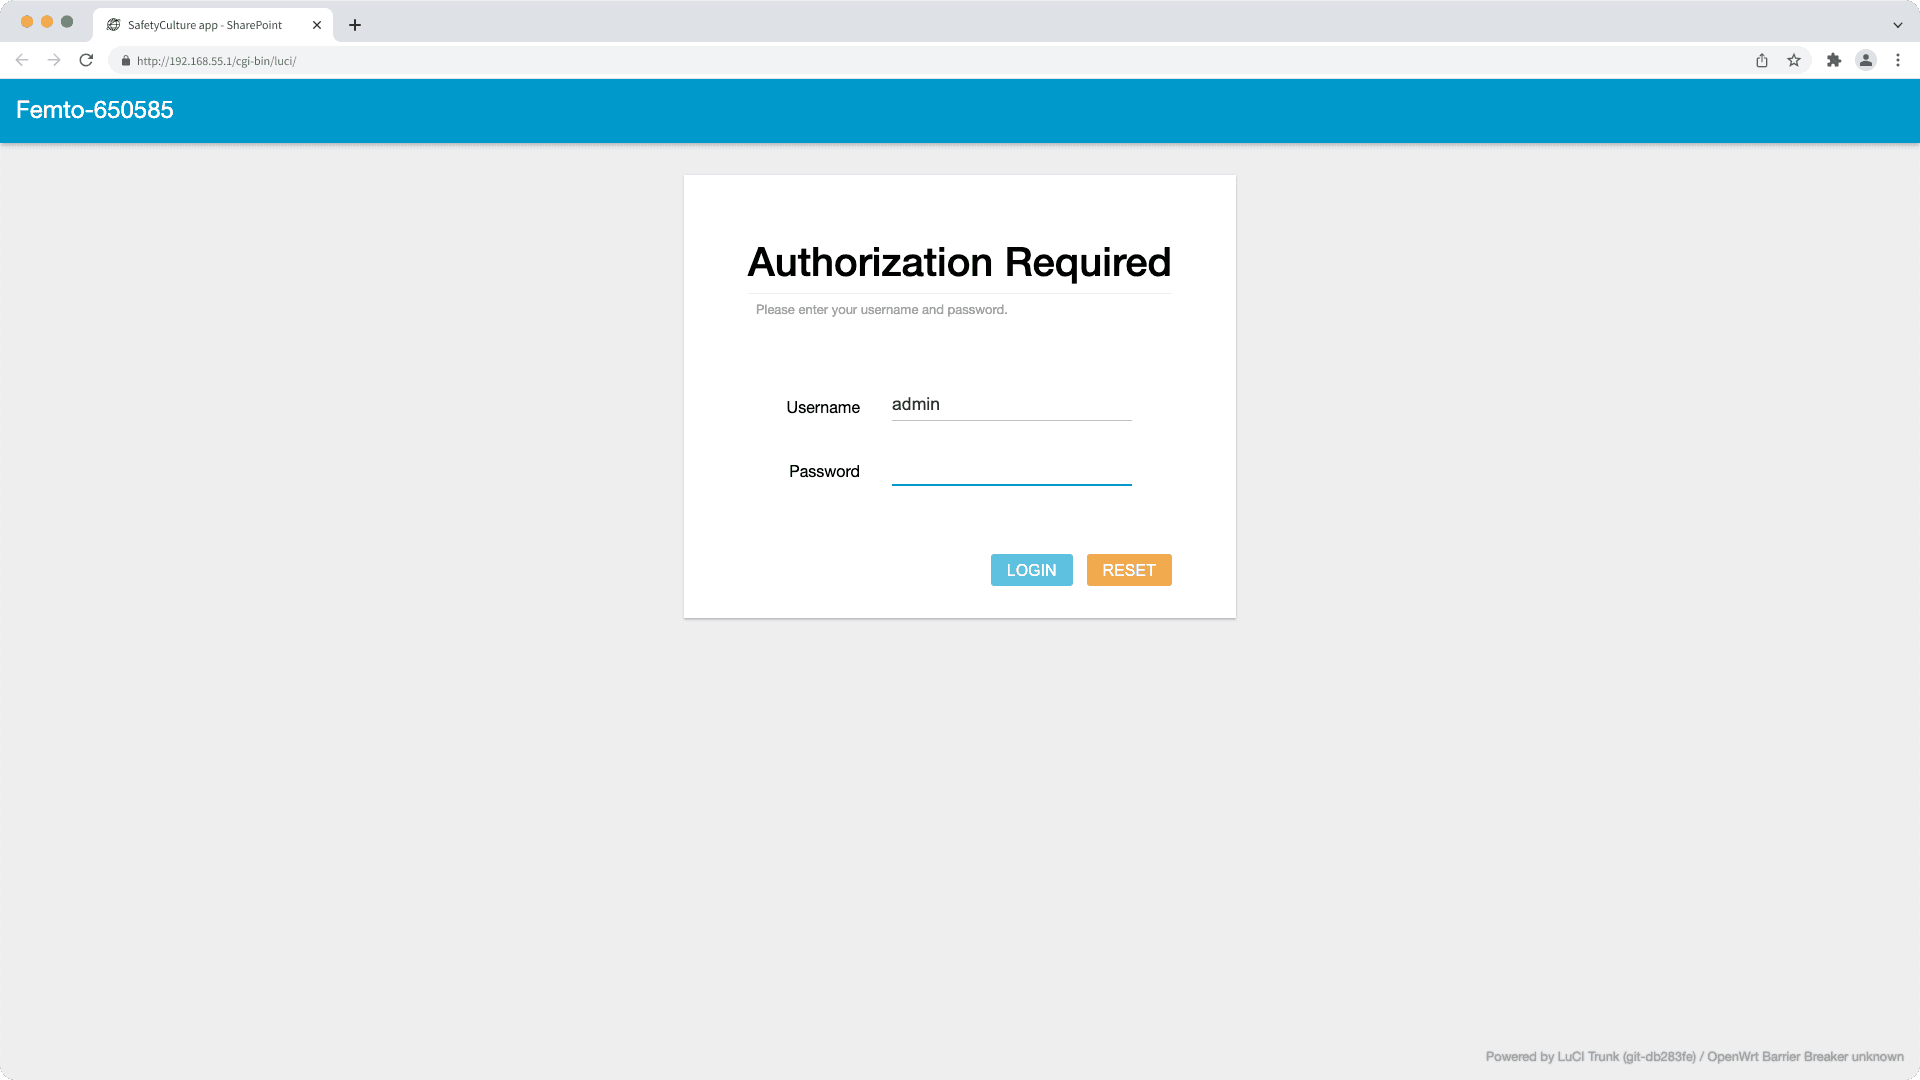
Open a web browser and enter "192.168.55.1" in the address bar.
Enter the below details to log in.
Username: admin
Password: Located at the bottom of the gateway (Gateway password)

Click Network on the left-hand side of the page, then click WAN. If you want to configure the gateway for a static IP address, you can click Ethernet Wan, then set "wantype" to "Static IP" and configure the static IP address accordingly.
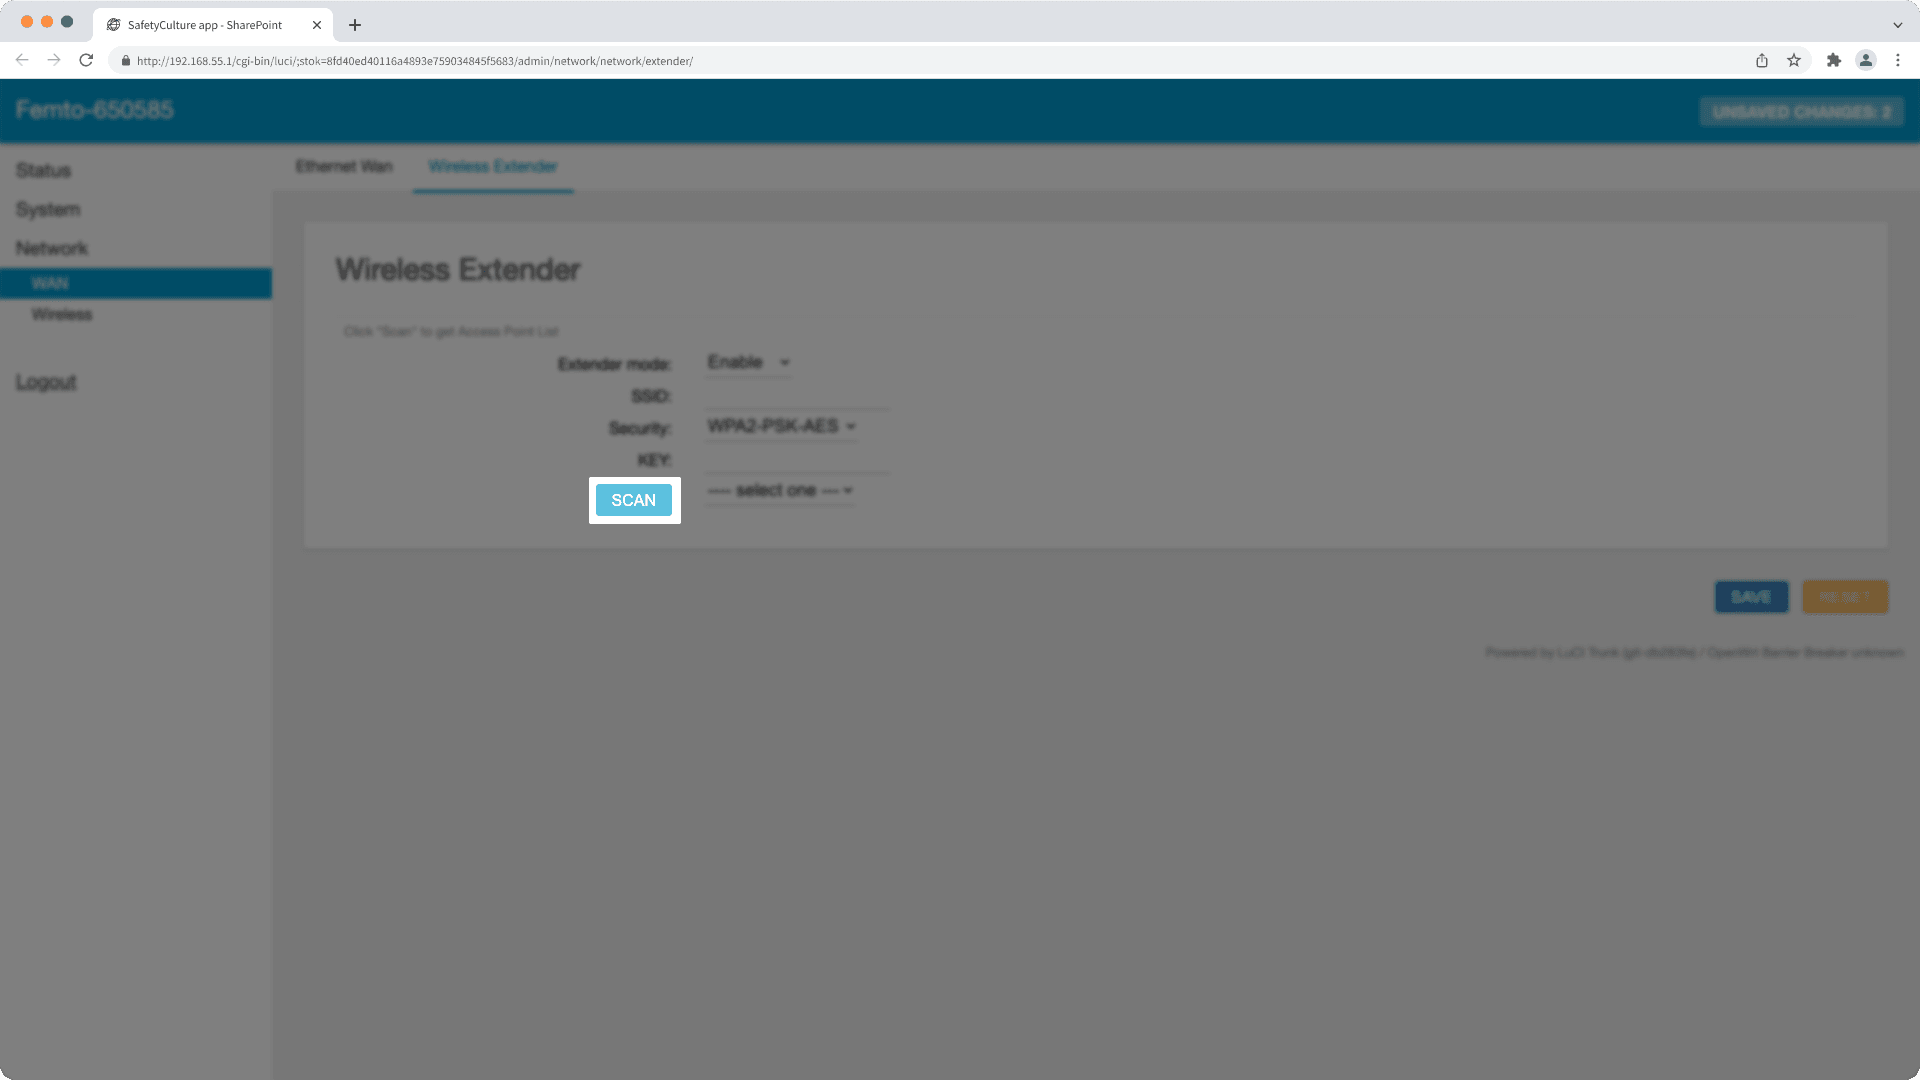
Click Wireless Extender tab on the top of the page, then change the "Extender mode" to "Enable".
Click SCAN, then click the "Select one" dropdown menu.

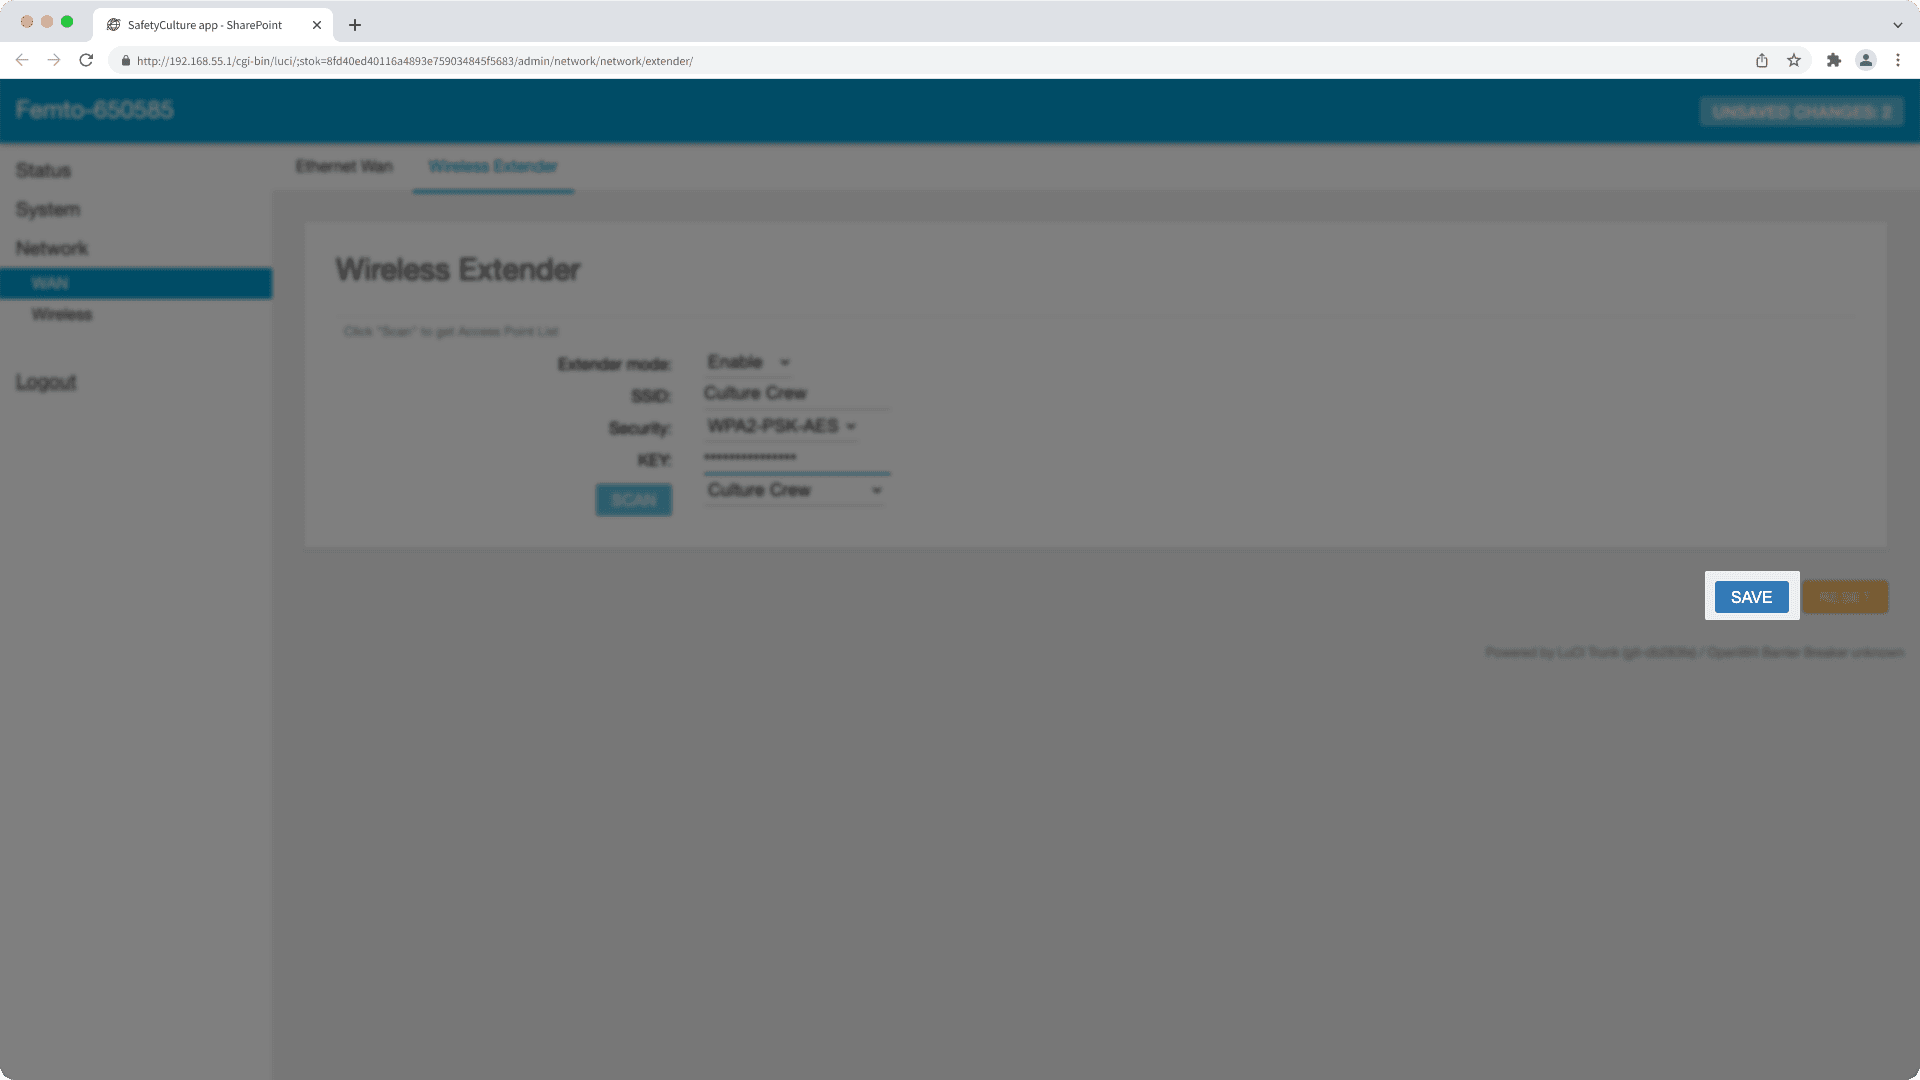
Select the Wi-Fi network you want the gateway to be connected to, then enter the Wi-Fi password in the "Key" and click SAVE on the bottom-right corner of the page. The "Save and restart wireless" icon will continue to loop, so do not wait for it to stop.

This will reset the gateway. On the gateway, The power indicator will show the red LED light, and the rest will show the green LED light.
Wait one to three minutes and reconnect your computer to the previous Wi-Fi network.
Go back to Sensors tab and refresh the page.
Check the connection status of the gateway.
If you can't locate the password on the gateway, then the password is a7z4GBxxxx, with the “xxxx” being the last 4 digits of EUI. For example:
EUI: 00005813d33e4a37
Password: a7z4GB4a37
Was this page helpful?
Thank you for letting us know.