How do I digitize my checklists?
After you have set up your SafetyCulture organization, it’s time to start digitizing your checklists. You may have paper forms piled on your desk, digital copies stored on your device, or are thinking about creating new ones but unsure where to begin. There are three sure-fire ways to start this process.
Download templates from the Library: Browse through thousands of free templates across every industry. Explore industries, preview templates, and find the ones that fit your business needs. You can also download any template and customize it to suit your team's specific needs.
Convert your existing forms: You can upload anything on hand, and we'll convert everything for you.
Explore the Templates feature: As early as now, we want to highlight that it is always a best practice to learn how to build templates from scratch in SafetyCulture. This will allow you to easily change your templates as you improve your workflows.
1. Download templates
The Library (opens in new tab) in SafetyCulture is a centralized content hub where you can browse ready-made templates, courses, and collections. With thousands of content available, you can download templates directly to your account to conduct inspections and create checklists, and have the ability to edit them to suit your organization's needs.
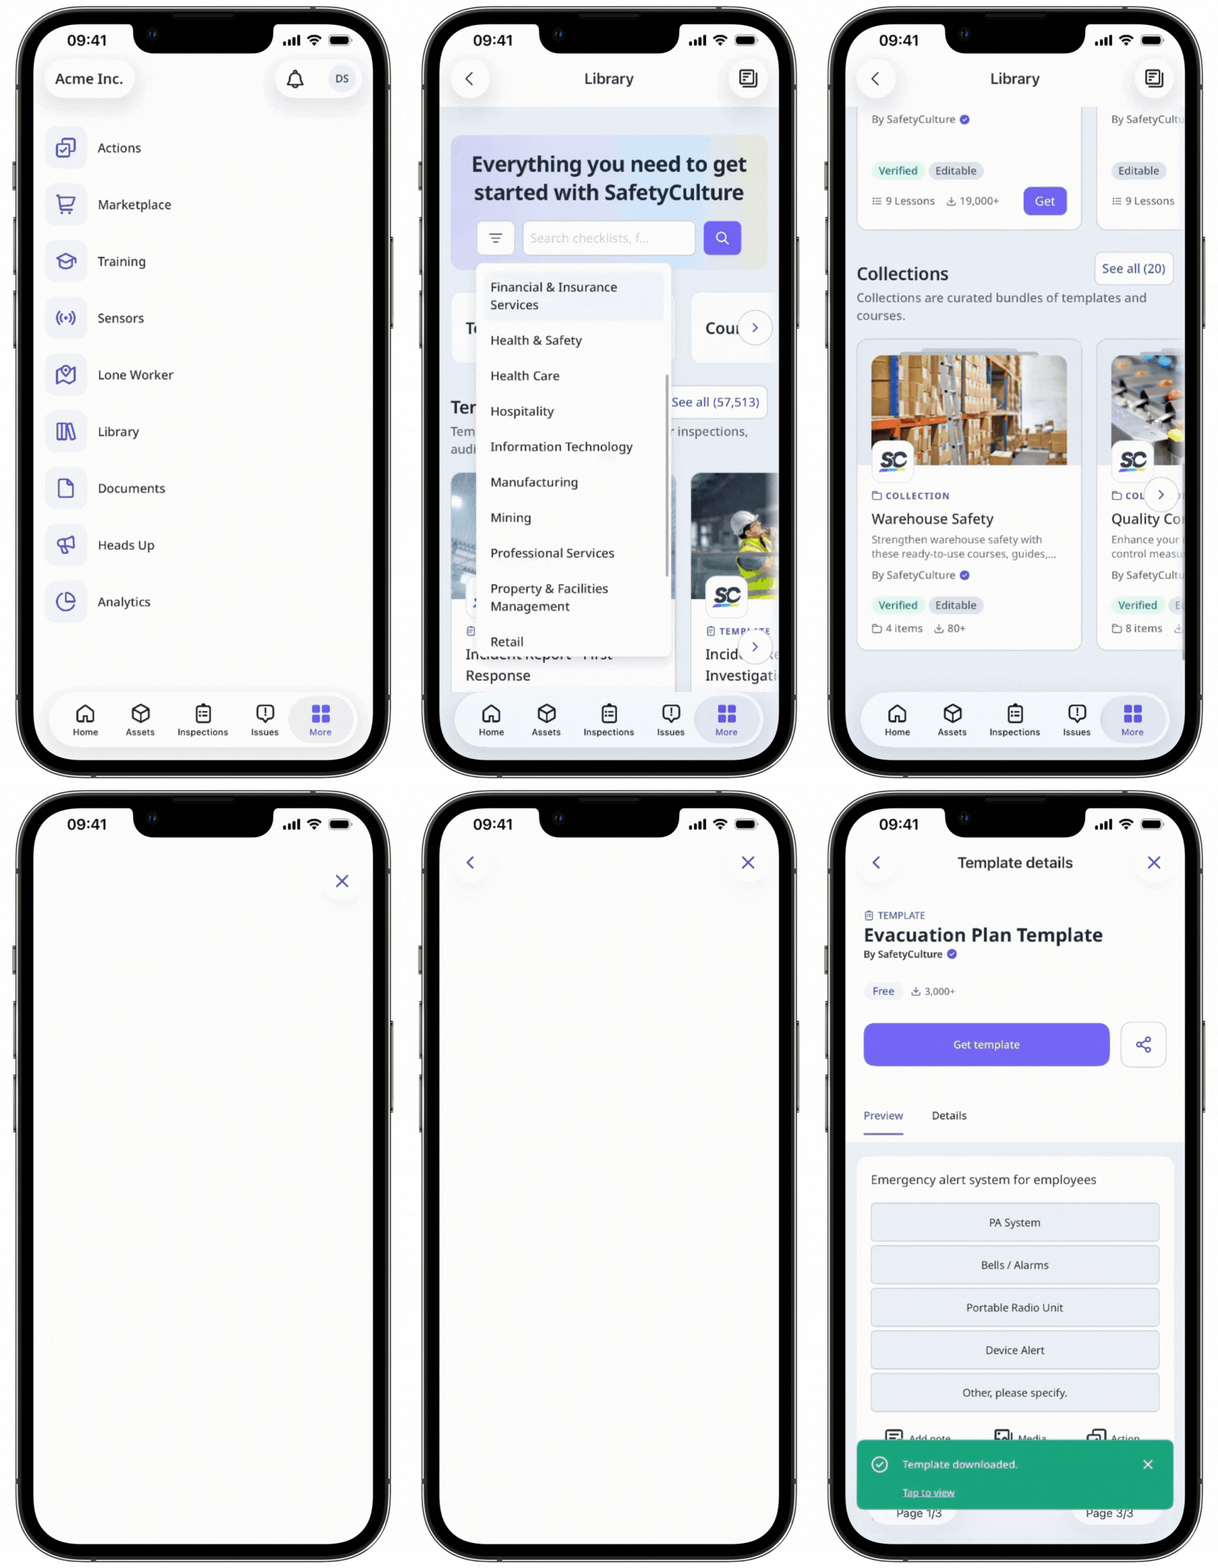
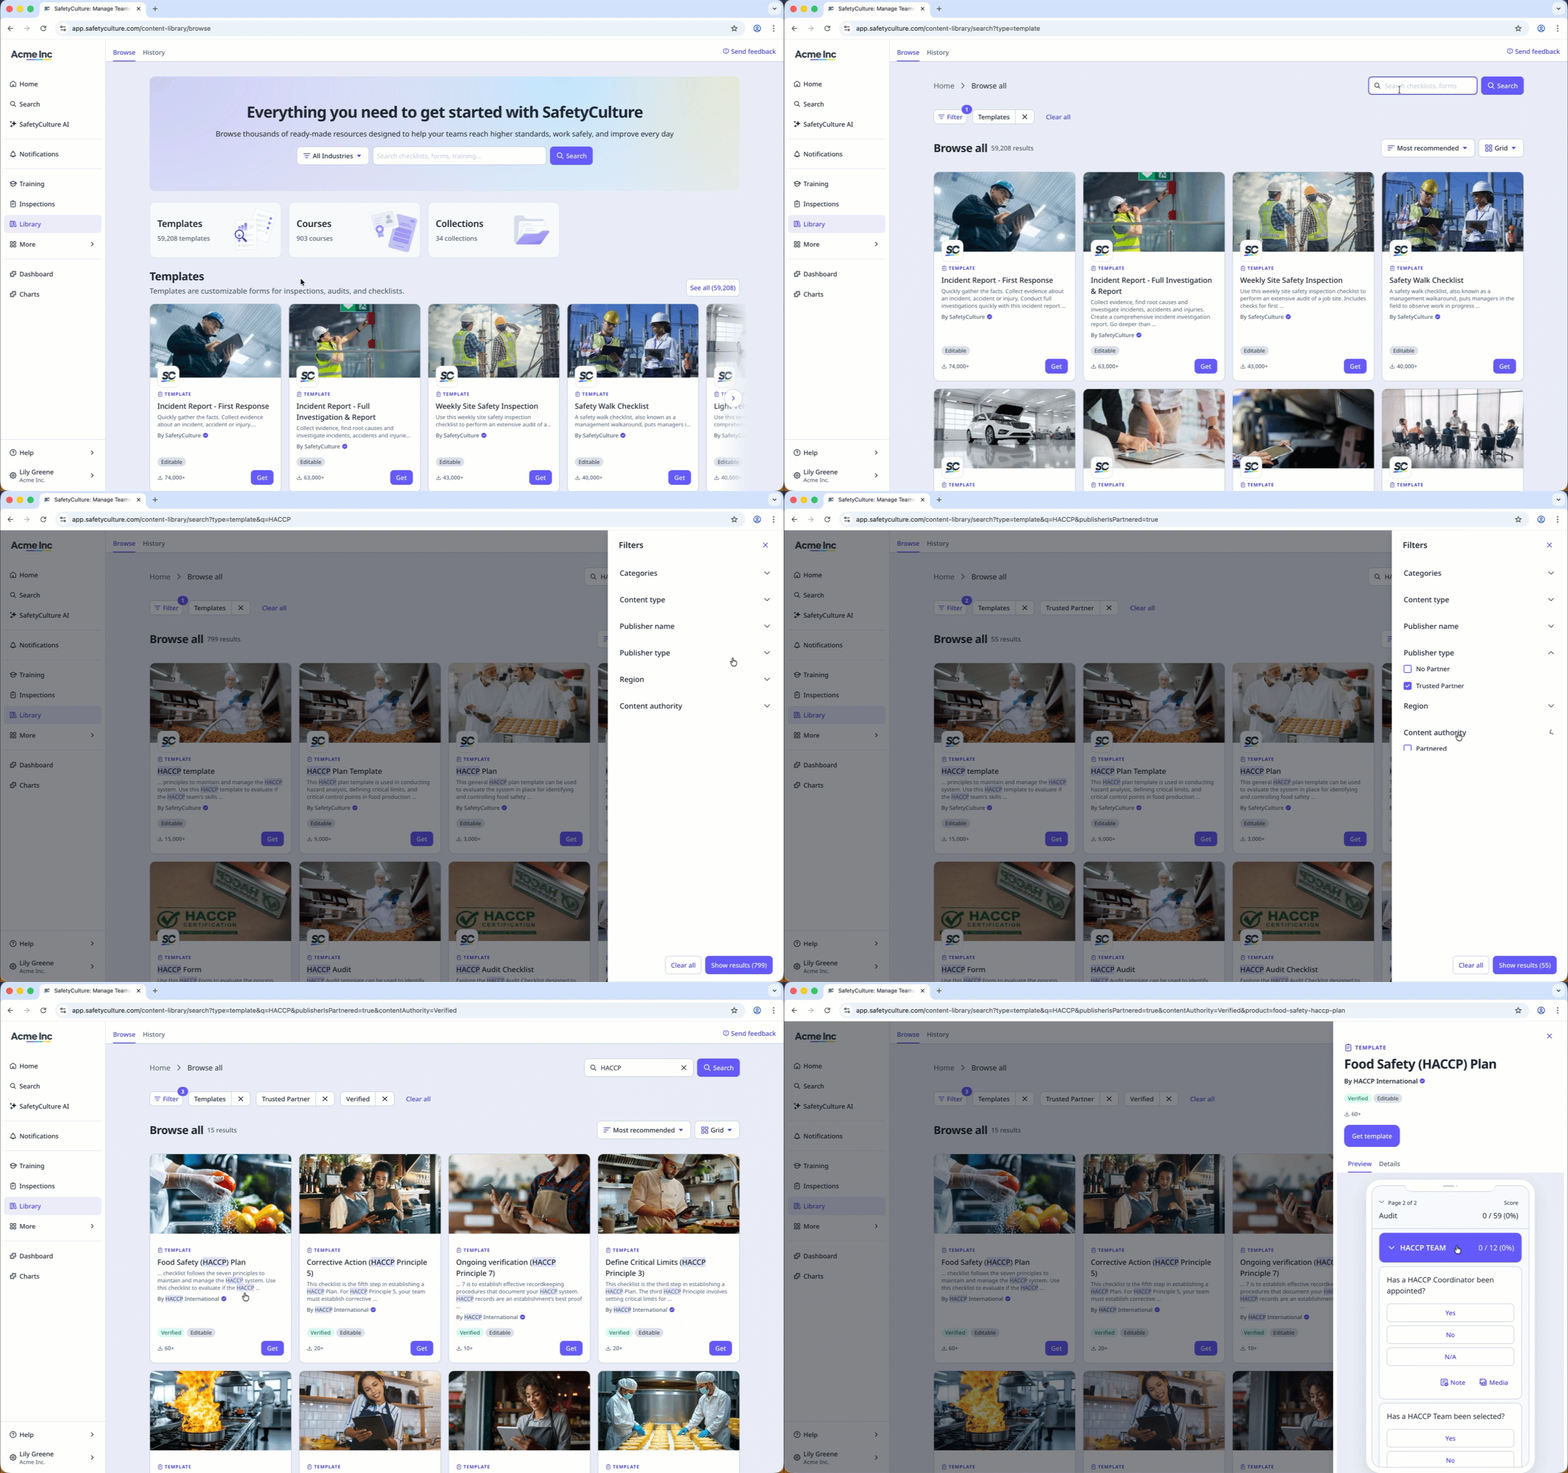
Download a template from the Library
Select
 Library in the sidebar or select it in More.
Select Templates at the top of the page.
To narrow down your results, you can apply filters and search by keywords.
Select a template.
In the side panel, click Get template.

2. Convert forms
Converting existing forms or checklists and adding them to SafetyCulture improves data accessibility and storage, helps you collect and analyze your data easily, and streamlines your organization's workflows. You can cut down on paper and storage costs and significantly reduce your team's turnaround time.
We understand that the template might sometimes not turn out to be exactly what you're after. We encourage you to edit your template further and give your own finishing touches to make the best version of your forms for your team.
You can convert Excel files up to 5MB and images (JPEG or PNG) or PDF files up to 10MB.
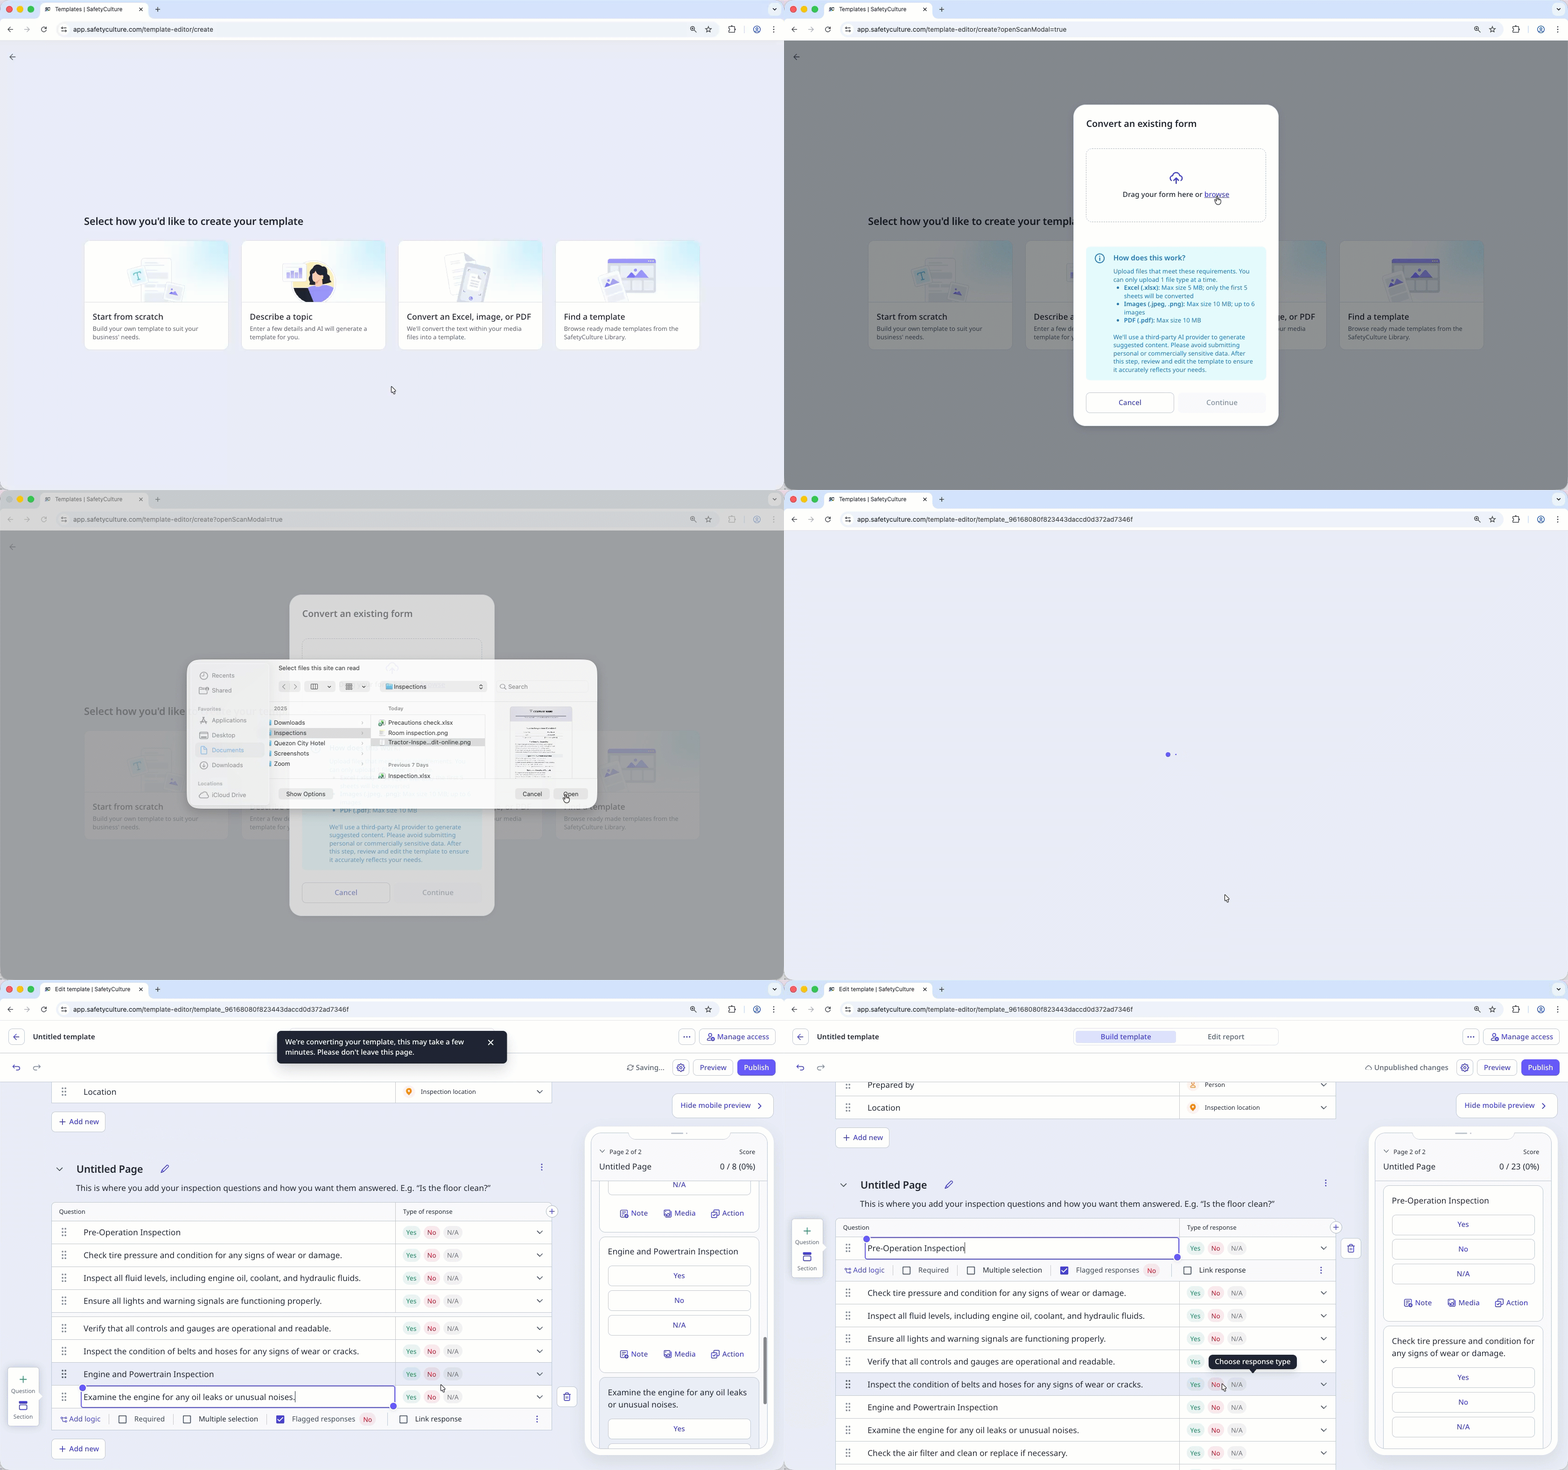
Convert an Excel into a template
Select Templates in the sidebar or select it in More.
Click Create on the upper-right corner of the template list.
Click Convert an Excel, image, or PDF.
In the pop-up window, drag your files to the "Drag your form here" section or click browse to select files.
Click Continue. This starts the template conversion.
Edit your template as needed.
Click Publish on the upper-right of the page to publish the template. If you're not ready to publish the template, you can go back to the templates list and come back when you're ready.
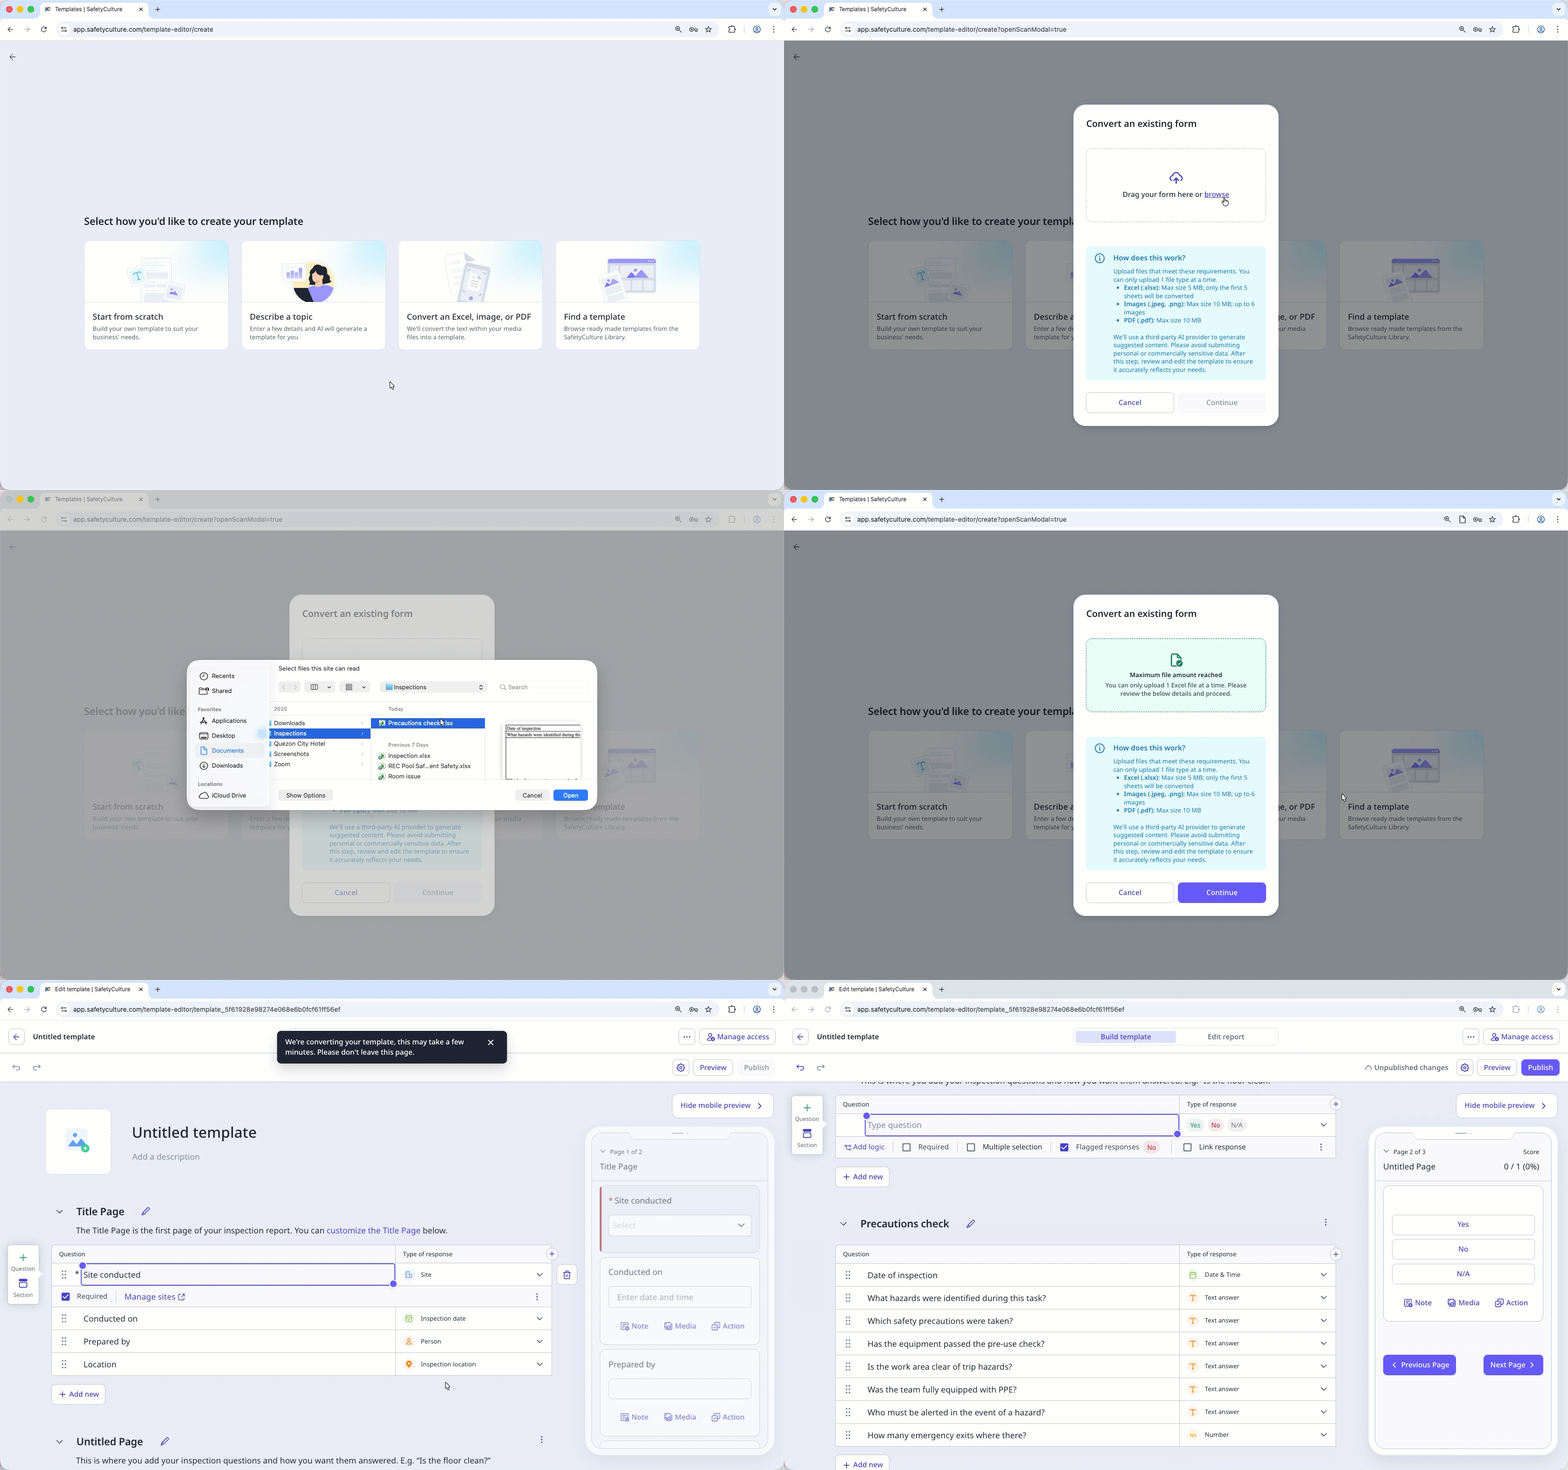
 Upload file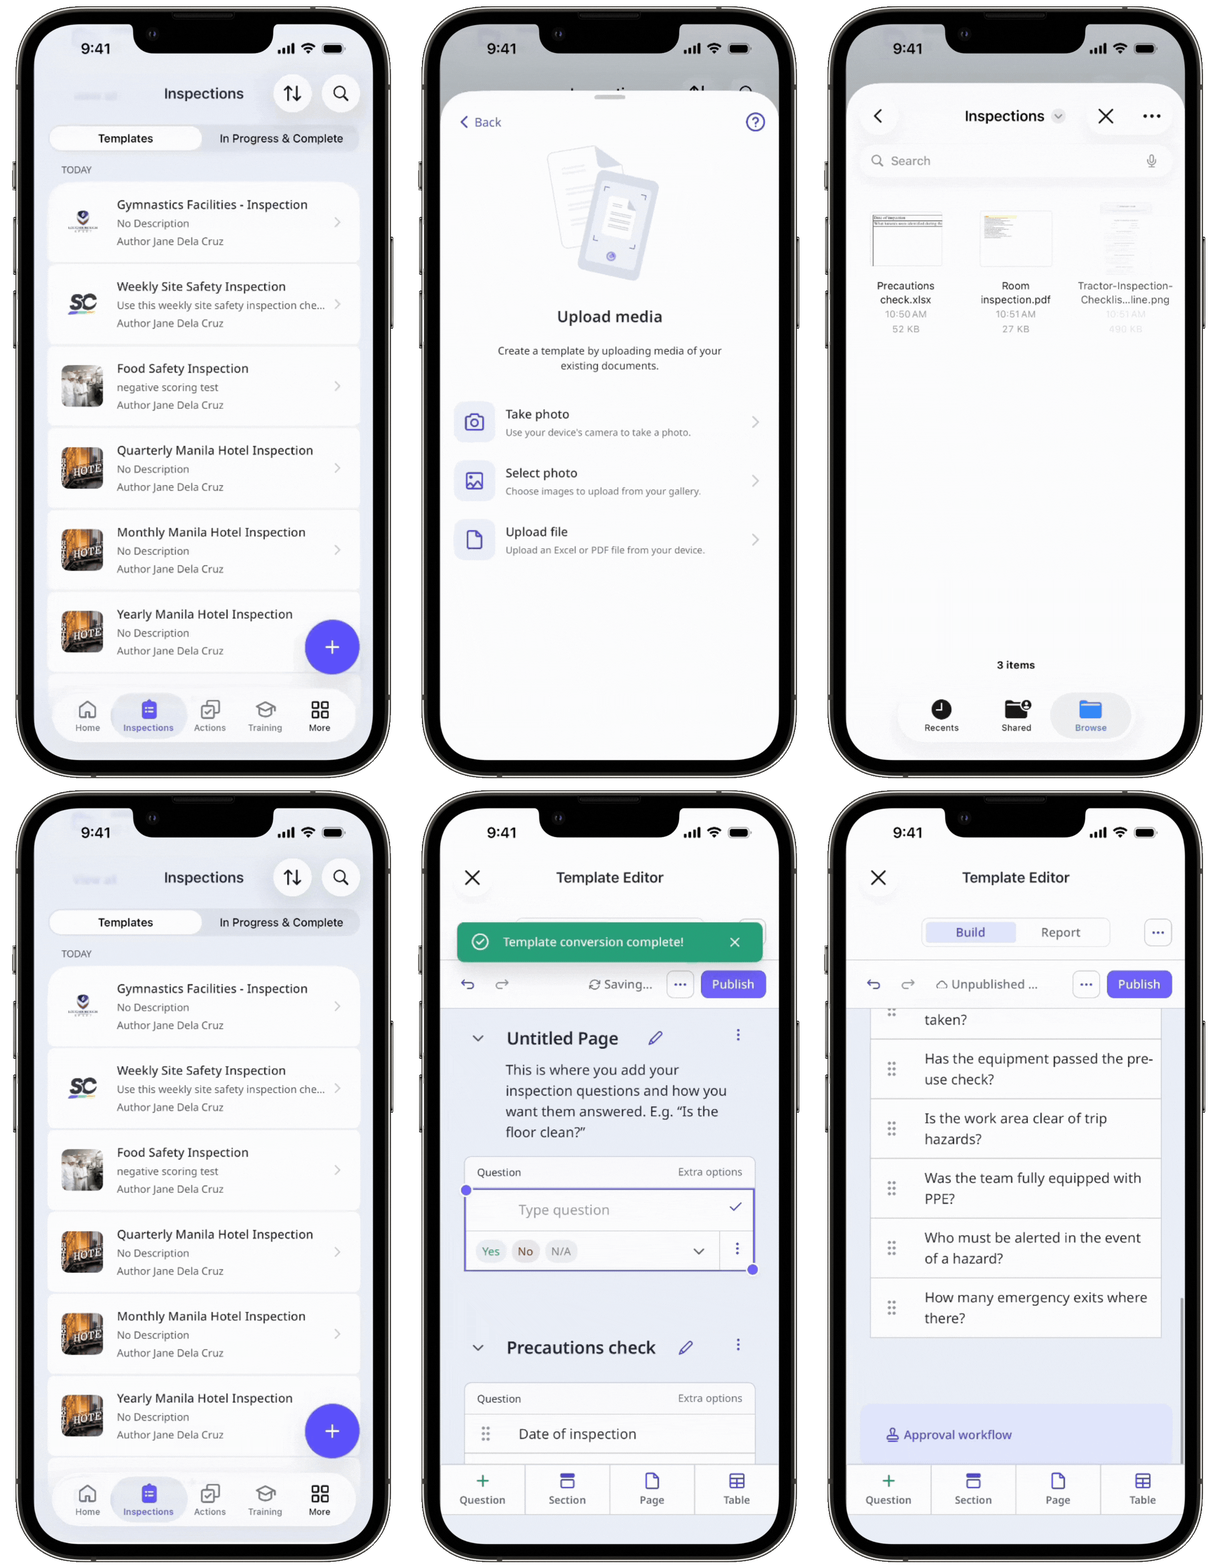
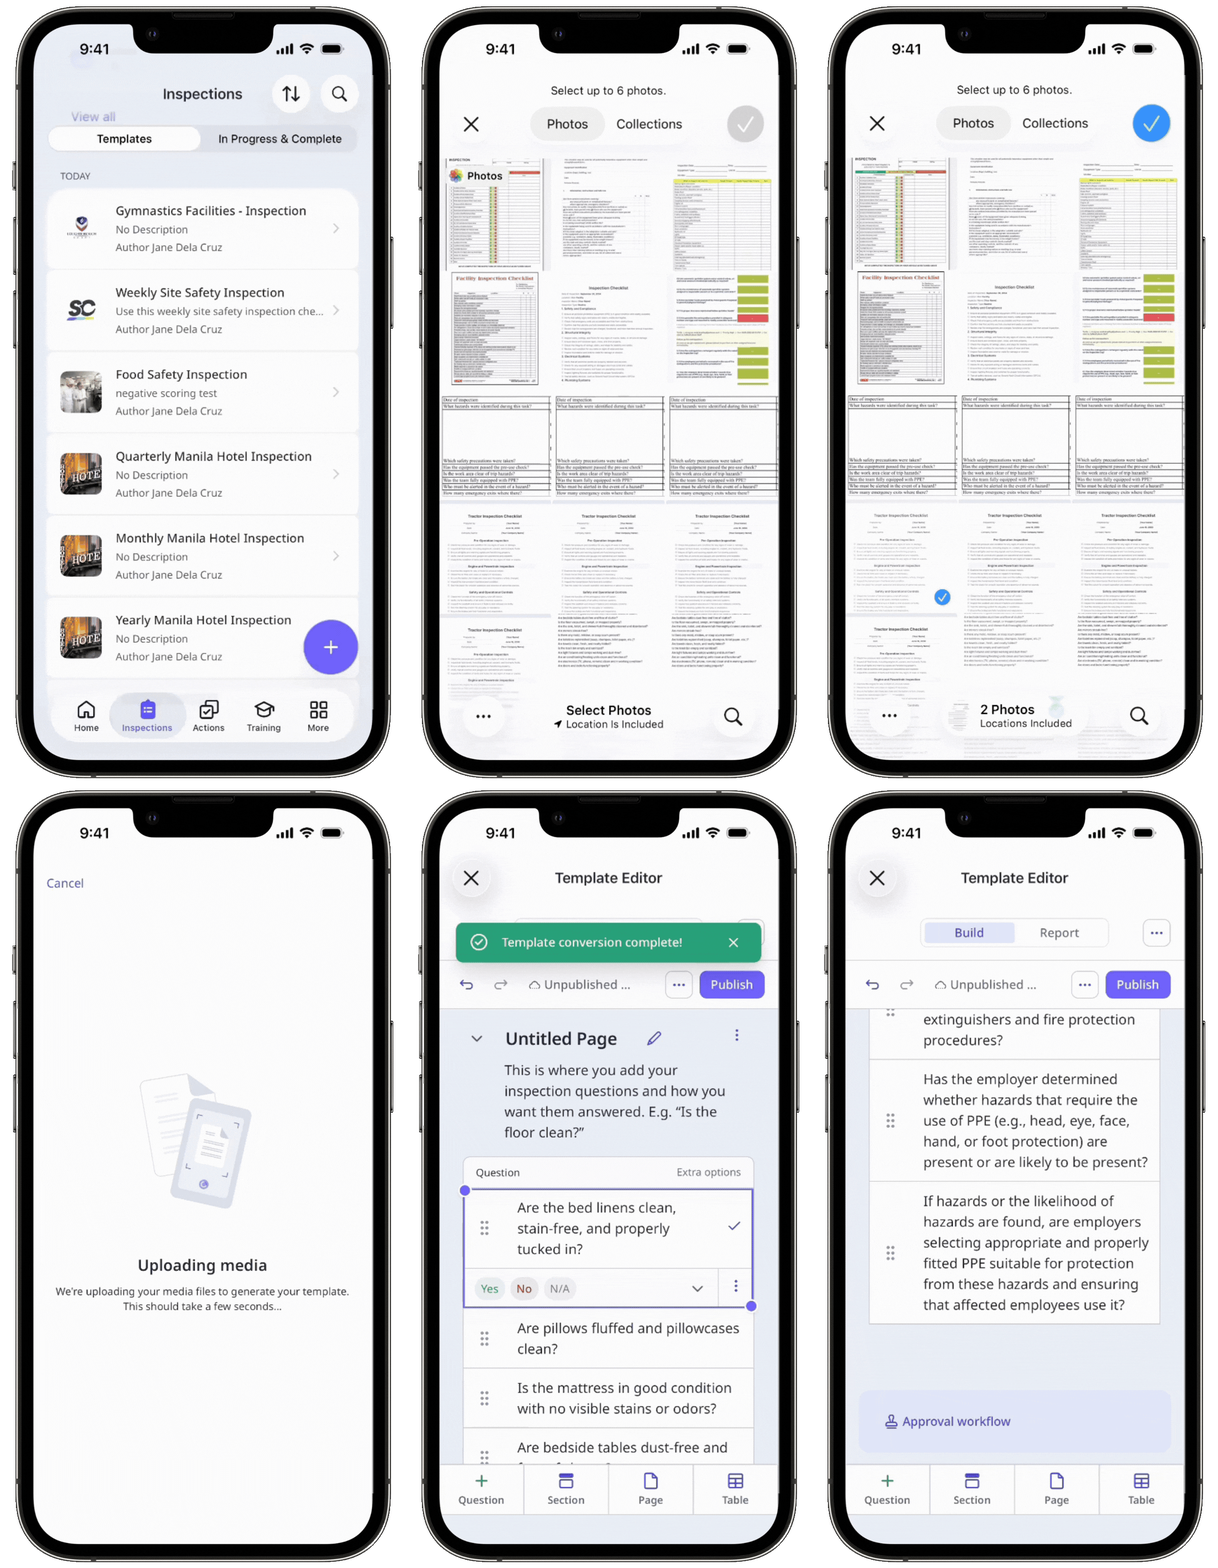
Convert an image into a template
Select Templates in the sidebar or select it in More.
Click Create on the upper-right corner of the template list.
Click Convert an Excel, image, or PDF.
In the pop-up window, drag your image to the "Drag your form here" section or click browse to select files.
Click Continue to start the template conversion.
Edit your template as needed.
Click Publish on the upper-right of the page to publish the template. If you're not ready to publish the template, you can go back to the templates list and come back when you're ready.
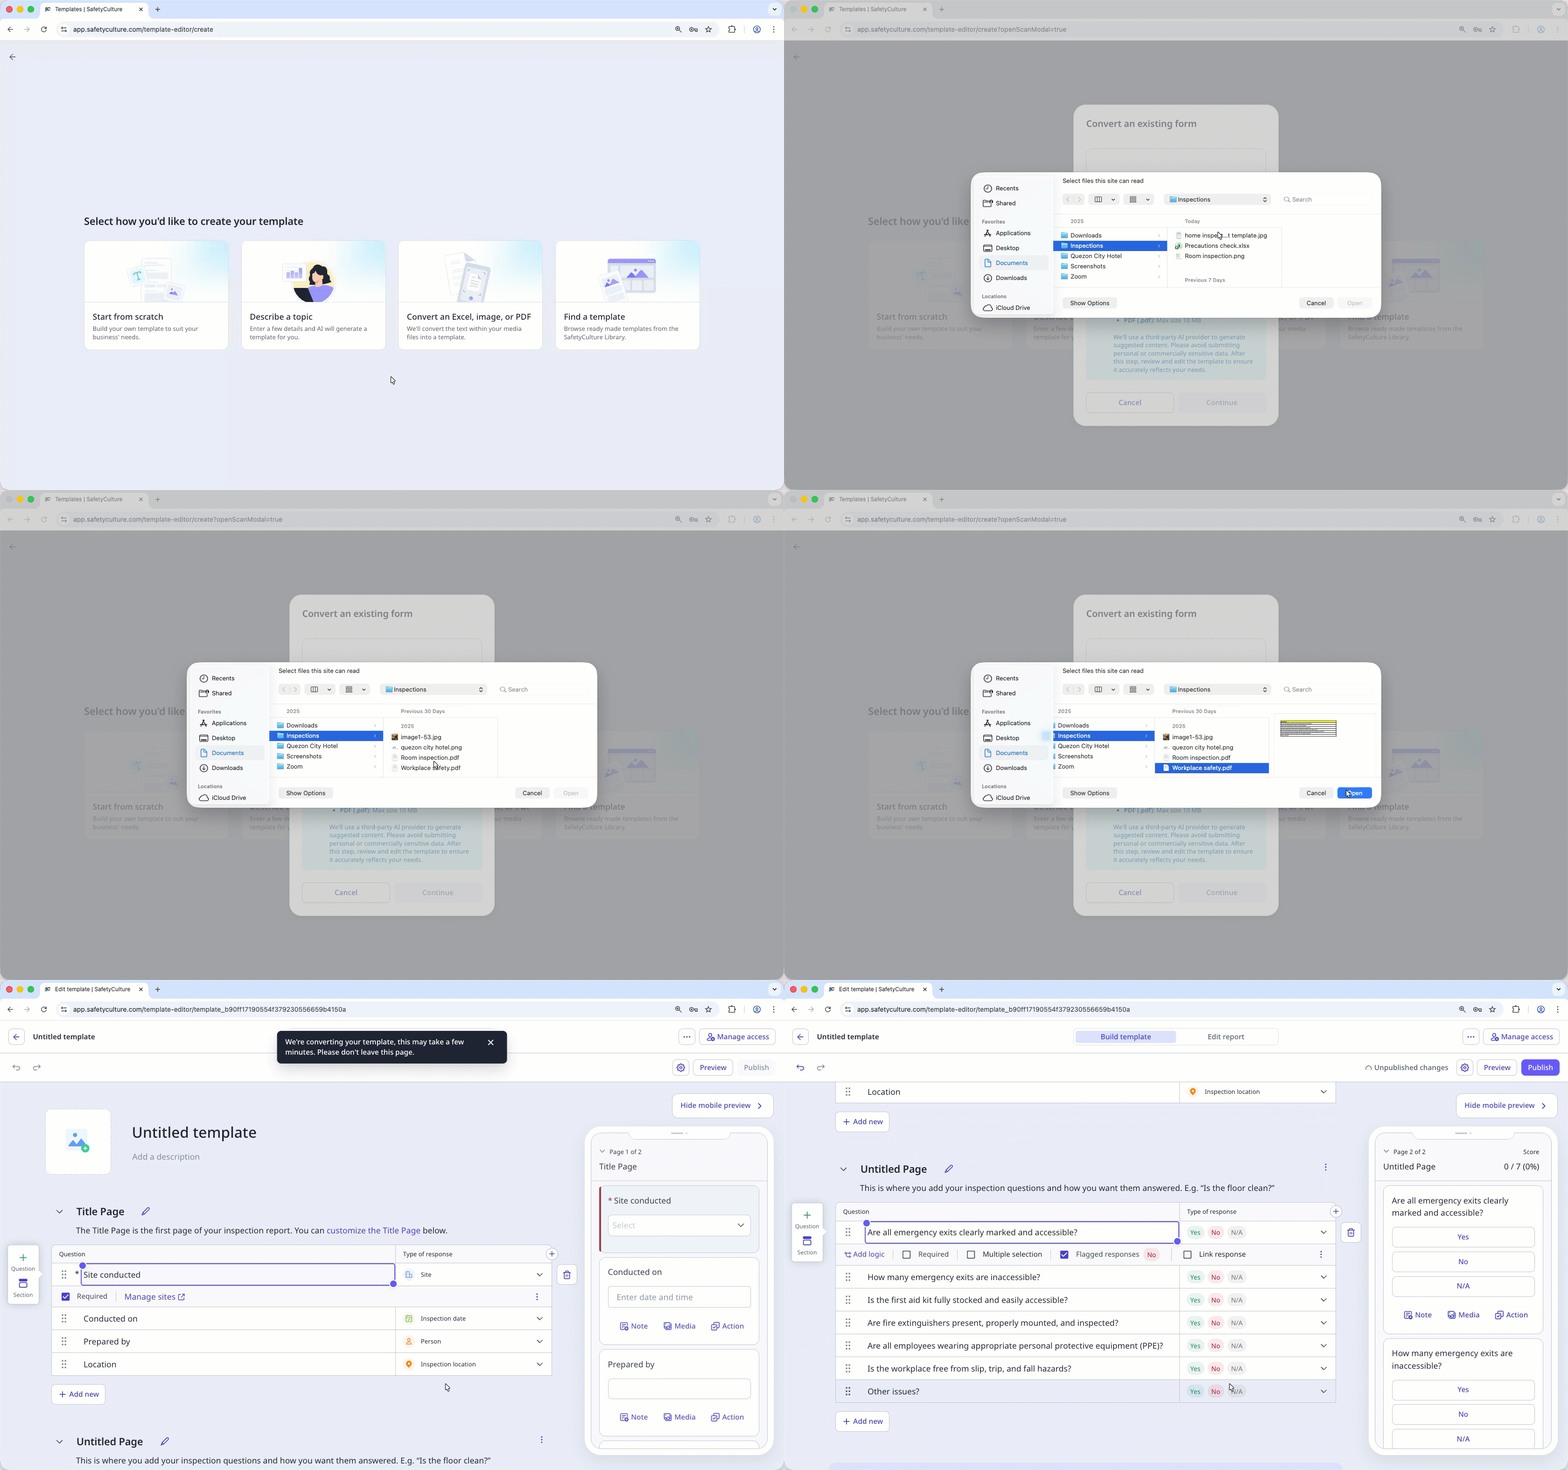
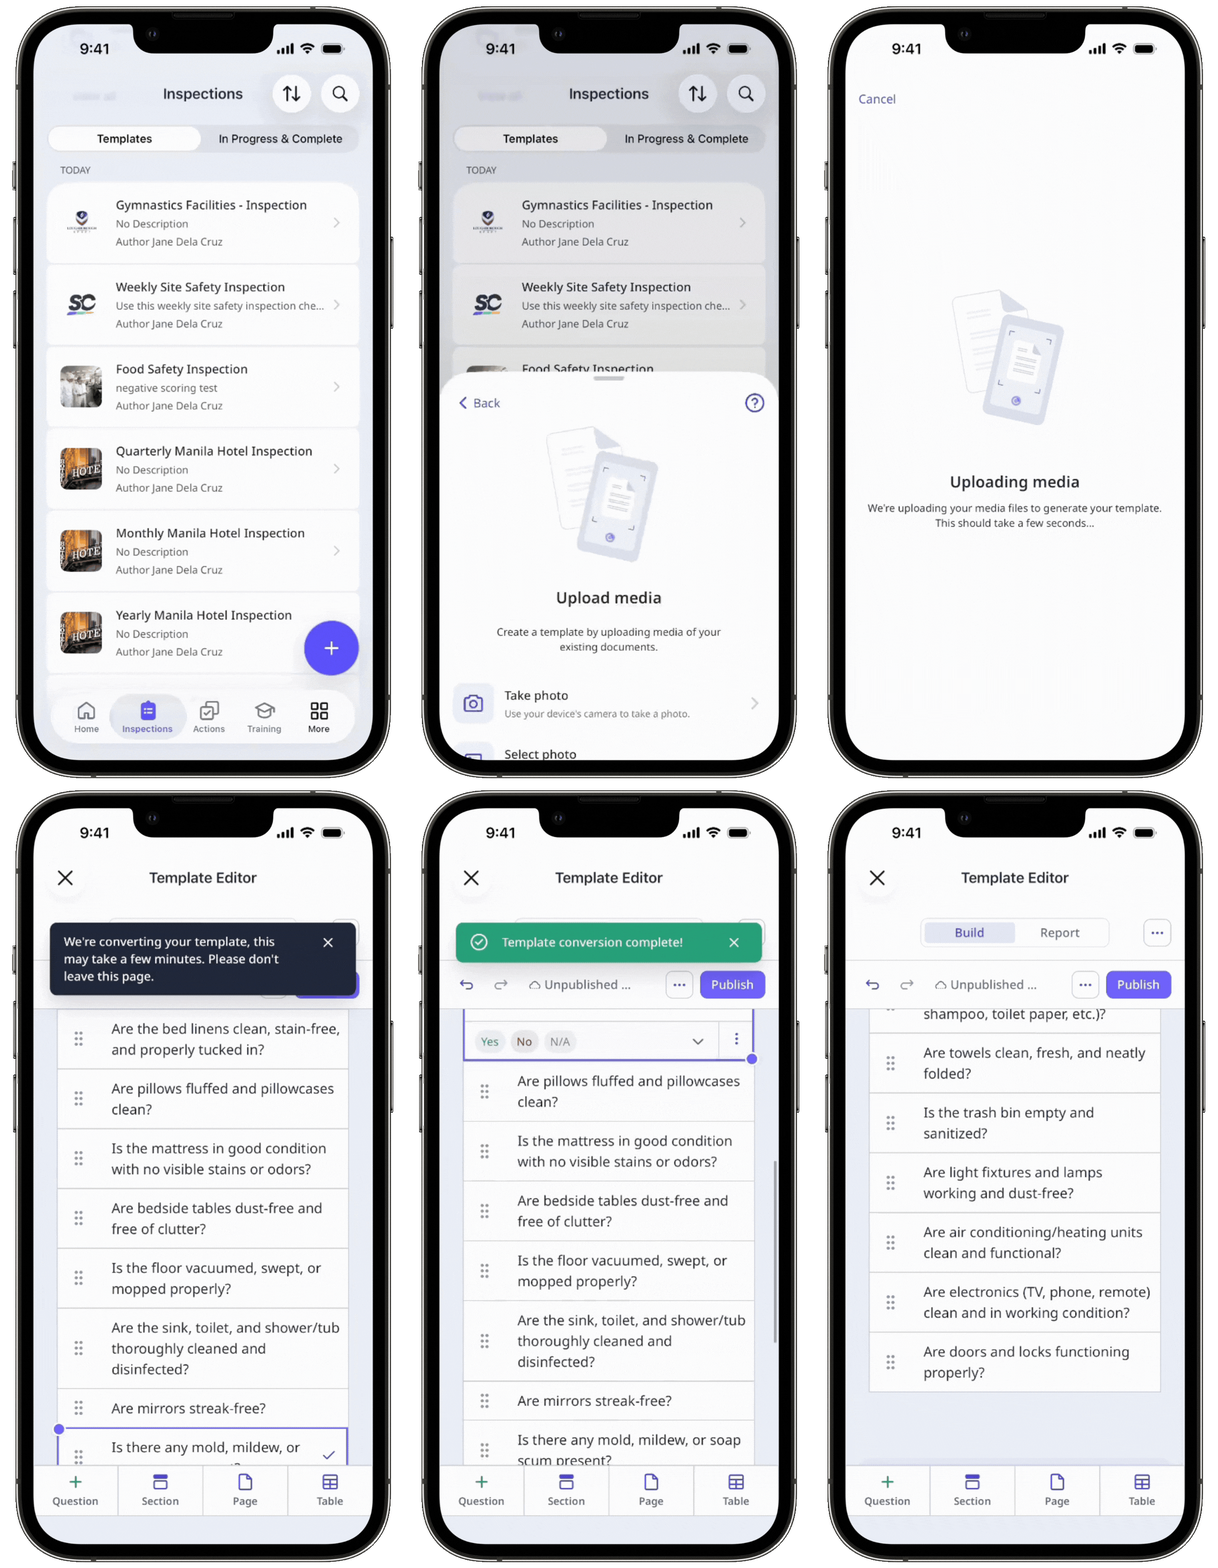
Convert a PDF into a template
Select Templates in the sidebar or select it in More.
Click Create on the upper-right corner of the template list.
Click Convert an Excel, image, or PDF.
In the pop-up window, drag your files to the "Drag your form here" section or click browse to select files.
Click Continue to start the template conversion.
Edit your template as needed.
Click Publish on the upper-right of the page to publish the template. If you're not ready to publish the template, you can go back to the templates list and come back when you're ready.
If you already have a Word file, you can convert it to an Excel, an image, or a PDF, or upload your document for our customer enablement team to convert for you.
← Previous article: Manage your users (Part 3) | Next article: Digitize checklists (Part 2) →