Sensor details
Sensor details include sensor categories, locations, and time zones:
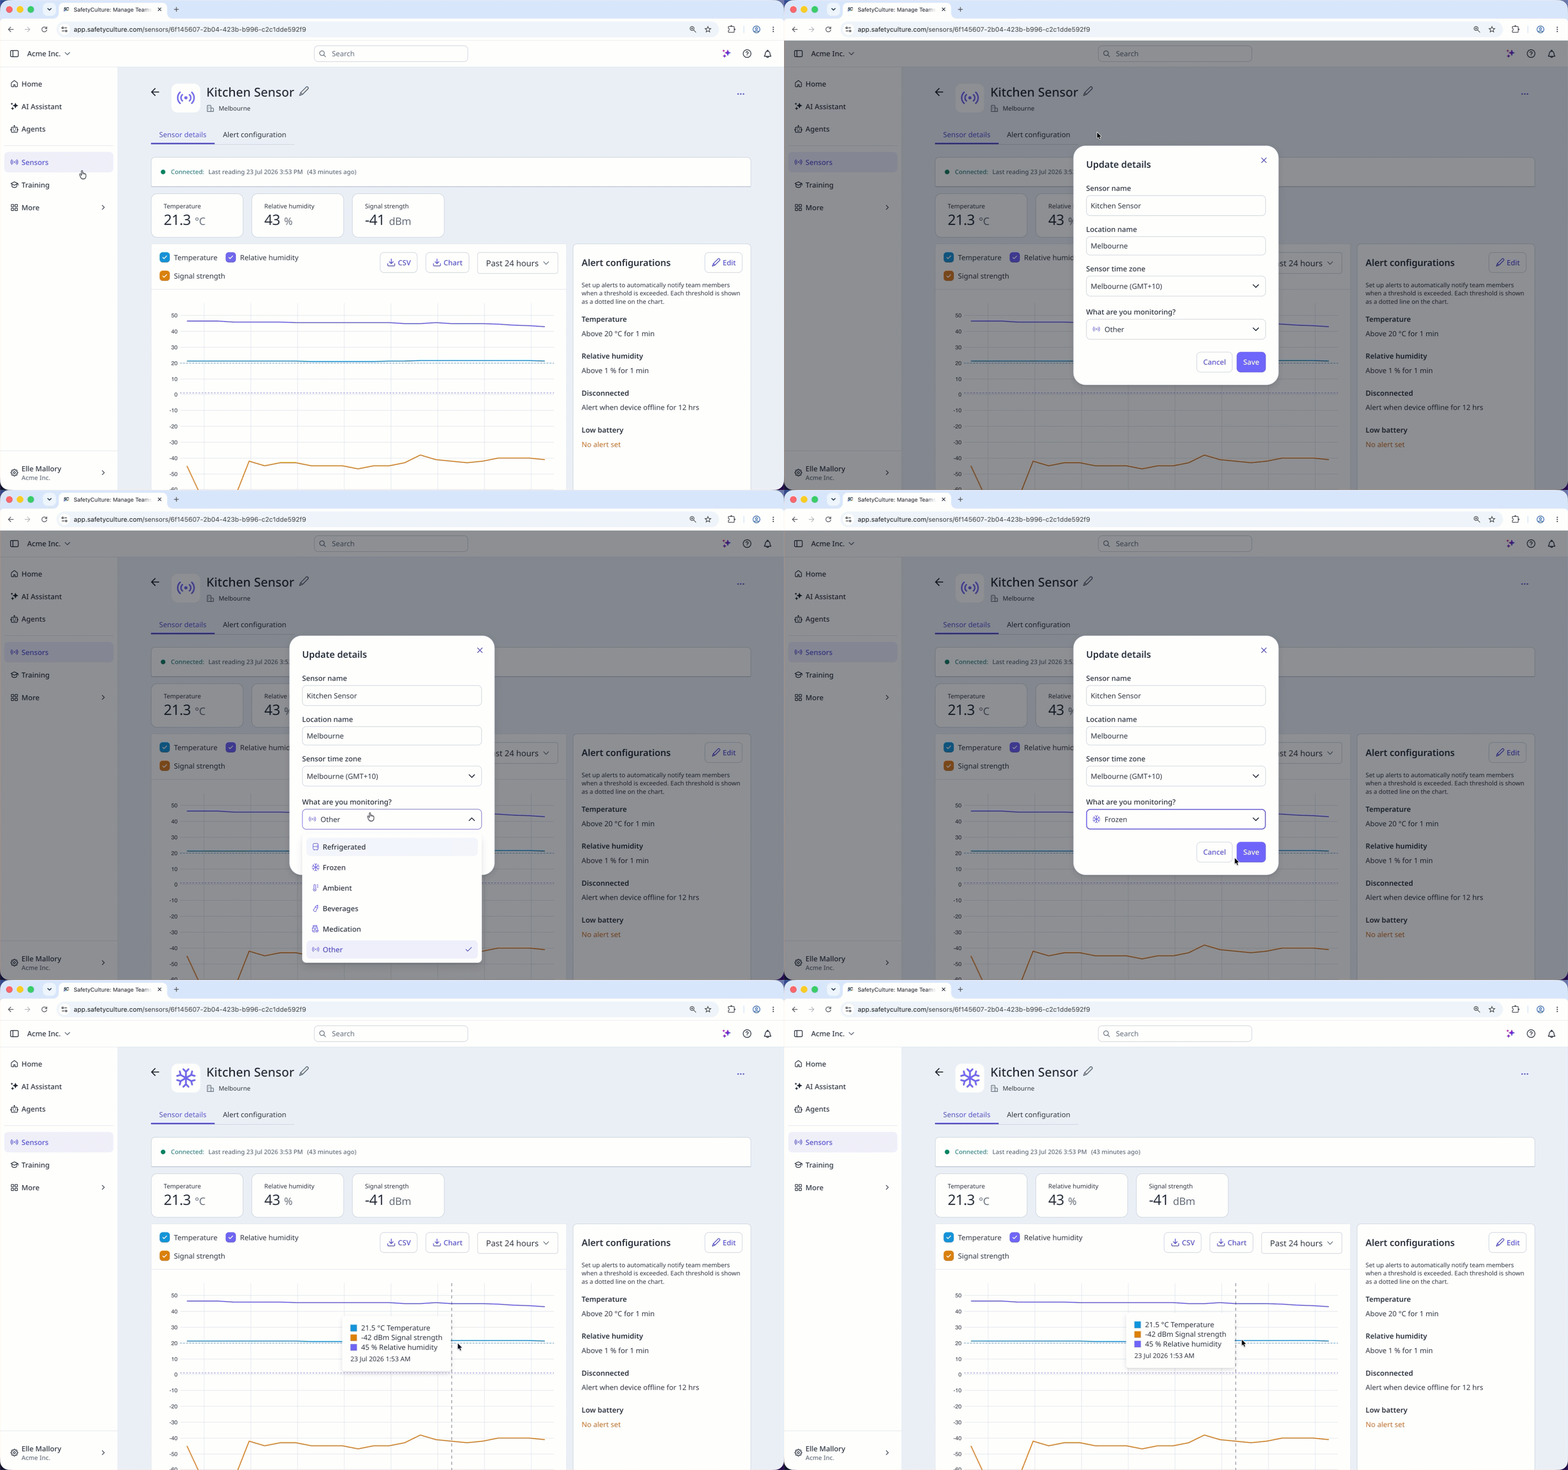
Sensor categories are used to organize and sort sensors, allowing you to monitor items that are sensitive to temperature or weather conditions. Depending on the number of places you would like to observe, you may want to change your sensor categories as you repurpose your sensor devices for other items that need tracking.
Sensor locations are used to name where the sensor is positioned. This can be helpful when you have multiple sensors to keep track of. You can change sensor location names to help you quickly differentiate between sensor locations.
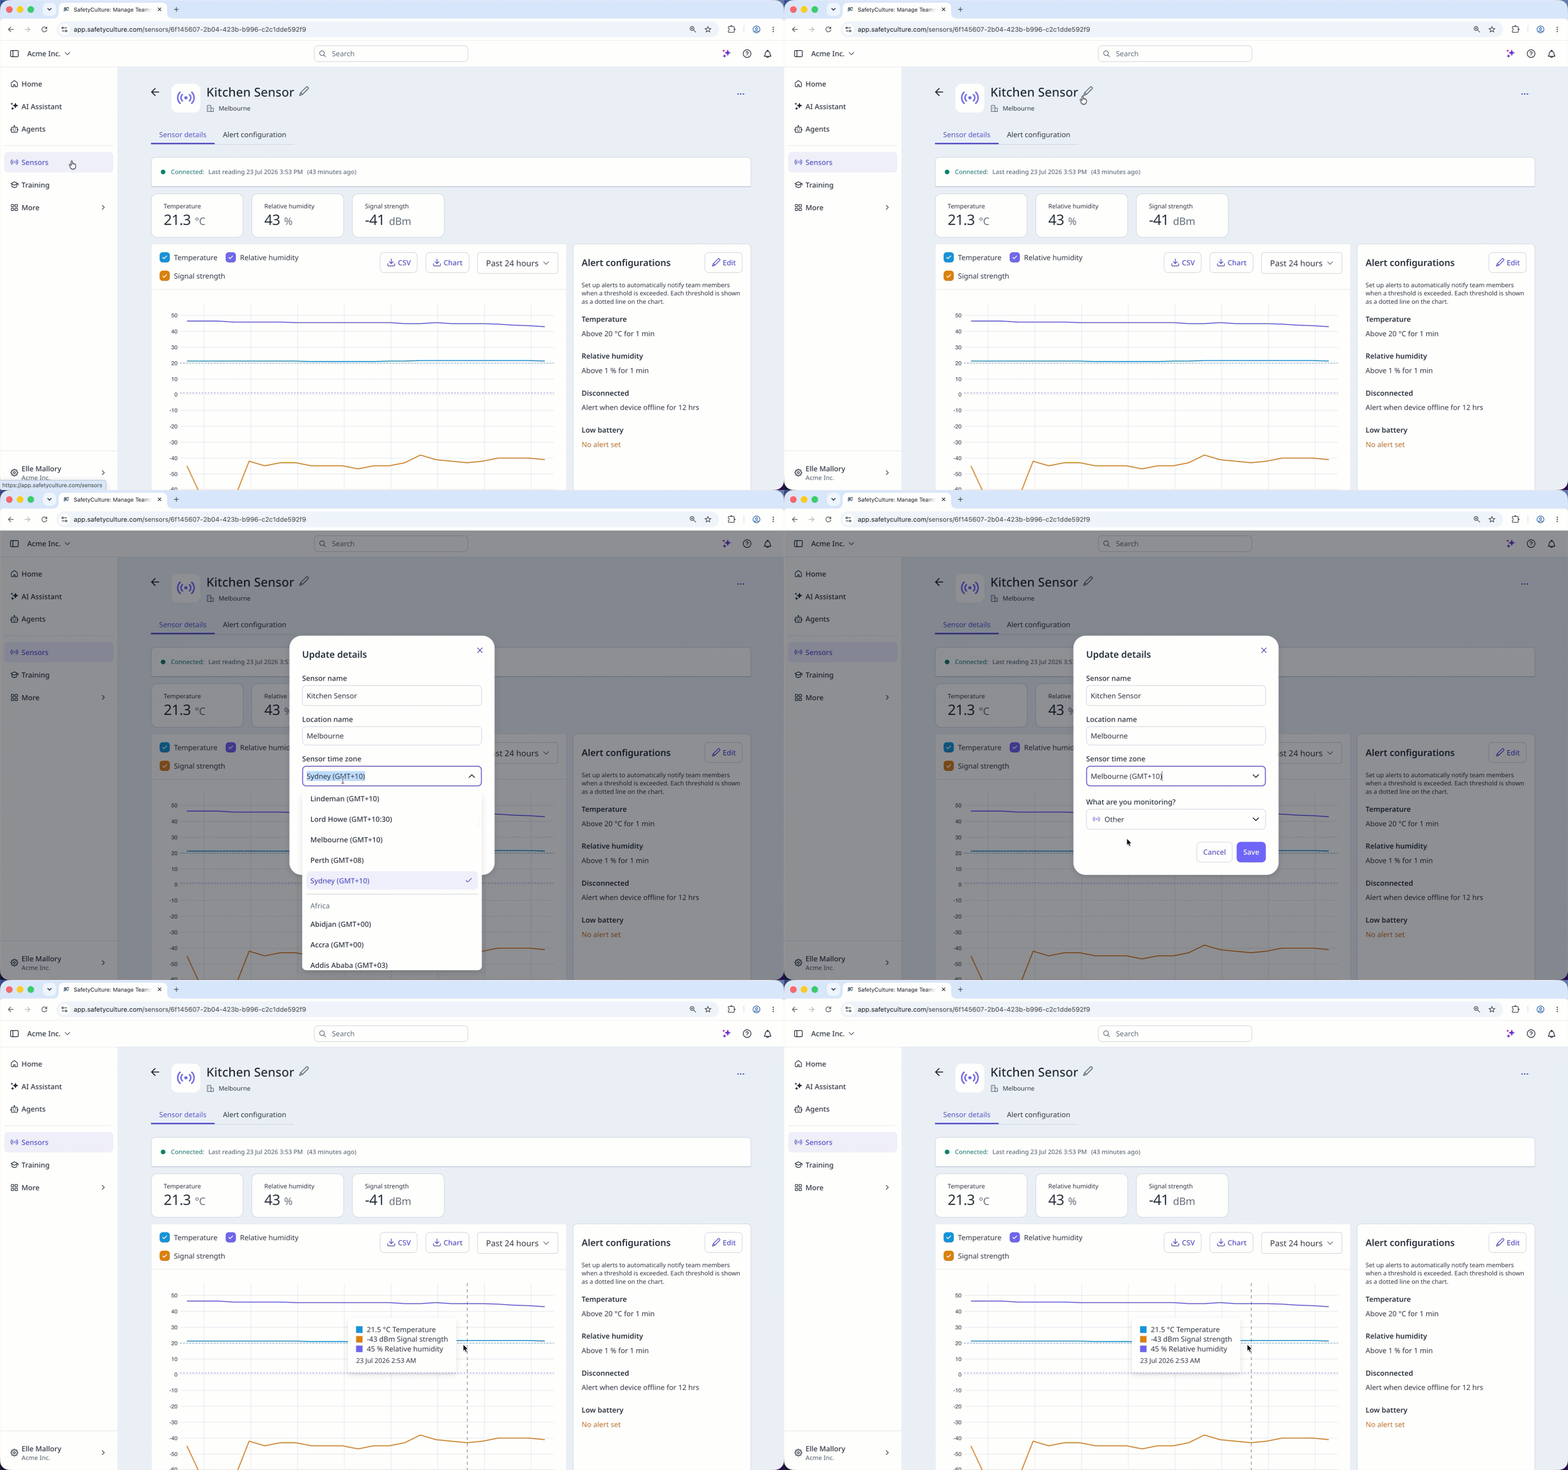
Sensor time zones are used to keep track of where the sensor belongs, ensuring any data from the sensor is logged at the correct time. This can be helpful if you have sensors across multiple parts of the world located in different time zones. The time zone is also displayed in sensor alerts and CSV exports.
Sensor locations are currently different from the sites used in other areas of SafetyCulture, such as Inspections and Actions.
Change a sensor's category
Click Sensors from the sidebar or in More.
Select Sensors at the top of the page.
Click the sensor.
Click at the top of the page.
Click the dropdown menu under "What are you monitoring?" and select the category.
Click Save.
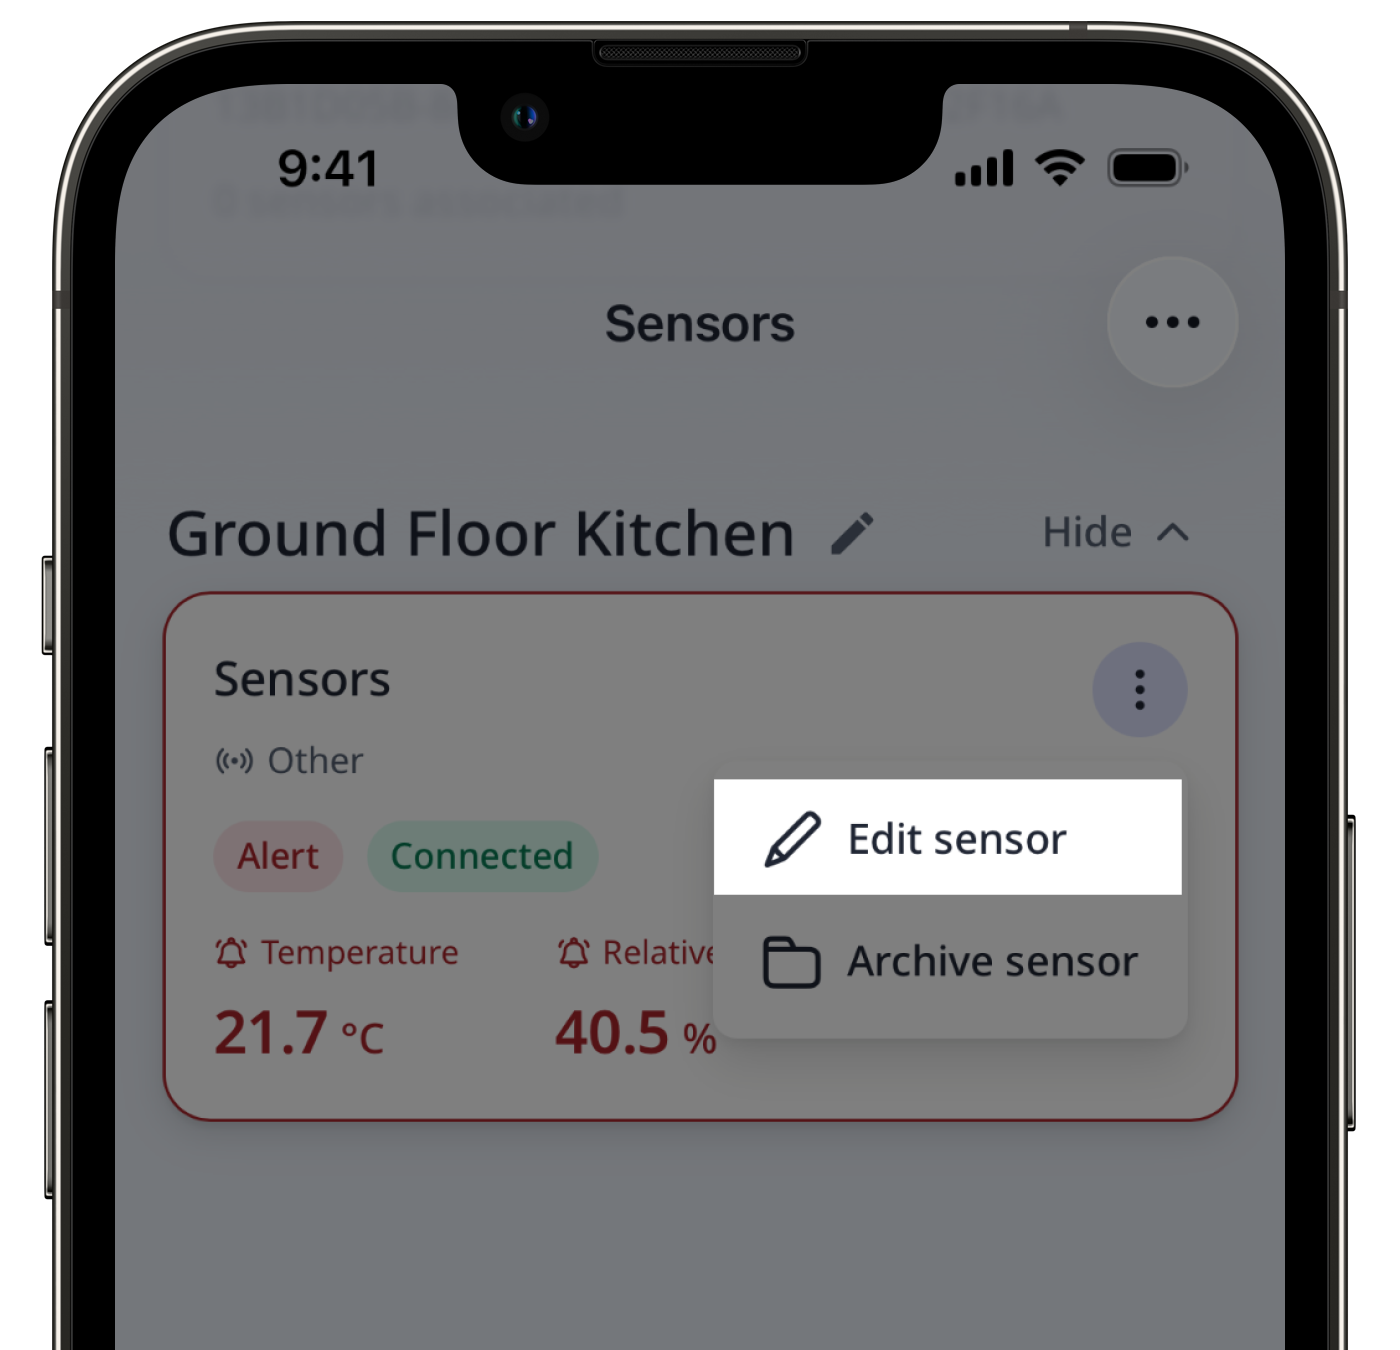
You can only change the category for hardware sensors.
Change a sensor's location
Click Sensors from the sidebar or in More.
Select Sensors at the top of the page.
Click the sensor.
Click at the top of the page.
In the pop-up window, enter the location name.
Click Save.
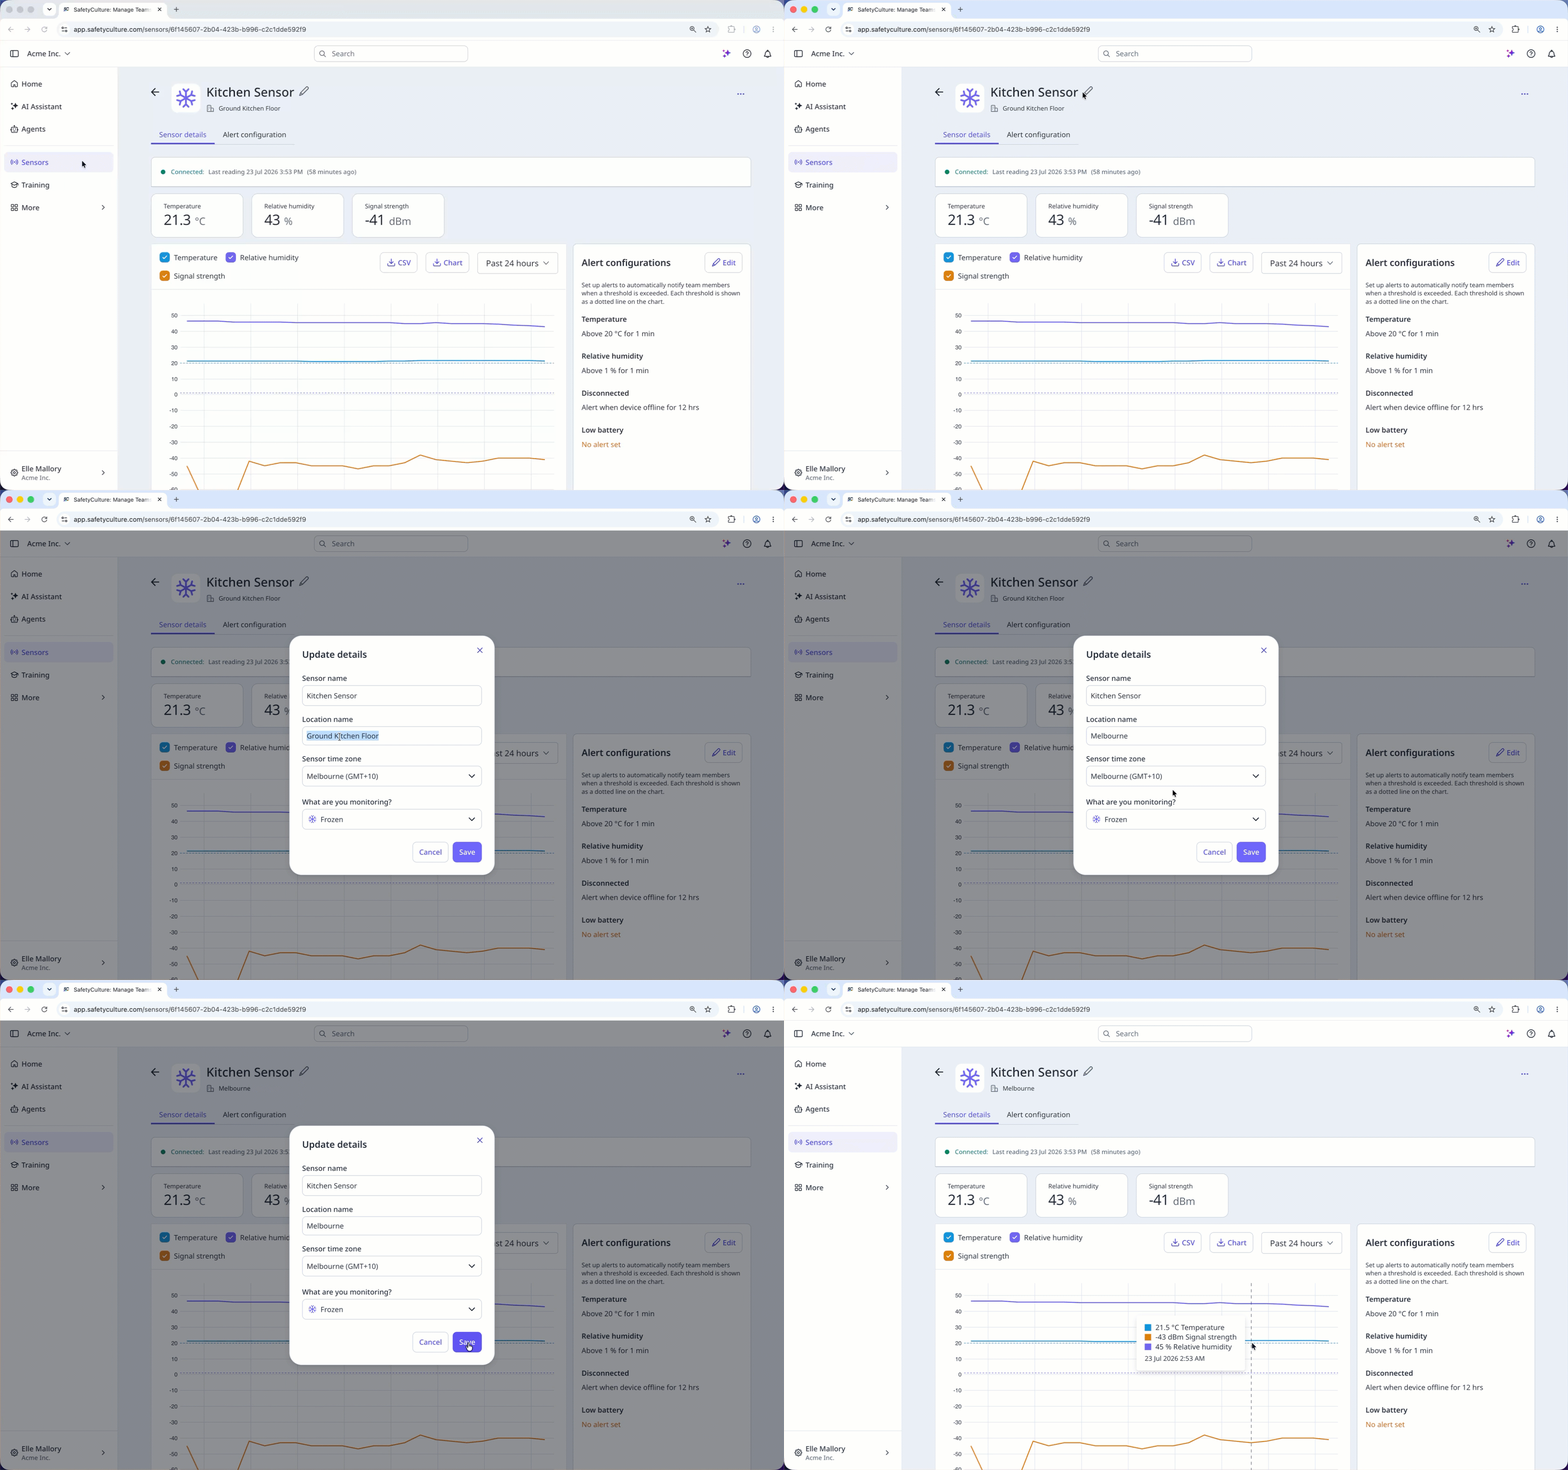
Change a sensor's time zone
Click Sensors from the sidebar or in More.
Select Sensors at the top of the page.
Click the sensor.
Click at the top of the page.
In the pop-up window, select the sensor time zone from the dropdown menu.
Click Save.