Third-party products can change over time, so some labels or screen layouts in this article may look different in your environment. If you notice anything out of date, use the feedback form at the bottom of this page to let us know.
How does exporting inspection reports to OneDrive work?
When you connect SafetyCulture to OneDrive, the integration automatically exports completed inspection reports from SafetyCulture into a folder in your OneDrive account. This helps your team keep reports in a central location and use OneDrive features such as search, sharing, and access control.
The integration exports inspection reports based on the inspections that the account installing the integration can access. If you are an administrator, you can give yourself inspection access for the templates you need or assign yourself "Override permissions: View all data" permission so you can export reports for all inspections in your organization.
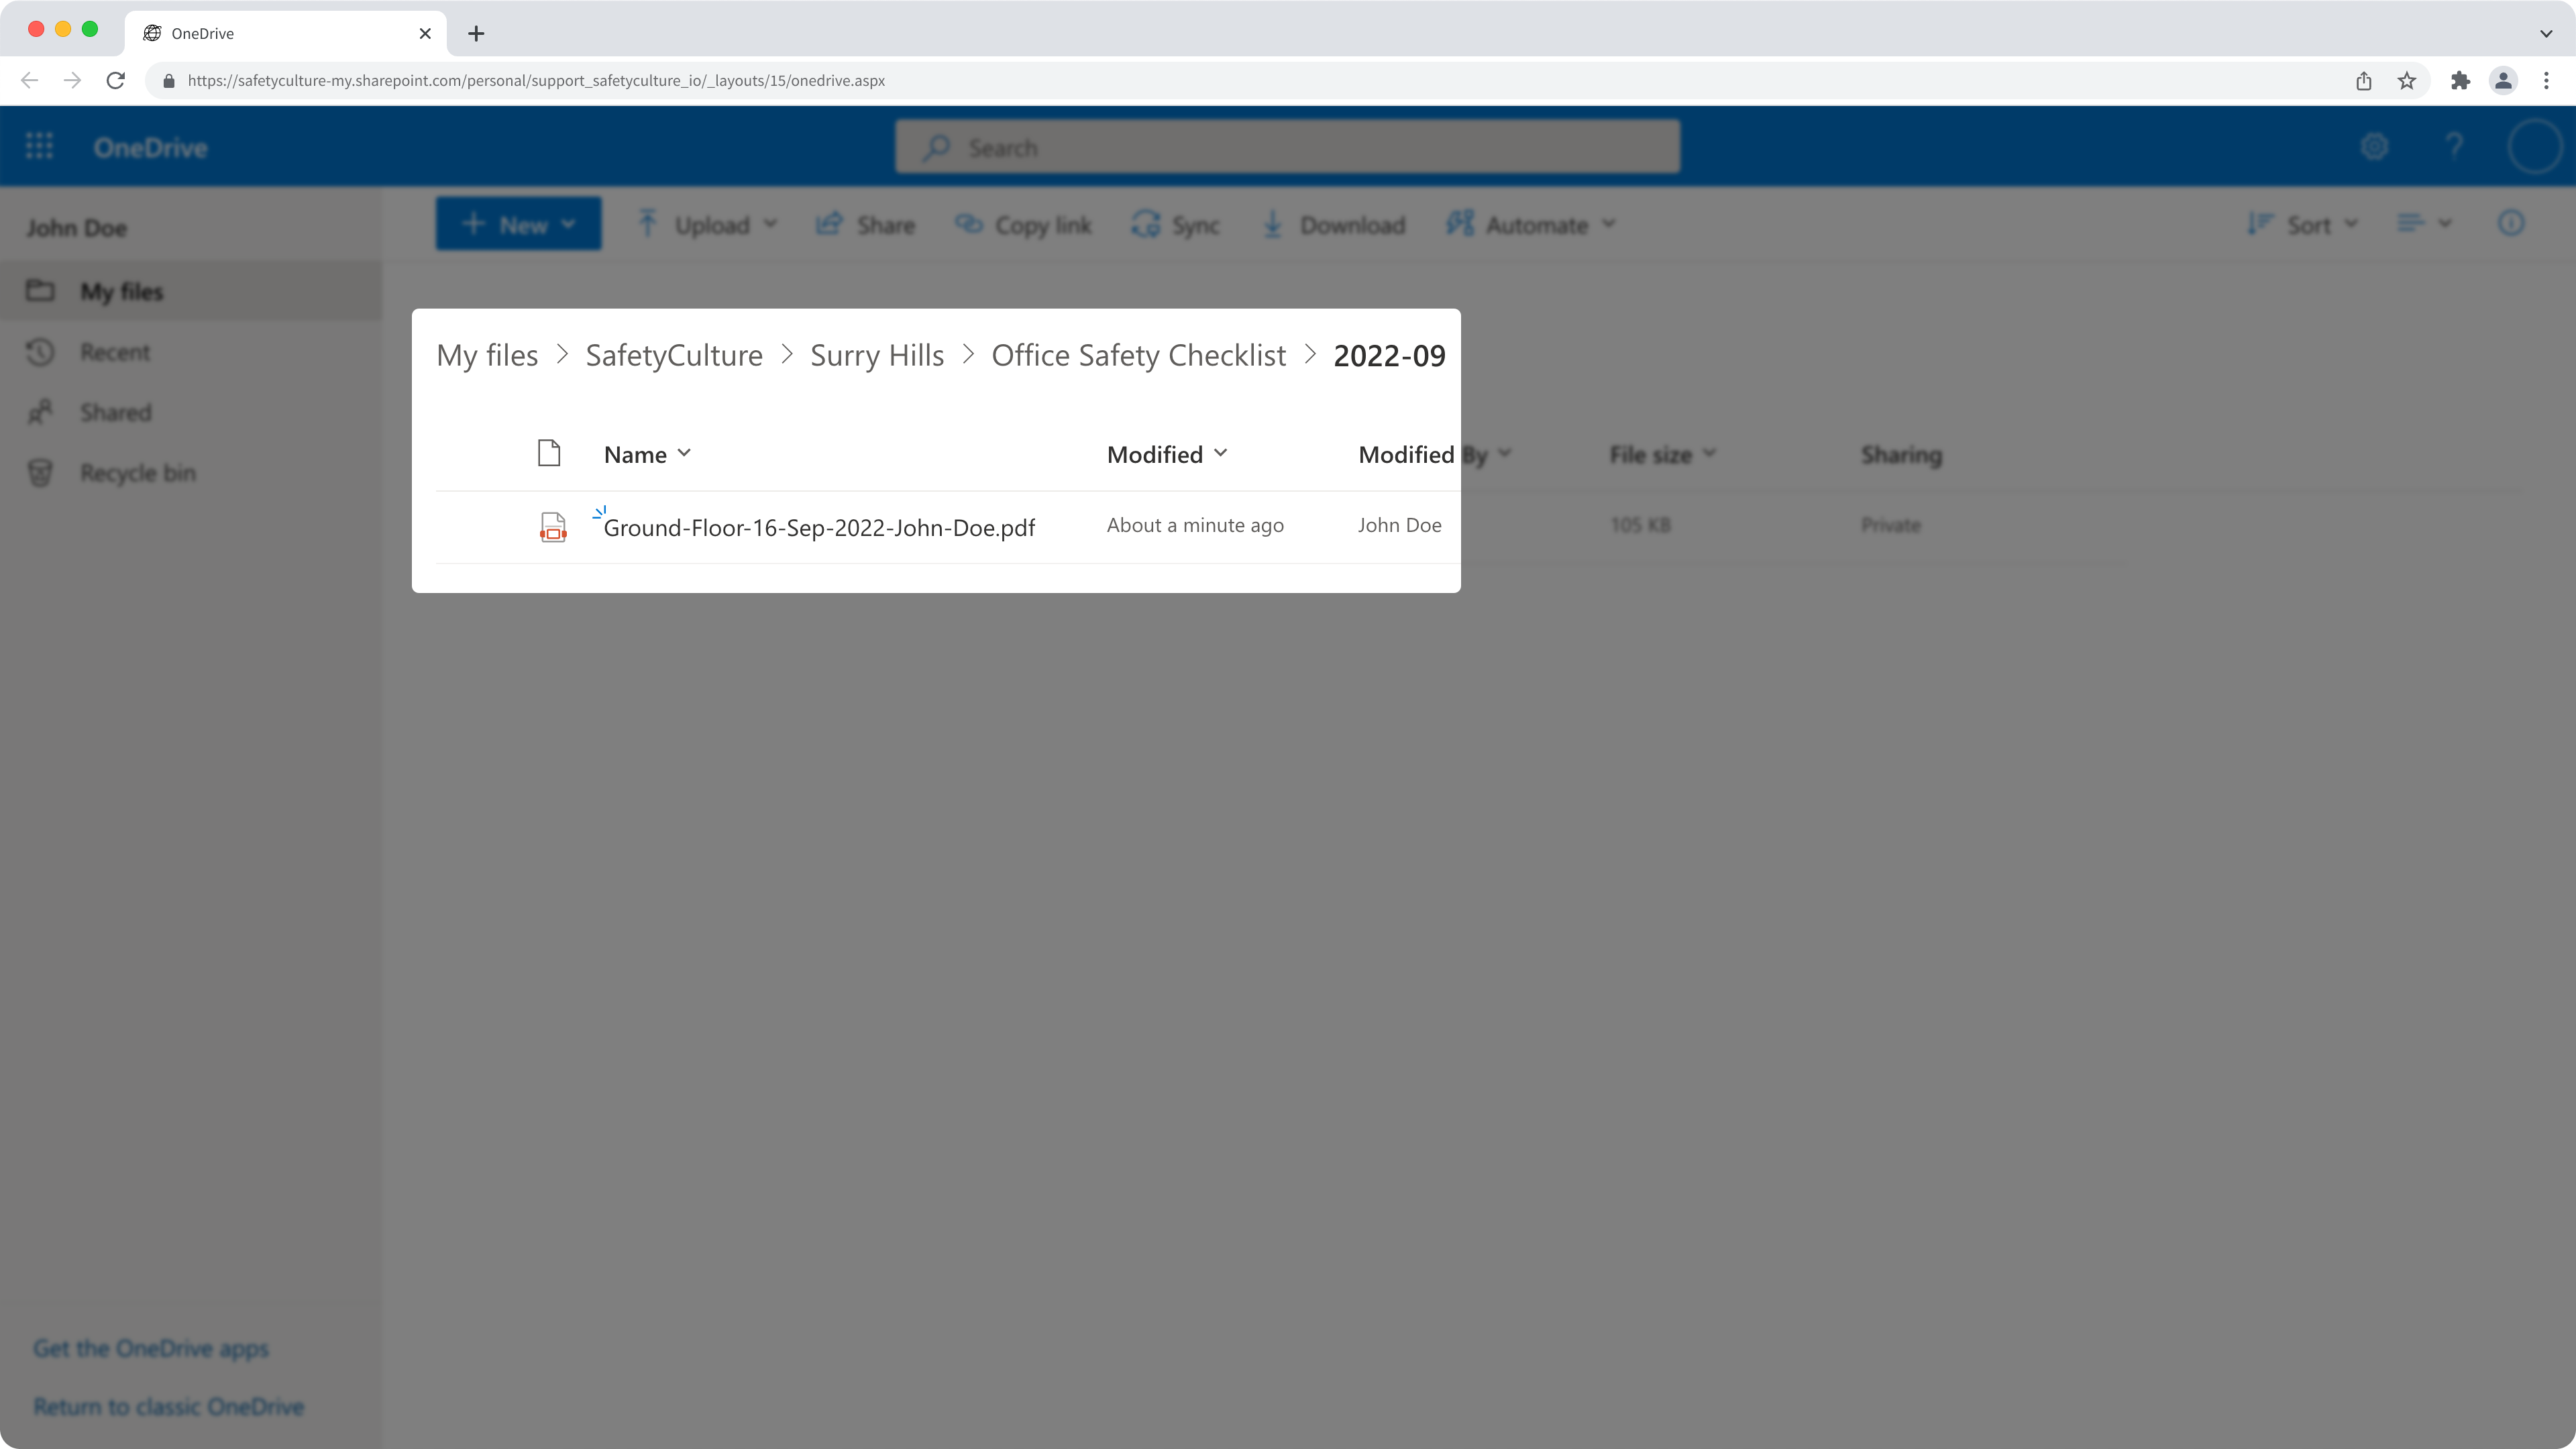
By default, exported reports follow the folder structure in your SharePoint site "SafetyCulture / [site name] / [template title] / [yyyy-mm]", where:
SafetyCulture is the fixed root folder, so you can always see where the files came from.
[site name] is the SafetyCulture site the inspection belongs to.
[template title] is the title of the template used for the inspection.
[yyyy-mm] matches the month the inspection was completed, using a year-month format like 2025-07.
OneDrive also has a limit for file and folder path length. If the combined path (all folders and the file name) exceeds 400 characters, the export fails and the report does not appear in OneDrive.
To avoid export failures, keep inspection titles, template titles, and site names concise and avoid deep folder structures.
The integration only exports inspections that you complete after you set it up. It does not automatically upload inspections that you completed before you connected this integration.
What you'll need
Automatically export inspection reports to OneDrive
Click your organization name in the lower-left corner of the page and select Integrations.
Search for "OneDrive" and select the integration.
Click Install at the center of the page.
In the pop-up window, click Install.
Select your account type.
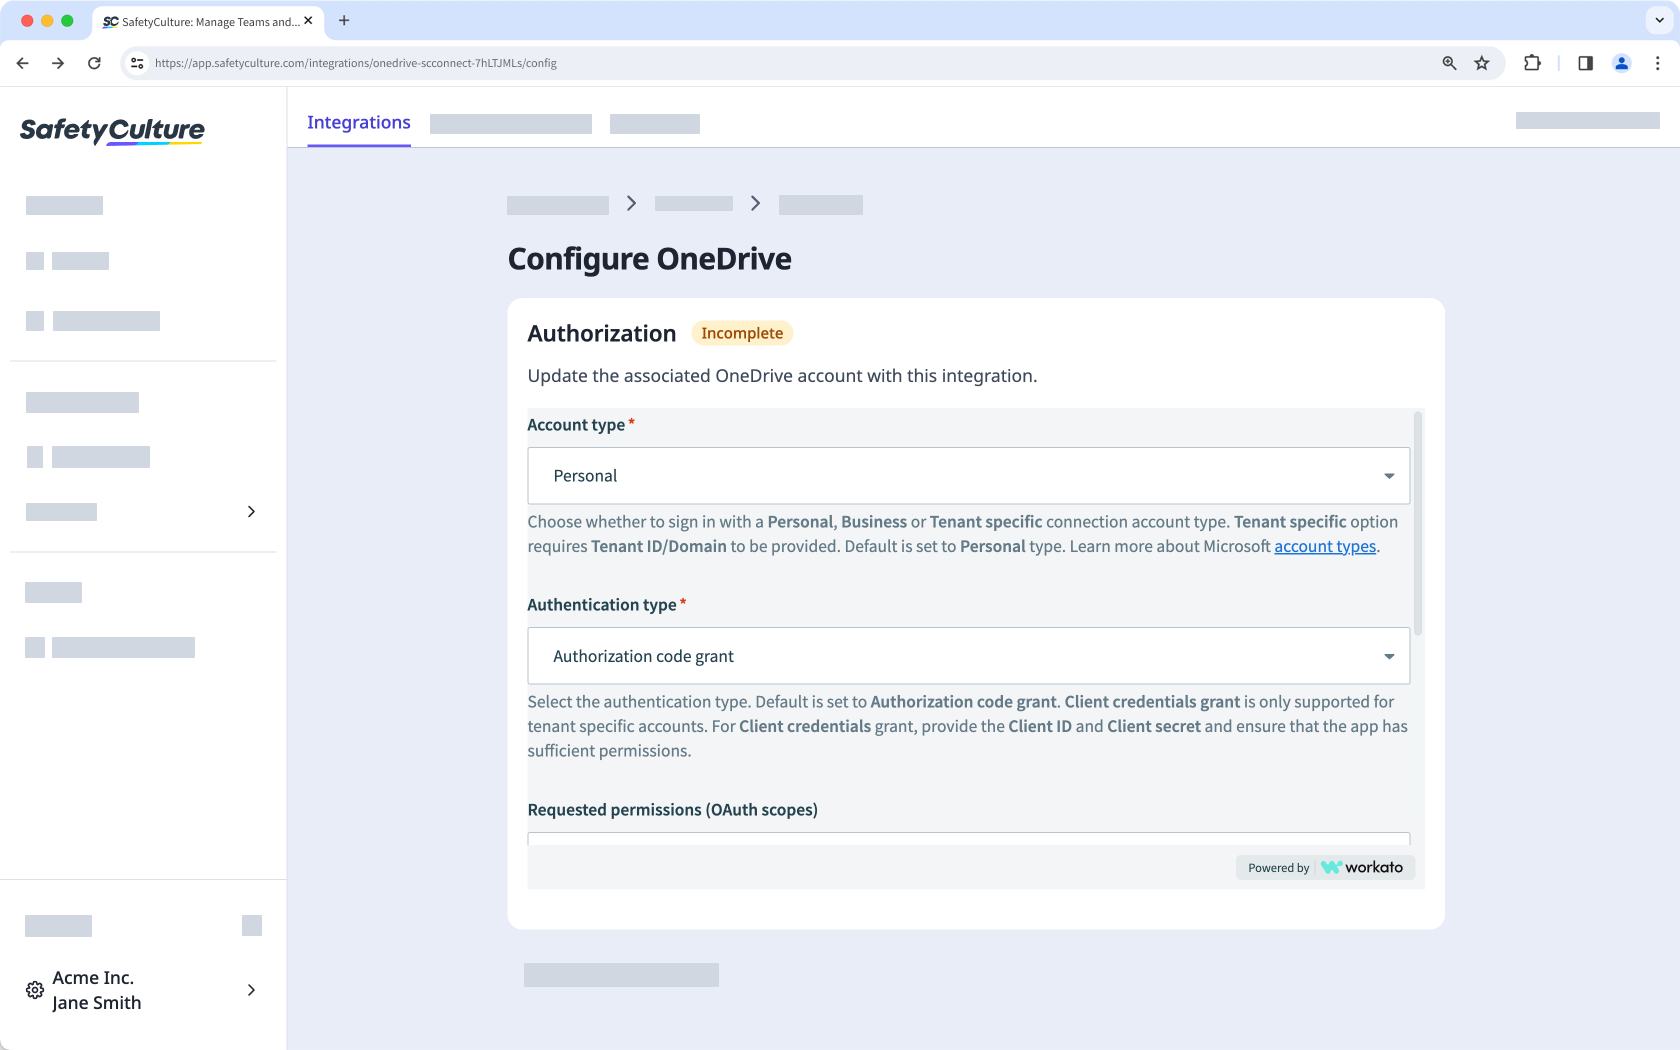
For the authentication type, use "Authorization code grant" unless your Microsoft 365 administrator provided different details for a tenant-specific setup.
For the advanced options, you can leave the settings as they are and use the default permissions unless your Microsoft 365 administrator supplied specific instructions.
C lick Sign in with Microsoft. Follow the prompts to authenticate the connection.
Click the dropdown menu under "Folder location".
Select where in OneDrive you want to export your inspection reports and click Save and apply. Folders owned and shared with you by other people aren't available to select from.
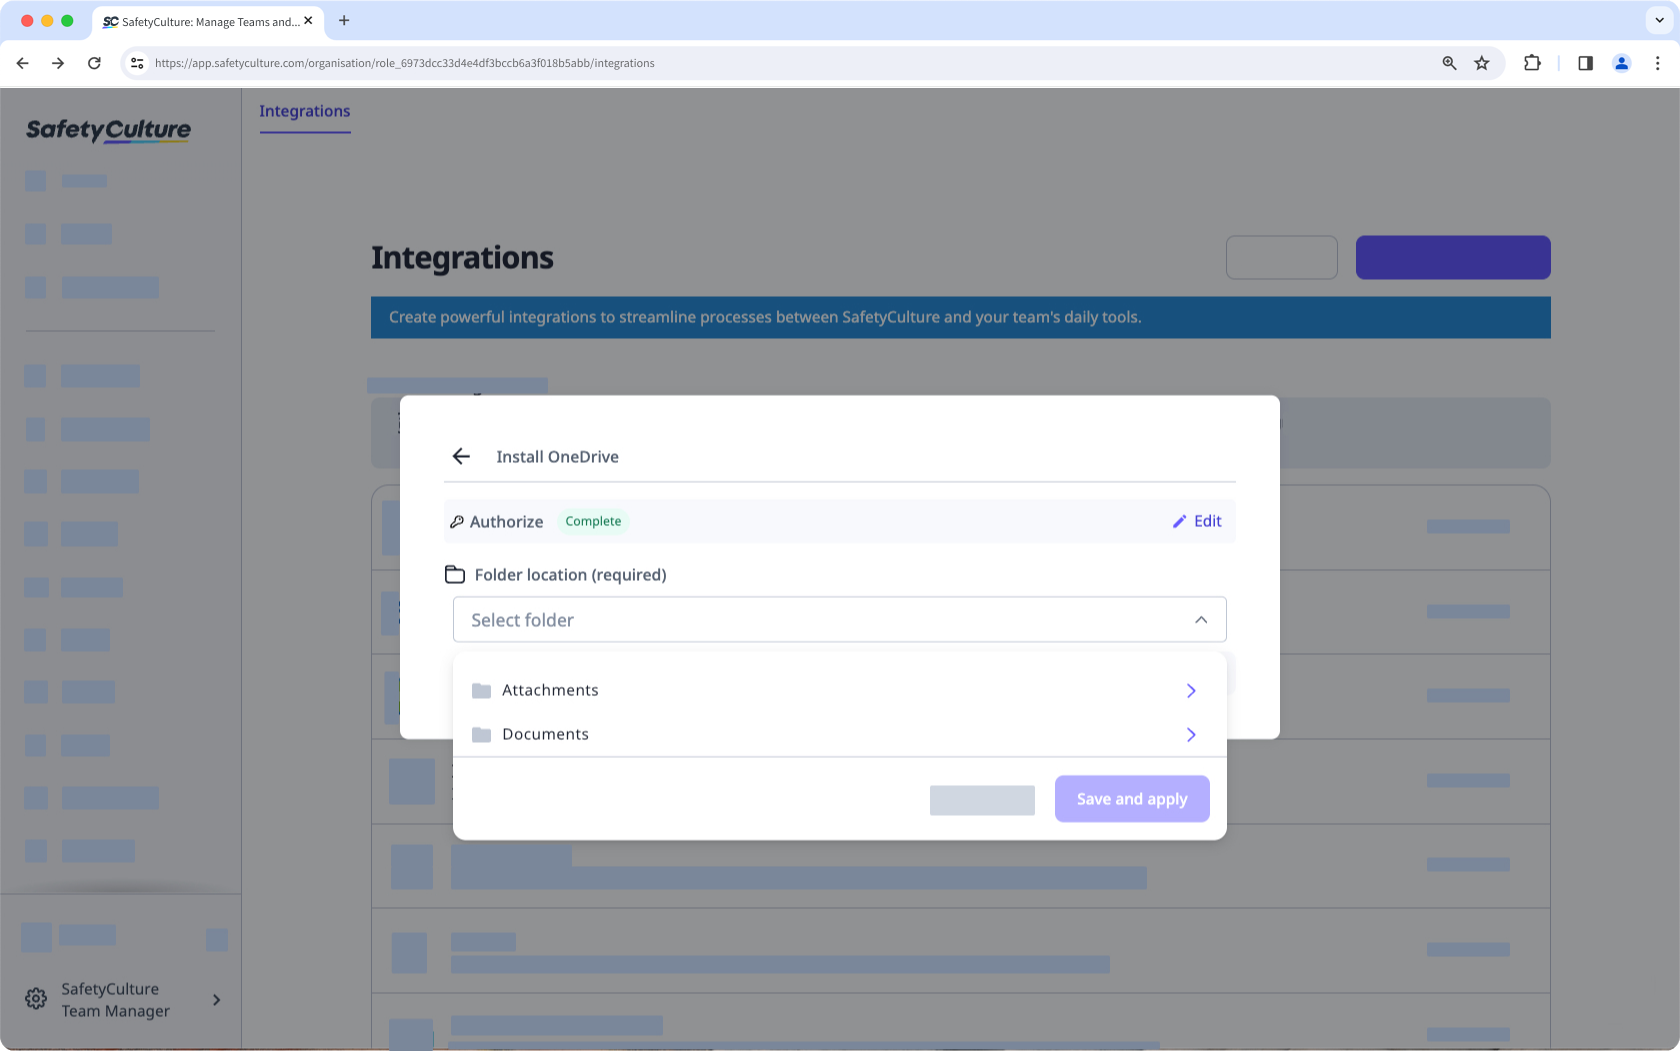
Click Done.
Once the integration is installed and set up, completed inspections will be automatically exported to your selected folder location in OneDrive.