What you'll need
Editing the name or the description of an investigation category applies to all existing investigations that use that category.
Edit an investigation category
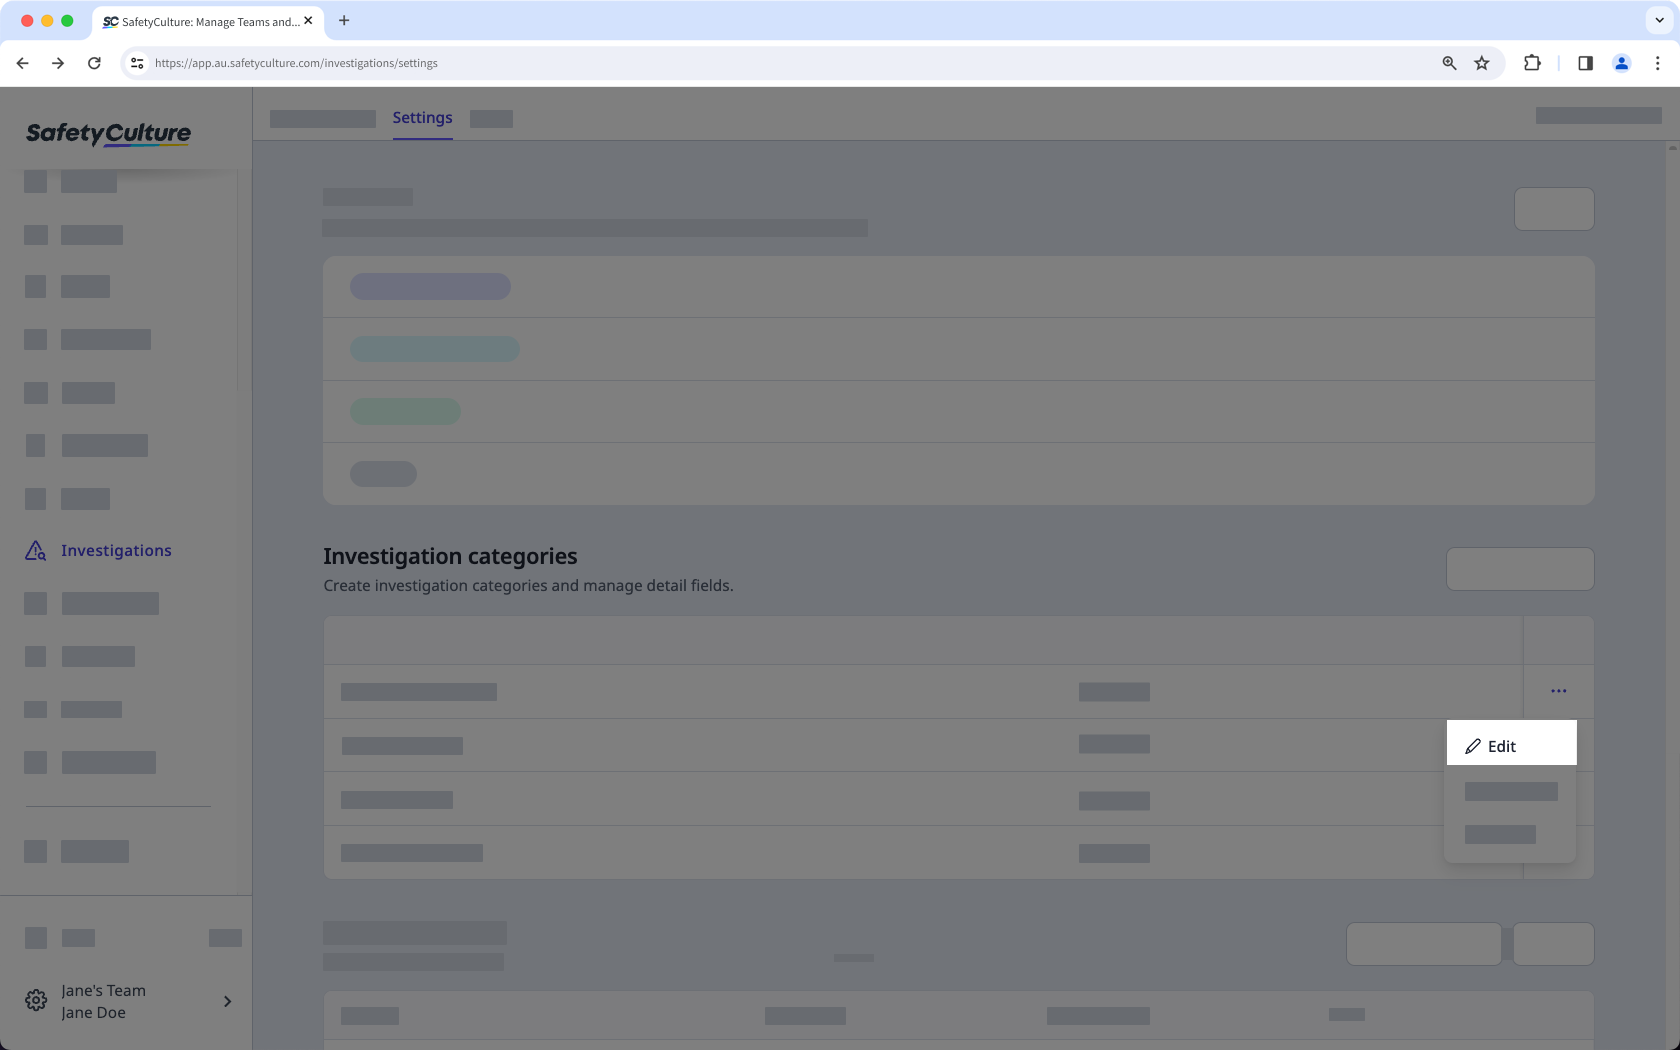
Select Investigations in the sidebar or select it in More.
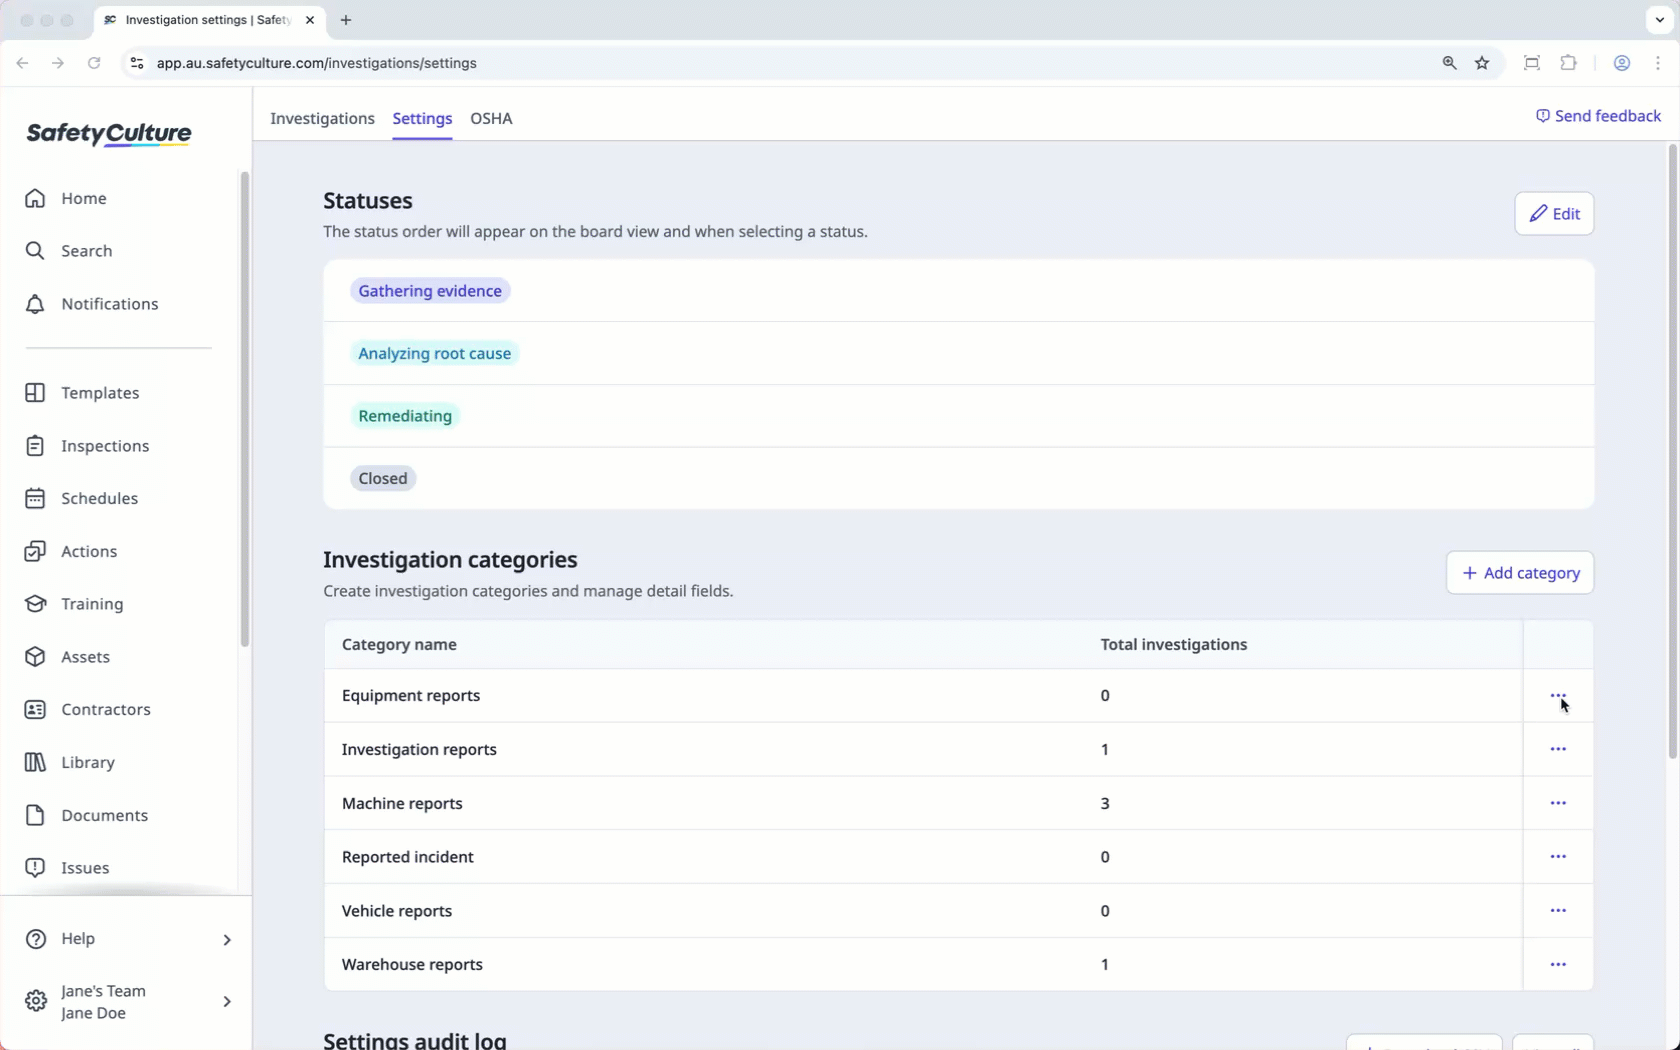
Select Settings at the top of the page.
In the "Investigation categories" section, click on the category's right-hand side and select Edit.
In the "Category" section, click Edit.
Edit the category name and description accordingly.
Click Save.
Changes to detail fields, such as renaming fields or editing options for single-select and multi-select fields, apply to all investigation categories using that detail field.
Edit investigation detail fields
Select Investigations in the sidebar or select it in More.
Click Settings at the top of the page.
In the "Investigation categories" section, select an investigation category.
In the "Details" section, click Edit.
On the right-hand side of the page, create new or manage existing detail fields accordingly.
Create a new field: Click Create new field on the lower-right of the page. In the pop-up window, enter the name of the field and select the field type. Then, click Save.
Add an existing field: Click on a field's right-hand side. Alternatively, click
 to drag and drop the field to the "Details" section on the left-hand side of the page.
Edit a field: Click on a field's right-hand side and select Edit. In the pop-up window, you can rename the field or edit any options for single-select and multi-select fields. Then, click Save.
On the left-hand side of the page, manage your detail fields accordingly.
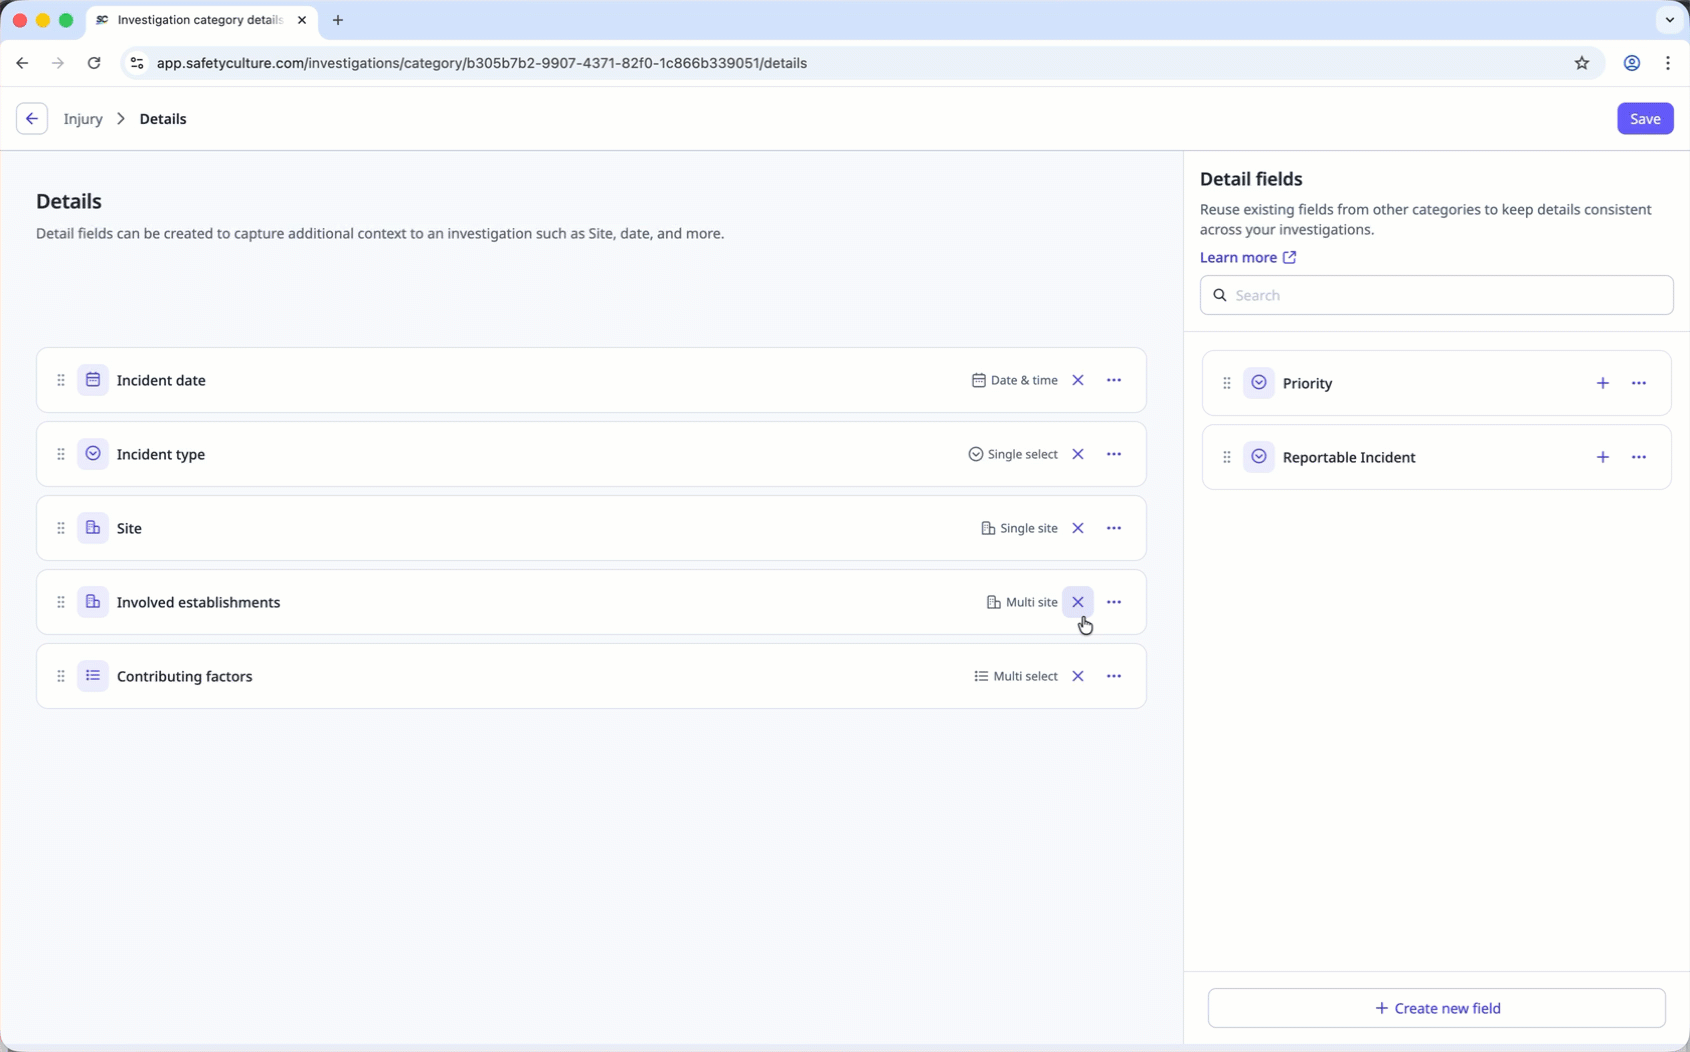
Remove a field: Click on the field's right-hand side. Alternatively, click
to drag and drop the field from the "Details" section to the right-hand side of the page.Reorder detail fields: Click
to reorder the fields to your preferred arrangement.
Click Save on the upper-right of the page.
You can add only one site field in each category.