How does access for investigations work?
Access to investigations is managed at the individual investigation level, so you can control who can view or make changes. By default, only the creator has access and is set as the investigation owner.
There are three access levels you can give, depending on what your team needs:
Owner: Has full control of the investigation, including managing access, deleting the investigation, and transferring ownership. There can only be one owner at a time. Ownership can only be reassigned by the current owner or a user with "Investigations: Manage" permission.
View: Can only view the investigation details but can’t make changes.
Edit: Can view and edit investigation details, add relevant issues, inspections, and actions, and download investigation reports.
Users with "Override permissions: Manage all data" permission are treated as having owner-level access on all investigations. This means they can transfer ownership even without being the owner.
If you're on Free Plan, all investigations in your organization are visible to all users. To control who can view or edit an investigation, upgrade to Premium Plan or Enterprise Plan.
Give access to an investigation
Select Investigations in the sidebar or select it in More.
Select an investigation and click Manage access on the upper-right of the page.
In the pop-up window, select the user you want to give access to.
Click Done. By default, each user is given the "View" access to the investigation. You can click the dropdown next to each user to change their access level.
Click Save.
Edit access to an investigation
Select Investigations in the sidebar or select it in More.
Select an investigation and click Manage access on the upper-right of the page.
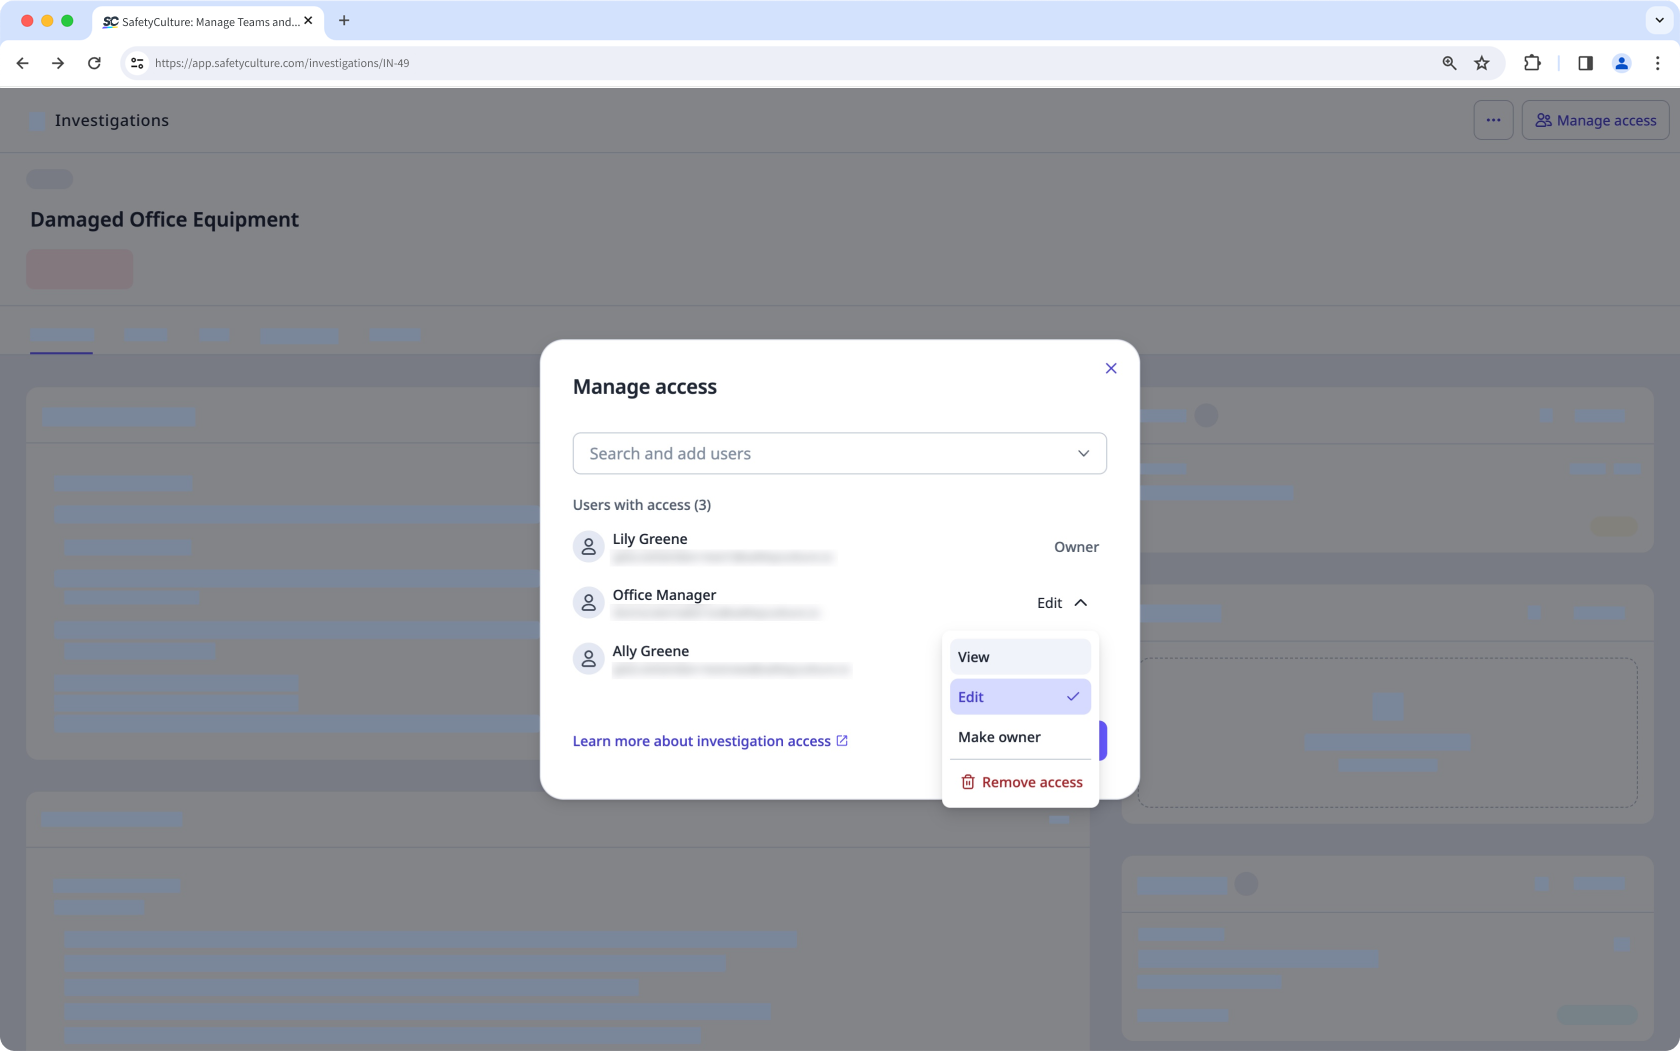
In the pop-up window, find the user under “Users with access”.
Click next to the user's name and select View or Edit.
Click Save.
Remove access to an investigation
Select Investigations in the sidebar or select it in More.
Select an investigation and click Manage access on the upper-right of the page.
In the pop-up window, find the user under “Users with access”.
Click next to the user's name and select Remove access.
Click Save.
Transfer ownership of an investigation
Select Investigations in the sidebar or select it in More.
Select an investigation and click Manage access on the upper-right of the page.
In the pop-up window, search for and select the user you want to transfer ownership to.
Click Done.
Click next to the user's name and select Make owner.
Click Save.